Back to Don's Maps
 Bushwalking Index
 Lightweight Bushwalking / Hiking Gear
Lightweight Tents
Click on the photos to see an enlarged version
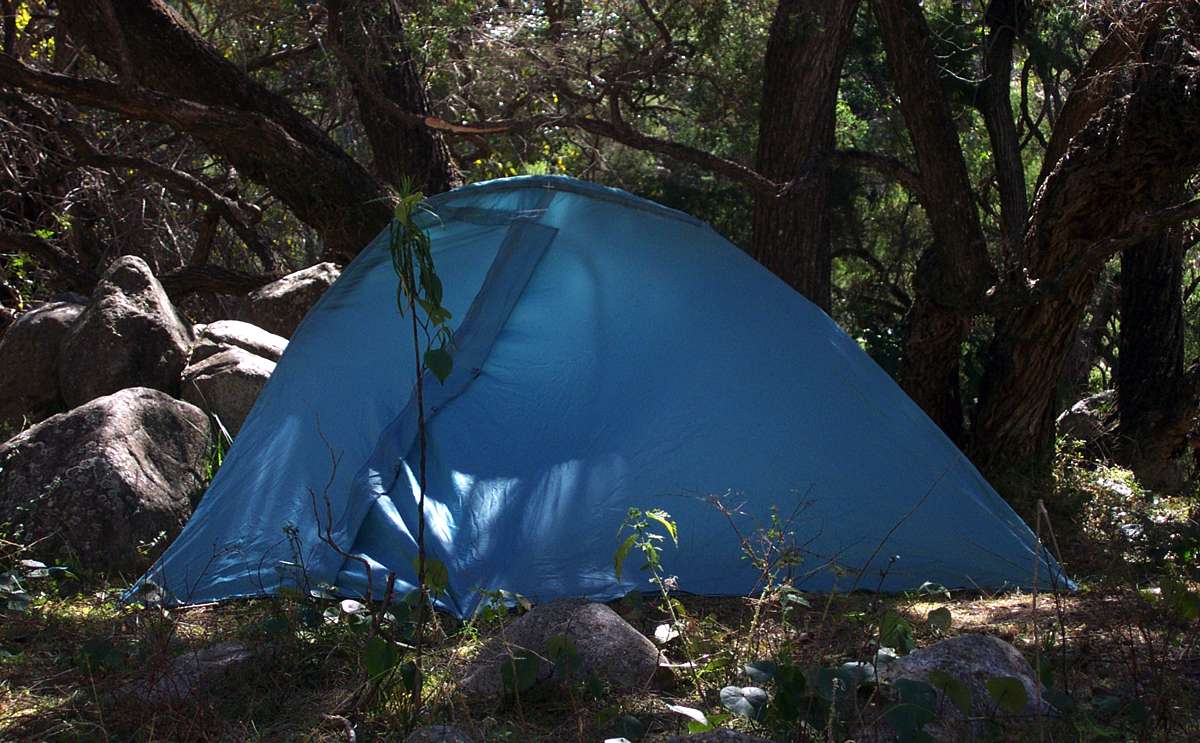
The lightest tent is the classic bushwalker's fly, with nothing but a piece of string and a rectangular film of waterproof substance, but using it involves compromises. I have used a 160 gram painter's polythene drop sheet, eight foot by ten foot, a length of "Spectra" (150 kg breaking strain) cord from sailing supply stores strung between trees and been totally dry in a three inch downpour down the gorges.
But you have to find trees or bush poles (usually fallen eucalypt twigs or branches) to support the cord, and rocks to hold the sides down, and even if there is little or no wind, the rain comes in both ends purely from random effects and splash, though usually not enough to matter, but stronger wind can shake the whole transparent edifice alarmingly. The plastic used in drop sheets is quite tough and stretchy, however, and does not usually fail. In any case, there is usually little wind down the gorges. It would not be suitable for an exposed site, obviously.
Photo: Chandler River the afternoon before the downpour, Don Hitchcock September 2006
However, when I first started bushwalking as a young bloke, I used a sheet of plastic from the hardware store and a length of cord. With a big piece of plastic, you can accomodate three or four hikers cheaply and easily, and it works well enough.
The first organised bushwalk I went on, around 1962, with the University of Queensland bushwalking club, I took a big sheet of plastic and a cord, (and a suitcase and some blankets!) for a base camp/bludge walk. I shared the tent with a couple of mates. It poured rain the entire weekend, and I remember it as consisting mostly of sitting over a smoking fire, drying socks and clothes for much of the weekend. We went in the University truck, everybody in the back of a truck which was normally used for moving university furniture and other gear, sitting on our backpacks or whatever was available, and singing bawdy Rugby songs at the top of our voices. OH&S, not to mention the police, would have pink kittens these days. In the event of a crash, we'd have been mashed together at the front of the truck in a tangled heap of bodies, backpacks, and broken limbs.
It was dry when we got there after dark, so we set up the tent, knowing nothing about bushwalking between us, but there was rain coming, you could tell. One of my mates had brought a huge plastic bag, which he put his el cheapo cotton batting sleeping bag into, and he claimed the centre of the tent, where there was a comfortable hollow.
Then it rained, didn't it rain. My mate in the centre woke up with a wet sleeping bag - firstly because of condensation, and secondly from the water trickling into the bag coming downhill from the hollow!
We made a desultory trip across the river, but didn't go far, since the river was coming up fast. We got back and set about the serious business of eating food and preparing hot drinks, and trying to dry our gear over fires made from wet wood, in the pouring rain. We laughed and laughed, told tall stories and weak jokes, and shared whatever food we cooked.
Only a bushwalker would understand, but it was one of the most enjoyable weekends I had ever spent, and I was hooked on bushwalking for the rest of my life.
However there was a bloke there with curly blond hair and a Paddy Pallin green japara tent, who spent the entire weekend in the tent, just poking his nose out occasionally making endless cups of tea by firing up a "choofer" which was a shellite (white gas, gasoline) self pressurising stove made of brass, with a cheerful roar once it got going. I decided that a "choofer" was going to be my next purchase. It beat sitting over a smoky fire.
Packing up, others took these voluminous green caterpillar things, down sleeping bags, and stuffed them into impossibly small bags. That was obviously going to be an urgent purchase too. I also got a "Mountain Mule" H frame backpack which had a hollow frame in which you could store shellite fuel for your "choofer".
Later still, when I could afford it, I replaced the piece of plastic I used for most of the first year with a Paddy Pallin green japara tent, which (I shudder to think now!) weighed three pounds, not including a groundsheet. We carried eighty pounds apiece on a three week unsupported trip to the Snowy Mountains, and a similar amount on a three week rock climbing trip to Tasmania. We got the weight of food down, for a start we didn't take bacon, but there was the climbing gear to carry as well. I will never eat pre-sliced pumpernickel bread again. We were strong but stupid, ah, those were the days!


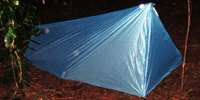
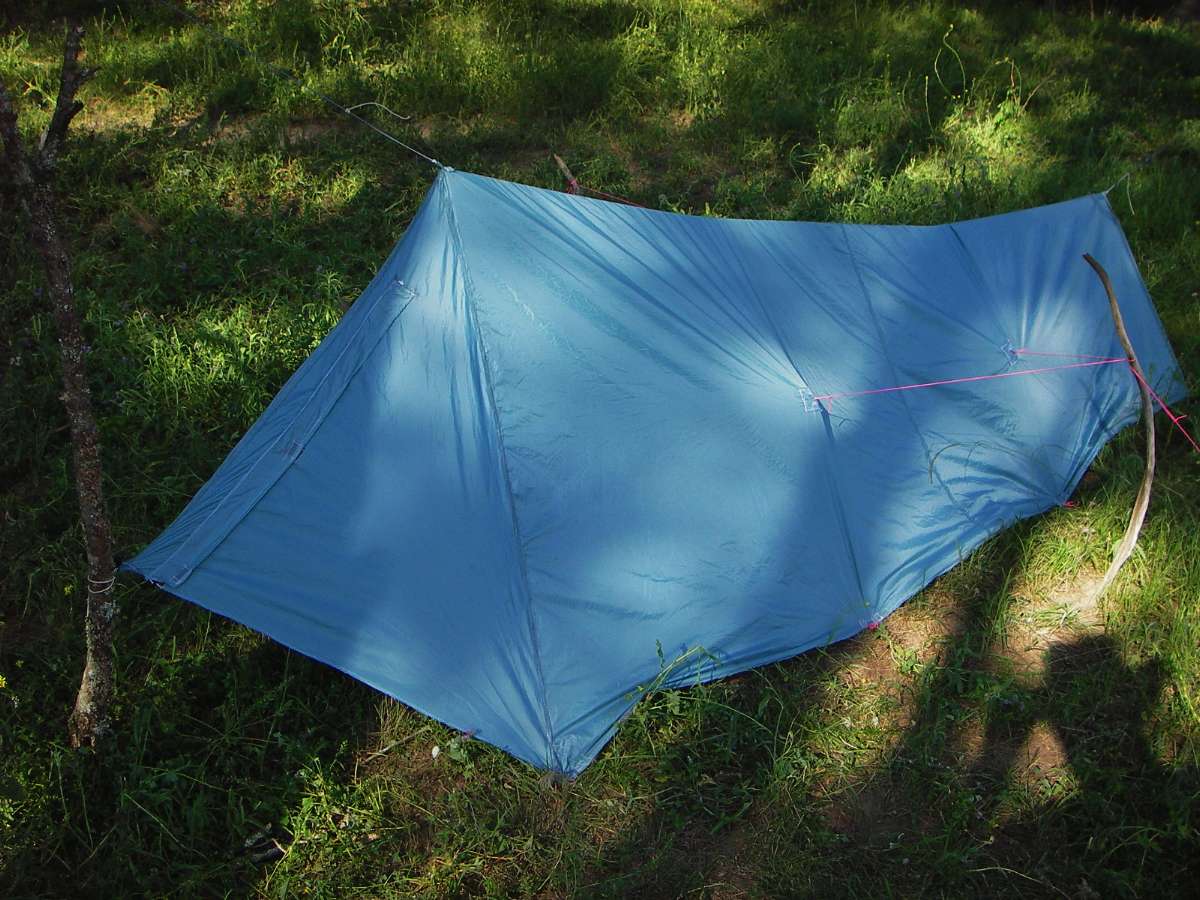
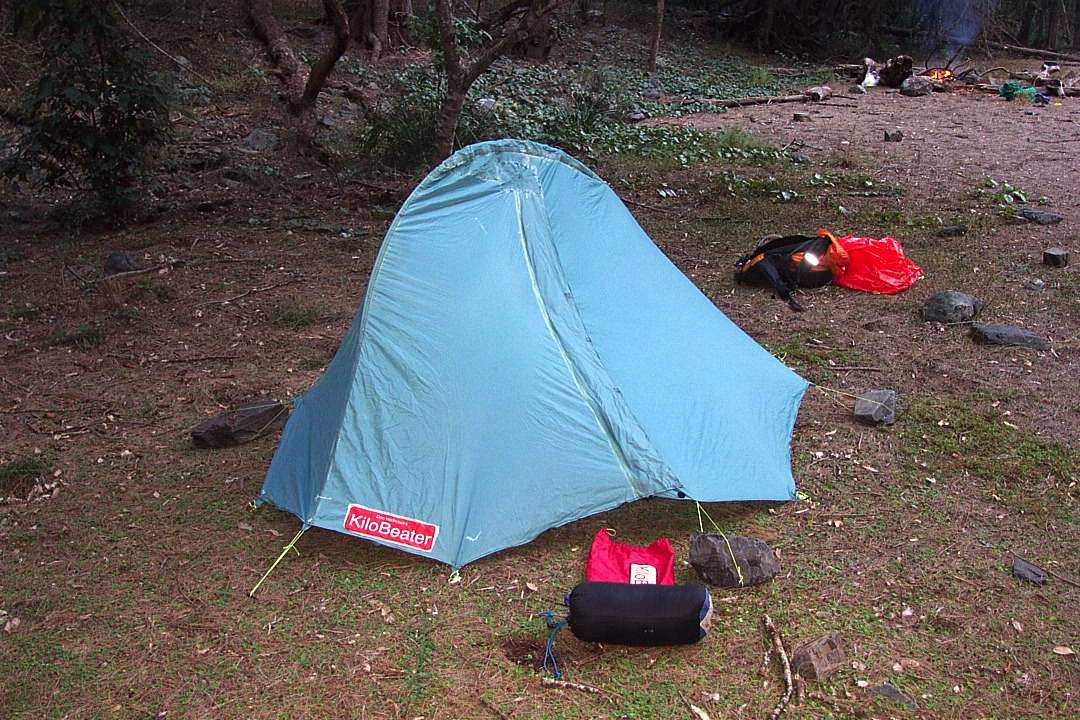
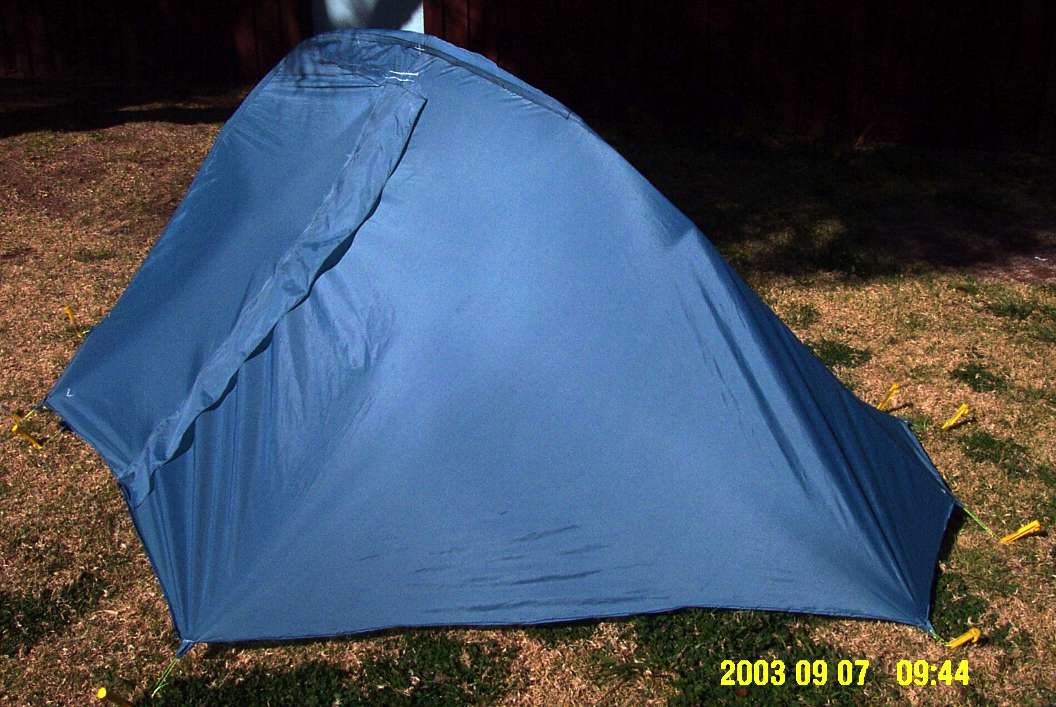
The KiloBeater Mark IVc
This is the outcome of my experiments with tarps.
If you use Silnylon, it comes out at about 370 gm, and if you add triangular end pieces so that no rain can get in (above left and left), and include the bag to store it in, a zipper, spectra cord, carbon fibre pegs and buckles and webbing and a couple of strips of reflective tape to find it in the dark, and my version is 450 gm. Add a 50 gm space blanket (aluminised Mylar sheet) as a ground sheet and you are up to 500 gm total. The tent does not have insect protection or an integral floor.
Because of the Silnylon construction, it packs down into an amazingly small volume, and is an inherently strong design, more so than any other tent I've made. The Spectra cord and webbing for the ridge is arranged (at the high end of the tent) in two attached but waterproofed with respect to each other sections above and below the fly so that water cannot dribble through to the inside of the tent, despite the sloping ridge line. This is the tent I'd prefer to be in if a rain and wind storm hit.
Photo: Don Hitchcock June 2006, October 2006
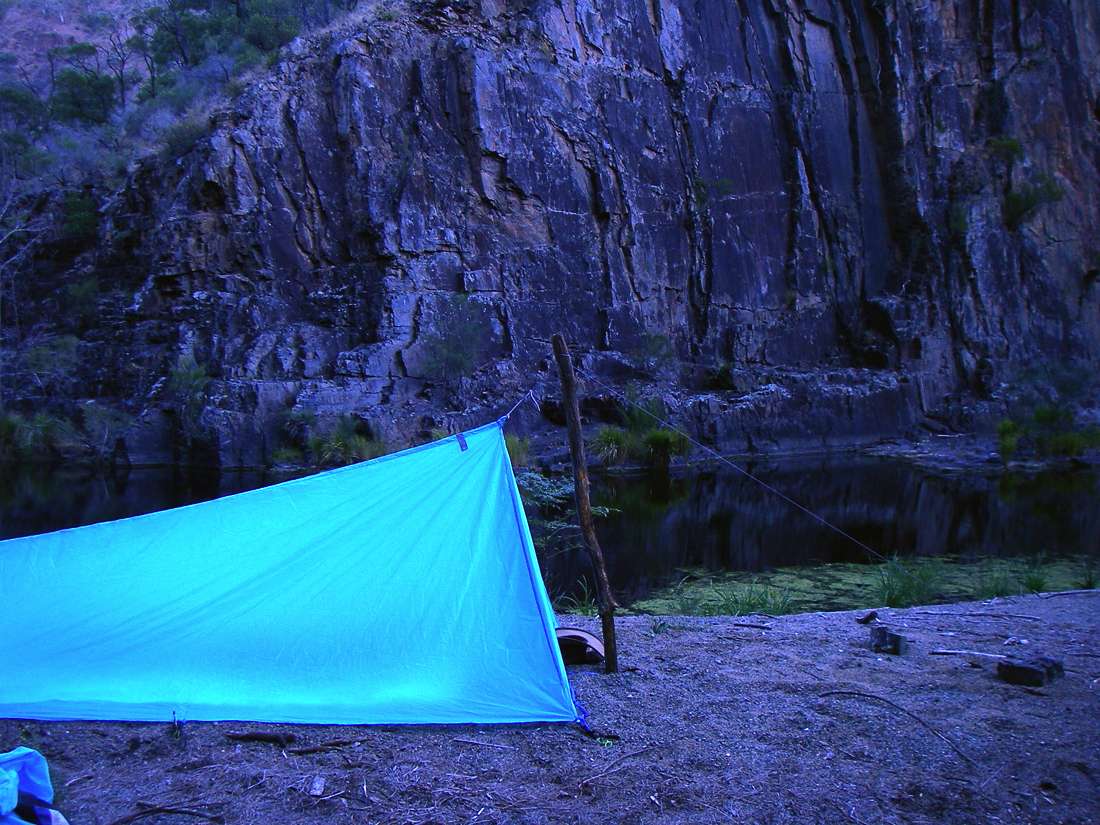
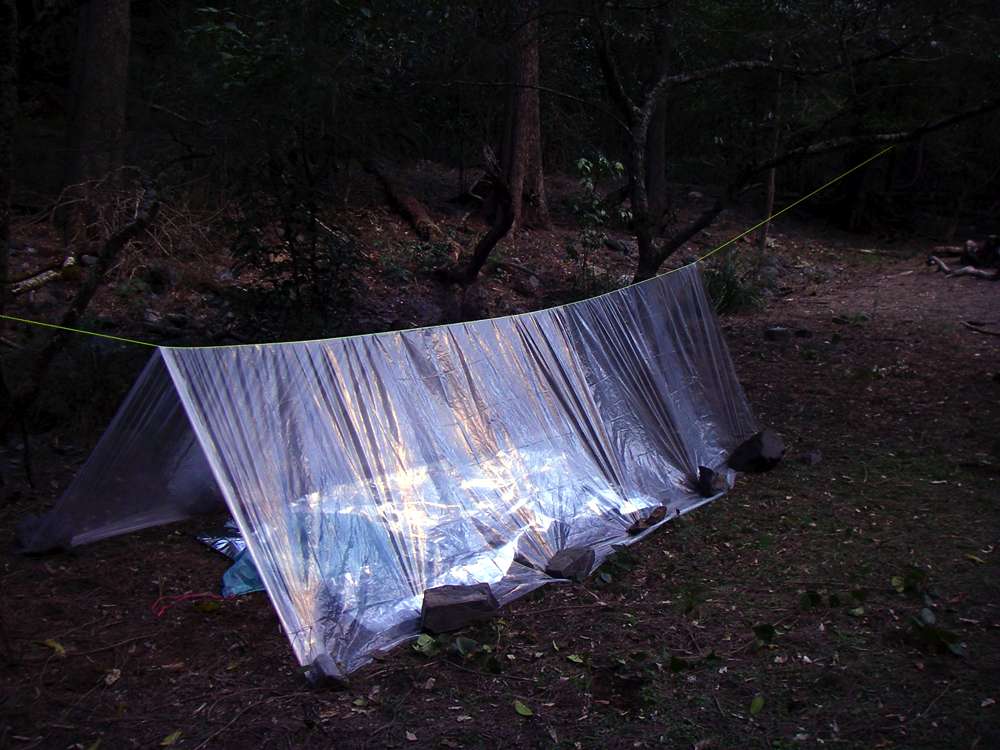
"Long Pool" down the gorges on Salisbury Waters. My 450 gram tent in the foreground. 16:10 h May 2006
I make most of my own equipment since that is the only way I can get the good design and the lightness I want. I make my own tents, sleeping bags, backpacks, raincoats, gaiters, stoves and combination pot supports/wind shields, and radically alter aluminium billies in the quest for lightness.
However, equipment such as tents and backpacks only have to help you survive the night and the next day till you get home to shelter. If you are going on a longer trip, you need to make sure that your equipment will last the distance, or that you can pull the plug when necessary.


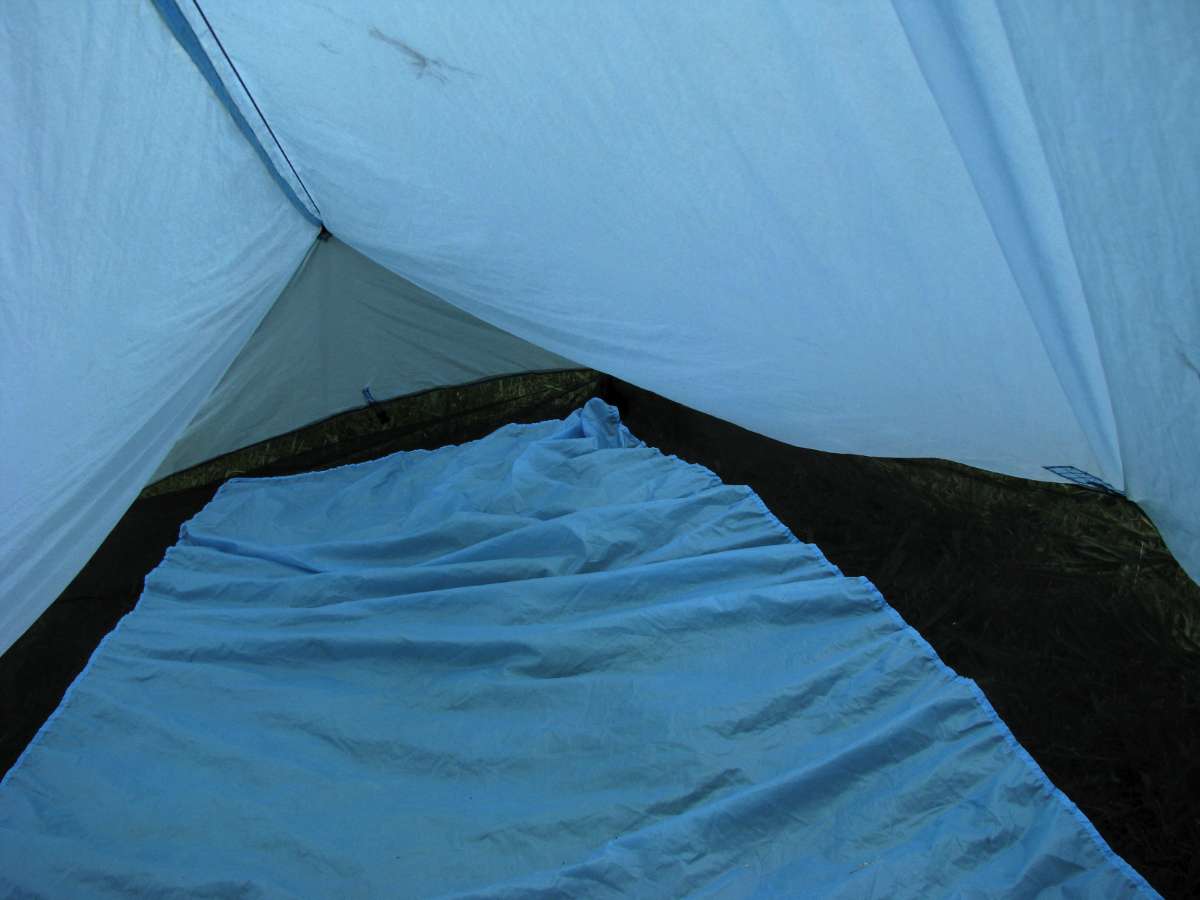
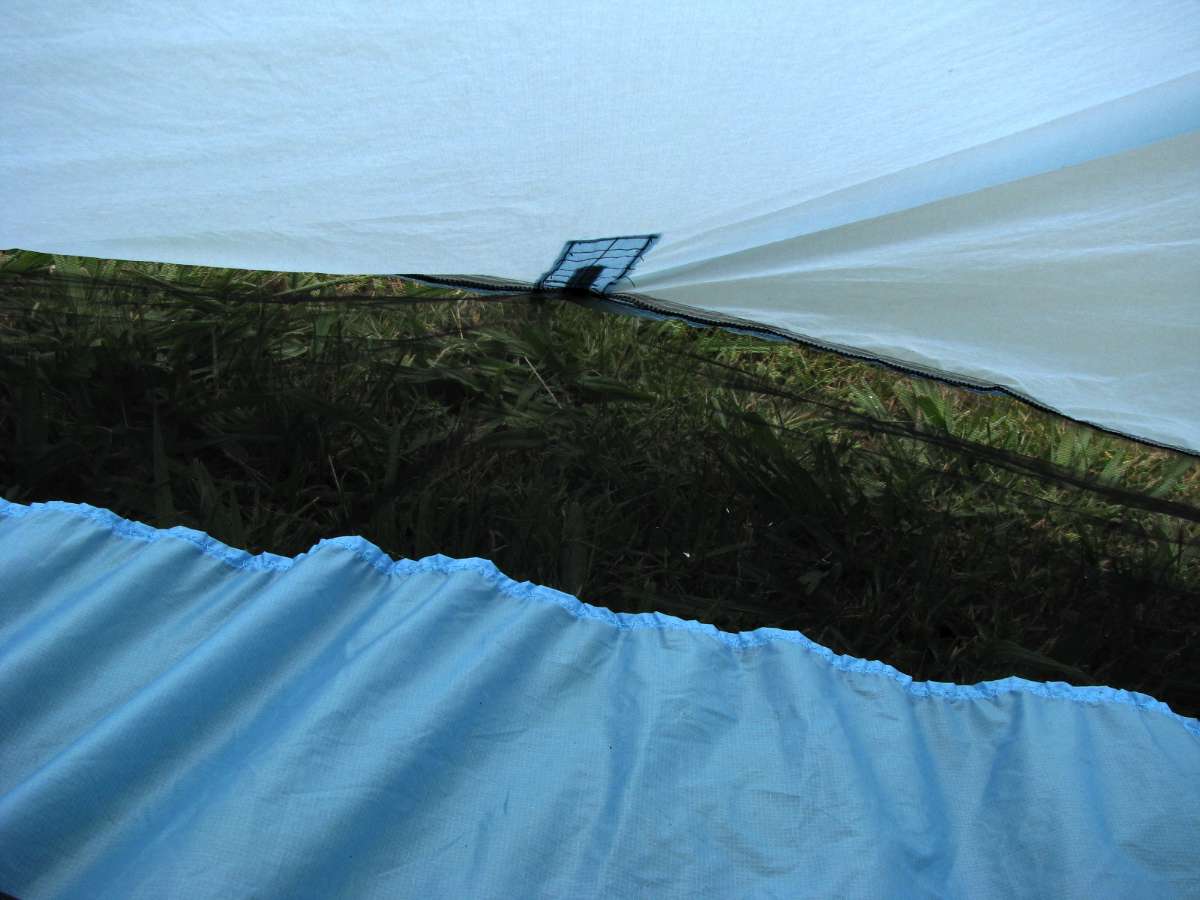
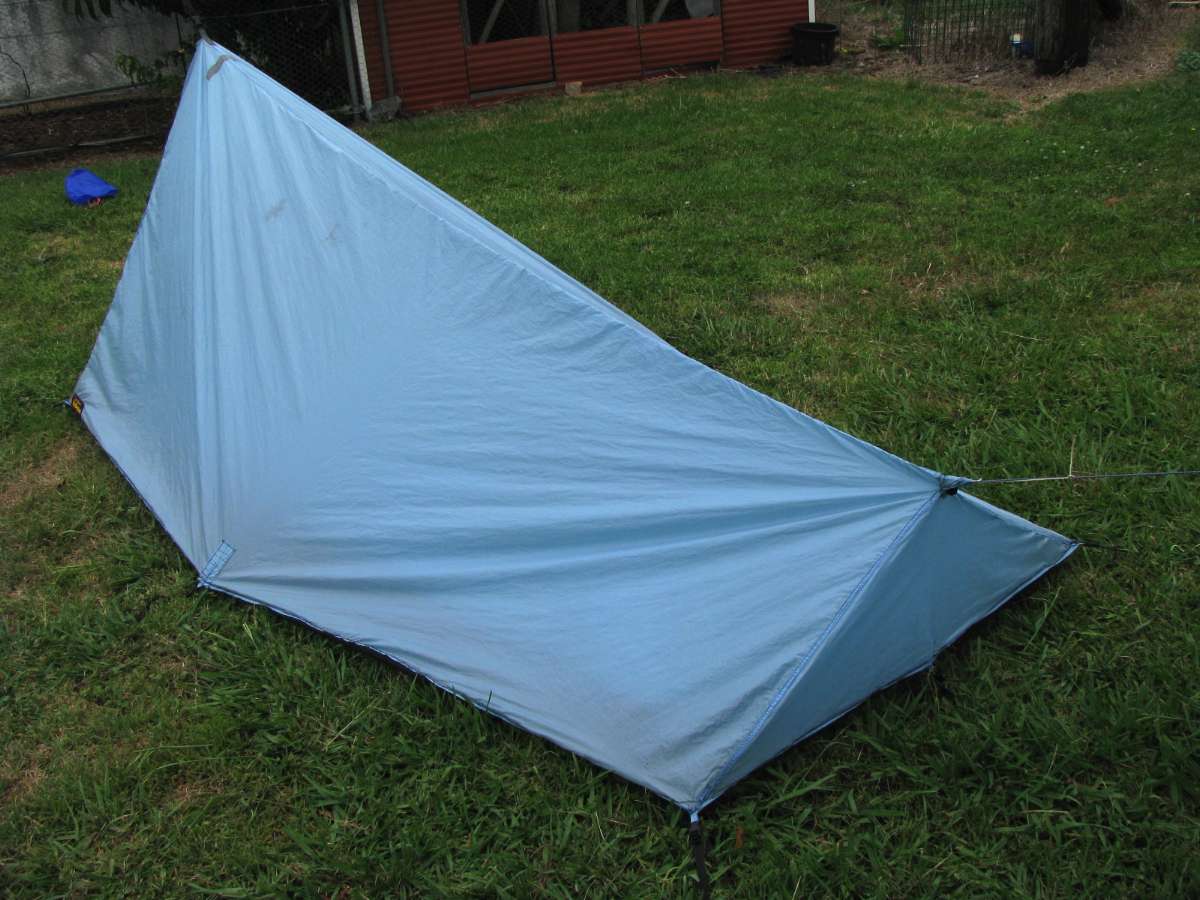
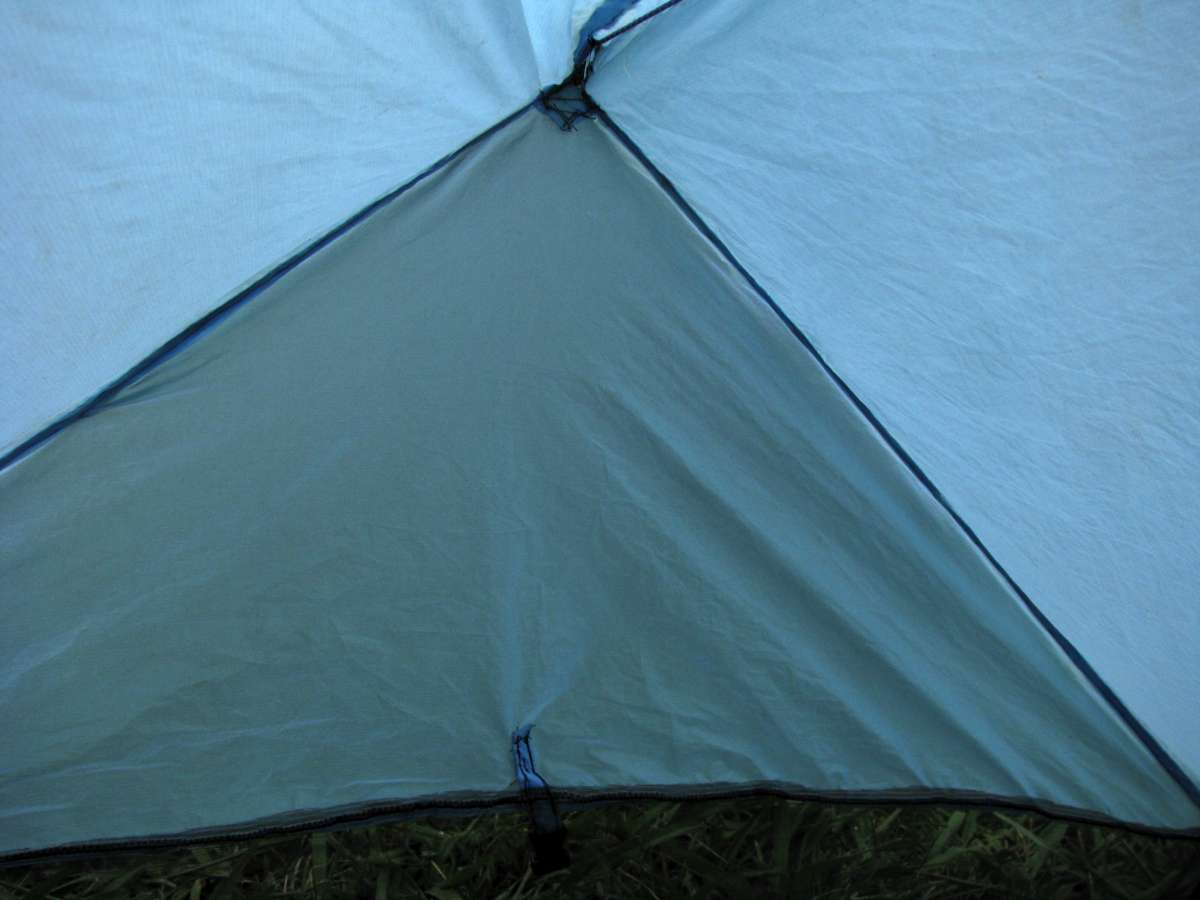
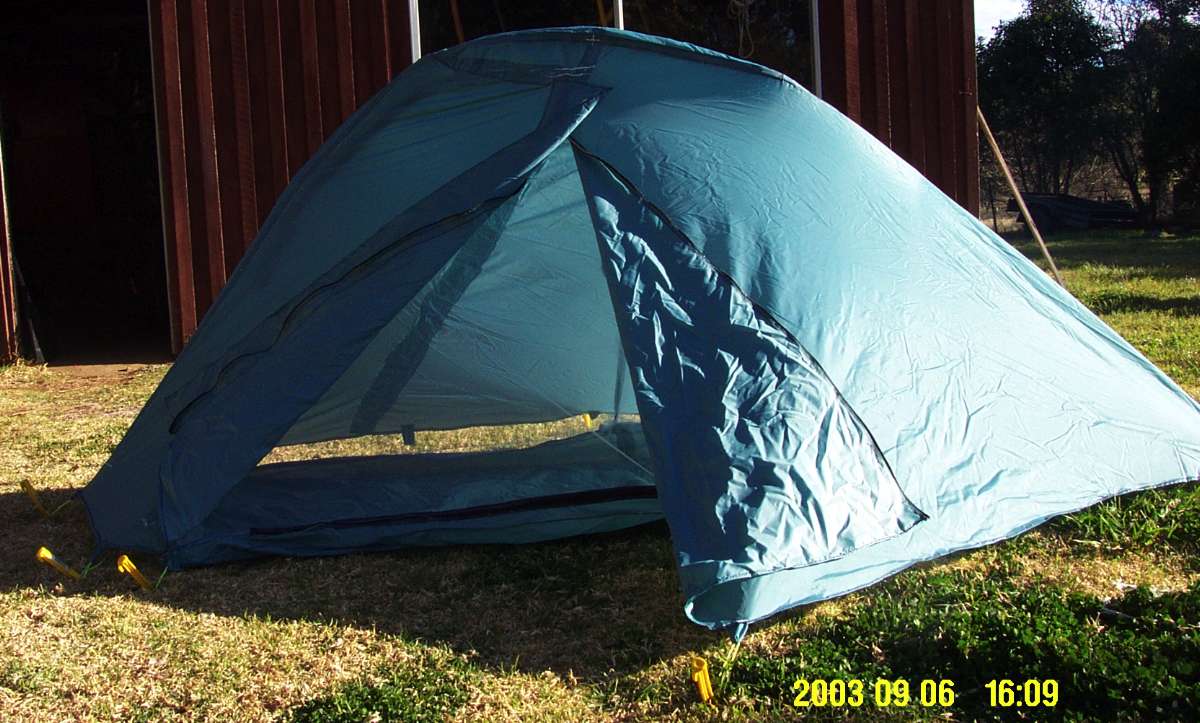
Photo: Don Hitchcock January 2009
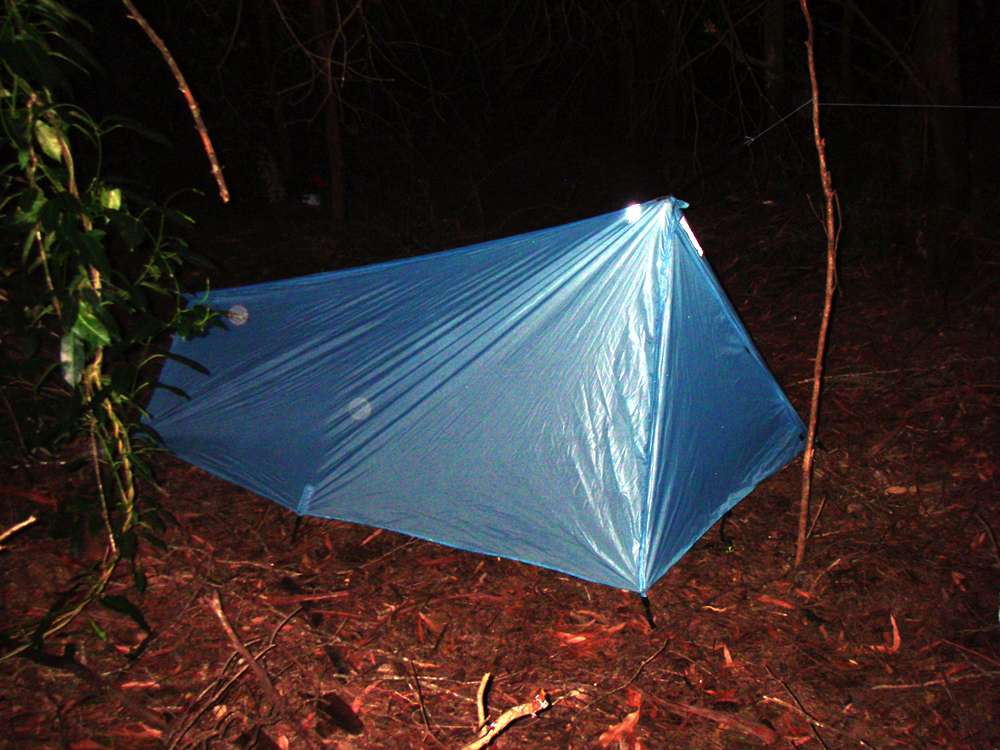
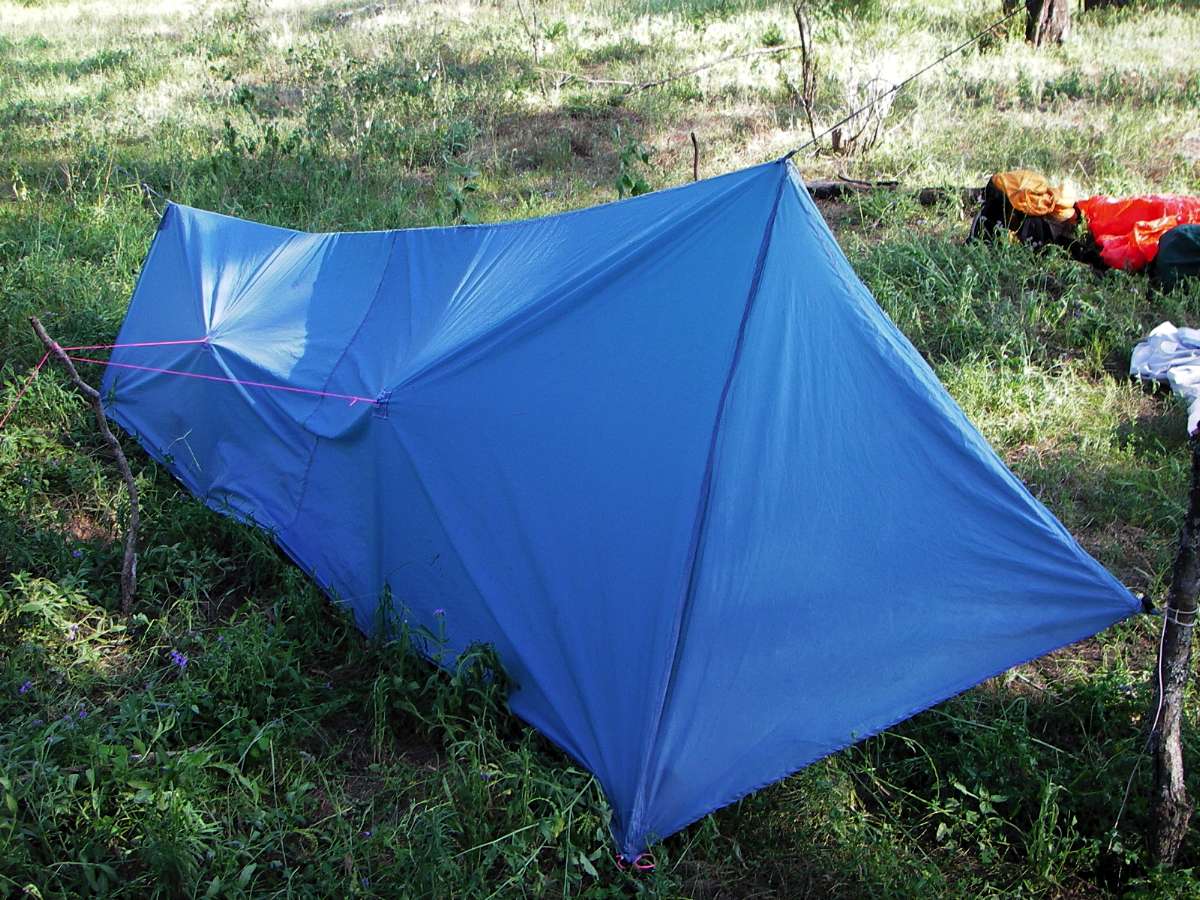
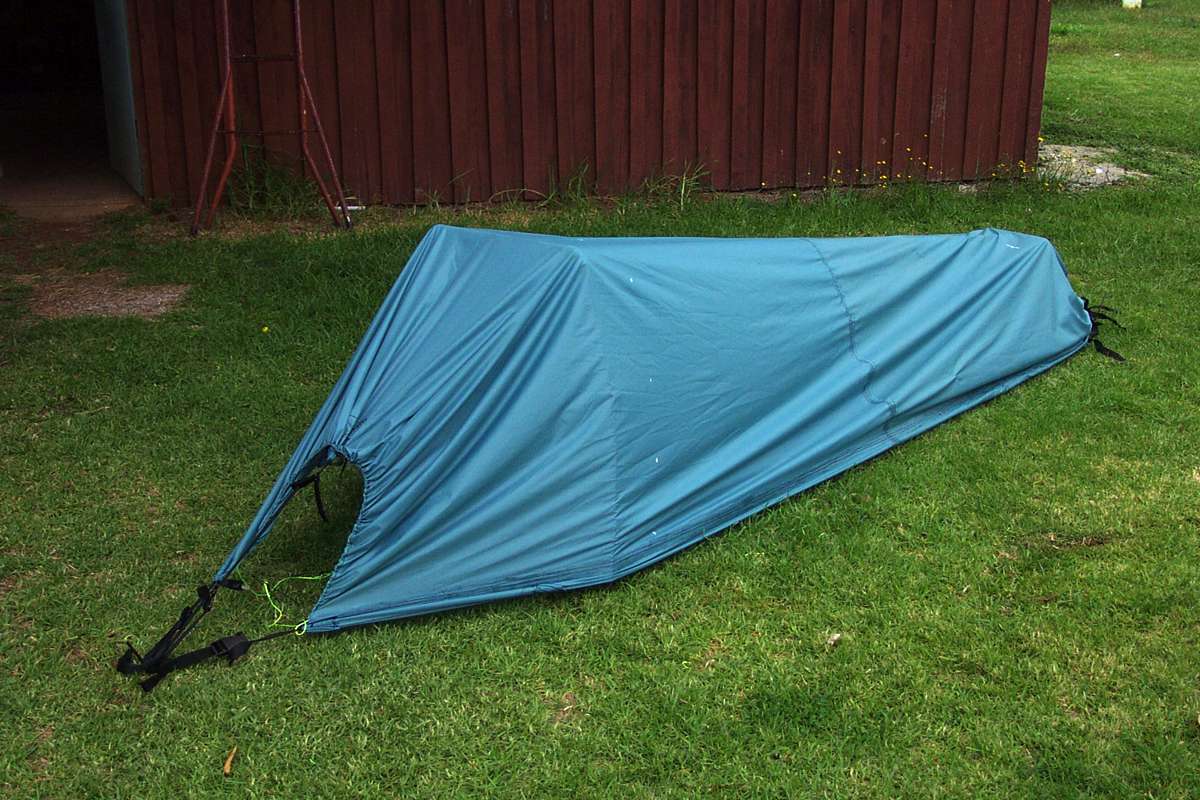
The KiloBeater Mark IVd
I have since added a silnylon floor and insect protection, as well as a carbon fibre pole at the front. At the back I find a bush pole, or simply tie the cord to a tree, attaching it at a point higher than the back of the tent.
I also do not carry pegs for the ridge cord, I find something to tie the cord to at each end, either a tree, a bunch of grass, a bush, rocks, or fallen timber. I would have to consider carrying pegs and a small pole for the back of the tent if I was going to use it in a caravan park or another civilised area such as a city camping area, but so far I have got away with it even in those sort of areas.
The tent without the pole is 622 grams, the pole is 36 grams, so the all up weight is around 660 grams. All cords and pegs are inside the bag, the carbon fibre pegs are in their own little ditty bag with a hard base so that the pegs don't puncture the tent.
I use buckles and tapes to attach to the carbon fibre pegs, which I leave attached to the tent at all times. The carbon fibre pegs I make up by using carbon fibre from kite suppliers. They are tied with thin cord to the tapes, and each peg goes through a hole melted in the end of the tape.
The pole shown is a thin version, I now use a thicker diameter version with the same weight and much better stiffness. I was concerned to get enough ventilation, so I made the insect netting ("no-see-um" from Wilderness Fabrics) fairly wide. This will also allow any splash to be partly intercepted by the mesh, and then drop onto the ground. I line the inside of the tent with my gear, there is no vestibule, and wet shoes and socks go at the end, so the mesh is sensible there at least. Though if you wring out the socks there is not much drip in any case.
I sewed the mesh to the bottom of the fly, so that I wouldn't need to worry about sealing the sewn seam. I have tested it in several downpours, and there is no problem with runoff. Splash is not a problem, the mesh intercepts most of it, and any water that gets through drains out again. The mesh itself does not get "wet", it is hydrophobic.
I had to do something clever at the foot of the net. The cord runs right through the tent, exiting through a hole at the foot of the tent. This hole is not a problem for rain, because the cord is going downhill at that point, but it provides an entry point for insects.
My first fix was to simply stuff a scrap of insect mesh into the hole, which worked fine, but I wanted something a little more fail proof. Out of no-see-um insect mesh I made a four inch or ten centimetre length cylinder with a small diameter (~ one inch, 2.5 cm) of mesh, and sewed the base of the cylinder around the hole in the tent. I then sewed a bit of shock cord (strong elastic cord) to the tent, fed the spectra cord through the cylinder, then wrapped the shock cord around the mesh and cord, and tied a knot. It works a treat, the length of the cylinder means that there is a bit of movement possible, but no insects can get in, and it has been maintenance free for eight years now (2017)
The cord running through the tent is excellent for holding glasses, headlamp, and wet socks while I sleep. I attached another piece of shock cord to the spectra attachment inside the tent at the high end, and used the "tightening" knot, a "Tautline Hitch", a number of times down the cord, so that when I hooked glasses and headlamp above my head, they didn't slide down the slope to the foot of the tent. The height of the tent is such that you can reach up and hook things like that on easily, but they are well out of harm's way.
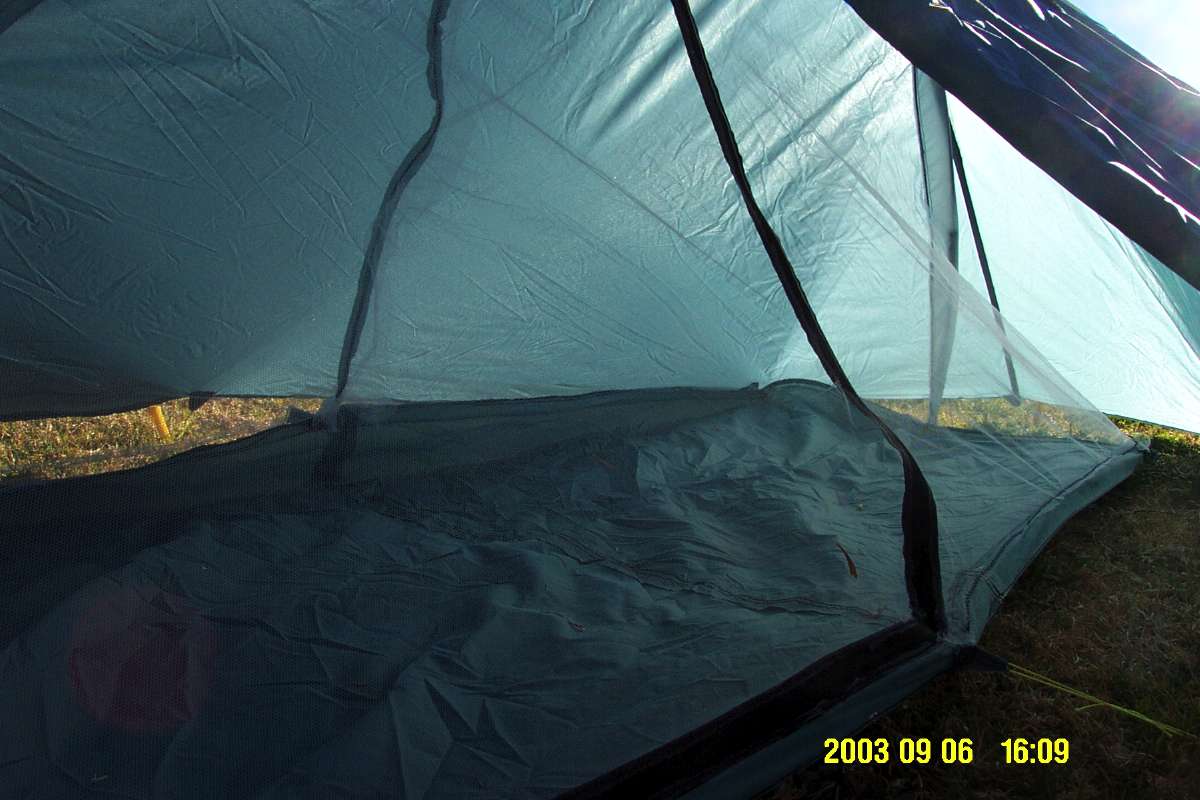
Update 2017

The complete tent has performed extremely well over the last eight years (11 years for the main canopy), with minimal maintenance. I have added two shock cords (see photo) to the middle of the sides of the tent which I tension with rocks or firewood, in order to keep the sides of the tent further apart. Silnylon stretches a bit when it gets wet, and the shock cord means that the tent walls are kept well away from me and my possessions and sleeping bag, thus keeping everything dry - condensation is normal in the latter part of the night on the inside of the tent in the climatic conditions I encounter, and the combination of extra weight of the condensation plus stretching of the canopy means that by morning there was a bit of sag. This has now been eliminated.
A couple of very small holes at the top front of the canopy were repaired with silicone sealant when insects ate their way out of the tent, a patch was put on the same area later (sewn and siliconed) when the extra tension at that point caused a tear to begin in the canopy, a tear in the insect mesh at the bottom of the tent caused by something sharp was repaired by a quick job on the sewing machine, and I will soon have to replace the (very lightweight) main zipper, which is showing signs of age, though it has not yet failed. It has been a very successful tent, it is light, easy and fast to put up and pull down, packs into a very small bundle, is light, stays dry inside even when being put up in the rain, and keeps out the rain and insects when it is up (flies can be a problem in summer in Australia).
I can prepare a meal outside the front of the tent while in my sleeping bag, even in the rain (if it is raining I normally hang a space blanket, or an umbrella if I have brought one over the main cord, which works very well), I can sit up at the front of the tent to get dressed in the morning, and the tent is well ventilated and stands up to strong winds well, though they are a rarity down the gorges where I normally walk.
Making the Mark IVd

Here are the dimensions I used for the one man version. I put them on a spreadsheet, so I could vary dimensions and see what effect they had. Note that the weight given is significantly below the actual finished weight of the tent, which includes spectra cord, adjustable tapes and carbon fibre pegs, zippers, sewing thread, seam sealer, attachment points, webbing at the front of the tent for the cord, shock cord, tent door holder-opener, name tag, reflective tape, and stow bags for both pegs and tent. These add at least 250 gm to the finished weight.
See Don's First Law of making your own stuff - any improvement almost always results in an increase in weight.
Here is the spreadsheet as an Excel document.
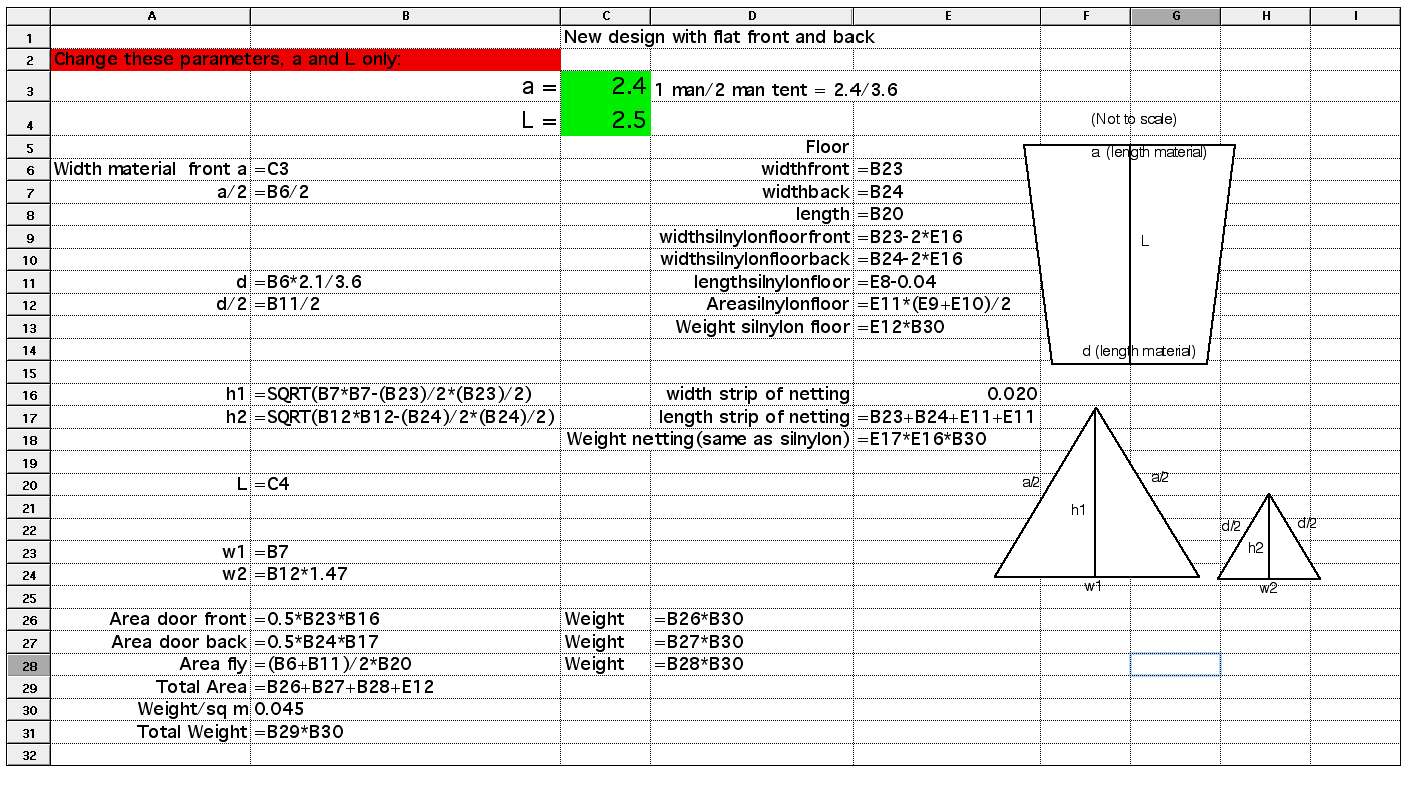
If all else fails, here are the formulas used in the spreadsheet so that you can type it into your preferred spreadsheet. There are just two dimensions to change once you have entered the kilograms per square metre (e.g. 45 grams per square metre = 0.045 Kg/m2) of the fabric you are using:
a - the length of the front of the fly when laid flat on the ground before assembly and
L - the length required for the tent.
Shortening or lengthening the tent has remarkably little effect on the weight of the tent - shaving ten centimetres off the length to 2.4 instead of 2.5 metres, for example, makes a difference of only 14 gm.
Note that I have tried to make sure that the spreadsheet is accurate, but can make no guarantees.
Note also that although I have indicated that a suitable value for "a" for a two man tent might be 3.6 metres, I have not yet constructed the two man tent. Readers must make their own judgements on that.
For interest's sake, increasing "a" to 3.6 gives a weight of 589 grams, so the final two man tent is likely to be less than one kilogram, allowing 350 to 400 grams for the extras like tapes, buckles, pegs, cords and so on.
Note as well that I have made the entry door an equilateral triangle. I believe it is not a good idea to make the tent larger by simply making the value of the width at the front of the tent more, and keeping the same height. This will make the sides of the tent all but useless because of the low roof at that point.
In addition, the tent will sag under the weight of dew or rain considerably if the slope of the roof is shallow. Silnylon is a great fabric, I know of no lighter or more waterproof easily available fabric, but it tends to expand and sag when it gets wet, and users should be aware of this. If you don't want to go outside in the rain and tighten the tapes, do as I do and retension the tent by moving the contents of your pack firmly against the sides of the tent.
Commercial tent makers use different fabrics which do not have such a sag problem, but nothing beats Silnylon for its lightness or ability to be packed away in an astonishingly small volume.

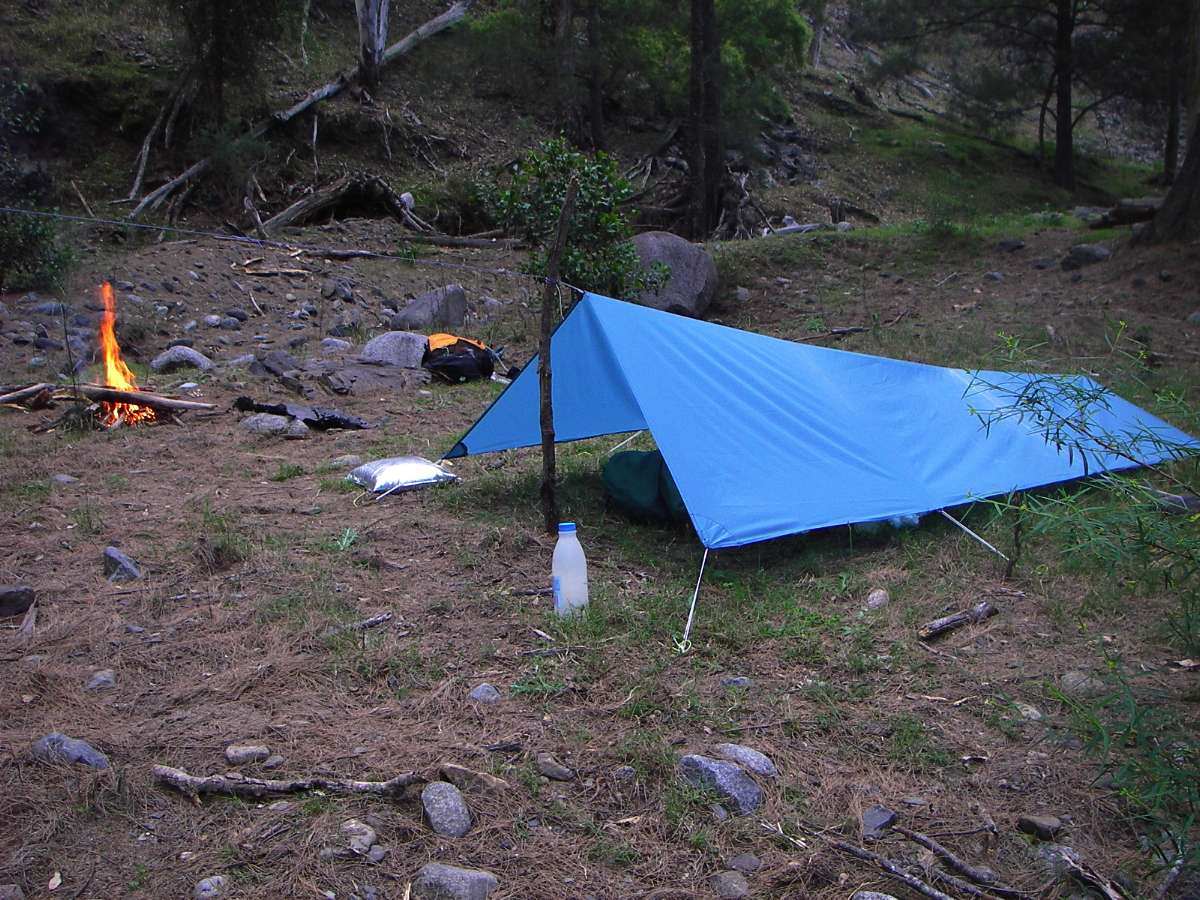
The KiloBeater Mark IVa
I made up this shaped tarp from Kmart shower curtains to see how it would go. It looked good, and worked well. I used shock cord (high quality elastic cord for sailboats) to attach it to the rocks and carbon fibre pegs, and that meant the tent was always taut, though this is not vital. There is a fair bit of slop in the system from the tension in the central cord to keep everything shipshape.
The white mark across the tent is talcum powder. It needed to be joined in the middle, and then the seam had to be sealed. You use talcum powder so that the seam sealer does not stick to itself when you pack the tent away. These days I tape the underneath side, rather than just slathering seam sealer over the seam. Taping looks better and is stronger and more waterproof. All you do is cut a strip of tent material, put a little seam sealer on the seam, and press the strip onto the wet seam sealer, which spreads out under the tape. Only do a bit at a time, the seam sealer dries quickly, and do it in a well ventilated spot. The tent is trapezium shaped, the high end is wider than the low end, in order to save weight but provide shelter where it is needed most.
If this will be your first attempt at making a tent, I highly recommend this sort of design. It will teach you a lot - you need to learn how to set out and cut the fabric, make a rolled hem for the edges, a flat felled seam for the joins, how to tape the seams, add strengthening patches where there will be cords attached, and it looks good when it is finished.
If you go on overnight hikes at a time when you know that the probability of fine weather is close to 100%, you won't have to worry about rain, and this will keep the dew off. If it does rain, it will still work well unless there is a lot of wind with the rain, though I'd set it up closer to the ground than in this photo, and with the front corners a little closer together to give head room. It is about as light as you can get for a durable tent, and it packs away into almost nothing. I'd make it out of silnylon if that is available, but any waterproof fabric is fine. You will need to find a light strong stick for the pole where you camp, always an option in Australia, as shown in this photo, or carry one.
There is a great deal to be said for making your own gear, and you will never look at a tent the same way again, I guarantee it.
Photo: Don Hitchcock October 2005
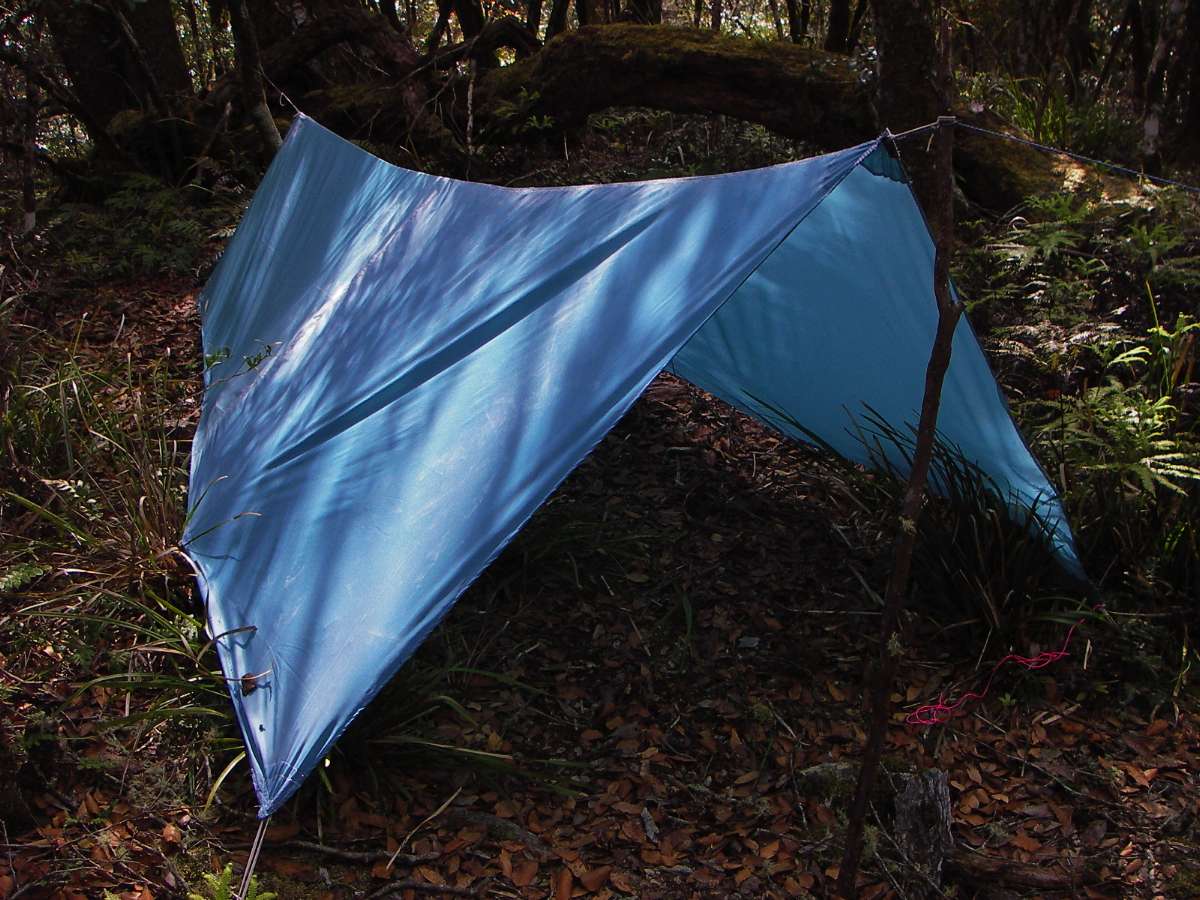

Here it is set up on a site in rainforest with very little room available to spread out, and with a storm looking likely, so I set it up in a narrower profile with the edges close to the ground.
When the thunderstorm broke, I had to rig a raincoat over the cord just inside the tent, and weigh it down with gear to keep out driving wind and rain.
Photo: Don Hitchcock November 2005
The KiloBeater Mark IVb
When I got home, I put on a "beak" to act as a rain deflector, creating the Mark IVb, and added a zip on the beak to make access easier, and two pulls on either side to accommodate strings to hold the sides out.
Photo: Don Hitchcock December 2005
The tent was starting to look too complicated by half, and ugly.
I eventually decided to fill in the two ends with triangular pieces, as it would use less material, be more rain and wind proof, be easier to set up, and be lighter. The tent can be much shorter and thus saving weight, because you are not concerned about rain getting in. All you need to do is add a zipper and a zipper cover to keep the rain off the zipper, though with a vertical zipper it doesn't matter much if it leaks. Access is much easier then than with this large beaked version.
This experiment led directly to the Mark IVc, which I made using silnylon, since I was pretty sure what I wanted by then. Silnylon is a lot more expensive than shower curtains.
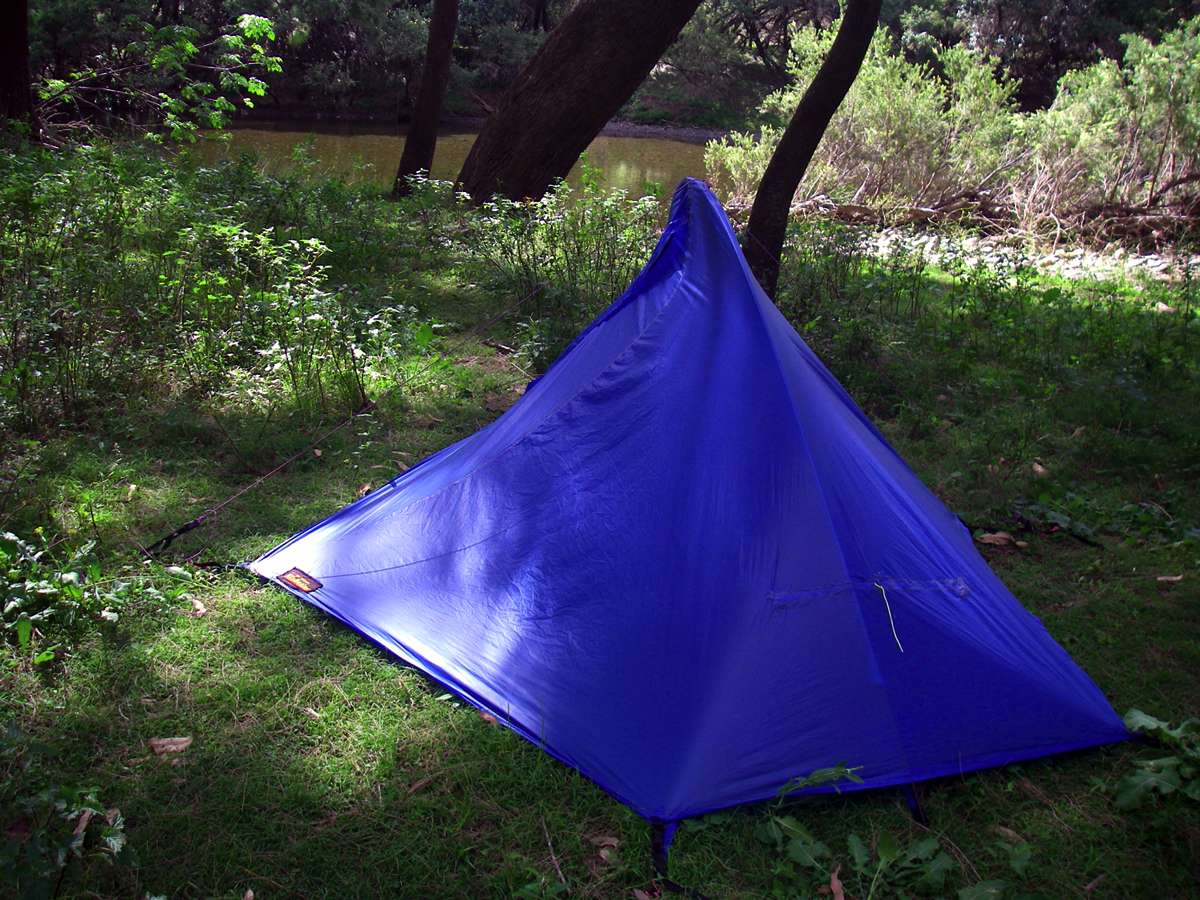
The KiloBeater Mark IIIb
This tent which I designed and made is very easy to set up. It has insect protection and a vestibule, and is supported by a carbon fibre pole bent into a hoop shape.
Photo: Lower Chandler River, Don Hitchcock December 2008
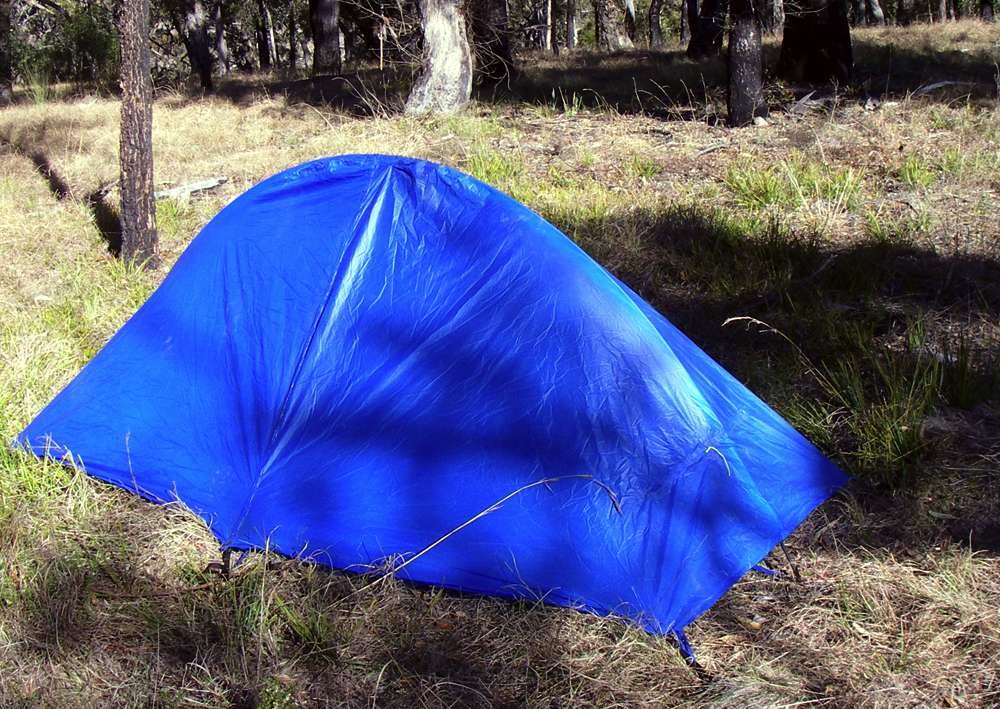
The KiloBeater Mark IIIb
These days I use "no-see-um" mesh for an insect screen, and Silnylon, (50 gm per m²) which is very light and totally waterproof for the fly and floor. Silnylon is made by impregnating a thin woven nylon fabric with liquid silicone from both sides. This makes it strong for its weight and waterproof, but not breathable. You must use special silicone seam sealer, I use McNett Silnet Silicone Seam Sealer and it is a good idea to tape the seams on the inside with a long strip of Silnylon you have cut from your waste, then put seam sealer down, press the strip of Silnylon on the sealer, and press and rub down to eliminate air bubbles. Do a short section at a time, the sealer dries quickly. Taping with this method is easy to do, and makes the seam stronger and totally waterproof.
This tent, with carbon fibre pole, more room than the shower curtain tent, better weather protection, better insect mesh and better tapes and pegs, comes in at 850 gm total.
Photo: Don Hitchcock August 2006
I have used Silnylon for ditty bags, backpacks, sock gaiters against grass seeds, and raincoats as well as tents. I make up a cutting pattern on a spreadsheet with many variables such as length and height and width which I can change to see what happens to the weight, and a drawing program, and my tents are now much neater looking. Any tent is a compromise between the desire for light weight, ease of use, resistance to abuse, and so on. Commercial tents must be cognisant of the tendency of users to think that the product should be bullet proof, so the makers have to make them as near as possible to this, which inevitably makes them heavier. If you are prepared to tolerate a certain amount of flimsiness for what I and other ultralight (equipment!) bushwalkers regard as the holy grail, as close as possible to zero weight, then careful use and the ability to repair equipment both back home and in the field is vital.
This was my KiloBeater Mark II. It was made from Kmart shower curtains, had a carbon fibre pole and pegs, bridal veil insect screen, and worked very well. It weighed 880 grams with pole and pegs and stuff bag, and was very easy to put up and take down.
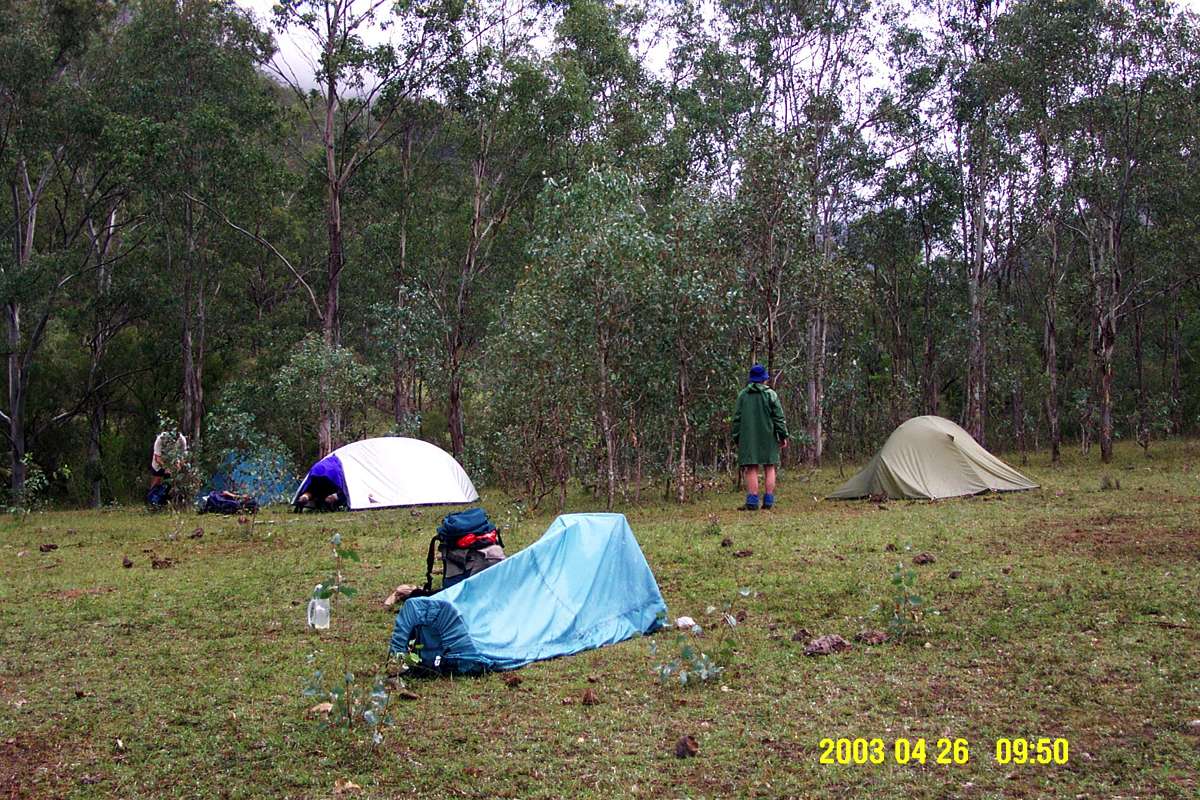
Photo: Mihi Gorge, Don Hitchcock September 2003
Camped for the night at a delightful spot on the Chandler.
I made this tent from Kmart shower curtains (70 gm per m²), and it served me well for many years. It was the second of the series of KiloBeater™ tents I have made, specifically designed to come in under one kilogram. In this case I simply set up the carbon fibre pole in an arc, then draped the fabric over it, cutting and shaping as necessary, rather like Christian Dior doing a haute couture dress, but without the talent or dressmaking skills. It turns out that less than half of a tent is the waterproof bit. Net, zippers, tapes, cords, poles, floor and pegs all add to the final weight.
This leads to Don's first rule of lightweight hiking:
Any improvement almost always results in more weight!
The tent had a bridal veil insect net and a floor of shower curtain material inside, as well as one side as a vestibule. It worked well, and weighed 880 gm total including pegs and pole, and packed up into a very small package. Small volume is almost as important as small weight when designing bushwalking equipment. I make my own tents, sleeping bags, raincoats, stoves, stove supports, carbon fibre poles and pegs, backpacks, warm hats, gaiters, ditty bags, pack liners and so on. Not because I can't afford commercial versions, (I have spent thousands on equipment and materials over the last few years) but because mine are either better for the purpose, or lighter, or less volume.
However this version was a very reliable tent, and survived rain and hail storms, though I had to repair it once when a large rock fell on it and made a big rent in it, fortunately when I was having a cup of turkish coffee outside at the time, when I was unwillingly benighted in the Dangars Falls gorge. That is a story that needs a long time to tell, and a trip that shaved several years off my life .......
Photo: Chandler River, Don Hitchcock May 2004
There was a reasonable amount of splash space between the edge of the fly and the groundsheet in the Mark II. There was not a huge amount of room inside, but there was plenty of vestibule space for boots and pack and so on.
However, there are wild dogs (dingoes) in the gorges, and leaving things where a dog can get in and pinch stuff is not a good idea. A friend of mine on a trip we went on down the Chandler had a plastic container of sugar and one of milk powder taken which he had left outside the tent.
We recovered the milk powder container with big bite marks in it, but the sugar was gone forever.
I have gradually come around to the idea that a vestibule for me is a waste of time.
Instead I unpack my pack, and put the bags beside me down the walls of the tent. This tensions the walls, and leaves enough room for me between them. Pack and wet shoes and socks go at the bottom of the tent to each side. This system seems to work pretty well.
Photo: Don Hitchcock September 2003
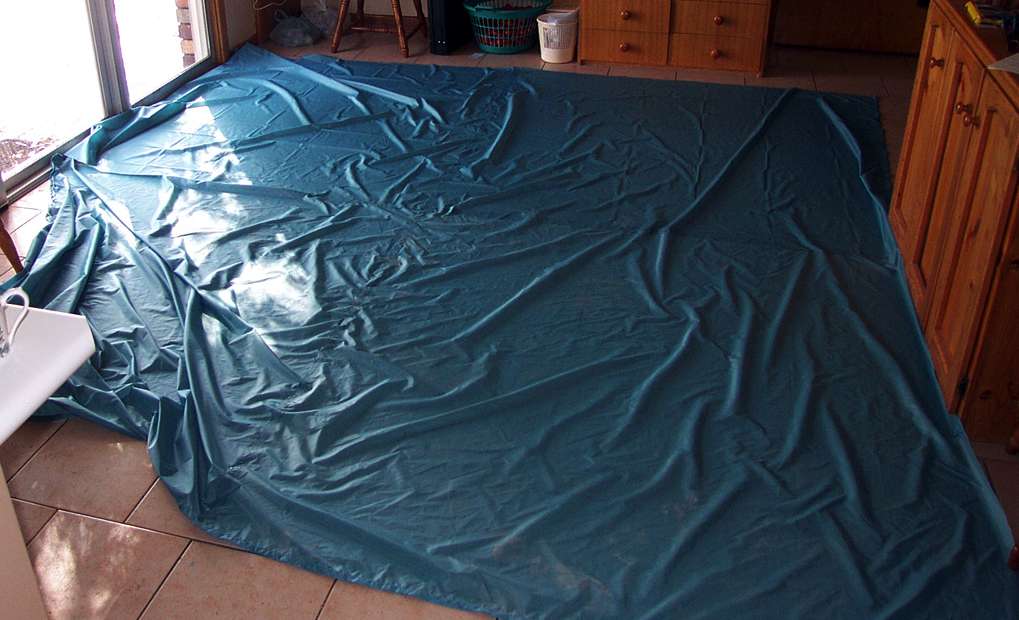
Finished.
Photo: Don Hitchcock September 2003
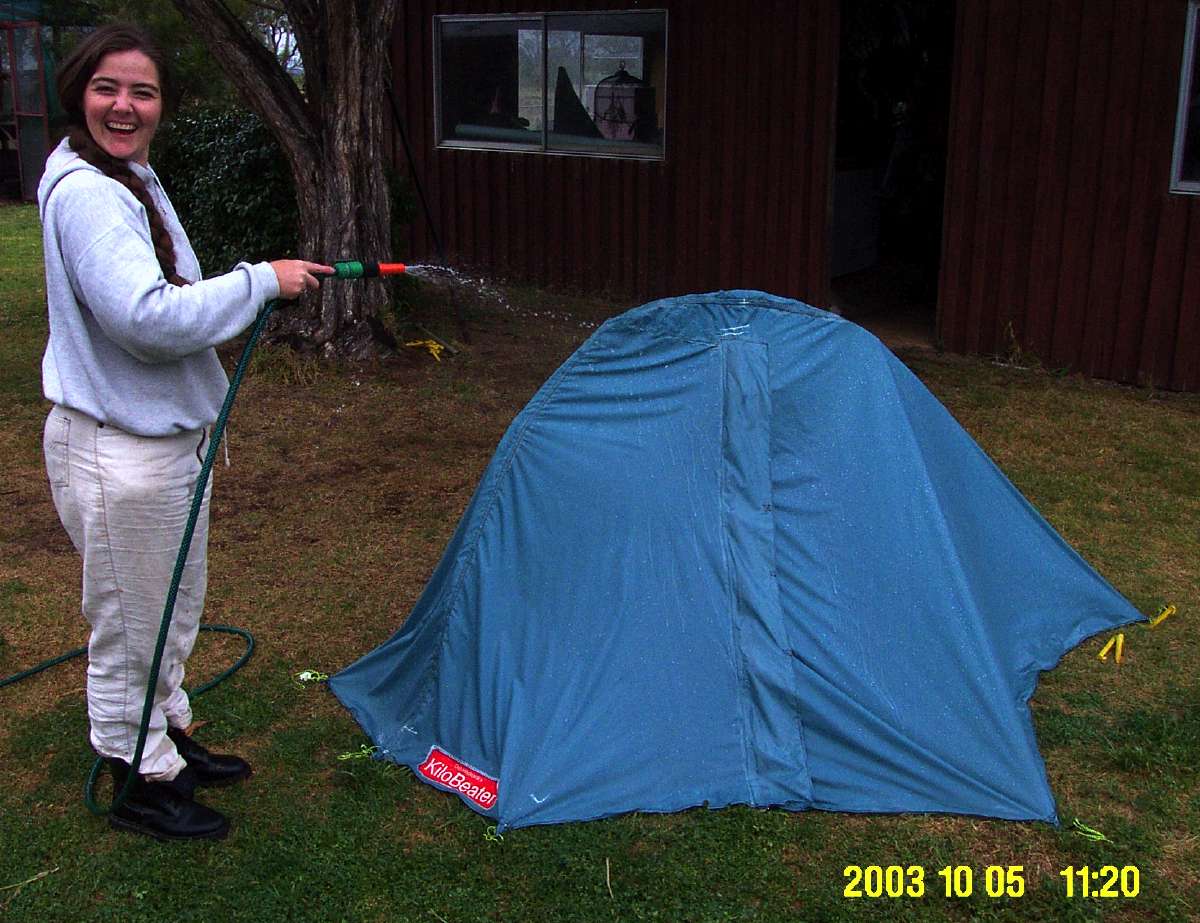

In October my son and daughter arrived home, and helped me to locate an annoying leak. Anna in particular had a lot of fun hosing the tent with me inside! Ben had a look too, and neither of us could work out where it was coming from.
Photo: Don Hitchcock October 2003

At last I found that water was getting in and running down a fold twenty centimetres away from where the leak appeared, and not where I am looking in this photo. I applied seam sealer liberally, and had no more problems.
Photo: Don Hitchcock October 2003
The Kilobeater Mark I
I christened my tent the Kilobeater, because the aim was to make a tent lighter than one kilogram all up. This one came in at around 800 grams.
I started out by sewing together four shower curtains from Kmart. I found the material to be totally waterproof and very durable, and weighed around 70 grams per square metre. I'd have loved to advertise the origin of the material with dolphins and seahorses and mermaids, but the PVC of which those sort with printed designs are made is very heavy.
I used a flat fell seam, a strong seam often found on jeans seams, to join the bits together. This was a major operation for me, I'd never used a sewing machine much before, but it is now second nature. If you make your own gear, be prepared for a steep learning curve, and your sewing machine will become a good friend.
Photo: Don Hitchcock April 2003
I put it together as a tube, larger at the entrance than the foot, and gave it shape with carbon fibre poles I got from a kite shop, and glued together myself. Easier said than done, believe me. To get the angles, you cut a connector at an angle, glue it together, then reinforce the joint by binding it with thread (I use braided nylon builder's line, used by brickies to get their levels. It is strong and cheap) over araldite, and cover the lot with araldite.

When making the joints, you need to make sure that there is still a hole all the way through so that hat elastic can be threaded through, so you can easily pack and unpack the poles as in commercial versions.
I had a lot of trouble getting the poles to stay up inside the tent, but eventually found a method that worked well enough.
Photo: Don Hitchcock April 2003
One nice thing about this design was that there were only two pegs. It was totally waterproof, and just as well, as we had a torrential downpour during the night on this club bushwalking trip along Blue Mountain Creek, which leads into the Macleay. We left the tents up for a day walk to the Macleay, and the rain came down again the next night. The tent had a lot of condensation, however, and I never did get it insect proof. It was only used in the field just this one trip, and was cut up for use in the Mark II. If you make your own gear, be prepared to start again, and again, and again, as you find better ways to do things.
Another problem with this design was that getting in was like getting into a sleeping bag. Once in, there was enough room, but it was not as good as I had hoped. The condensation was ferocious, made worse by the heavy rain and consequent high humidity on the two nights I used it on a walk.
Photo: Don Hitchcock April 2003
Bushwalking Index
Lightweight Bushwalking / Hiking Gear
Anyone (e.g. students, libraries, government agencies such as tourist bureaus, the general public) may use, print and publish the photographs taken by me and presented on this bushwalking file for any legitimate non-commercial purpose, at no cost, and without asking permission. However a note such as "Photo: Don Hitchcock" somewhere in the document would be appreciated if it is to be published.