Back to Don's Maps
 Bushwalking Index
 Lightweight Bushwalking / Hiking Gear
Lightweight and Warm Sleeping Bags and Quilts
Nothing beats first quality down for compressibility, lightness and loft, but it is useless when it gets completely wet, as I found out on one trip. The bag was ruined after that dunking. Back home, it took two weeks to dry on the line in the wind and the sun, but the feathers clumped together in heavy clods, making the bag not much more than a decoration for warm nights only, it was useless in the cold.
Since I am mostly walking in gorge country, where you are crossing the river every couple of hundred metres, there is always a possibility of getting your bag wet if things go pear shaped. Man made fibre will offer a bit of warmth even when wet, and dries well, back to its former loft.
Needless to say, I now use a belt and braces approach to keeping my sleeping bag/quilt dry. I use a new strong garbage bag inside the pack when going into the gorges, carry a spare for a long trip, and put another lightweight garbage bag around the sleeping bag/quilt. I've never had a recurrence of that disaster, thankfully. The price of warmth is eternal vigilance.
The first sleeping bag I made used two inches of man made fibre on top, and one inch below, and had a hood, and a one third zipper. It weighed about 900 g.
However there are compromises. There was very little room inside, and the insulation below me bunched up and didn't do much, because you lie on it, squashing it down to almost nothing, which means that there is very little warmth in it, apart from keeping the wind out.
Another problem was that I had used the standard method of keeping the insulation in place, running thread from one side to the other. This did not work at all well. The insulation only stayed in place once I sewed along all the edges with a zig-zag stitch.
Photo: Don Hitchcock December 2006
I took out the bottom insulation, and cut off the extra layer of material. This got it down to 724 g including the stuff sack, but because I had made it so small in the initial design process, turning over without turning over the bag as well was difficult. If the bag turns over along with you, then there is only a thin layer of material between you and the outside (cold) world.
You lose heat upwards in a sleeping bag. In other words, insulation below you does almost nothing for your comfort on a cold night. However, it does protect you from the cold if you turn the whole thing over.
Photo: Don Hitchcock February 2010
I have never used a sleeping mat. When I started walking, there was no such thing, so I continued as I started, and have not regretted the lower weight. A sleeping mat can vary from about 250 g to 900 g.
Don's Rule One of lightweight walking:
You save 100% of the weight of something you don't take on a walk.
Don's Rule Two of lightweight walking:
If you don't have it, you don't need it.
The hood worked well, and the bag was light, and packed down to a small volume, but it was not a completely satisfactory bag for winter, being on the small side, and you had to set it up just right in cold conditions, and not roll over too much during the night. However, I used it as my only sleeping bag for more than three years, including a nine week bushwalk (or "tramp" as the kiwis call it) in the south island of New Zealand, as well as summer, winter, autumn and spring walks in the gorges east of Armidale.
But there was still not much room inside!
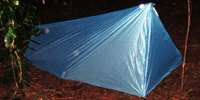
Since we use "doonas" or quilts at home, I decided to see if a quilt would work for bushwalking.
Making a Quilt
I needed a quilt for cold, winter trips, and used a three inch layer of insulation.
I read somewhere that a rough rule of thumb is that one inch of insulation is rated at 10° Celsius, two inches is rated at -10° Celsius, and three inches is -30°. I don't know how accurate this is, but I find it a useful guide, especially when thin sleeping bags are sold with wildly optimistic temperature ratings.
It is sometimes below zero in the gorges where I do most of my walking, and I have had my wet socks freeze solid inside the tent on a -10° night, requiring them to be thawed out over a stove so I could get the ice crystals small enough that I could put the socks on, but temperatures this low are thankfully rare. That night I was in a two inch bag, and I was reasonably warm. I always wear all my clothes and thermals when it is going to be a cold night.
Theoretically, it doesn't matter what the insulation is. It can be straw, sawdust, high quality down, cotton batting, anything - all it has to do is provide an air space, and preferably one which lets the air and moisture out only gradually. Too much permeability, and you lose heat through convection of the air, too little, and you wind up with moisture inside the bag, which fills the air spaces, which means you don't have the insulation you need - and you are lying in a clammy, uncomfortable bag.
I decided to cut the material to 84 inches long by 48 inches wide, and I needed two pieces that size.
This gave plenty of seam allowance, and as it turned out, I needed that generous allotment, partly because I am not an expert tailor, and partly because the loft of the filling steals both width and length.
I got a surprise when I measured the bag when it was finished. If you just lay it down on the floor without stretching, it comes out at 75 inches long, and 39 inches wide. The three inch loft steals width and length, and some seams were sewn more than once. However, those final dimensions give a generous and warm quilt, for me. My height is 68.5 inches.
Then I had to join the edges of the bag together along three sides only.
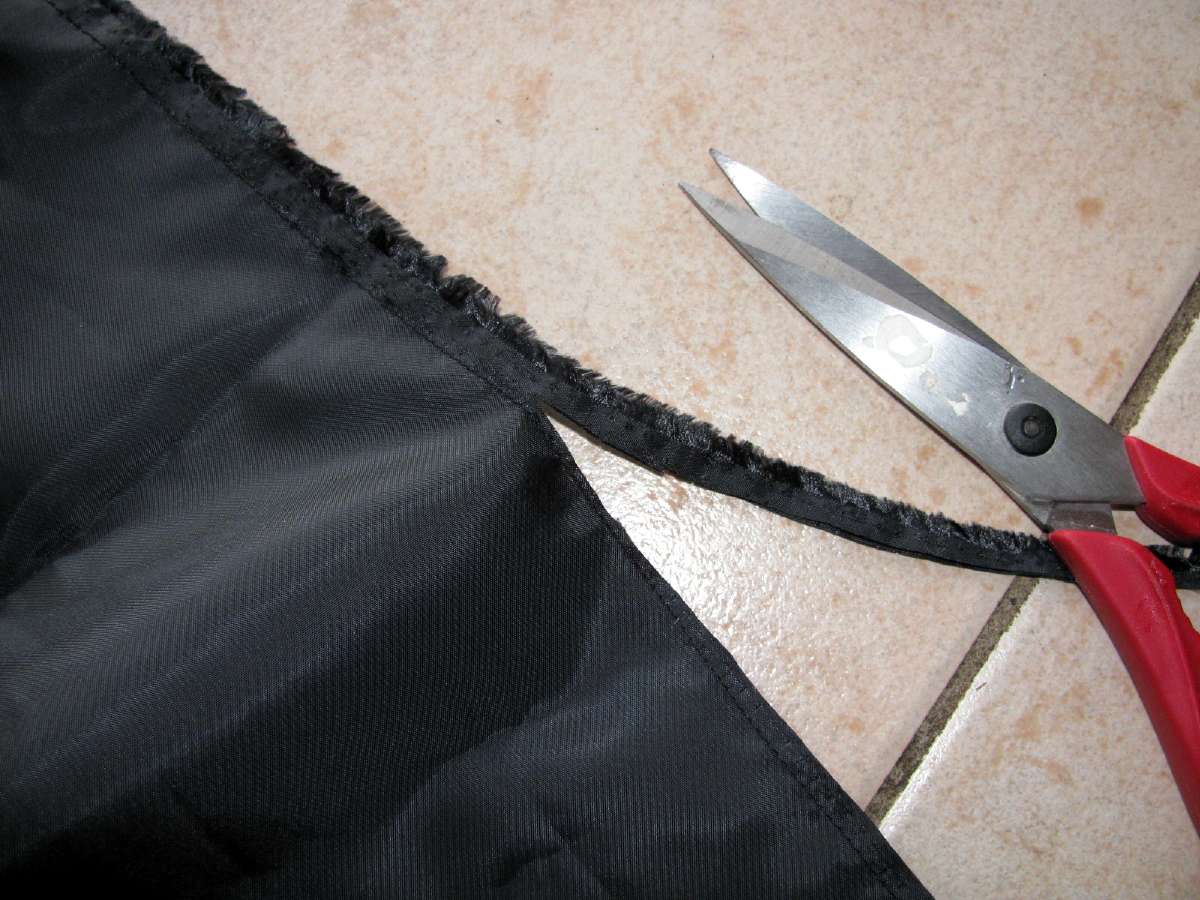
I used a French Seam, which is one of the most useful and easy seams to use. All you do is sew a straight (not a zig-zag) stitch a little distance in from the edge, with the outsides facing out, along the bottom and sides of the soon-to-be bag, leaving the top unsewn. This will be sewn in the very last step.
Then cut the excess material carefully about one eighth of an inch from the sewn stitch.
Photo: Don Hitchcock January 2010
Now turn the bag inside out (you did leave the top edges unsewn, didn't you?) iron the edge formed by the stitching flat, and sew another seam a little more than one eighth of an inch in. The idea is that you are enclosing the cut edges by this second line of stitching, so it does not fray, and gives a neat finish.
Photo: Don Hitchcock January 2010
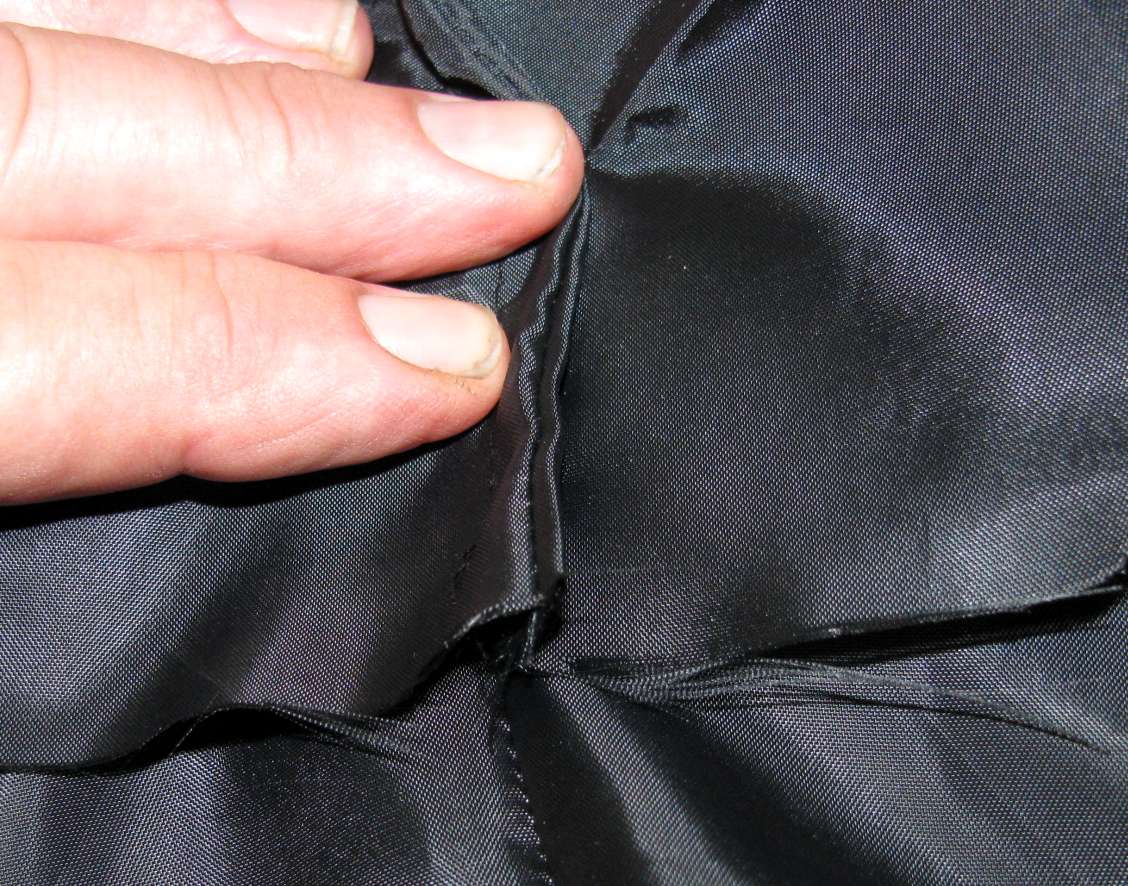
Now you can turn it the right way round, which gives a neat sewn edge. There is a ridge of material on the inside of the bag, not on the outside. This photo shows the inside ridge at my fingers, and the outside neat seam at the bottom of the image.
Photo: Don Hitchcock January 2010
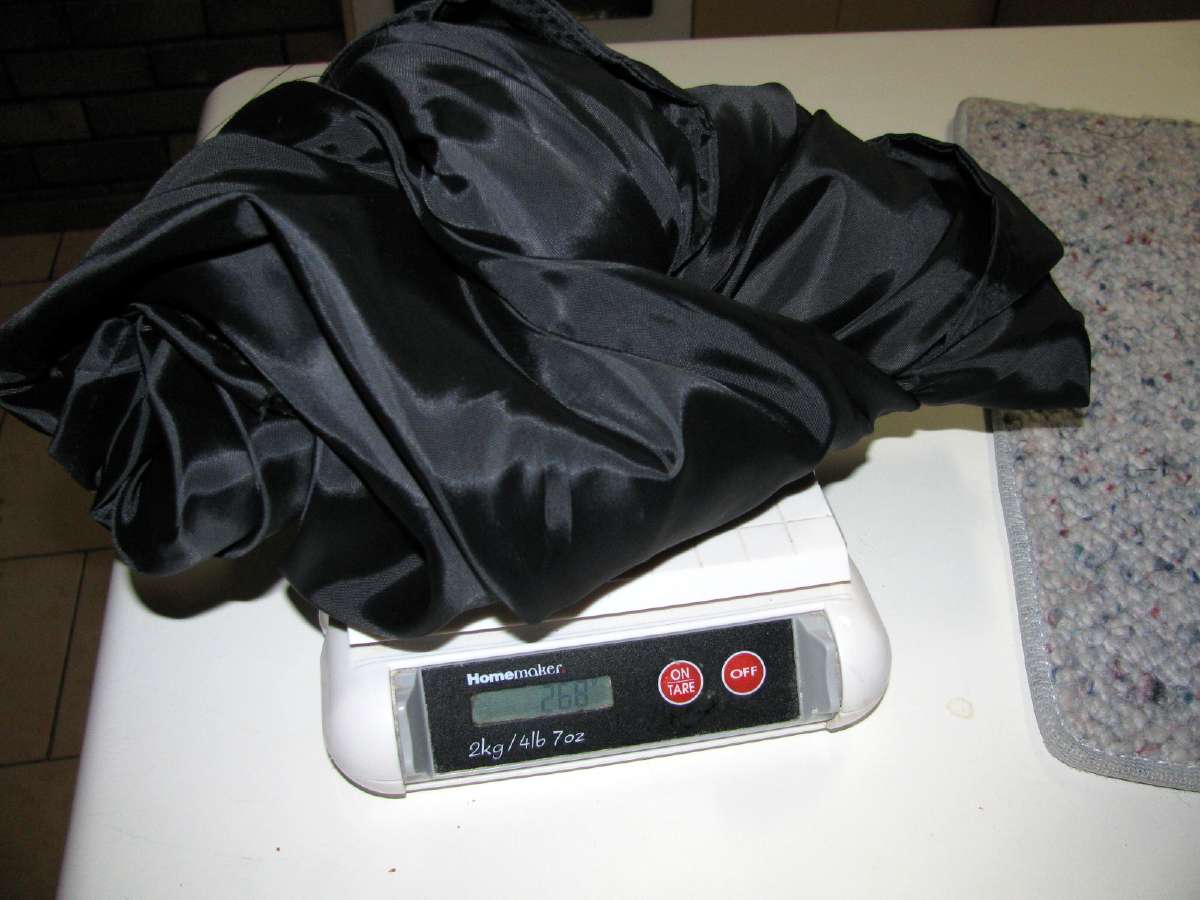
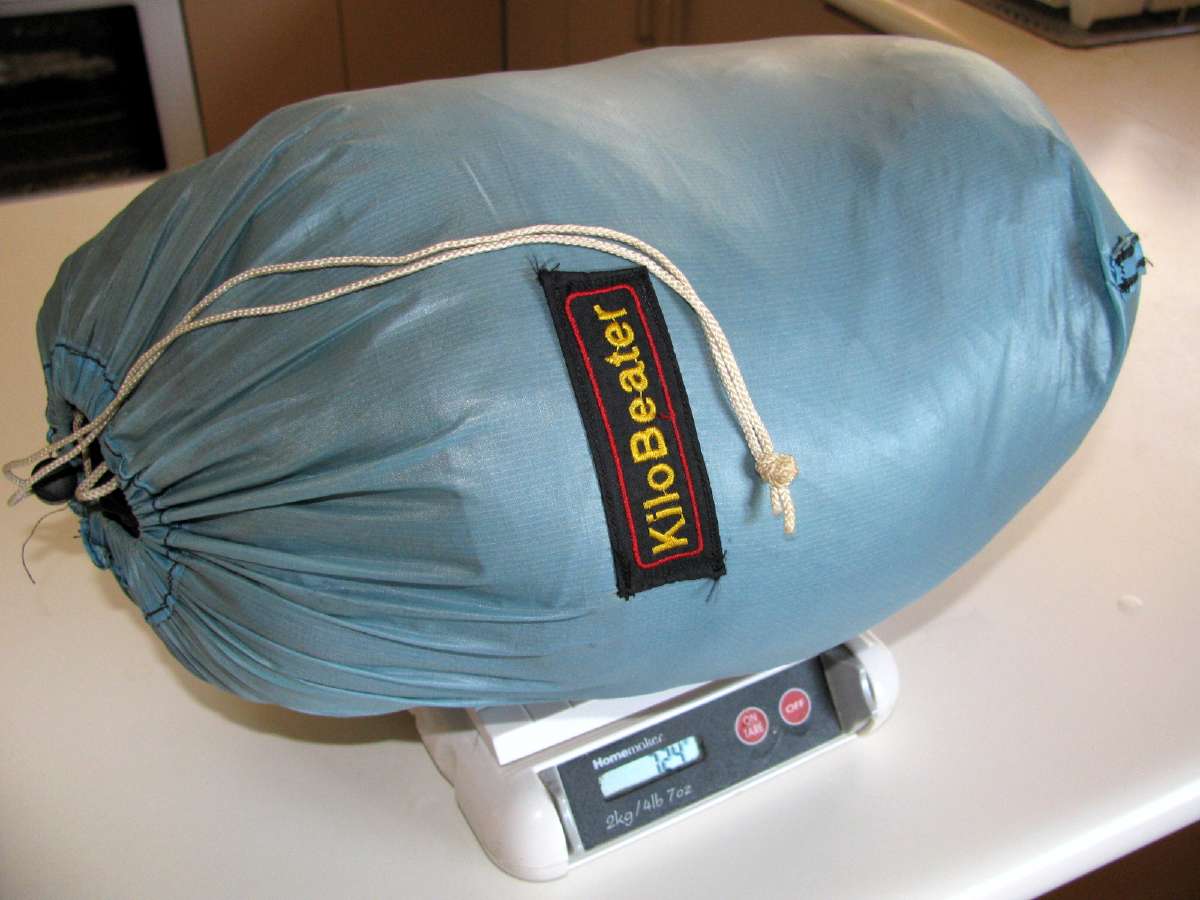
The weight of the bag at this stage was 268 grams. (The silk one I am sewing now is 170 grams at this stage.) I used black lining, made for lining dresses, a light, silky material which is strong, and does not fray easily. For my next bag I will use silk, which is lighter still, and only use two inches of fill.
Photo: Don Hitchcock January 2010

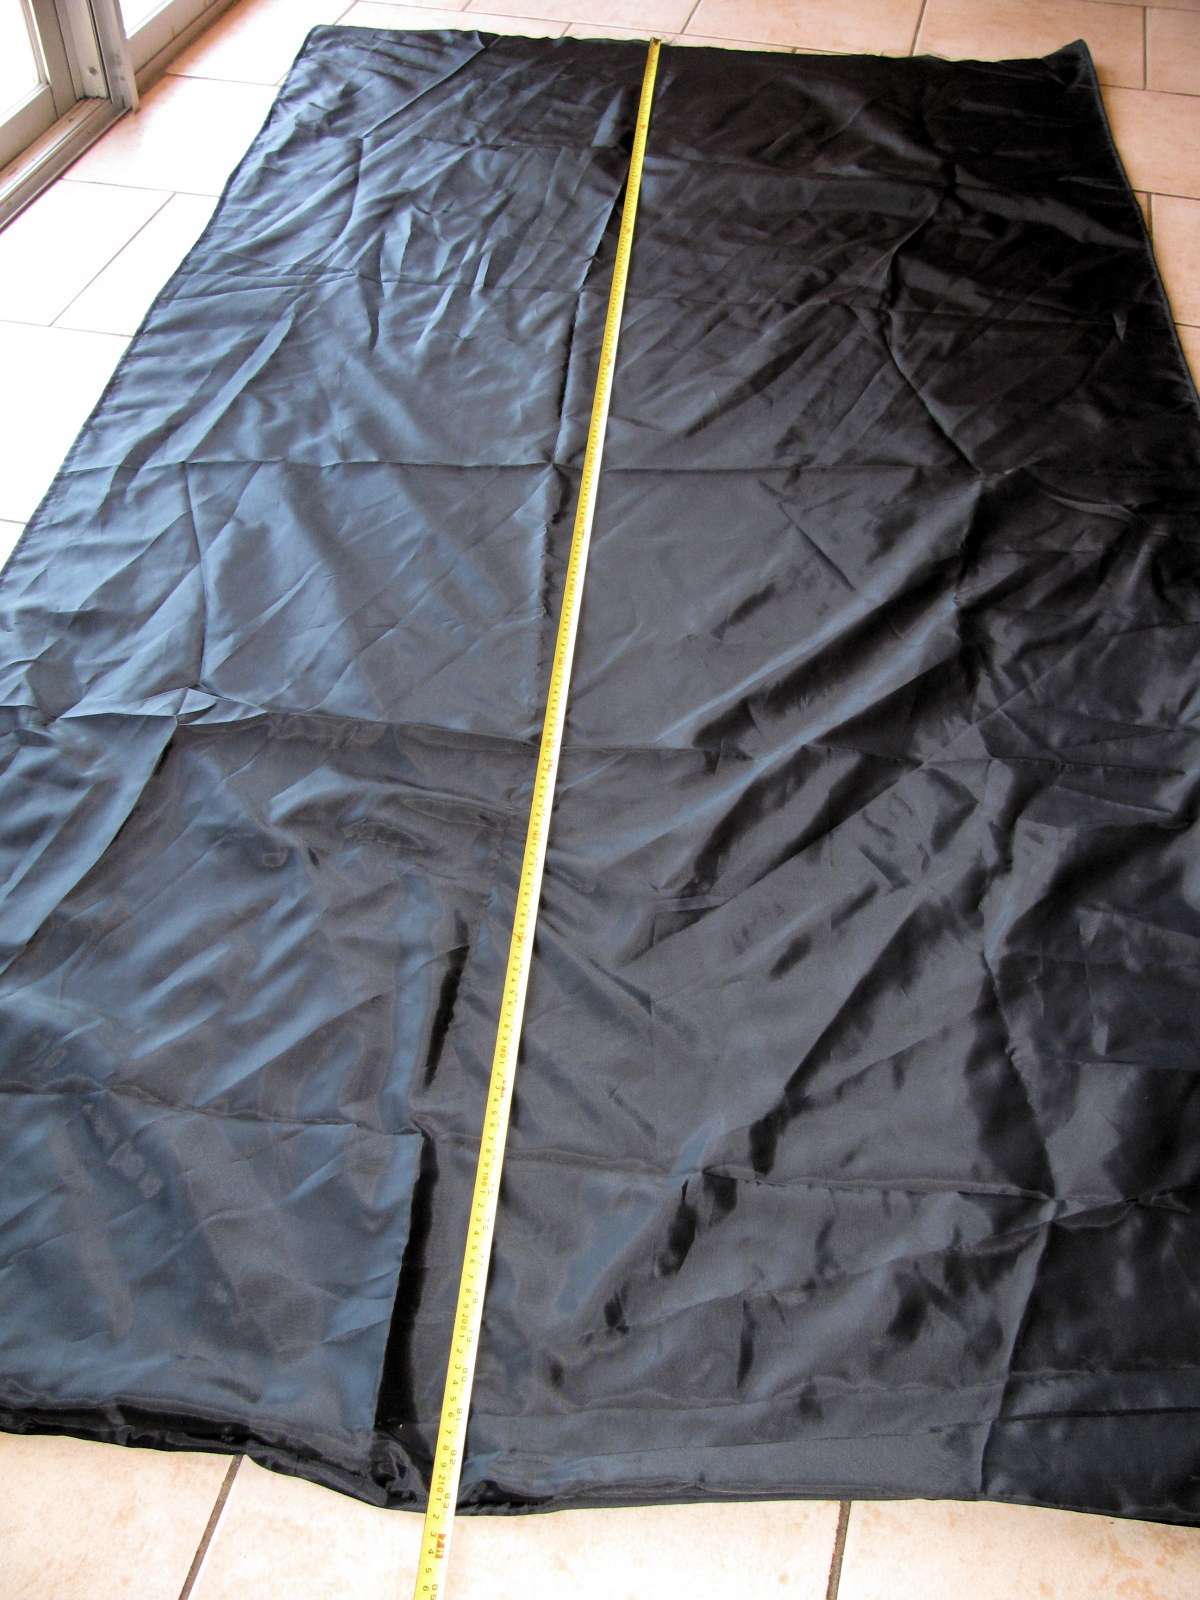
By this stage the bag had shrunk three inches to 45 inches wide, and was now 83 inches long.
Photo: Don Hitchcock January 2010

I was now ready to start sewing the insulation to the bag.
Turn the bag inside out.
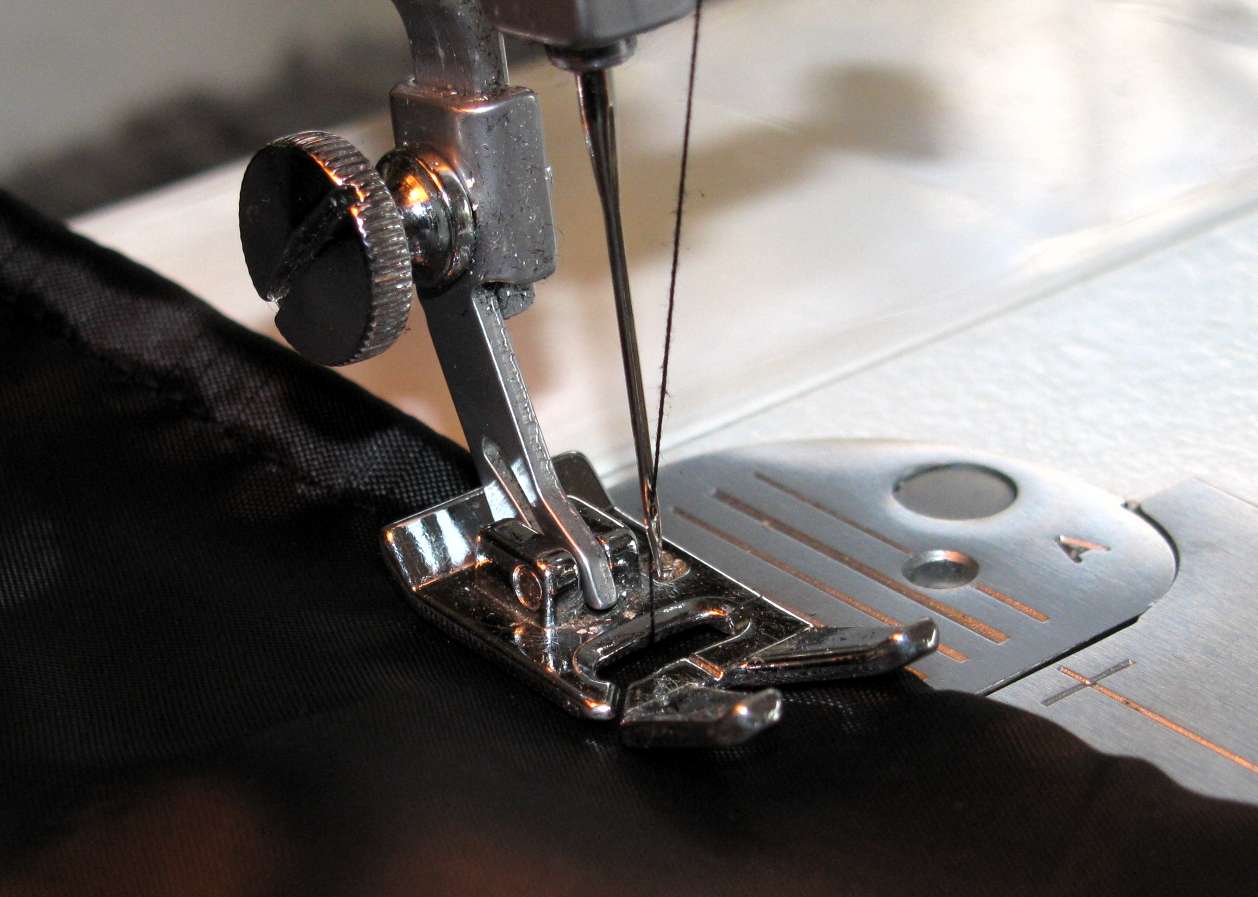
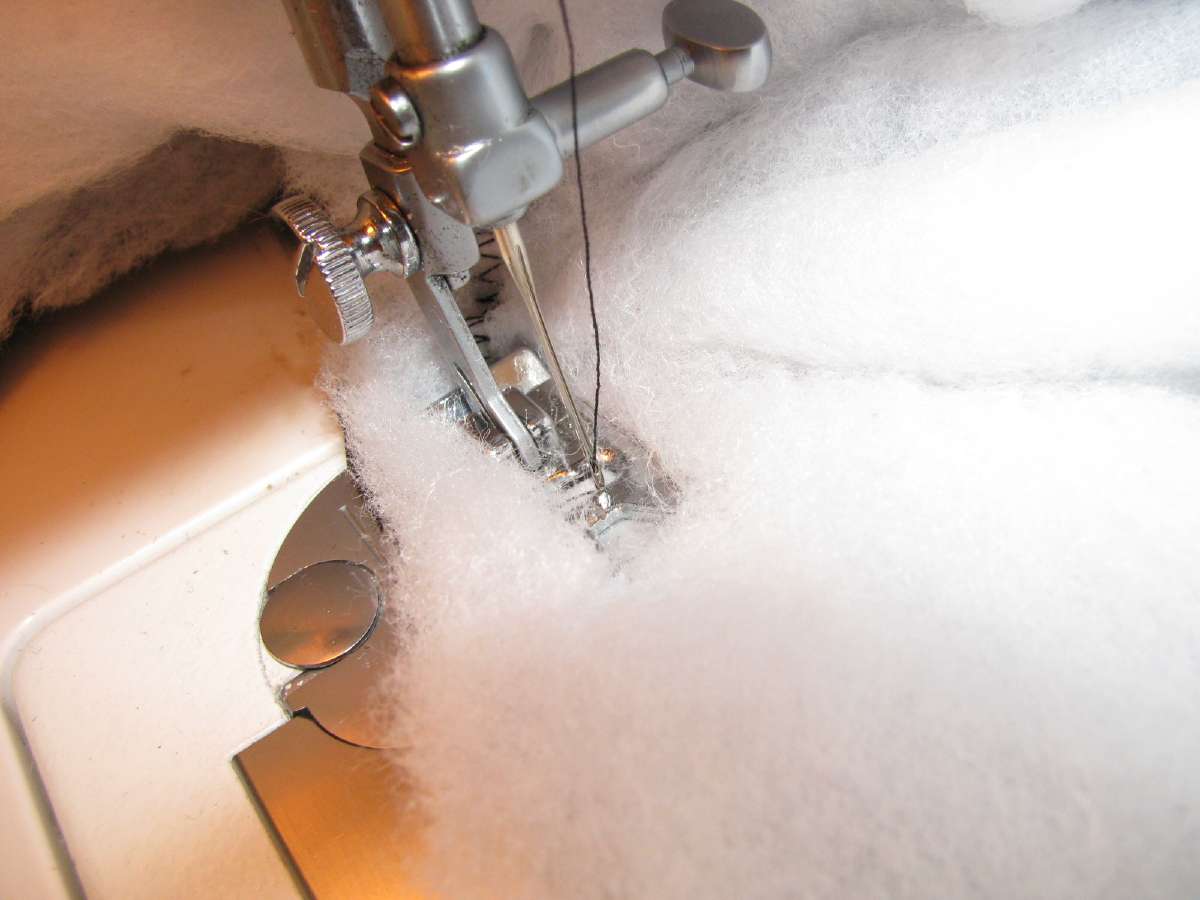
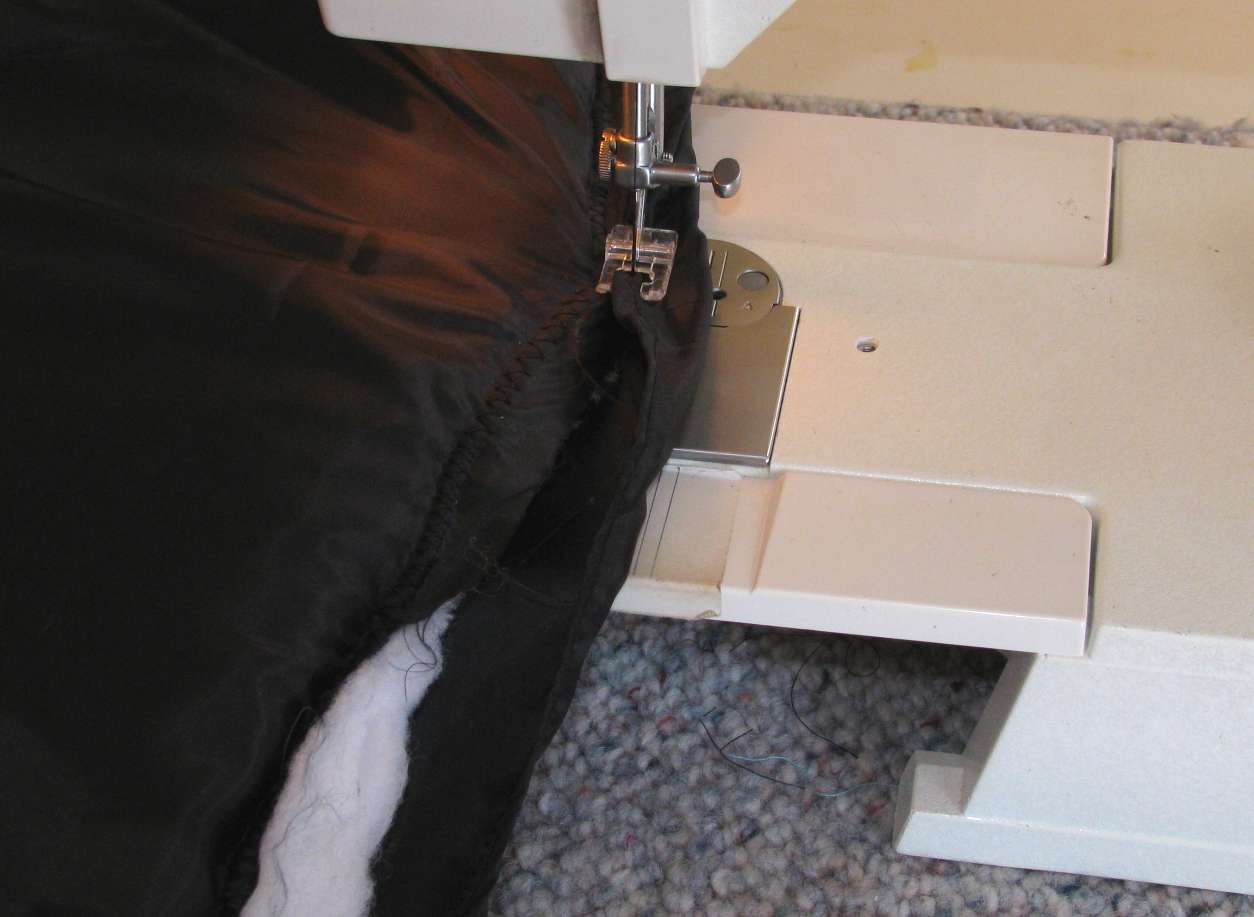
You will be sewing the insulation through two thicknesses of material or more, along the edges only, and later turn it right way round, with the insulation inside the bag. This starts out fine, until you find that the insulation gets caught up in the sewing foot.
Photo: Don Hitchcock January 2010

I made up what I call a ski (there must be a technical term for it!) out of a plastic plant tag, cut to size and shaped to glide over the insulation. I taped it to the sewing machine foot, and heated up a kitchen skewer and melted a space in the plastic as shown here (click on the photo to enlarge) to allow the needle to reach the insulation and fabric. This modification worked really well.
Any similar reasonably stiff but also flexible piece of plastic would work.
Photo: Don Hitchcock January 2010
I did two thicknesses at once, then the third layer. I was running out of insulation at this stage, so I sewed several offcuts together using a curved sailmakers needle, which seemed to work well.
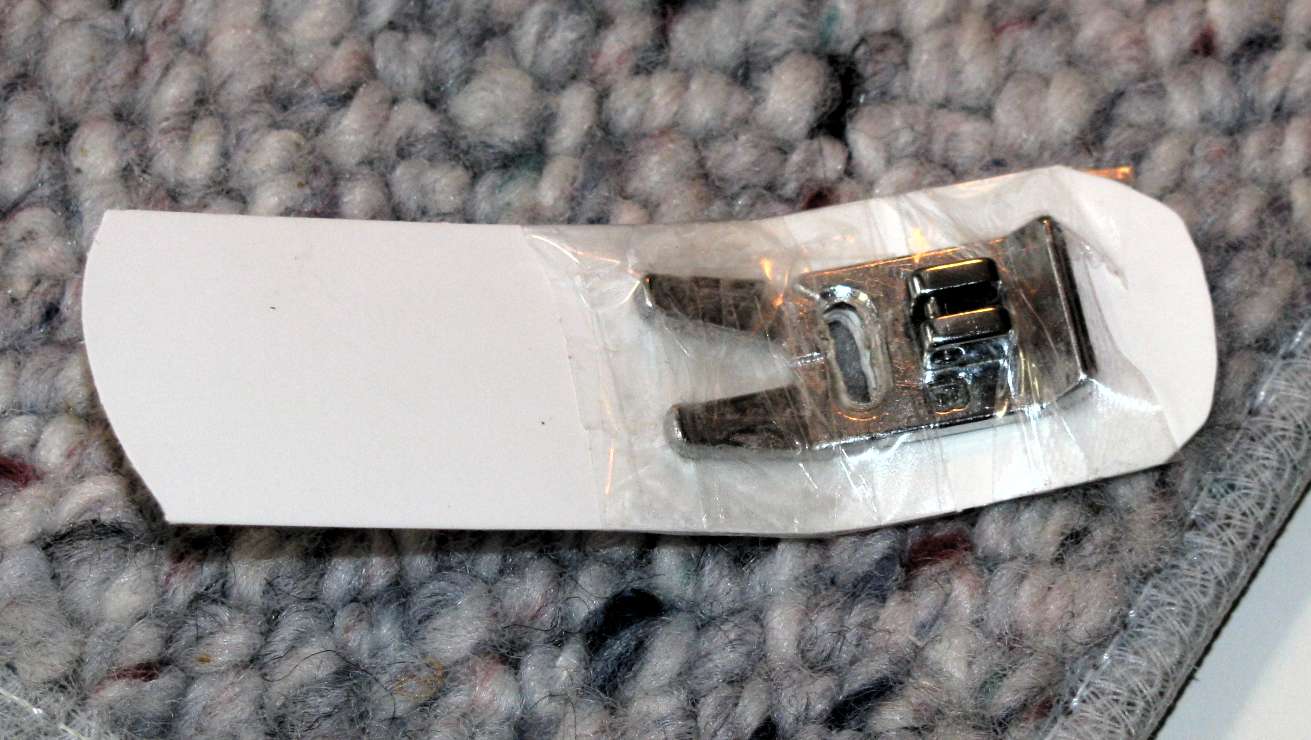
Supermarkets here in Australia have sewing kits with various size and shaped needles, including this one.
Photo: Don Hitchcock January 2010
After sewing on the label I fix to all my gear, I was ready to finish the bag.
I "rolled" the edges of the top of the bag, to stop fraying, most dressmakers use an overlocking stitch for this.
I then turned the bag right side out, with the insulation inside the bag. Everything looked good.
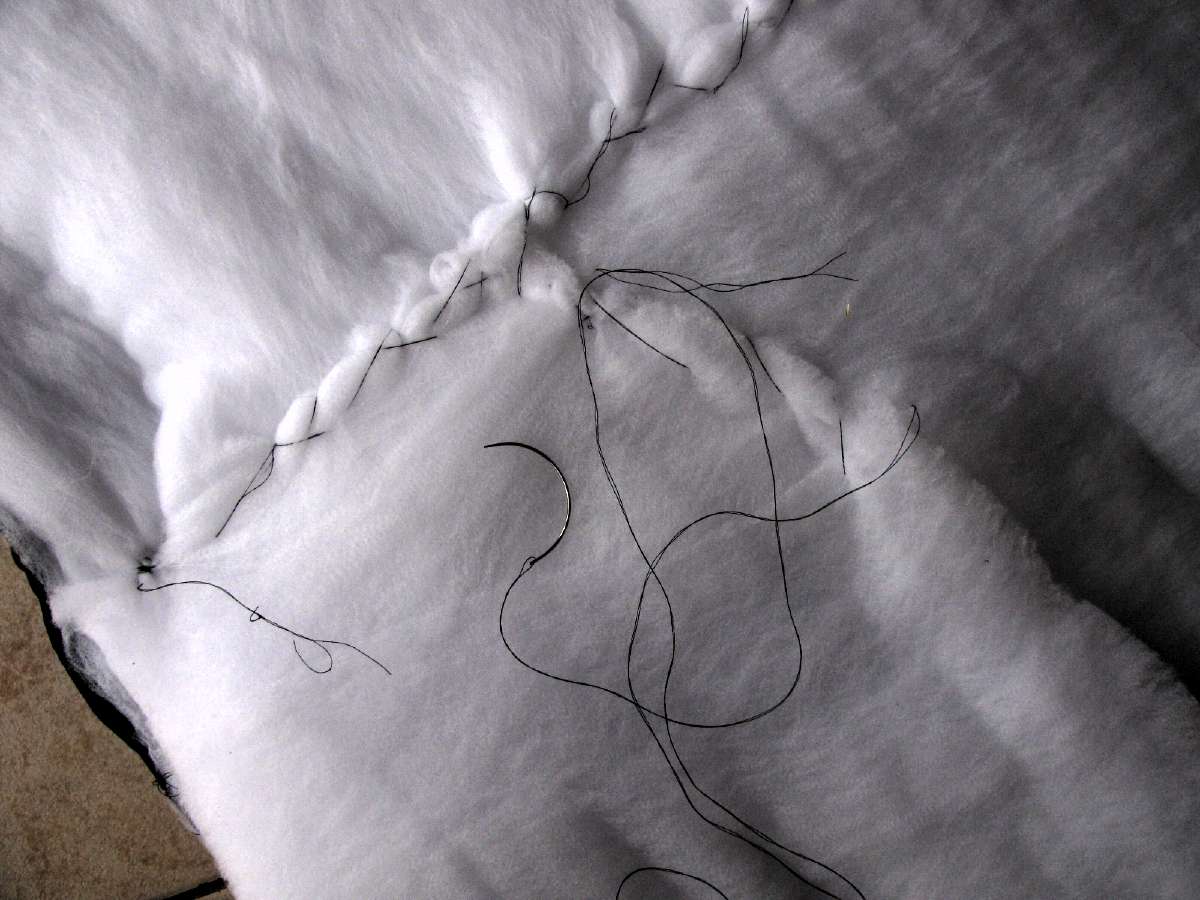
I sewed the insulation to the inside top of one side of the bag using a zig zag stitch as normal, pushing the other side out of the way temporarily while the insulation was sewn.
I then sewed the edges together. In this image you can see the zig zag stitching which secures the insulation in place along the top of the bag.
Photo: Don Hitchcock January 2010

I did this step right at the end, after completion of the bag, but I should have done it first, before making the first stitch.
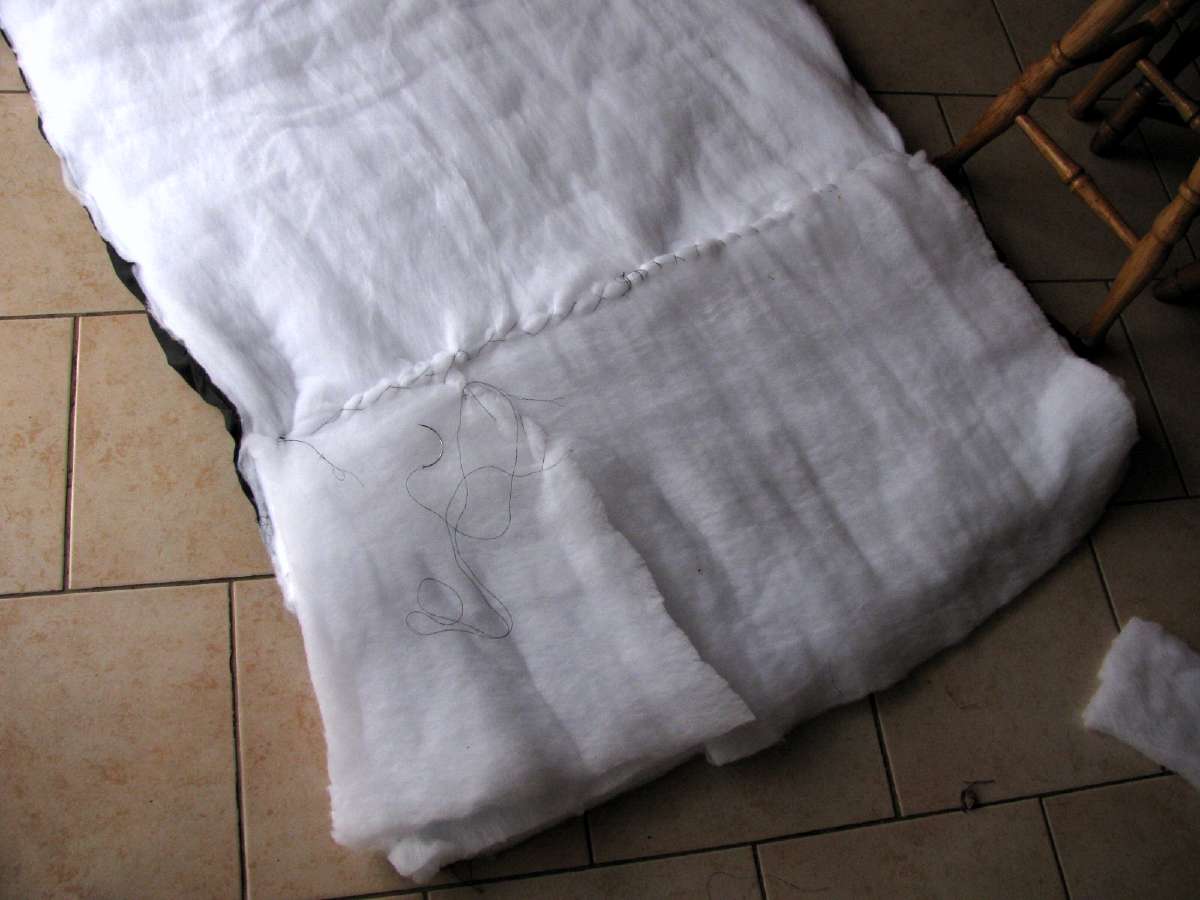
I sewed a "patch" on the bottom of the quilt, sewn on three sides, with rolled edge sides, to put my feet into. This means that when you first get under the quilt, your feet go into it and stretch the quilt out to its full length, your feet cannot poke out the bottom, then retract your feet to a comfortable position, with plenty of overlap for warmth. It is a very worthwhile addition to the quilt.
The patch is 16 inches deep and 17 1/2 inches wide.
Photo: Don Hitchcock February 2010
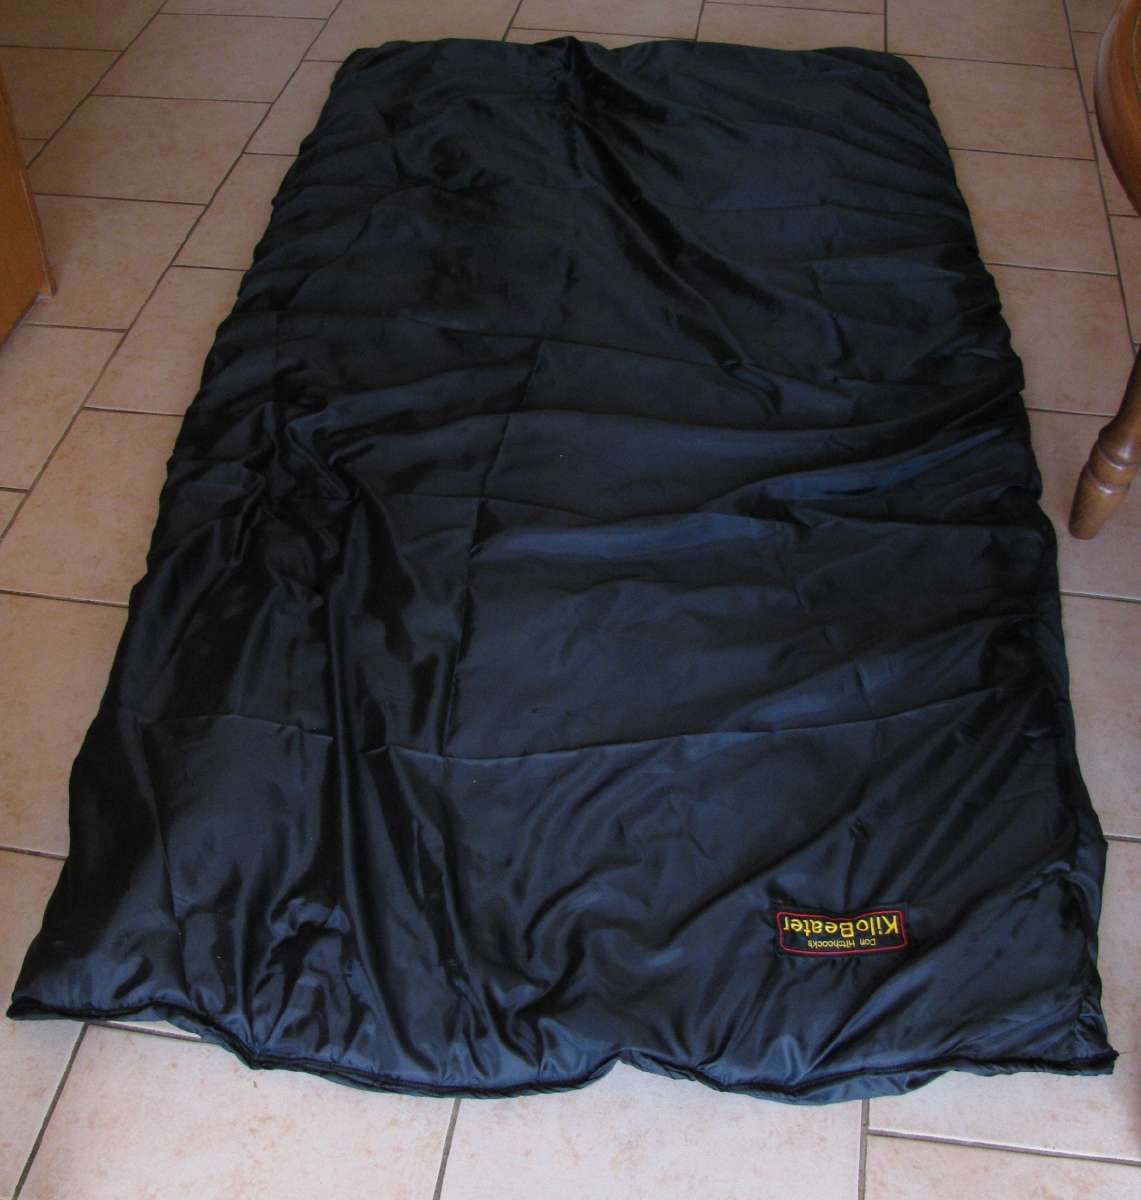
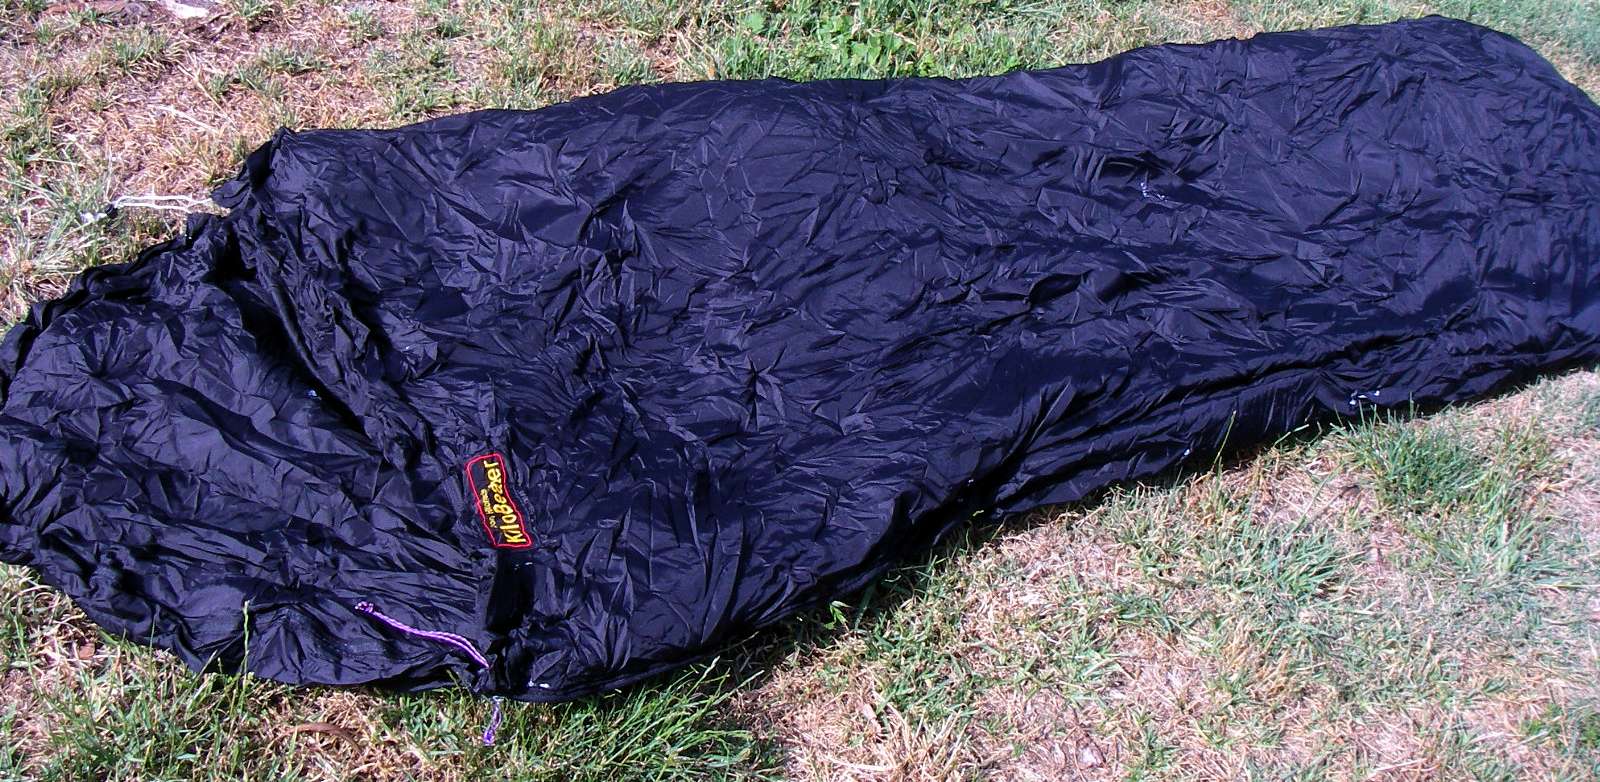
The finished article.
It feels luxurious and warm.
It weighs a touch under one kilogram, 996 g, in its bag.
But if the -30°C performance spec. is right, it is worth carrying when things get frigid. Time will tell, winter is approaching, and I am off to the Snowy Mountains in a week's time for a couple of weeks walking.
Photo: Don Hitchcock February 2010
Field Test
The quilt has performed really well down to +10 degrees celsius and humid conditions. It worked well in the Snowy Mountains, but we did not have frigid conditions. It has only recently got down to frosts here, winter is upon us, but I have not been down the gorges for a couple of weeks, real life has interfered.However it felt warm the whole time, you can sort of tell whether something is going to work. My tent is waterproof, non-breathing silnylon, so in humid conditions, I get a lot of condensation, and because my tent is the bare minimum size, the wet tent roof sometimes brushes the top of the foot of the quilt, but that does not affect my comfort, because the manmade fibre doesn't seem to absorb the moisture. When I get home, I spread it on the patio in the sun to get really dry, then hang it in a cupboard, uncompressed, folded but hanging from a trouser hanger, not put into its sack.
Addendum: It worked well down to -1 degrees celsius, the tent was frozen solid, and I was mostly warm. However my feet get cold easily, so I have sewed the ends together and then up the side to knee height which will help my frozen toes I think. I've just bought a stainless steel one litre water bottle which I will use as a hot water bottle. Decadent, I know, but in the old days we used to heat a rock in the fire, wrap it in wool and put it in the sleeping bag!
I am certainly going to make a two inch fill version, I've got some silk which I am going to use for the covering. I will make it a little smaller in overall dimensions as well, the first version is probably too generous in size.
What I did find is that I have to use a space blanket (aluminised mylar, emergency blanket) under me in winter. I don't use a thermarest under me, and the ground last time was a bit cold. I didn't notice it with previous versions because at the time I did not have a floor in the tent, and was using the space blanket as a groundsheet, they only weigh fifty grams.
But for most purposes I think a two inch version would be fine. The problem with the three inch is the space it occupies in your pack. My pack is on the small side, and the quilt is quite bulky. You can't beat down for compressibility. The two inch version, made slightly smaller, would be a lot easier to pack.
The foot pocket worked really well. I found it easy to find in the dark, and the quilt stayed in place during the night. I thought I might have to put velcro patches on the quilt and tent floor, but that is quite unnecessary. A huge bonus is that getting in and out is very easy - I am at an age where getting up in the middle of the night is sometimes necessary, and the quilt is great for ease of exit and entry. My previous "normal" sleeping bag that I made was definitely a tight fit, getting in and getting out, and not much hip room.
I certainly wouldn't swap it for a conventional sleeping bag. I would consider making a down fill version, though, because of the weight/performance/compressibility factor, but it would only be satisfactory for when I knew I wasn't going to have a wet trip, and there was no likelihood of falling in the water. That's where manmade fibre has the edge, if down gets sopping wet, your bag is ruined, and you are likely in any event to spend a very cold night if conditions are at all cool.
May 2010
The Next Quilt
29th July 2011 - I am in the middle of making another quilt:
- I am using a lightweight silk material.
- Taped the material to the tiled floor, with the initial rectangle starting out as 80 inches by 44 inches.
- I have cut both sides of the bag out, and hemmed the edges using my new sewing machine with a rolled hem foot, which does a great job.
- I have attached the "Kilobeater" label. Total weight at this point is 170 grams. I am not using a foot pocket this time, I will have an integral foot pocket which will be warmer.
- Next I will sew two inches of insulation to the bottom side.
- Leaving the insulation uppermost, then I will sew the bottom side to the top side, with the bottom side above the top, and the "Kilobeater" label on the top hidden between the two, with a straight stitch, on the bottom and the sides, but not along the top.
- Then I'll turn the whole thing inside out, so the insulation is now inside, and the label is on the outside, and sew the top together, not trying to turn the edges in.
After that I will sew the bottom together, and a little way up the sides to make a foot pocket. I have done this already with the previous model, and it works well.
I'll post photos when I'm through.
Bushwalking Index
Lightweight Bushwalking / Hiking Gear
Anyone (e.g. students, libraries, government agencies such as tourist bureaus, the general public) may use, print and publish the photographs taken by me and presented on this bushwalking file for any legitimate non-commercial purpose, at no cost, and without asking permission. However a note such as "Photo: Don Hitchcock, donsmaps.com" somewhere in the document would be appreciated if it is to be published.