Back to Don's Maps
Photography in Museums
Choice of camera
Mobile Phone
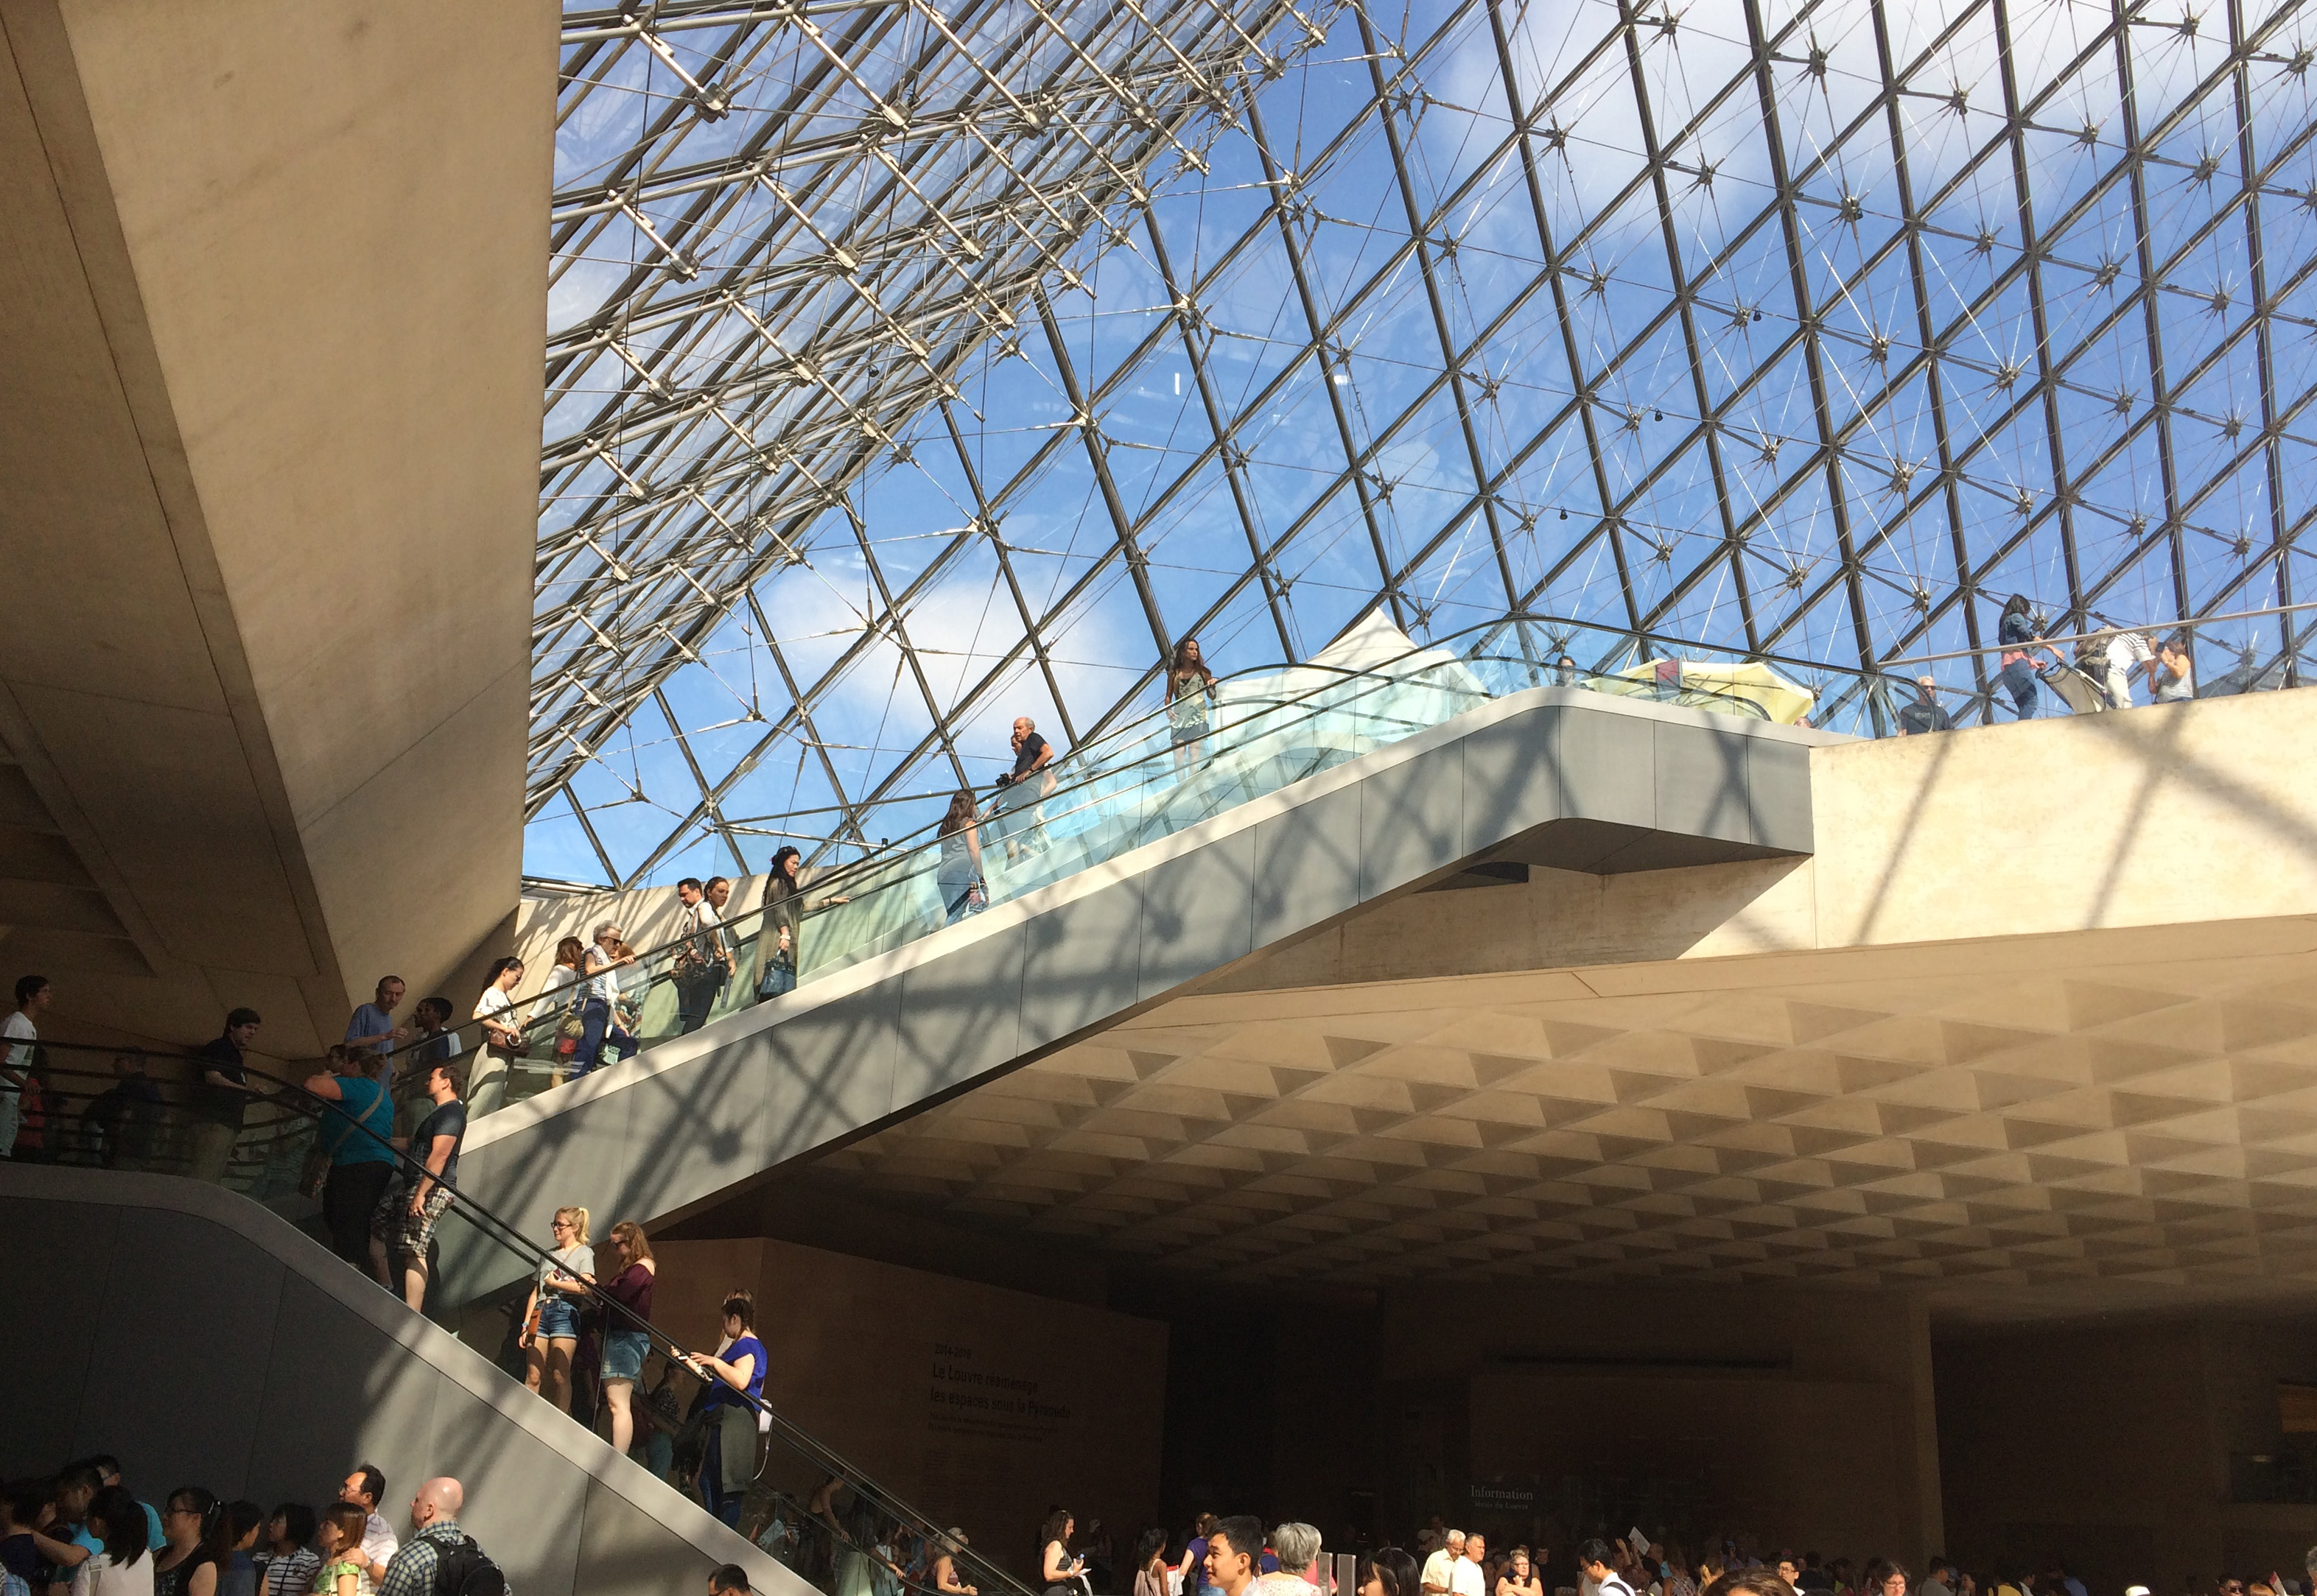
If convenience were the only criterion, and if all museum displays were as well lit as this shot inside Le Louvre, Paris, there would be no need to look further than a good quality mobile phone.
The quality is excellent. The shot has been cropped a little, but no other changes have been made. I took another photo at the same time with my Canon PowerShot G15, and there was no discernible difference in quality in the well lit parts of the image, apart from the larger number of pixels. My iPhone 5S camera chose the settings of: ISO 32, 1/1324 sec, F 2.2, 8 megapixels, no flash.
If all photos in museums could have these values, in particular the fast shutter speed and the extremely low ISO value, life for a museum photographer would be easy. The combination of a very low ISO value and a very fast shutter speed and 8MP size of the original means that the sharpness and detail is of very high quality, as is the tonal range.
There is, however, noise (dottiness) in the less well lit parts of the image, which may be seen if you click on this thumbnail and look at the original photo, which is a hint of the problems inherent in mobile phone photographs at the present time. They typically have very small sensors, which leads to greater noise.
The iPhone 5S (and iPhone 6 and iPhone 7, nothing has changed) has a very small sensor, 1/3.0″, sensor area 17.3 mm2. The later iPhones have a similar size sensor, but a stated pixel value of 12 MP, which, even with the aggressive noise reduction used, does not give significantly better results. Cramming more pixels into the same area might make the advertisement headline look better, but physics is not fooled.
Photo: Don Hitchcock 2015
Source: Le Louvre, under the glass pyramid, Paris, France
iPhone / digital camera comparison
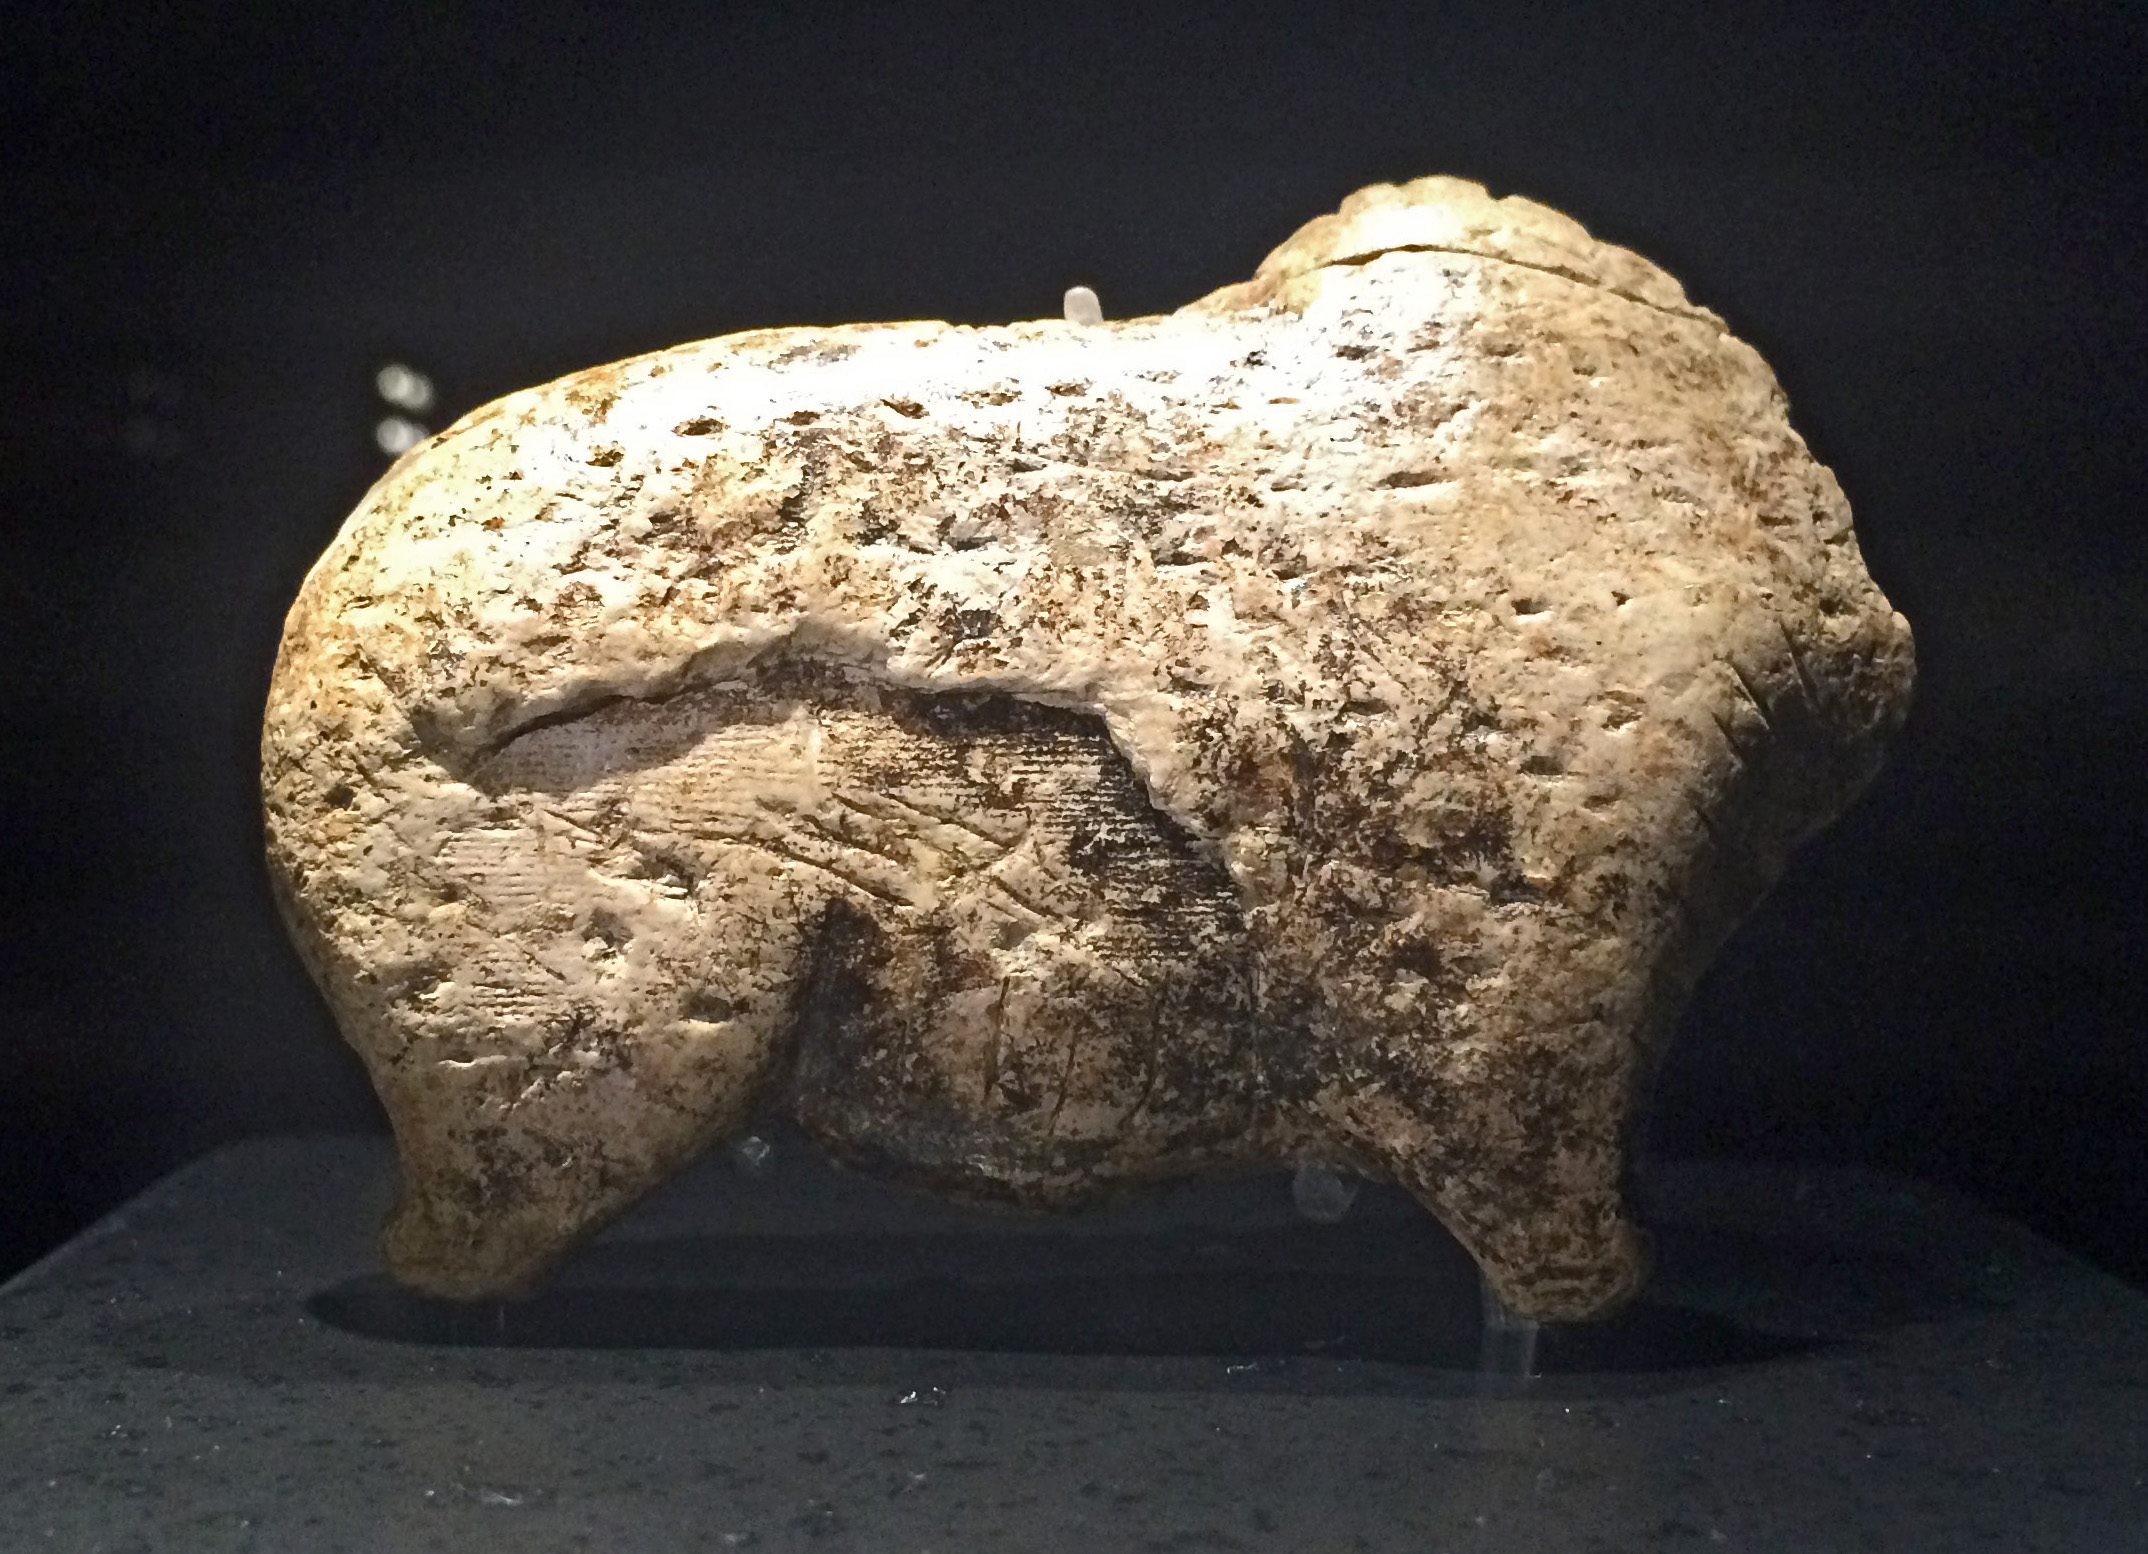
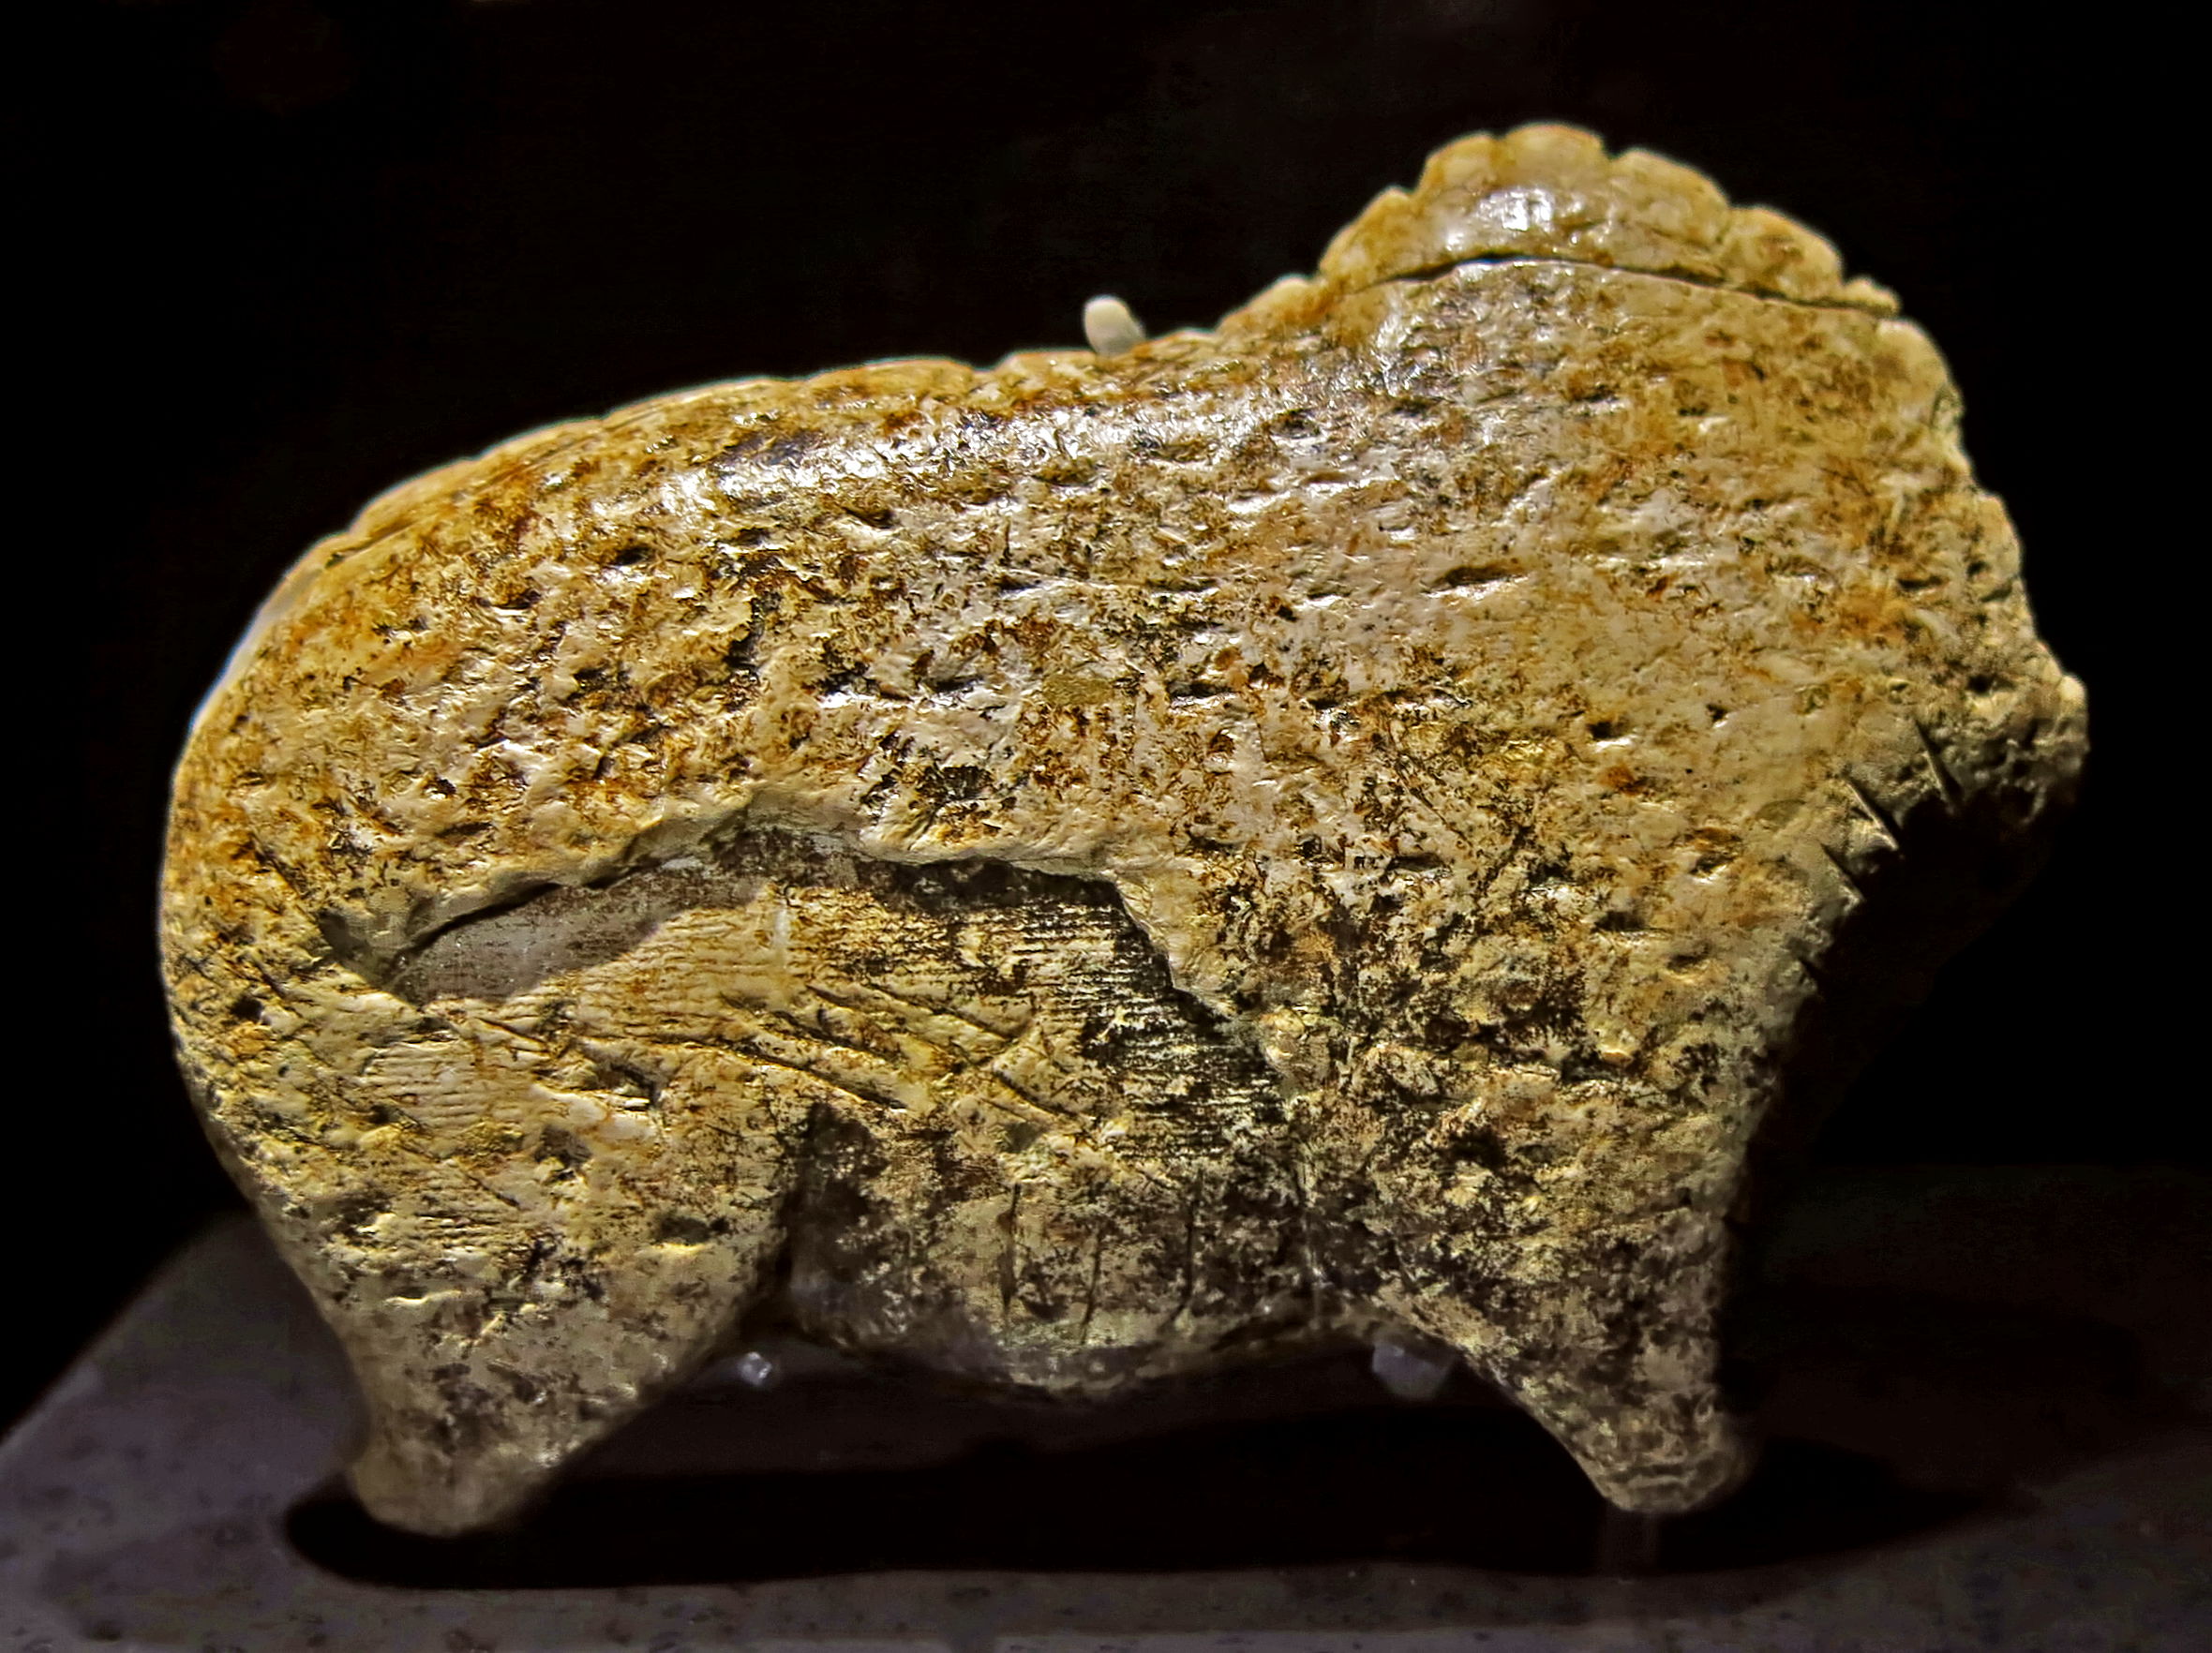
Once the available light decreases, however, a modern digital camera comes into its own.
Details:
iPhone 5S (left): ISO 320, 1/35 sec, EV 0, F2.2, 8 MP, sensor 1/3.0″, sensor area 17.3 mm2, no flash.
Canon PowerShot G15 (right): ISO 100, 1/40 sec, EV -2/3, F2, 9MP, sensor 1/1.7", sensor area 41.51 mm2, no flash.
With the EV set to -2/3 on the Canon, and better software, the ISO came down to ISO 100 compared with ISO 320 on the iPhone, and less noise results. In addition, with a 2.4 times larger sensor and better lens, there is very much better low light performance, with better colour and tonal range.
In addition, there is very little highlight 'washout' compared with the iPhone, which has badly overexposed highlights.
Smearing due to the noise reduction algorithm is very evident on the rear leg of the iPhone image.
Photo: Don Hitchcock 2015. Both images above were taken with available light, and both have been cropped and enhanced.
Source: Display, Museum der Universität Tübingen, Hohentübingen Castle
Cameras, image size, and backup options have changed greatly
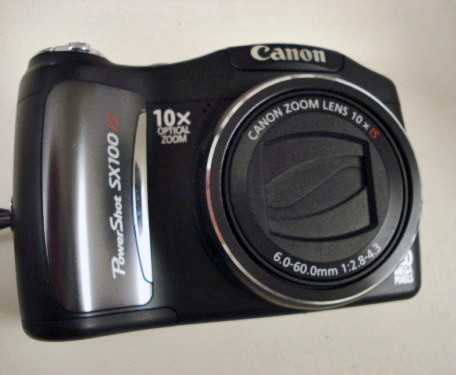
In 2008 I went to Europe, and used a Canon PowerShot SX110 for most of my photography, apart from a waterproof 'bushwalking' camera which I used when cycling along the Danube from the Black Forest to Budapest.
At the time, uploading to the cloud was not an option, since most campsites did not have wifi, and we camped everywhere. I suspect that most hotels did not have effective wifi, in any case, at that time. When I hired a car and drove to a large number of archaeological sites in France, I camped every night except for one night in a hotel in Brive-la-Gaillarde, before hiring the car.
For backup, I found places that would put your images onto CDs, which I carried with me and/or posted home. At the time, I did not realise how important it was to have large images, so most were shot at 2 MP, in order to keep the size of storage low.
The sensor is small, of the 1/2.3" type, (~ 28.5 mm2), and in low light conditions, when the ISO was bumped up to circa 800 ISO, graininess was evident. However there is no in-camera noise filter, for which I am now grateful, since although the image may be noisy, there is no 'smearing' of the images, and the graininess can be corrected to some extent by a noise filter plug-in using Photoshop.
Photo: http://www.ebay.com/

When I went to Europe in 2014, I took along a Canon PowerShot G15. It gave very good service, and I got some excellent shots with it.
I uploaded all my images to a notebook computer, and also used backup disks, which had become small and reliable, and uploaded to the cloud when possible, which wasn't very often.
The sensor in this camera is of the 1/1.7" type, sensor area 41.51 mm2.
When I went to Europe in 2015, again with the Canon PowerShot G15, I brought a larger HD notebook computer as well as backup disks, and also uploaded all images to the cloud, this was much easier since I was using public transport, and stayed in hotels every night which had free wifi. Some large French railway stations have fast free wifi. The best upload speed I got was on a train to Berlin.
By this time I had realised how important control of ISO values was to the quality of the resulting image.
Photo: https://shop.usa.canon.com/shop/en/catalog/powershot-g15
Features of a camera for museum photography
• Image stabilisation - It should have image stabilisation, which avoids camera shake. Not having this is a deal breaker.
•12 Megapixels or more - It should have images of at least 12 to 20 Megapixels.
•"One inch" type sensor - It should have the largest sensor you can reasonably have. Aim for at least a "one inch" type sensor, 116 mm2 in area.
• Optical zoom - It should have at least some optical zoom, preferably 10x zoom, but that is difficult to arrange with a large sensor. Some 'bridge' cameras, midway in size between a compact and a full DSLR have managed it, for example the Sony RX10 II has a 24-200mm (35 mm equivalent) lens built in, with an 8.3x zoom, and a "one inch" sensor, though its closest focus is an unacceptable 13 cm. It is otherwise a superb camera, albeit bulky and heavy.
• Compact camera - It should be a compact camera. They typically have an automatic macro mode, and focus on a very close object in a display case. DSLR format cameras are heavy and unwieldy. With a compact camera you can carry a spare in your jacket pocket.
• Macro setting - it should be able to automatically go to a macro setting, preferably 50 mm or less, two inches. Some display cabinets are very shallow. DSLR cameras have a typical minimum focus distance of 10 to 18 inches, 25 to 45 cm. This is a deal breaker.
• Anonymity - you can use a compact camera anywhere, in the street or in a museum, and no one takes the slightest notice of you. Put up a hulking great DSLR and it screams 'look at me - I'm a photographer'. I try to keep a very low profile in museums. Museum guards can be kind to you or not, open to reason or not, depending on what they had for breakfast. It is better not to attract their attention in the first place.
I've had a museum guard scream at me not to use flash, when all I was doing was focusing, and my camera emitted a dull red focusing beam. I tried to protest that it was not a flash, but the guard would have none of it. I was able to turn off the feature, and continued shooting.
It is important that the camera be as stable as possible when shooting. In one large European museum I leaned against a new, modern, cast concrete door post in order to stabilise myself and my camera for a difficult shot, and a female guard shoved me very hard in the shoulder to physically remove me from the wall. I staggered into the middle of the room from the blow, and looked at her. There was no apology, and no explanation. I had not finished photographing the exhibits, I was barely a quarter the way through, so I could not afford to protest and be thrown out. I bit my tongue.
I have also had a female guard be extremely helpful to me, when she saw that I was making a comprehensive record of everything on display, and directed me to a wonderful collection of Coptic textiles, beautifully made, but put away in drawers to protect them from the light. She was highly intelligent, very kind, and we ended up talking about life, the universe and everything. And our grandchildren.
Rules in museums can be quixotic. At one museum, I sat down to recharge my camera battery and have a bit of a rest. I pulled out a cryptic crossword and a pen to while away the time in a semi-productive manner. A guard told me that I could not have a pen out in the museum. However, if I went to the front desk, I could borrow a pencil and continue with my crossword. Note that my pen was not confiscated, it's just that I could not take it from my pocket and use it! I decided to put the pen away and do the crossword in my head, and she was happy with that.
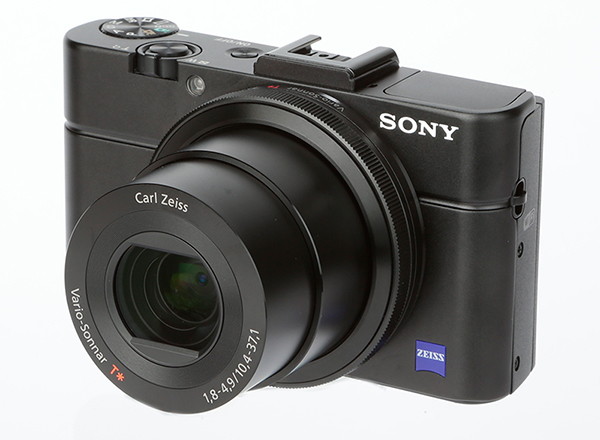
Photo: http://www.trustedreviews.com/reviews/sony-rx100-ii
Why not a DSLR?
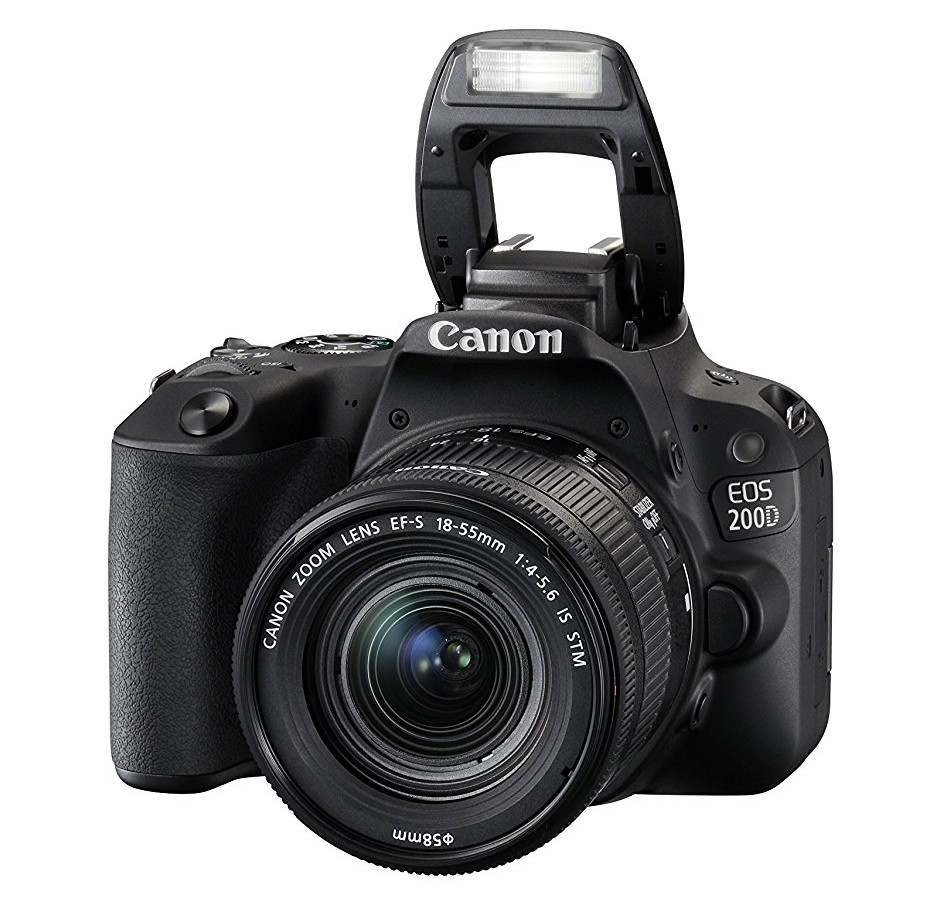
As an example, at the bottom of the DSLR range, there is the Canon EOS 200D DSLR EF-S 18-55mm (known as the EOS Rebel SL2 EF-S 18-55mm in the US) with an 18-55mm Lens, $700 USD, 24 MP, a large 332 mm2 sensor - but no image stabilisation, which makes it useless for museum photography and the closest focus is about ten inches, 25 cm, way too far away.
For comparison, the compact Canon PowerShot G15 will focus down to 1 cm, or less than half an inch. The Sony RX100 II focuses down to 5 cm, or two inches.
The camera and lens weigh 685 g altogether, or 1.5 pounds, 24 oz, which is light for a DSLR, but nearly three times heavier than a compact camera.
Photo: https://www.amazon.co.uk/Canon-EOS-200D-Digital-Camera-x/dp/B0733923XF
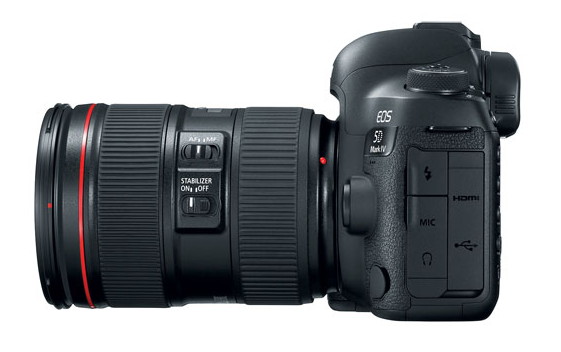
Or take the EOS 5D MarkIV, a top of the range DSLR camera. It has 30 MP, and a very large 864 mm2 sensor, the same size as 35 mm film. But it has no (body) image stabilisation, and the body weighs 890 g. If you pair it with a good lens, for example the EF 24-105mm f/4L IS II USM lens, which has image stabilisation, then the price of the total kit ranges from $4200 to $6000 USD depending on the supplier.
The closest it will focus is 18 inches, or 45 cm. This makes it useless for museum photography, since many display cabinets, especially of small exquisite items of jewellery, are shallow. Weight of the lens is 795 g. Total weight is 1685 g, or 3 pounds and 11 ounces.
If you do decide to use it anyway, you will get very tired holding it up all day in a museum, believe me. Enrol in a gym, and start lifting weights.
Don't forget leg day!
Photo: https://shop.usa.canon.com/shop/en/catalog/eos-5d-mark-iv-ef-24-105-f4l-is-ii-usm-lens-kit
Conclusion
Get the best quality modern compact camera you can find, such as the Sony RX100 II. Look at the specifications very closely.
At 281 g, 9.9 oz, it is light enough to carry all day, fits in a jacket pocket, has good image stabilisation, focuses down to 5 cm (two inches), image size 20 MP, zooms from 28-100 mm, has a "one inch" (116 mm2) sensor, and is small enough that you can carry two.
The automatic software on this particular camera is excellent, and tends to use the slowest speed that the image stabilisation can cope with, typically 1/30 sec, so that the ISO can be as small as possible, for the best quality image.
Carry spare batteries as well and a portable charger, it is easy to take 1200 photographs in a full day at a museum.
So how do I know what values for aperture, speed and ISO my camera has used on a particular photo?
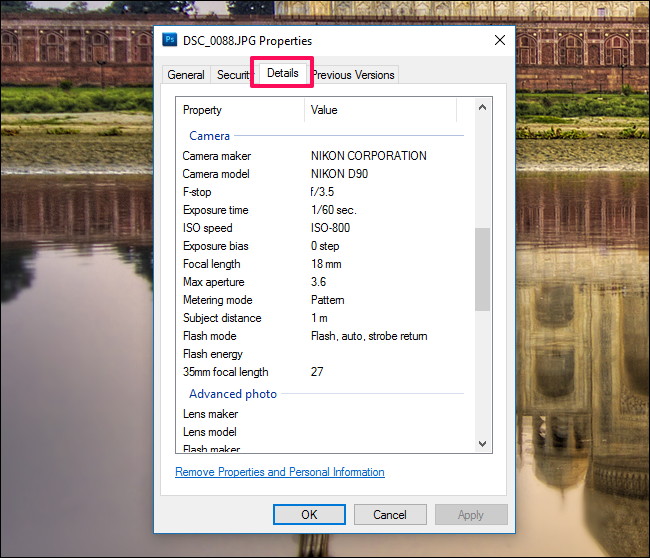
On Windows, right click on the photo and select 'Properties'. Click on the 'Details' tab and scroll down.
Photo and text: https://www.howtogeek.com/289712/how-to-see-an-images-exif-data-in-windows-and-macos/
On a Mac, the program which comes with OSX, Preview, has all this EXIF information, whether you have used a digital camera or an iPhone.
Open the file with preview, select 'Tools' from the menu bar, and then 'Show Inspector' from the drop down menu - or just press '⌘ I'.
Then choose the EXIF tab, as shown at left.
Photo: Don Hitchcock 2017
Settings
The ideal settings for your digital camera are:
ISO 80.
1/30 second or faster shutter speed with image stabilisation, 1/125 second or faster otherwise.
F8 aperture to give the best combination of depth of field and sharpness.
ISO
ISO determines the speed of the 'film' in your camera. Lower speed (80) gives higher definition than faster speed (800 or more).
All other things being equal, you will get much finer detail if you keep the ISO to the minimum, typically 80 ISO to 125 ISO.
This is a laudable aim, but it is sometimes either difficult or impossible to achieve in practice, in the milieu of museums. You will sometimes be forced to use an ISO of 400 or more, which reduces the sharpness of the image, in order to get shutter speeds of 1/30 second or faster, so that image stabilisation can work effectively.
Typically museums do not allow you to use flash, with the notable exception of the British Museum in London.
Thus your lighting will be that provided in the glass case. The problem is that many of the materials on display in museums are degraded by light, in particular painting media and textiles, so the museum directors often install lighting which is at the bare minimum needed to actually see the exhibit, and in some cases somewhat below that limit.
If you use the programmable section of your camera dial, rather than the automatic option, you can tell it to do some things that will help you in this aim:
1. Set the ISO to 80 or 125
2. Set the 'EV' or Exposure Variable to -1/3, -2/3, or -1.
3. Where you are able to use flash, set the EV for flash to a similar level, say - 2/3, or to 'fill-in' flash mode.
4. Modify the above if you look at the preview (or the resulting image, after downloading to your desktop PC) and find that there is not sufficient exposure. Note that photos can be enhanced significantly using Photoshop, in particular if they are too dark.
1. Set the ISO to 80 or 125
If the preview tells you that the time the shutter will be open will be longer than 1/30 of a second (e.g. 1/5 second), you will need to set the ISO to a higher value, or use automatic in order to bring it to 1/30 of a second or faster.
I will assume that your camera has a 'camera shake reduction' or 'image stabilisation' capacity. Without that, you will have great difficulty getting good results in museums. However, all technology has its limits, and as far as I can tell, 1/30 of a second is, at the moment, the slowest you can go with a modern camera and still get excellent results. Slower speeds than 1/30 second usually give poorer results in my experience, even if the camera lens assembly is completely stable, as when resting on the glass of a display cabinet.
Readers who have had experience with older, non - image stabilisation cameras will know that the normal speed for a hand-held camera was typically 1/125 second. Below that, you had to use a tripod. Tripods are usually not allowed in museums, because of the danger to other patrons of the splayed legs causing obstruction and accidents. Some have resorted in the past to 'monopods' or what looks like a camera on a walking stick. These are better than nothing.
2. Set the 'EV' or Exposure Variable to -1/3, -2/3, or -1.
Setting the EV to -1/3 rather than the zero setting will typically give you better results for all your photos, including well lit sunny landscapes and so on, since it tends to avoid the lack of detail in highlights, and give a better tonal range for many digital cameras.
Inevitably, however, with 'larger' negative values such as -1 (or up to -2 which is about the limit), the photograph will look 'darker', and will need later manipulation using Photoshop or a similar program to bring it up to what most people would regard as optimal brightness and contrast. This can be achieved by modifying the 'levels' on the photo, moving the right hand slider up to the first place that the graph shows a small positive value.
3. Where you are able to use flash, try setting the flash output compensation, or EV for flash, to -1/3, -2/3, or -1, or to 'fill-in' flash mode.
You will need to experiment to determine the characteristics of the images from your camera when flash is used with these EV values. In general, an EV of -1/3 will be an improvement on zero.
From the specifications for the RX 100 II section of https://www.dpreview.com/ ,
Fill flash used for this portrait created a nice overall exposure of our model, albeit on the slightly bright side. As with the RX100, flash output can be slightly unpredictable and occasionally too bright. The camera provides flash output compensation of +/- 2 EV.
Flash is a last resort. With a flash on the camera, it will reduce the relief of the object, and will often introduce unwanted highlights from the glass display case, and from reflective parts of the object. It may also 'wash out' the image, making it far too bright, which is why you should experiment with negative EV values for flash.
However, the use of flash has the good result that it will usually force your camera in automatic mode to use a low ISO value, and a displayed speed of 1/60 second. Using flash is one of the few times when you can set the aperture to F8 and get away with it. The speed of 1/60 which may be displayed on the camera preview is usually academic, since the flash is very much faster than this, typically 1/1000 second, and especially if there is little ambient light, there will be no 'ghosting' from light other than that from the flash.
I have occasionally had to set the flash to a large positive value such as +2 in order to get enough light on an exhibit at the back of a very deep cabinet. The objects at the front of the case were totally 'washed out', of course, but I got good illumination of the ones hanging on the back wall.
However, this seldom happens in most museums. The cabinets are usually shallow, and in any case flash is rarely allowed.
Good natural lighting is the best, but 'needs must when the devil drives'.
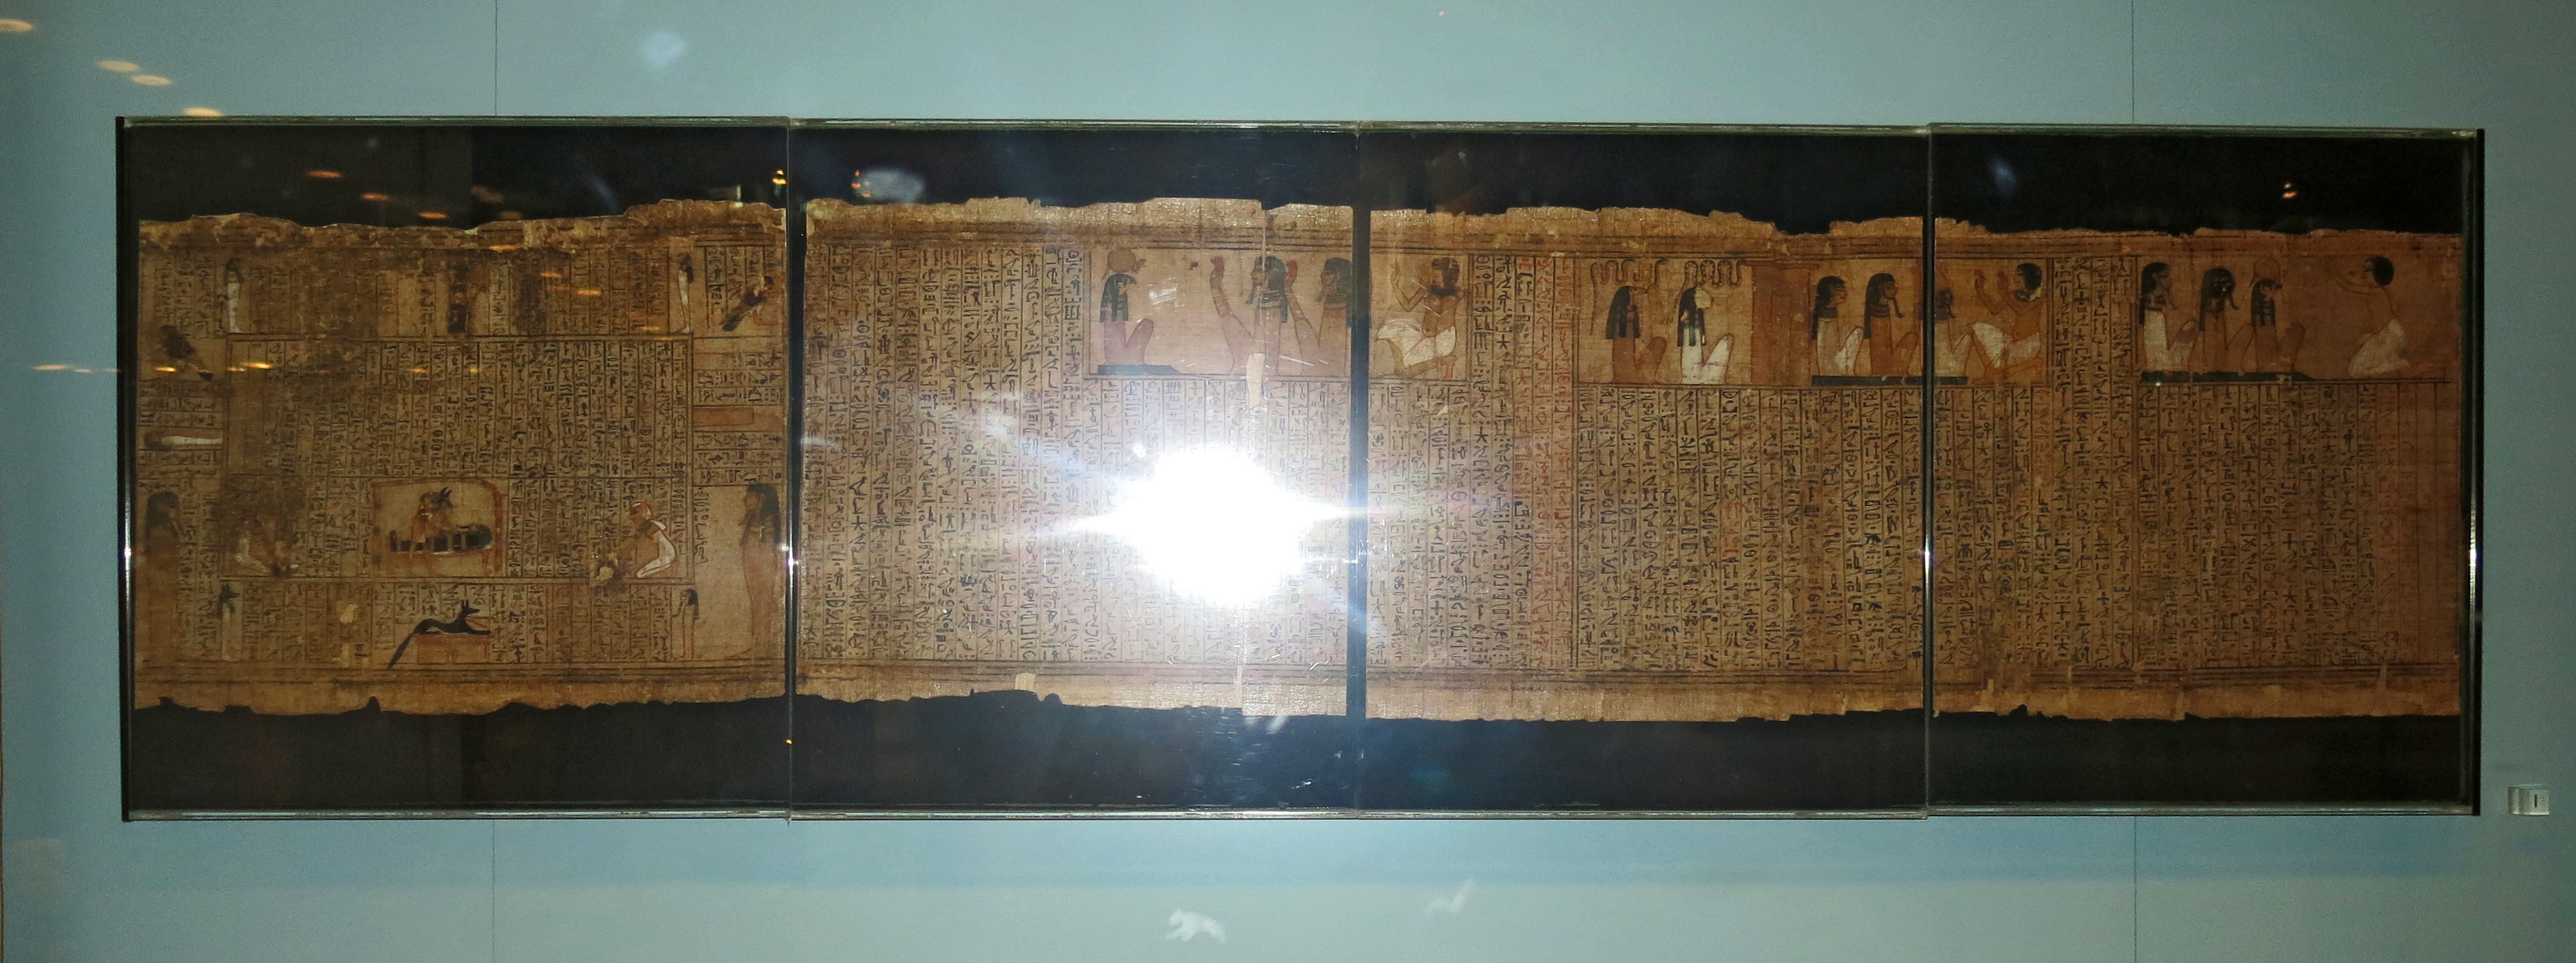
The effects of a high ISO level with a small sensor and aggressive on-camera noise reduction
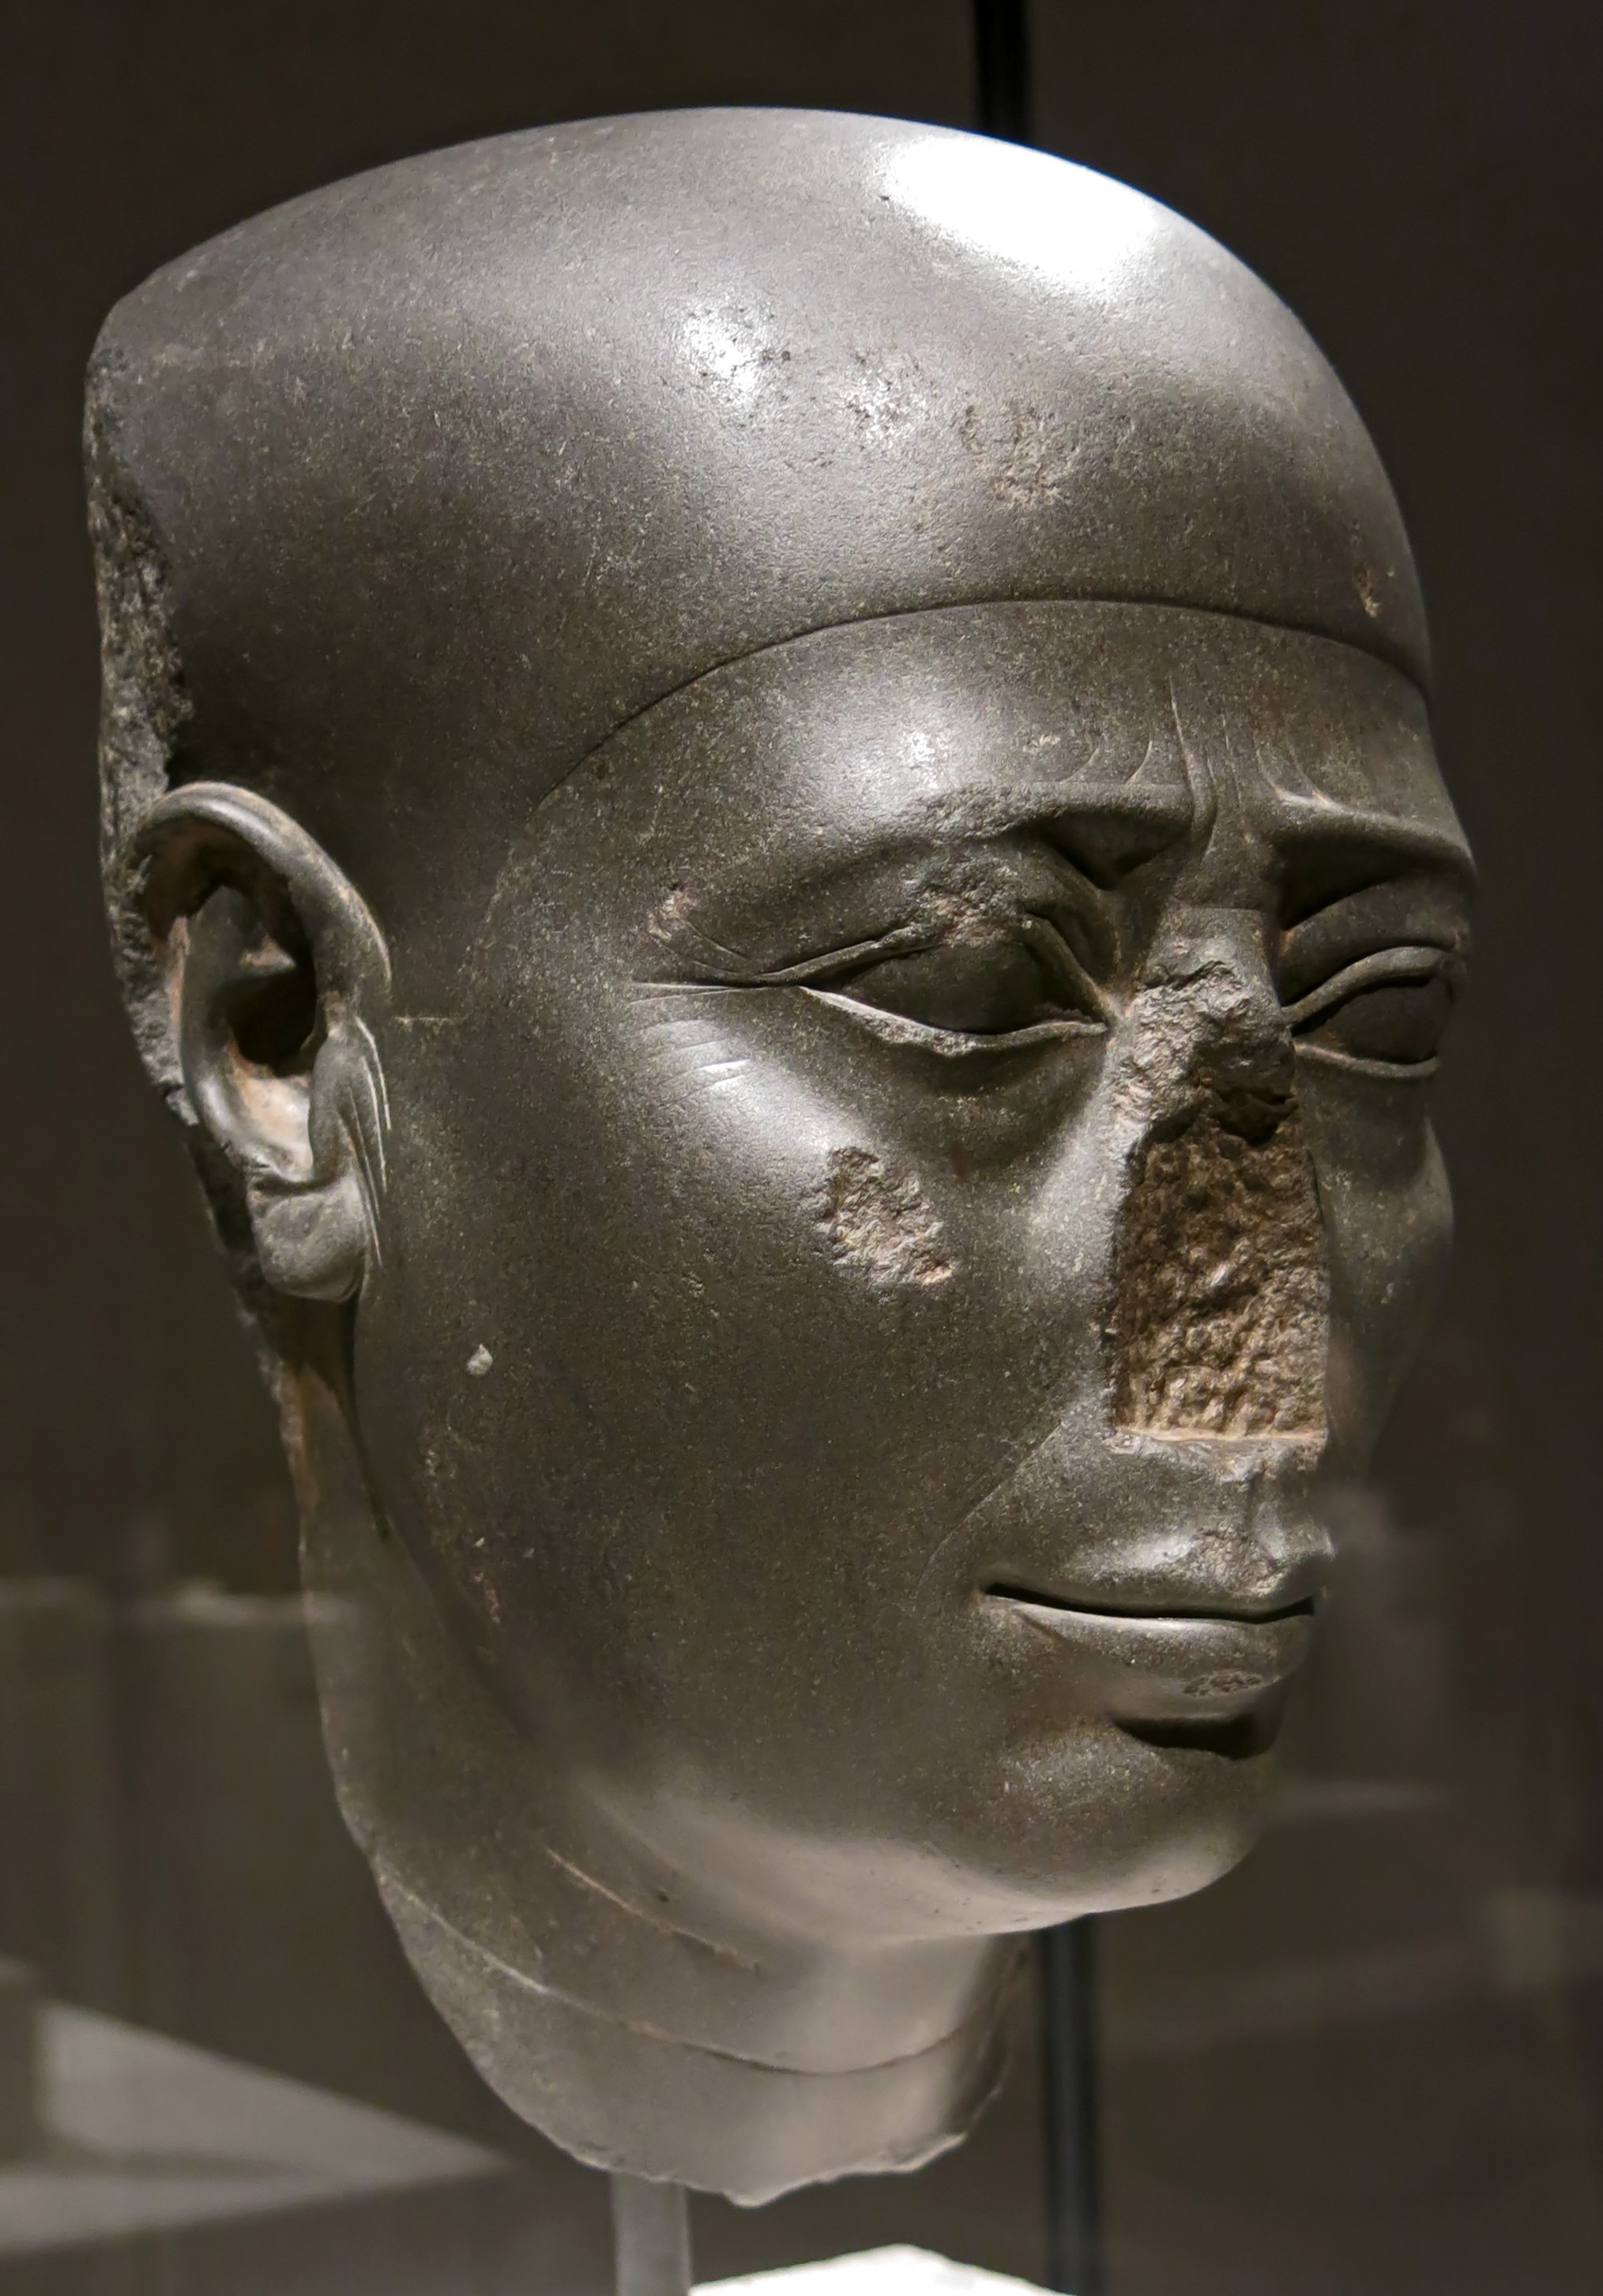
Head of a royal statue wearing a round wig with circlet and uraeus. Circa 2450 BC
ISO 800, 1/50 second, Canon PowerShot G15, sensor 1/1.7", sensor area 41.51 mm2.
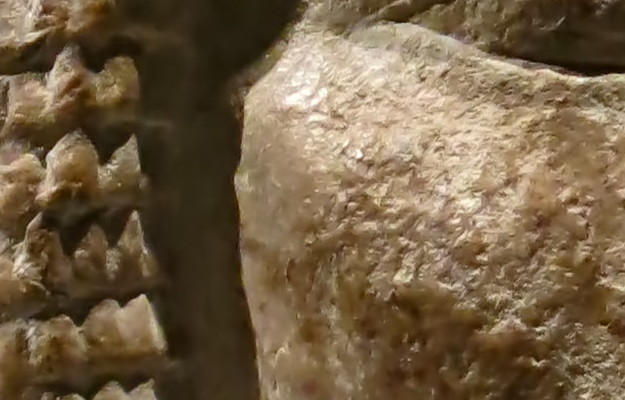
Examining the closeup on the right, or clicking on the thumbnail to obtain the full size original, will confirm that this ISO 800 image shows significant smearing of the smooth areas of the statue, although the effect is not so noticeable on highly textured parts of the image.
The smearing is an artefact of the noise reduction process of this particular camera, and is not an inevitable result, though it can also be seen in low light images on the iPhone.
I would have much preferred that the camera not use noise reduction at all, and to reduce the noise later on my Mac with a third party noise reduction plug-in such as Macphun's Noiseless CK, which I recommend, and find very useful indeed.
Photo: Don Hitchcock 2015
Source: Original, Staatliche Museen zu Berlin, Neues Museum, Germany
Text: © Card at the Staatliche Museen zu Berlin, (CC BY-NC-SA 3.0 DE)
Additional text: http://www.griffith.ox.ac.uk/gri/3pm8sta1.pdf
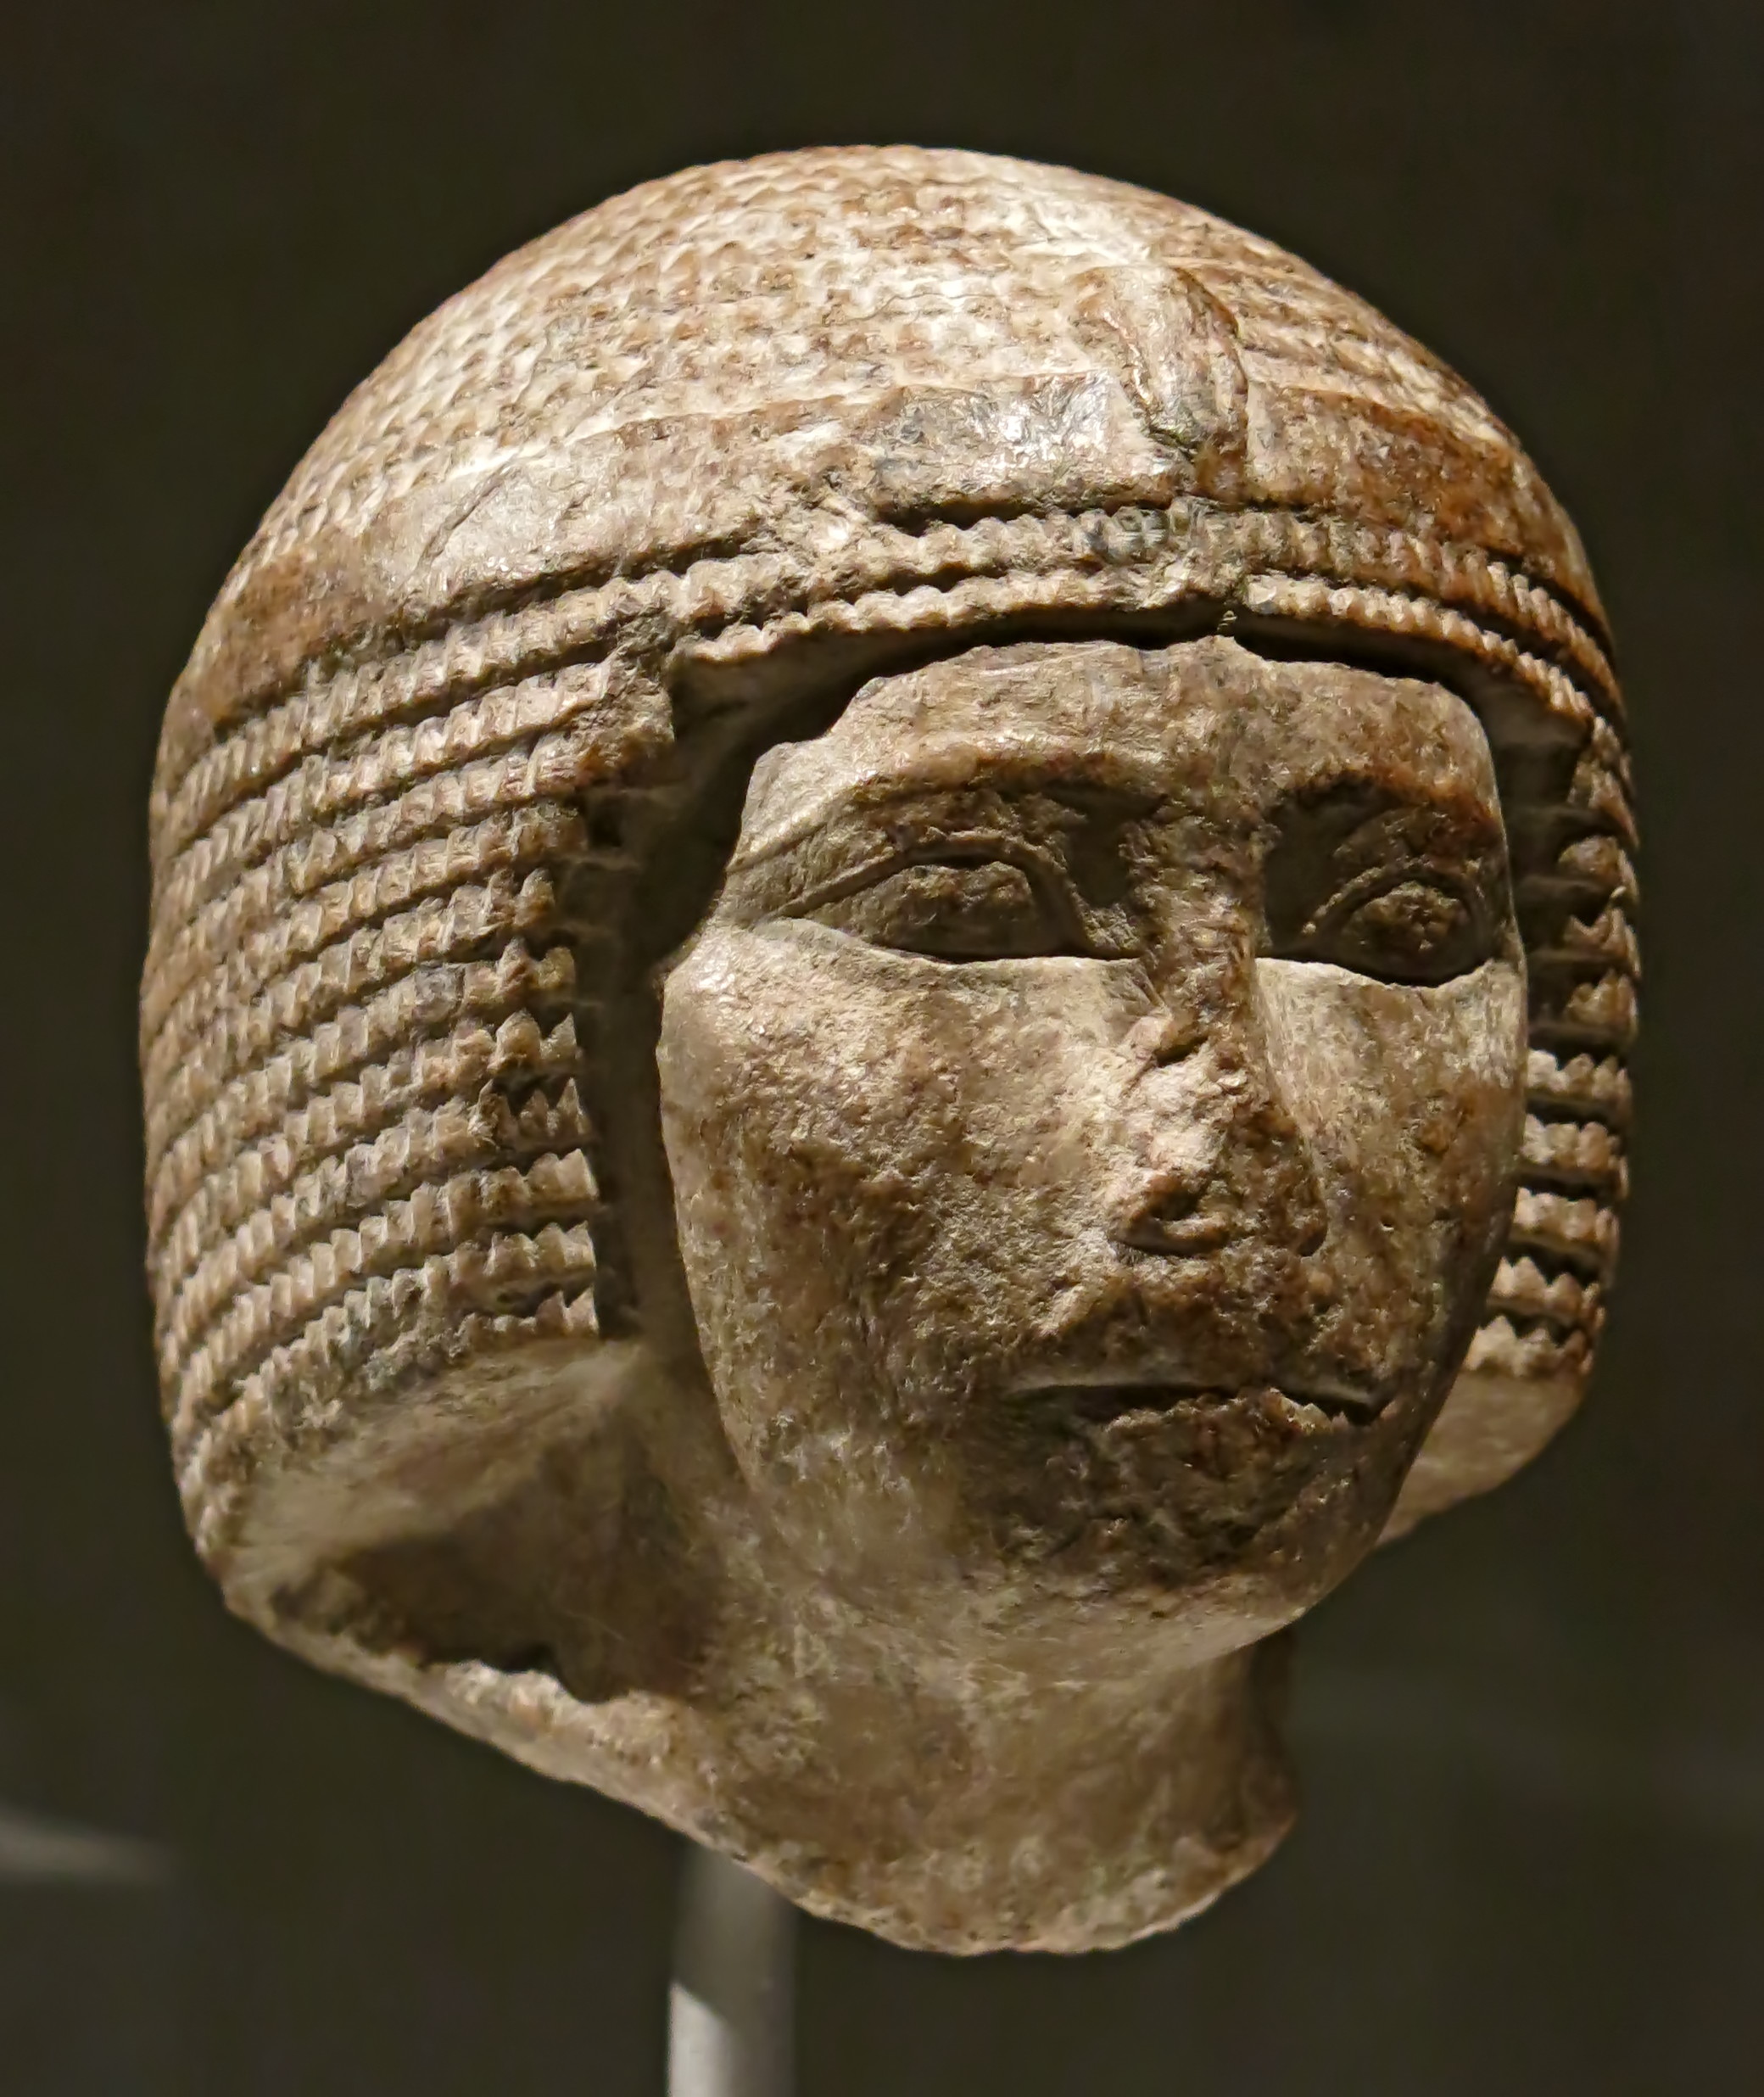
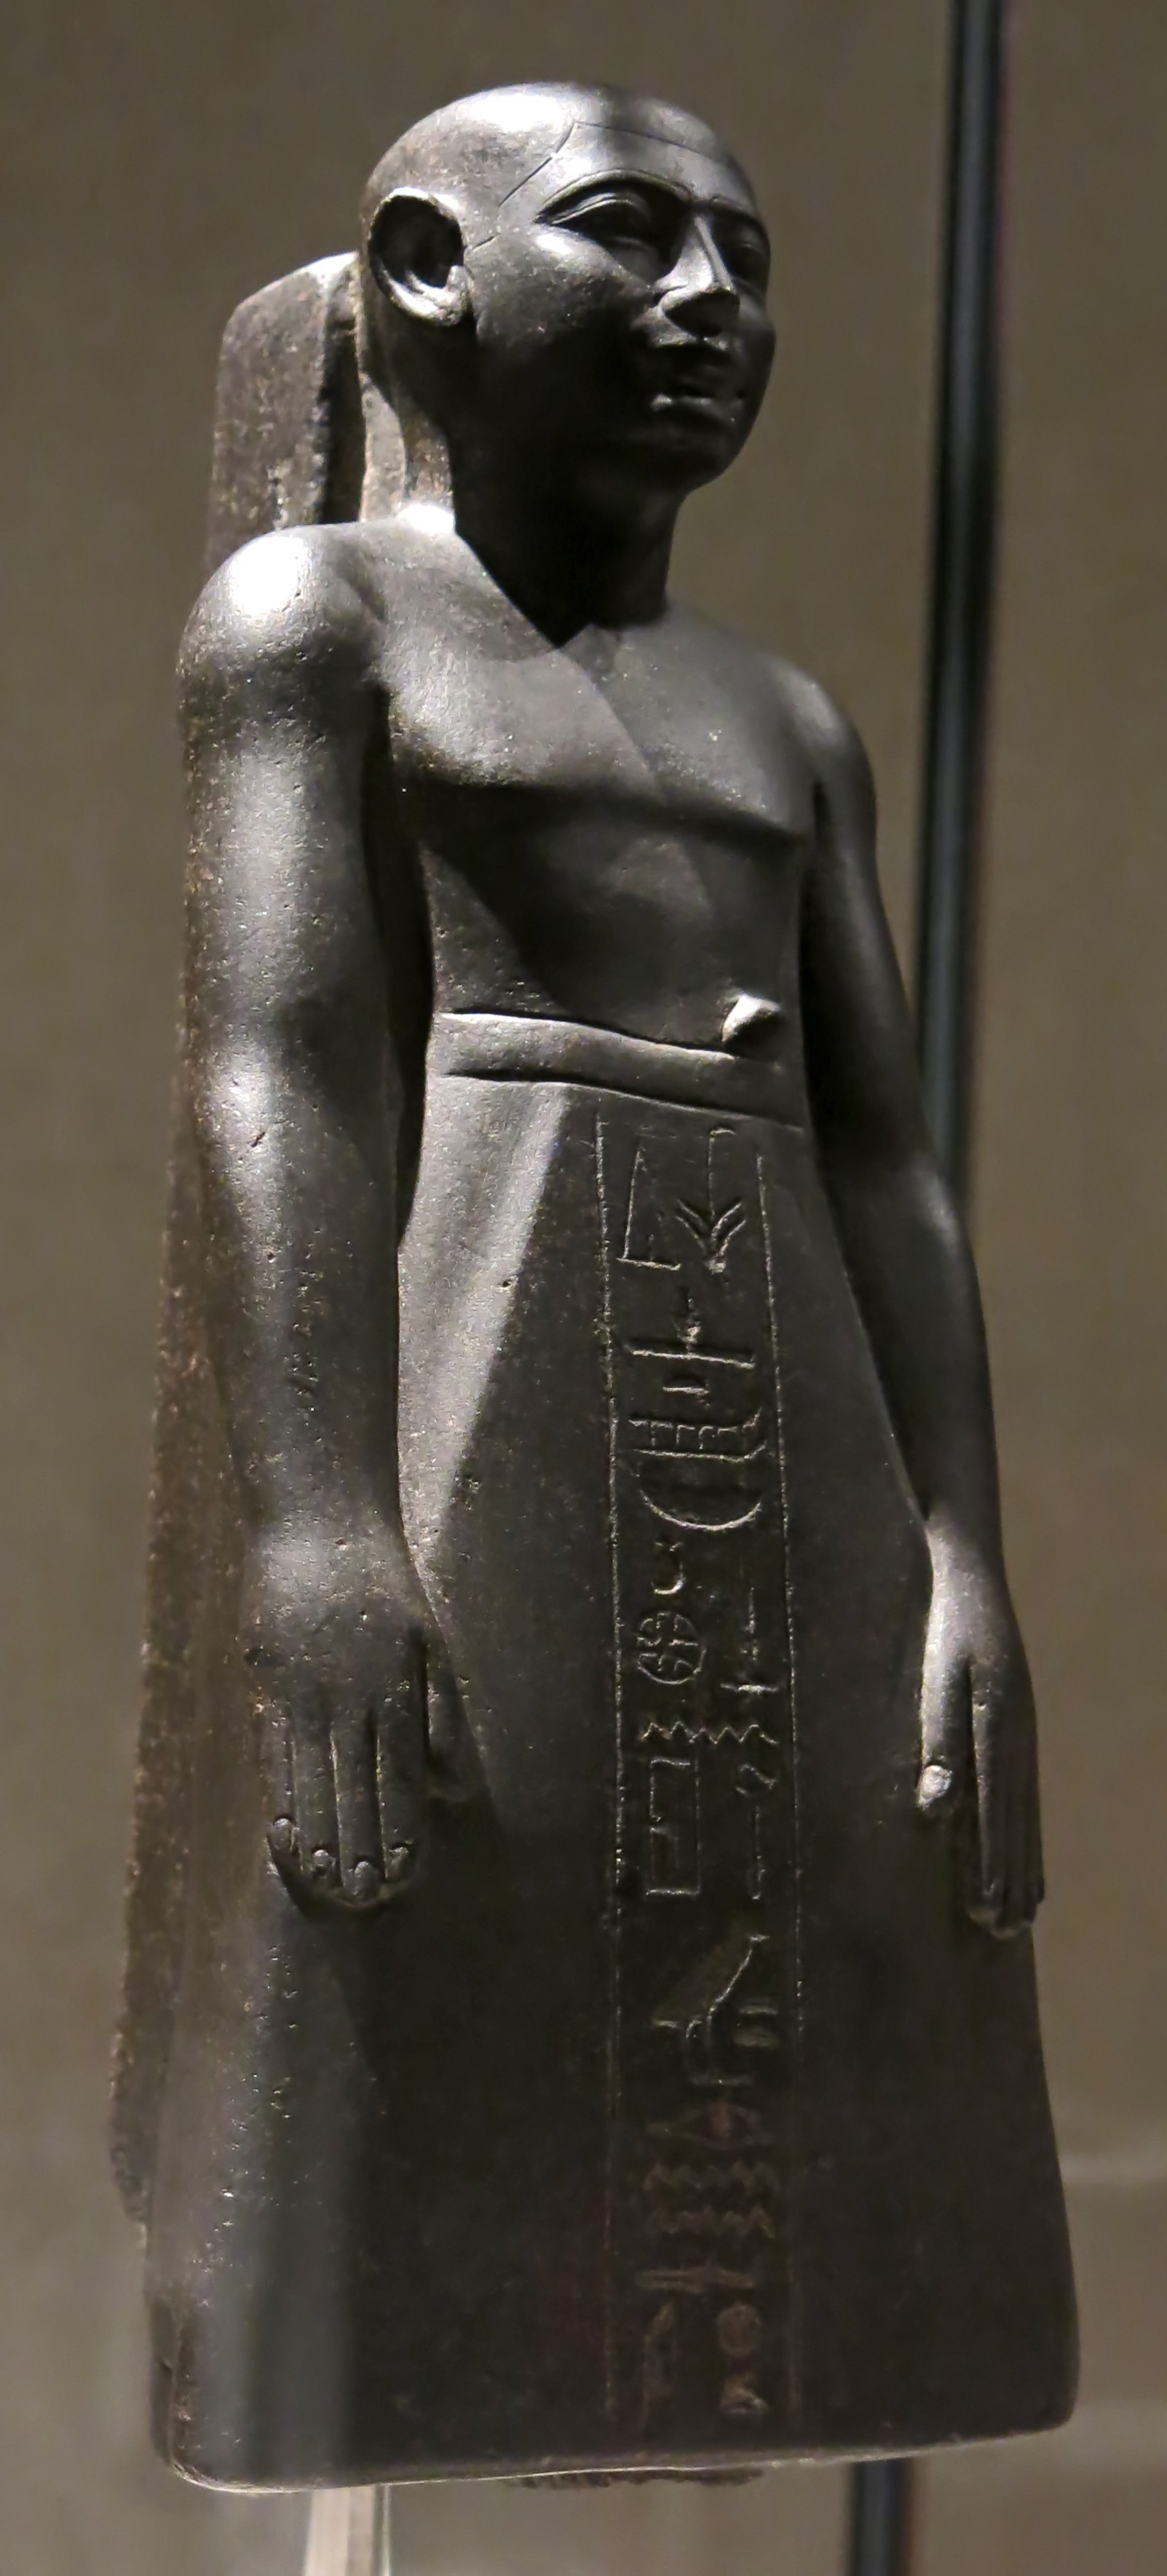
27th Dynasty: 525 BC - 404 BC. Head of a statue of an unknown man, circa 500 BC.
ISO 400, 1/40 second, Canon PowerShot G15, sensor 1/1.7", sensor area 41.51 mm2.
Although smearing can be discerned by careful examination of this image, most viewers would not notice it.
Note also that the smearing is brought about by the efforts of the camera to reduce noise, 'dottiness' in the image, brought about by a relatively small sensor in low light conditions. This is the reason for the continuing research into the creation of better sensors and their incorporation into cameras. With a larger and better designed sensor this noise can be considerably reduced.
Many professional photographers take all photographs in RAW format, and do their own noise reduction, often with better results than what is available on board the camera.
The downside of this method is that the file size of the images is greatly increased. This is not a problem in a studio or even at a wedding or similar function, but it is a serious difficulty to be overcome when you are travelling.
Catalog: Greywacke, ÄM 31196
Photo: Don Hitchcock 2015
Source: Original, Staatliche Museen zu Berlin, Neues Museum, Germany
Text: © Card at the Staatliche Museen zu Berlin, (CC BY-NC-SA 3.0 DE)
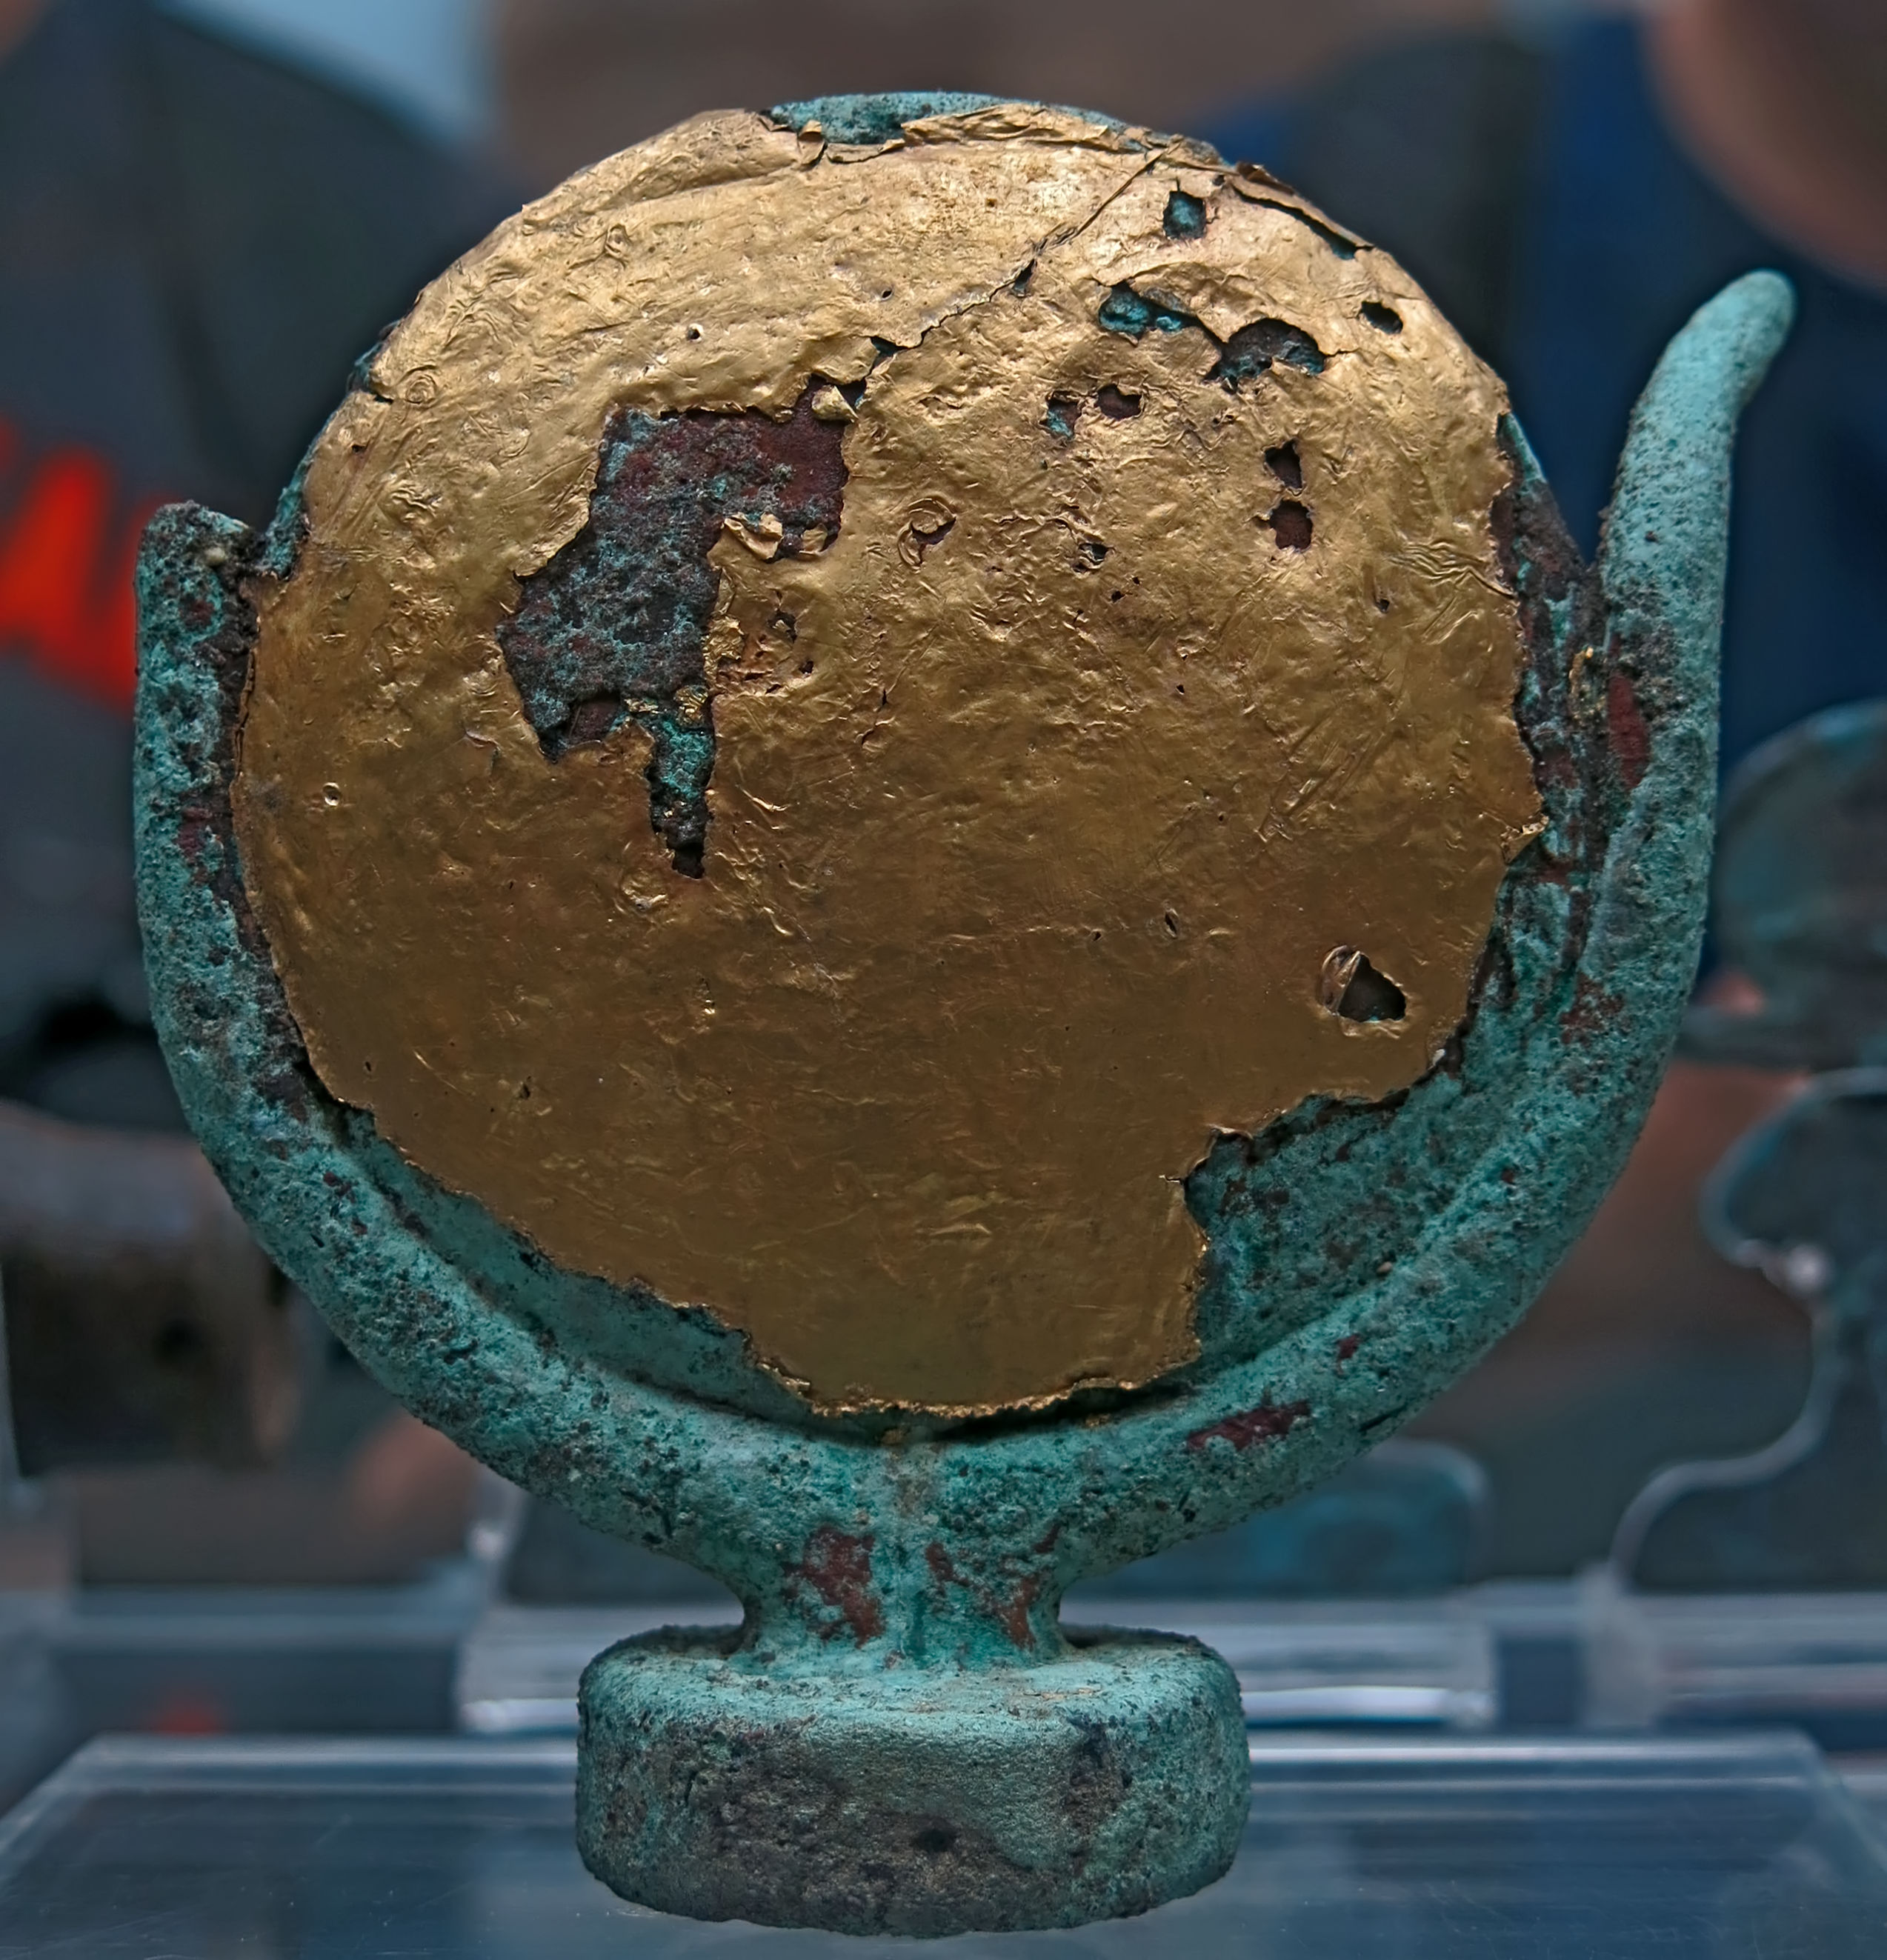
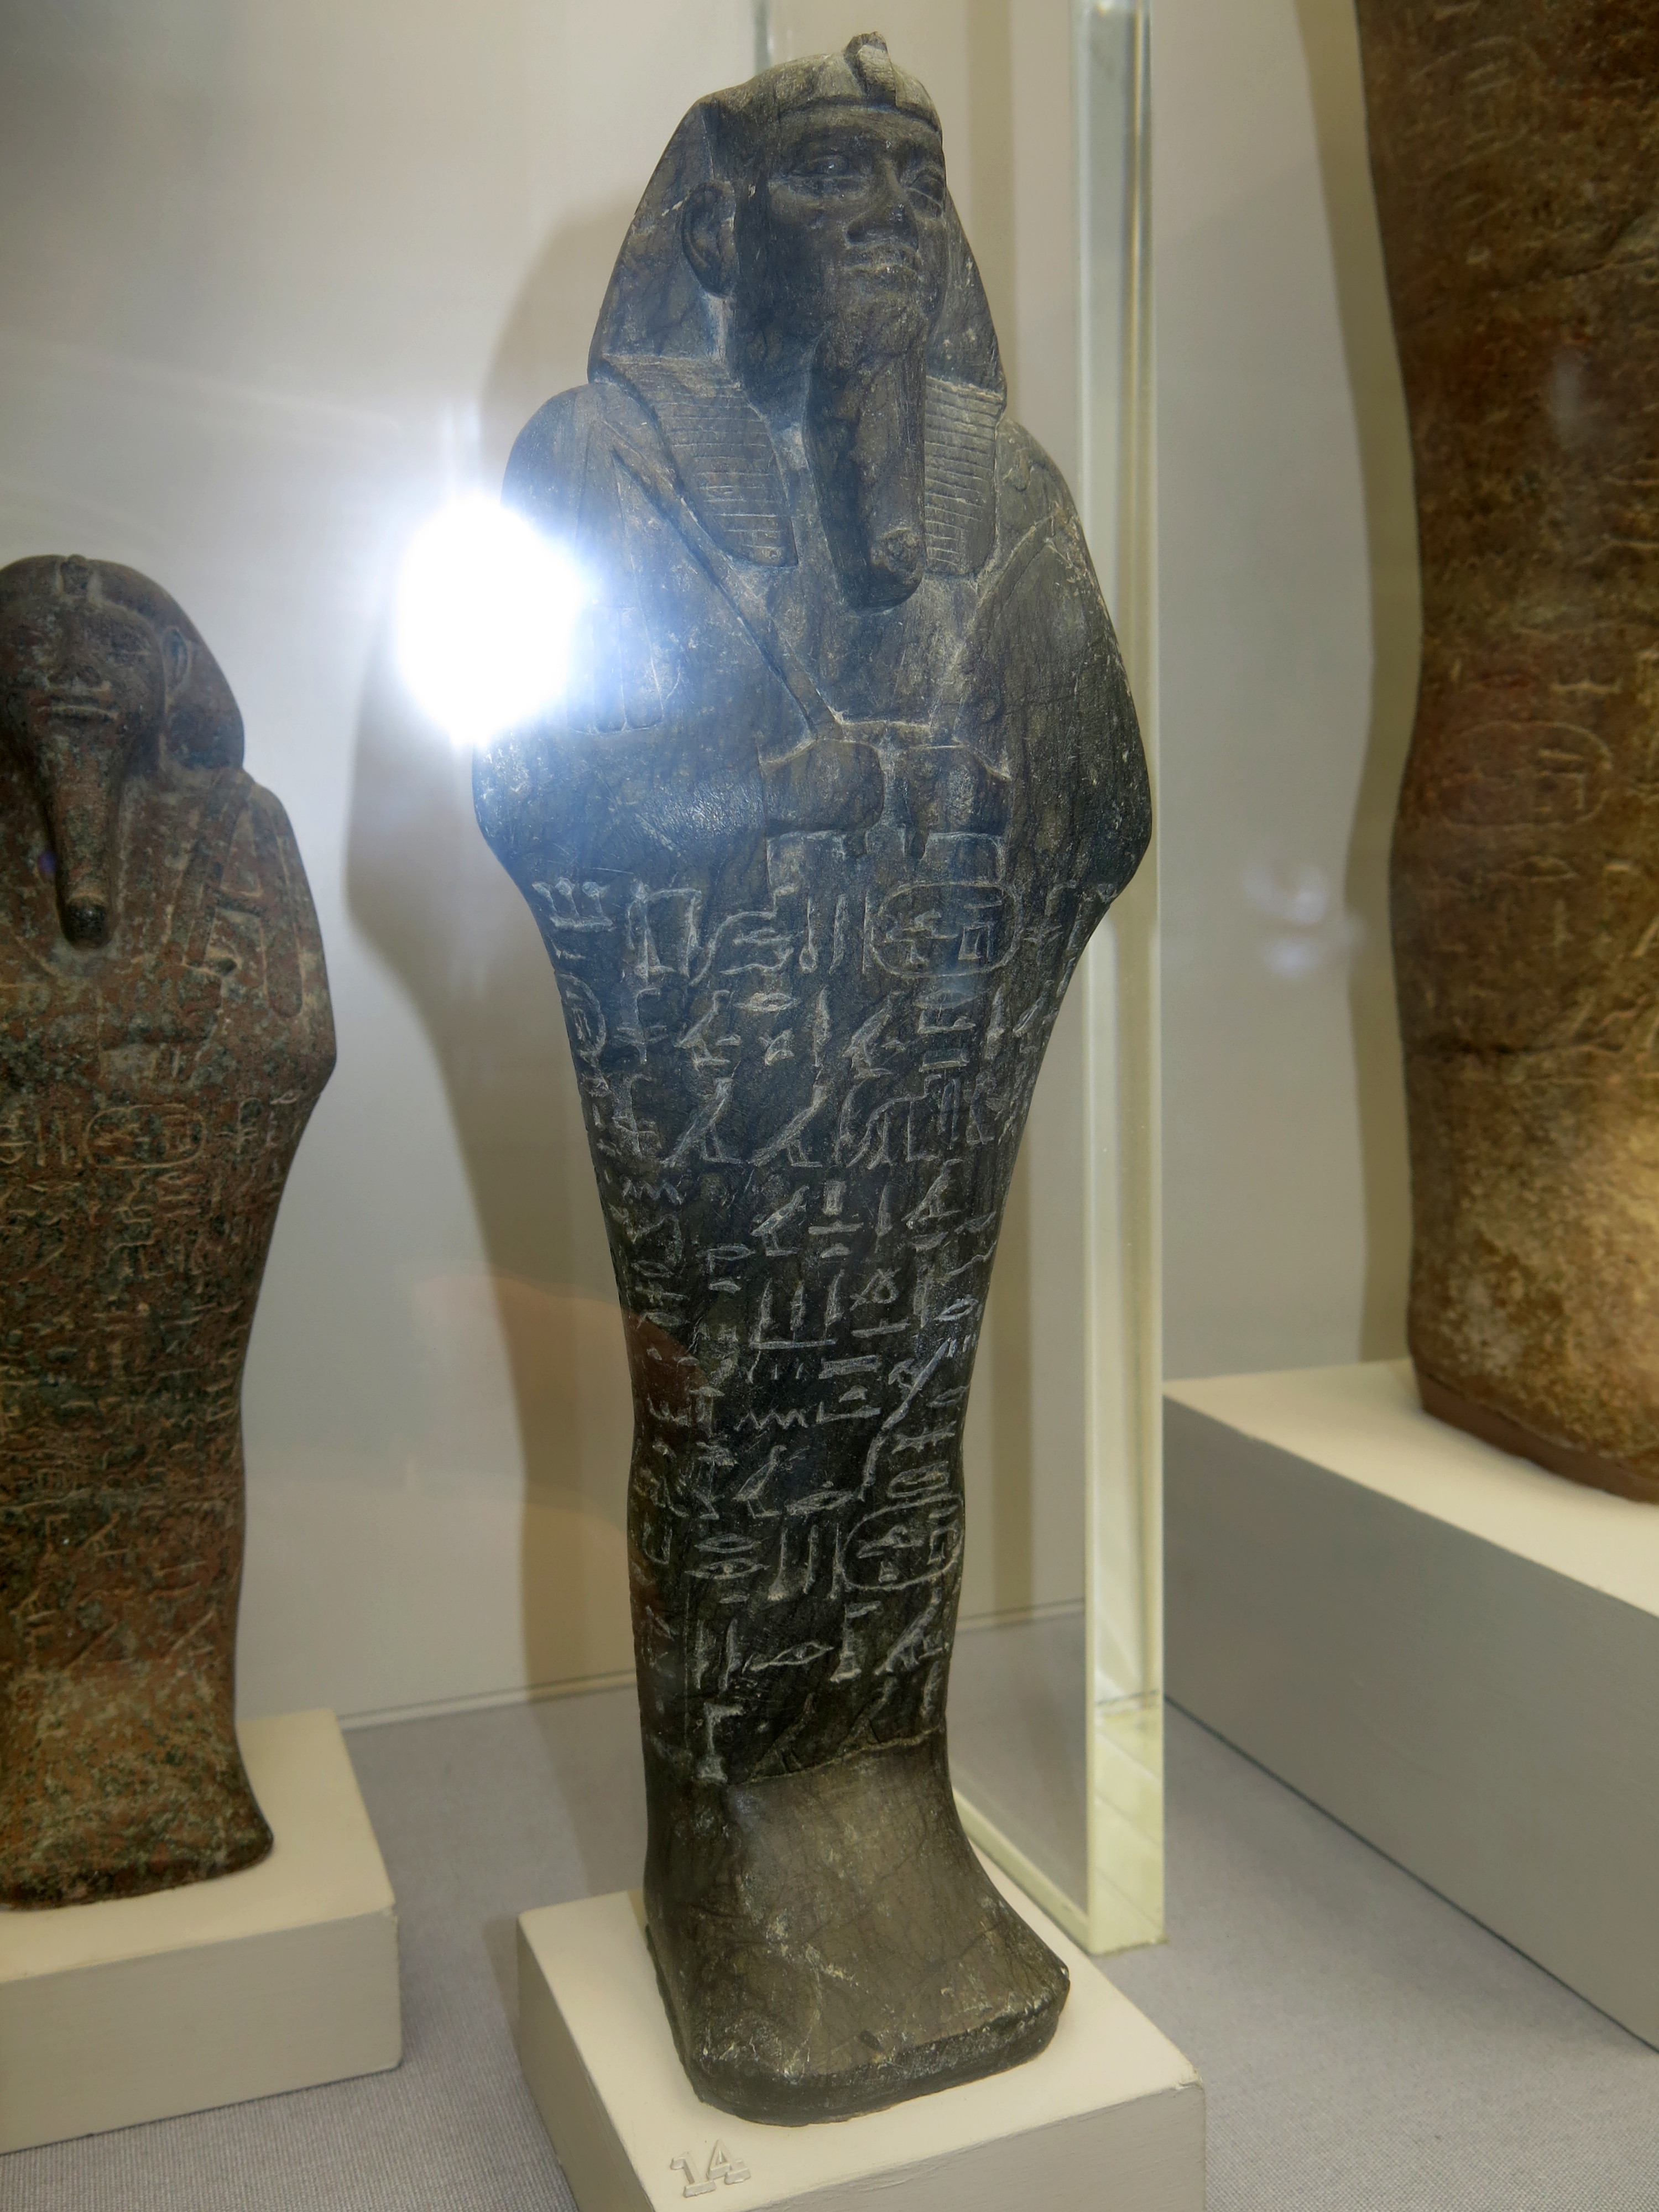
Gilded bronze divine headdress comprising solar disc and horns, Napatan period, circa 700 BC - 300 BC.
ISO 80, 1/50 second, Canon PowerShot G15, sensor 1/1.7", sensor area 41.51 mm2.
Clicking on the thumbnail will confirm that this shows no sign of the smearing evident when high ISO values are used.
Catalog: EA63592
Photo: Don Hitchcock 2015
Source: Original, British Museum
Text: Card with the display at the British Museum, © Trustees of the British Museum, CC BY-NC-SA 4.0
The effects of a high ISO level with a larger sensor
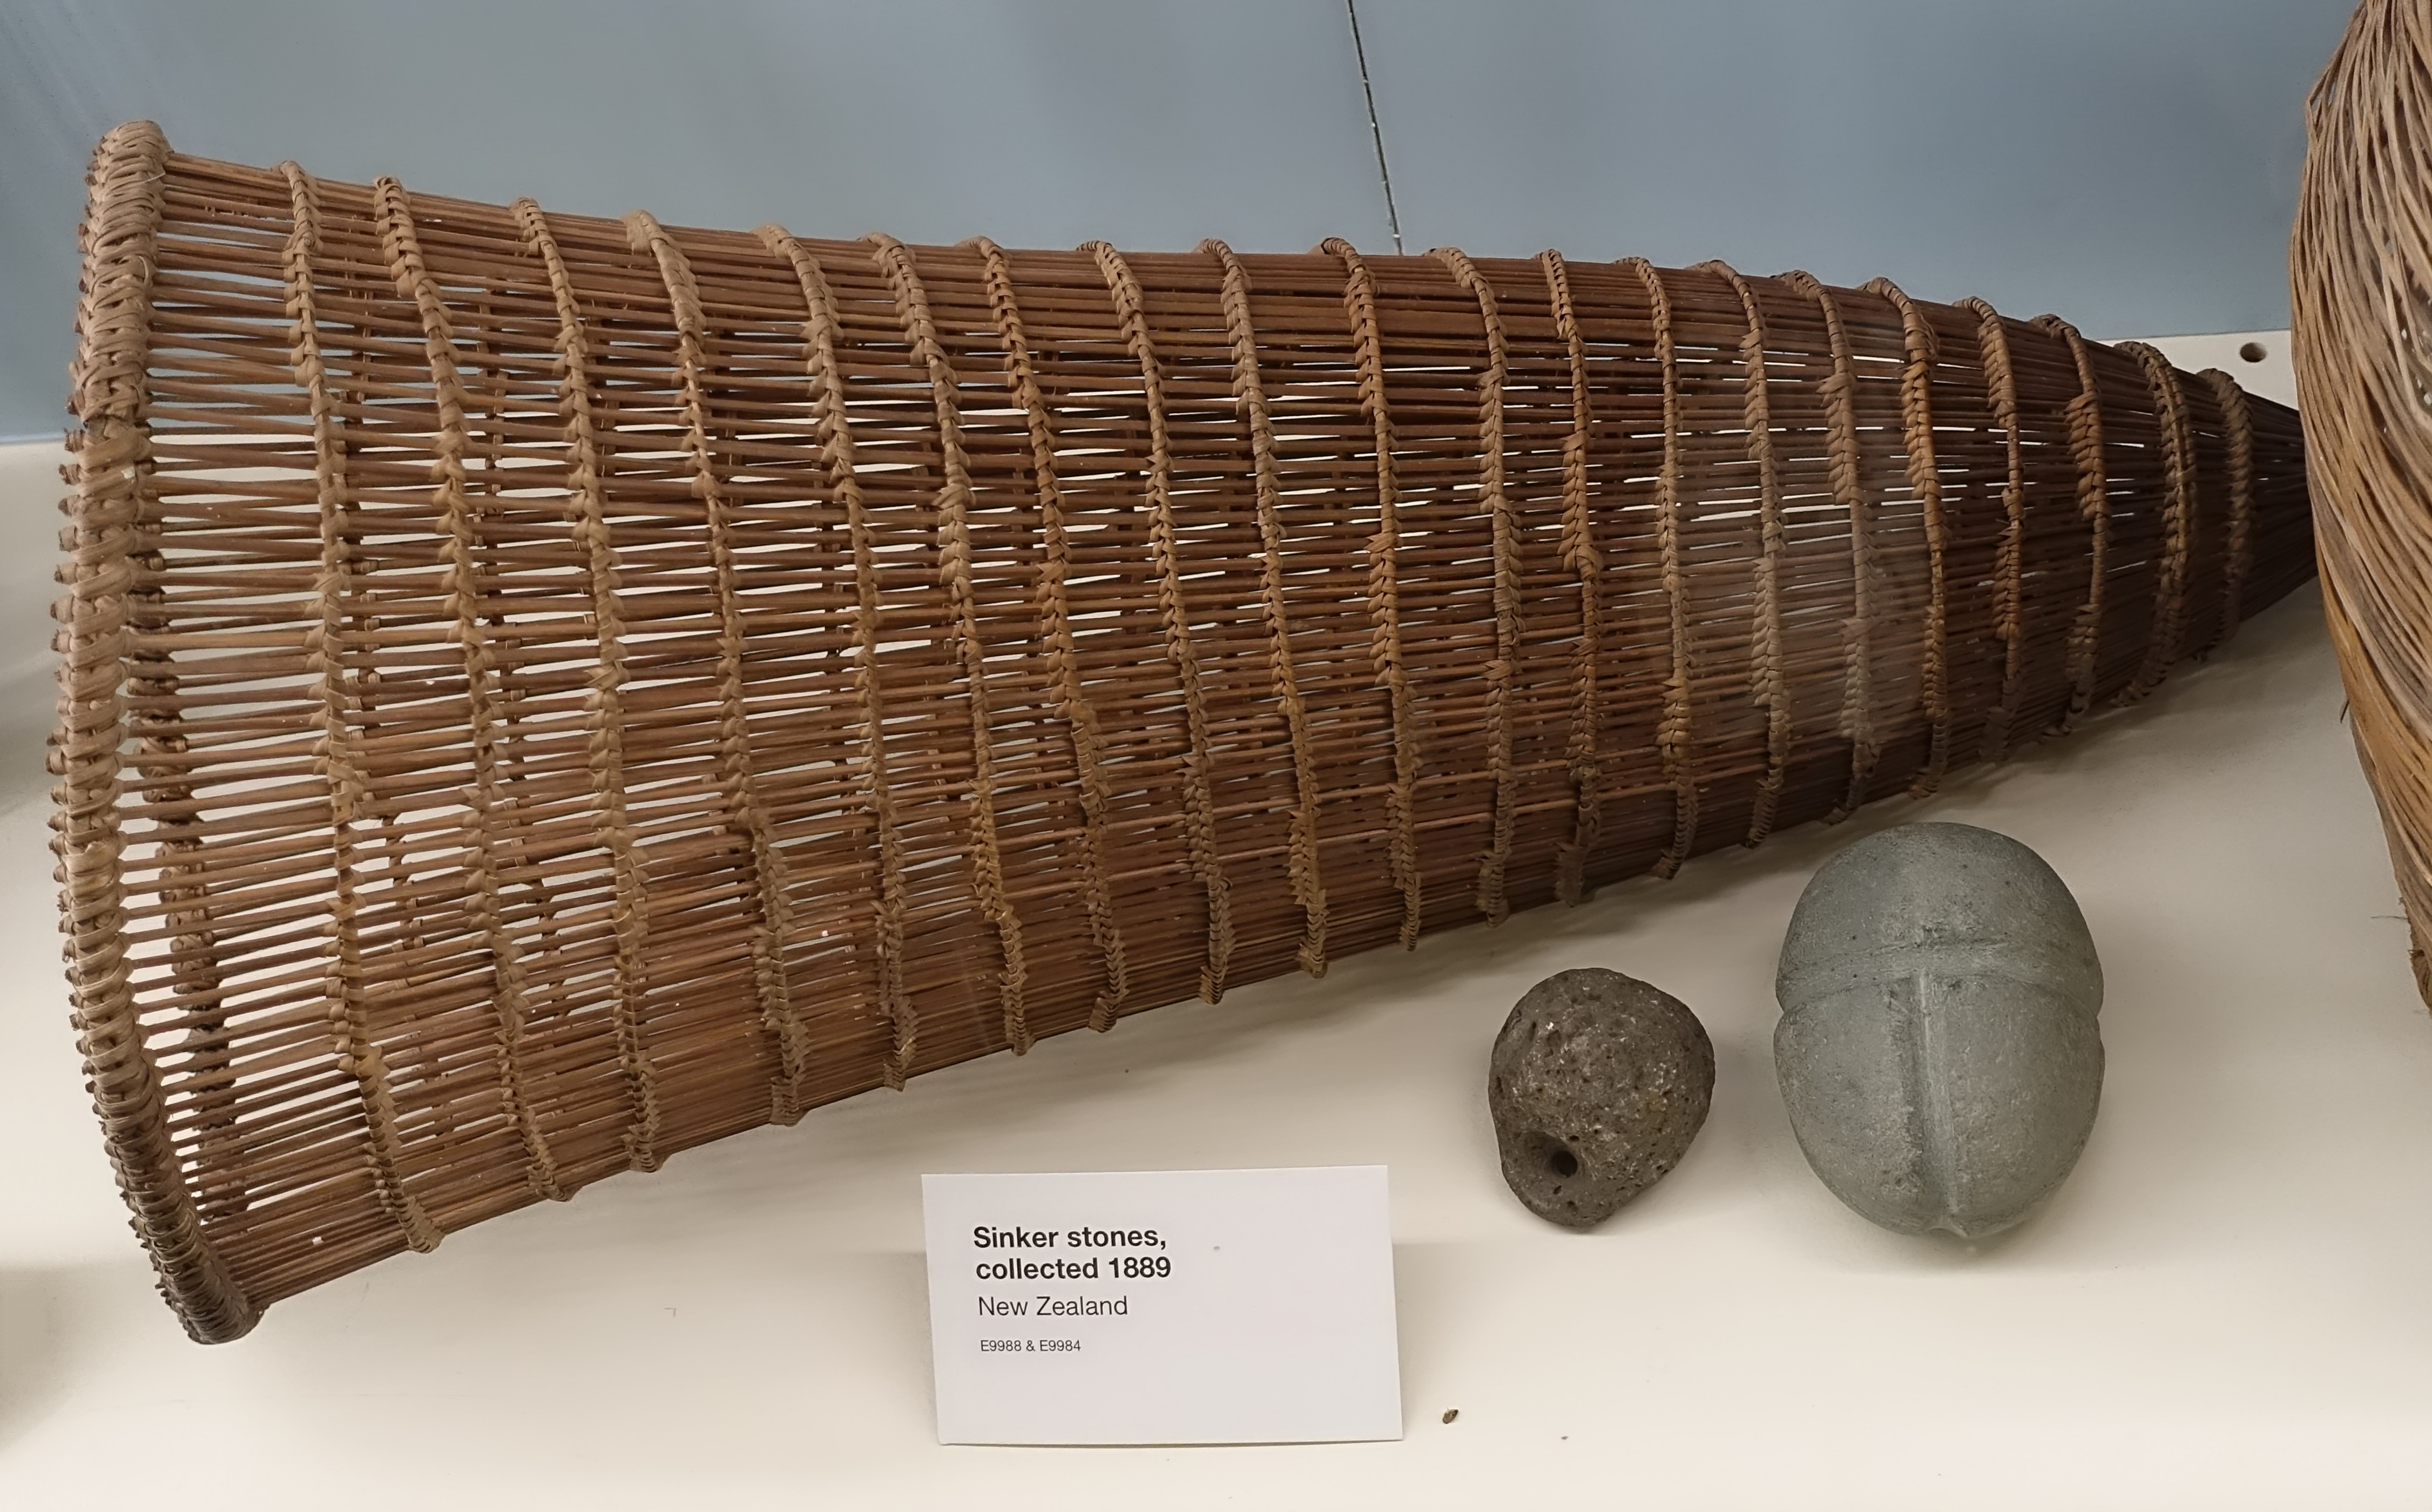
Fish trap, collected 1960, Papuan Gulf, Papua New Guinea.
ISO 800, 1/40 second, Sony RX100 II, sensor size "one inch" (116 mm2)
With a larger (nearly three times greater area) and better designed sensor and better software, this image shows no sign of excessive noise or smearing, even at 800 ISO.
Photo: Don Hitchcock 2017
Source: original, Queensland Museum, Brisbane.
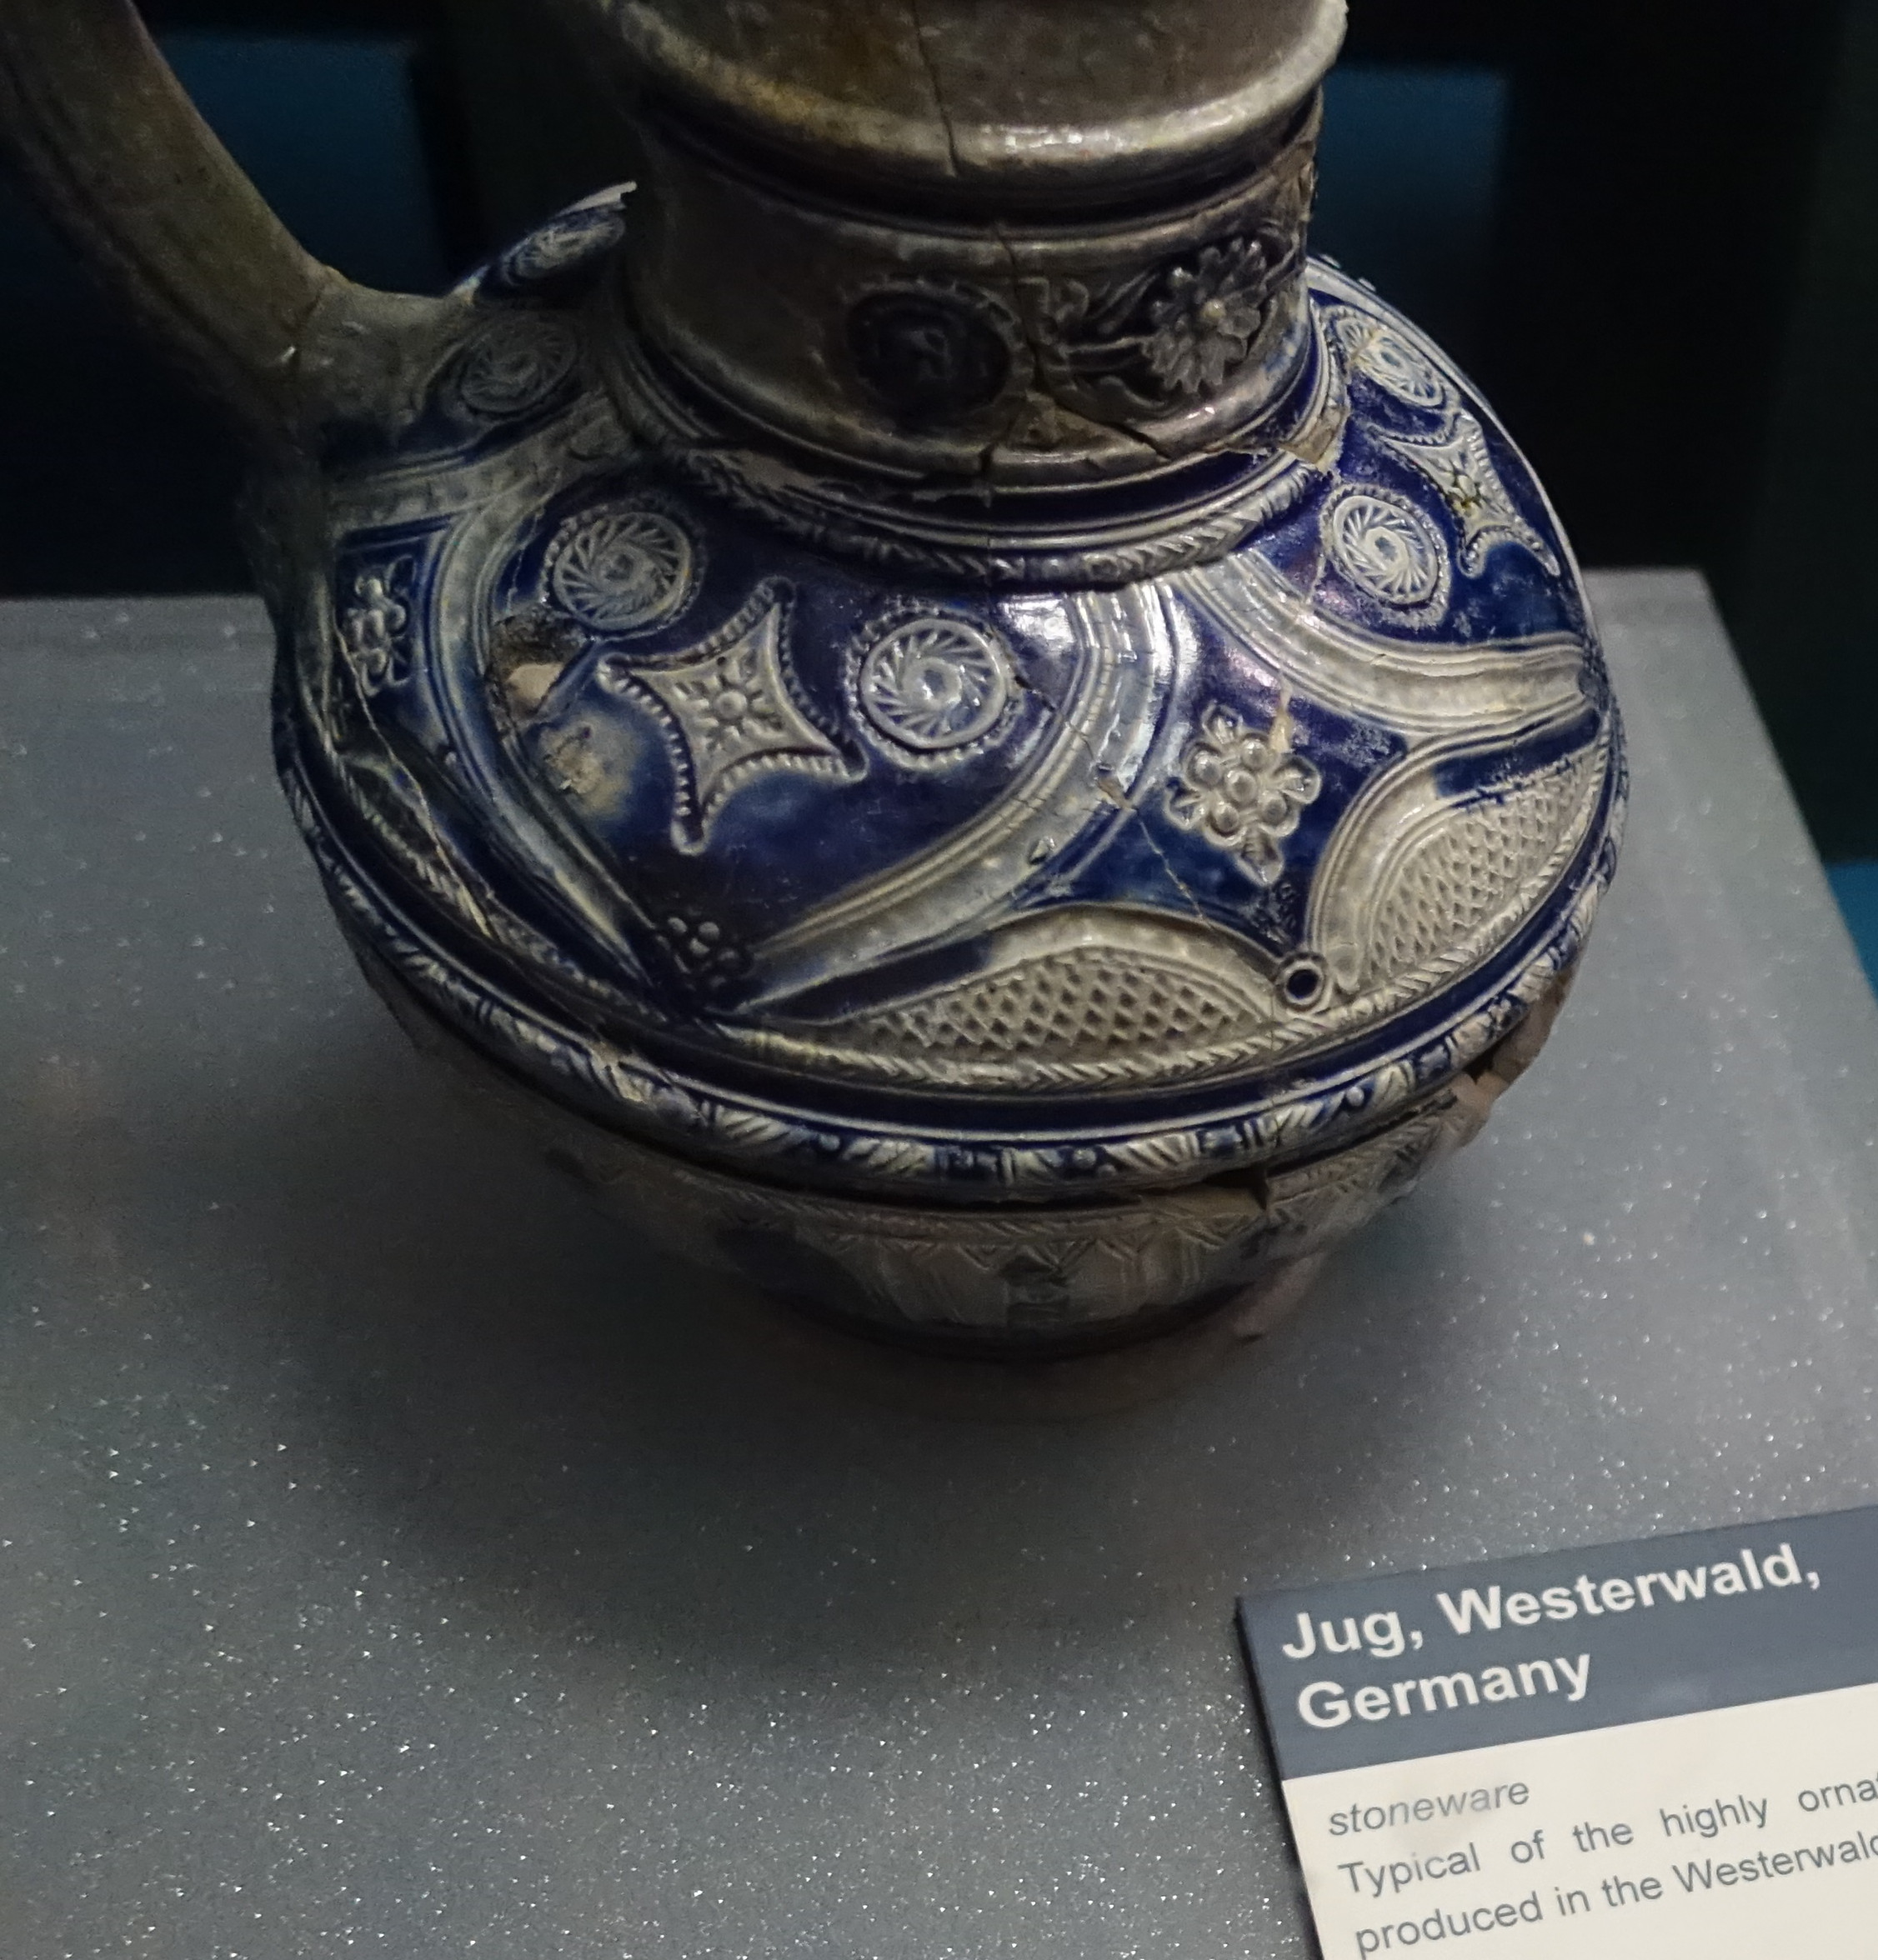
Jug, Westerwald, Germany, stoneware, from the wreck of the Batavia.
ISO 2000, 1/50 second, Sony RX100 II, sensor size "one inch" (116 mm2)
Even at ISO 2000, the image is of generally good quality, though with a little noise in the darker areas of the image.
The software used on this camera to reduce noise does so in a far less obtrusive way than the Canon PowerShot G15 or the iPhone.
Photo: Don Hitchcock 2017, cropped
Source: original, Geraldton Museum
ISO to the max!
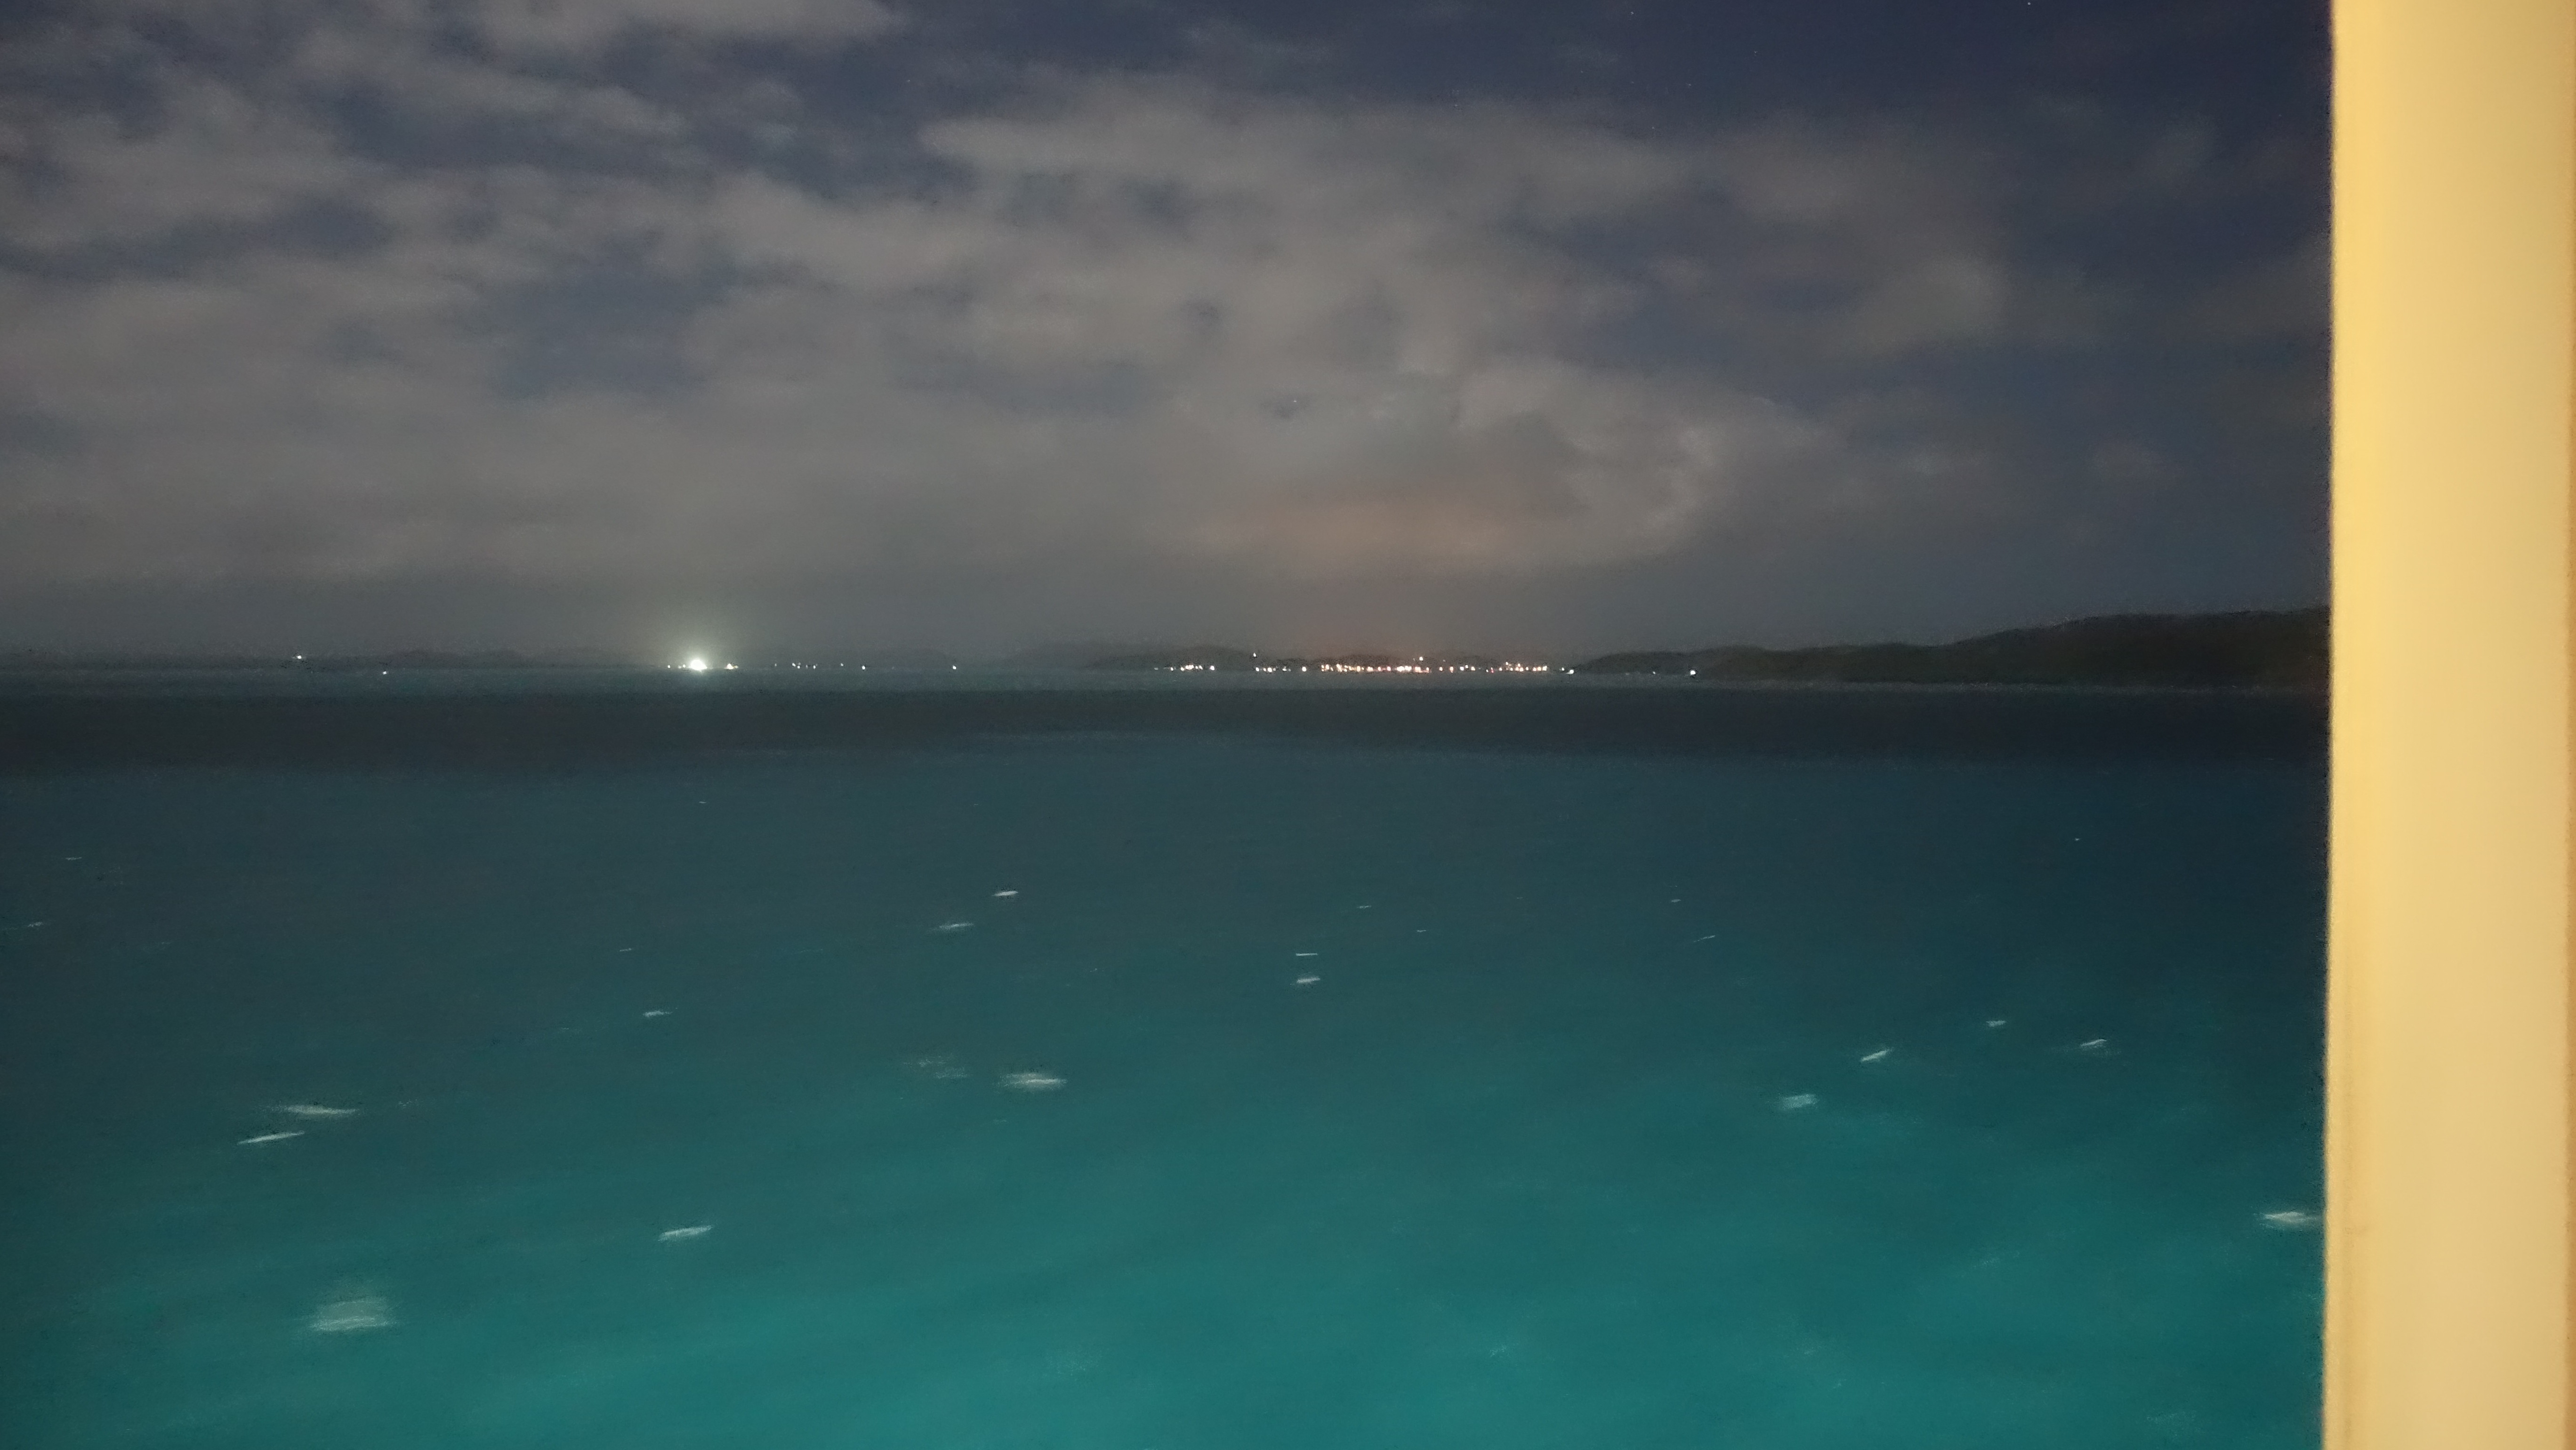
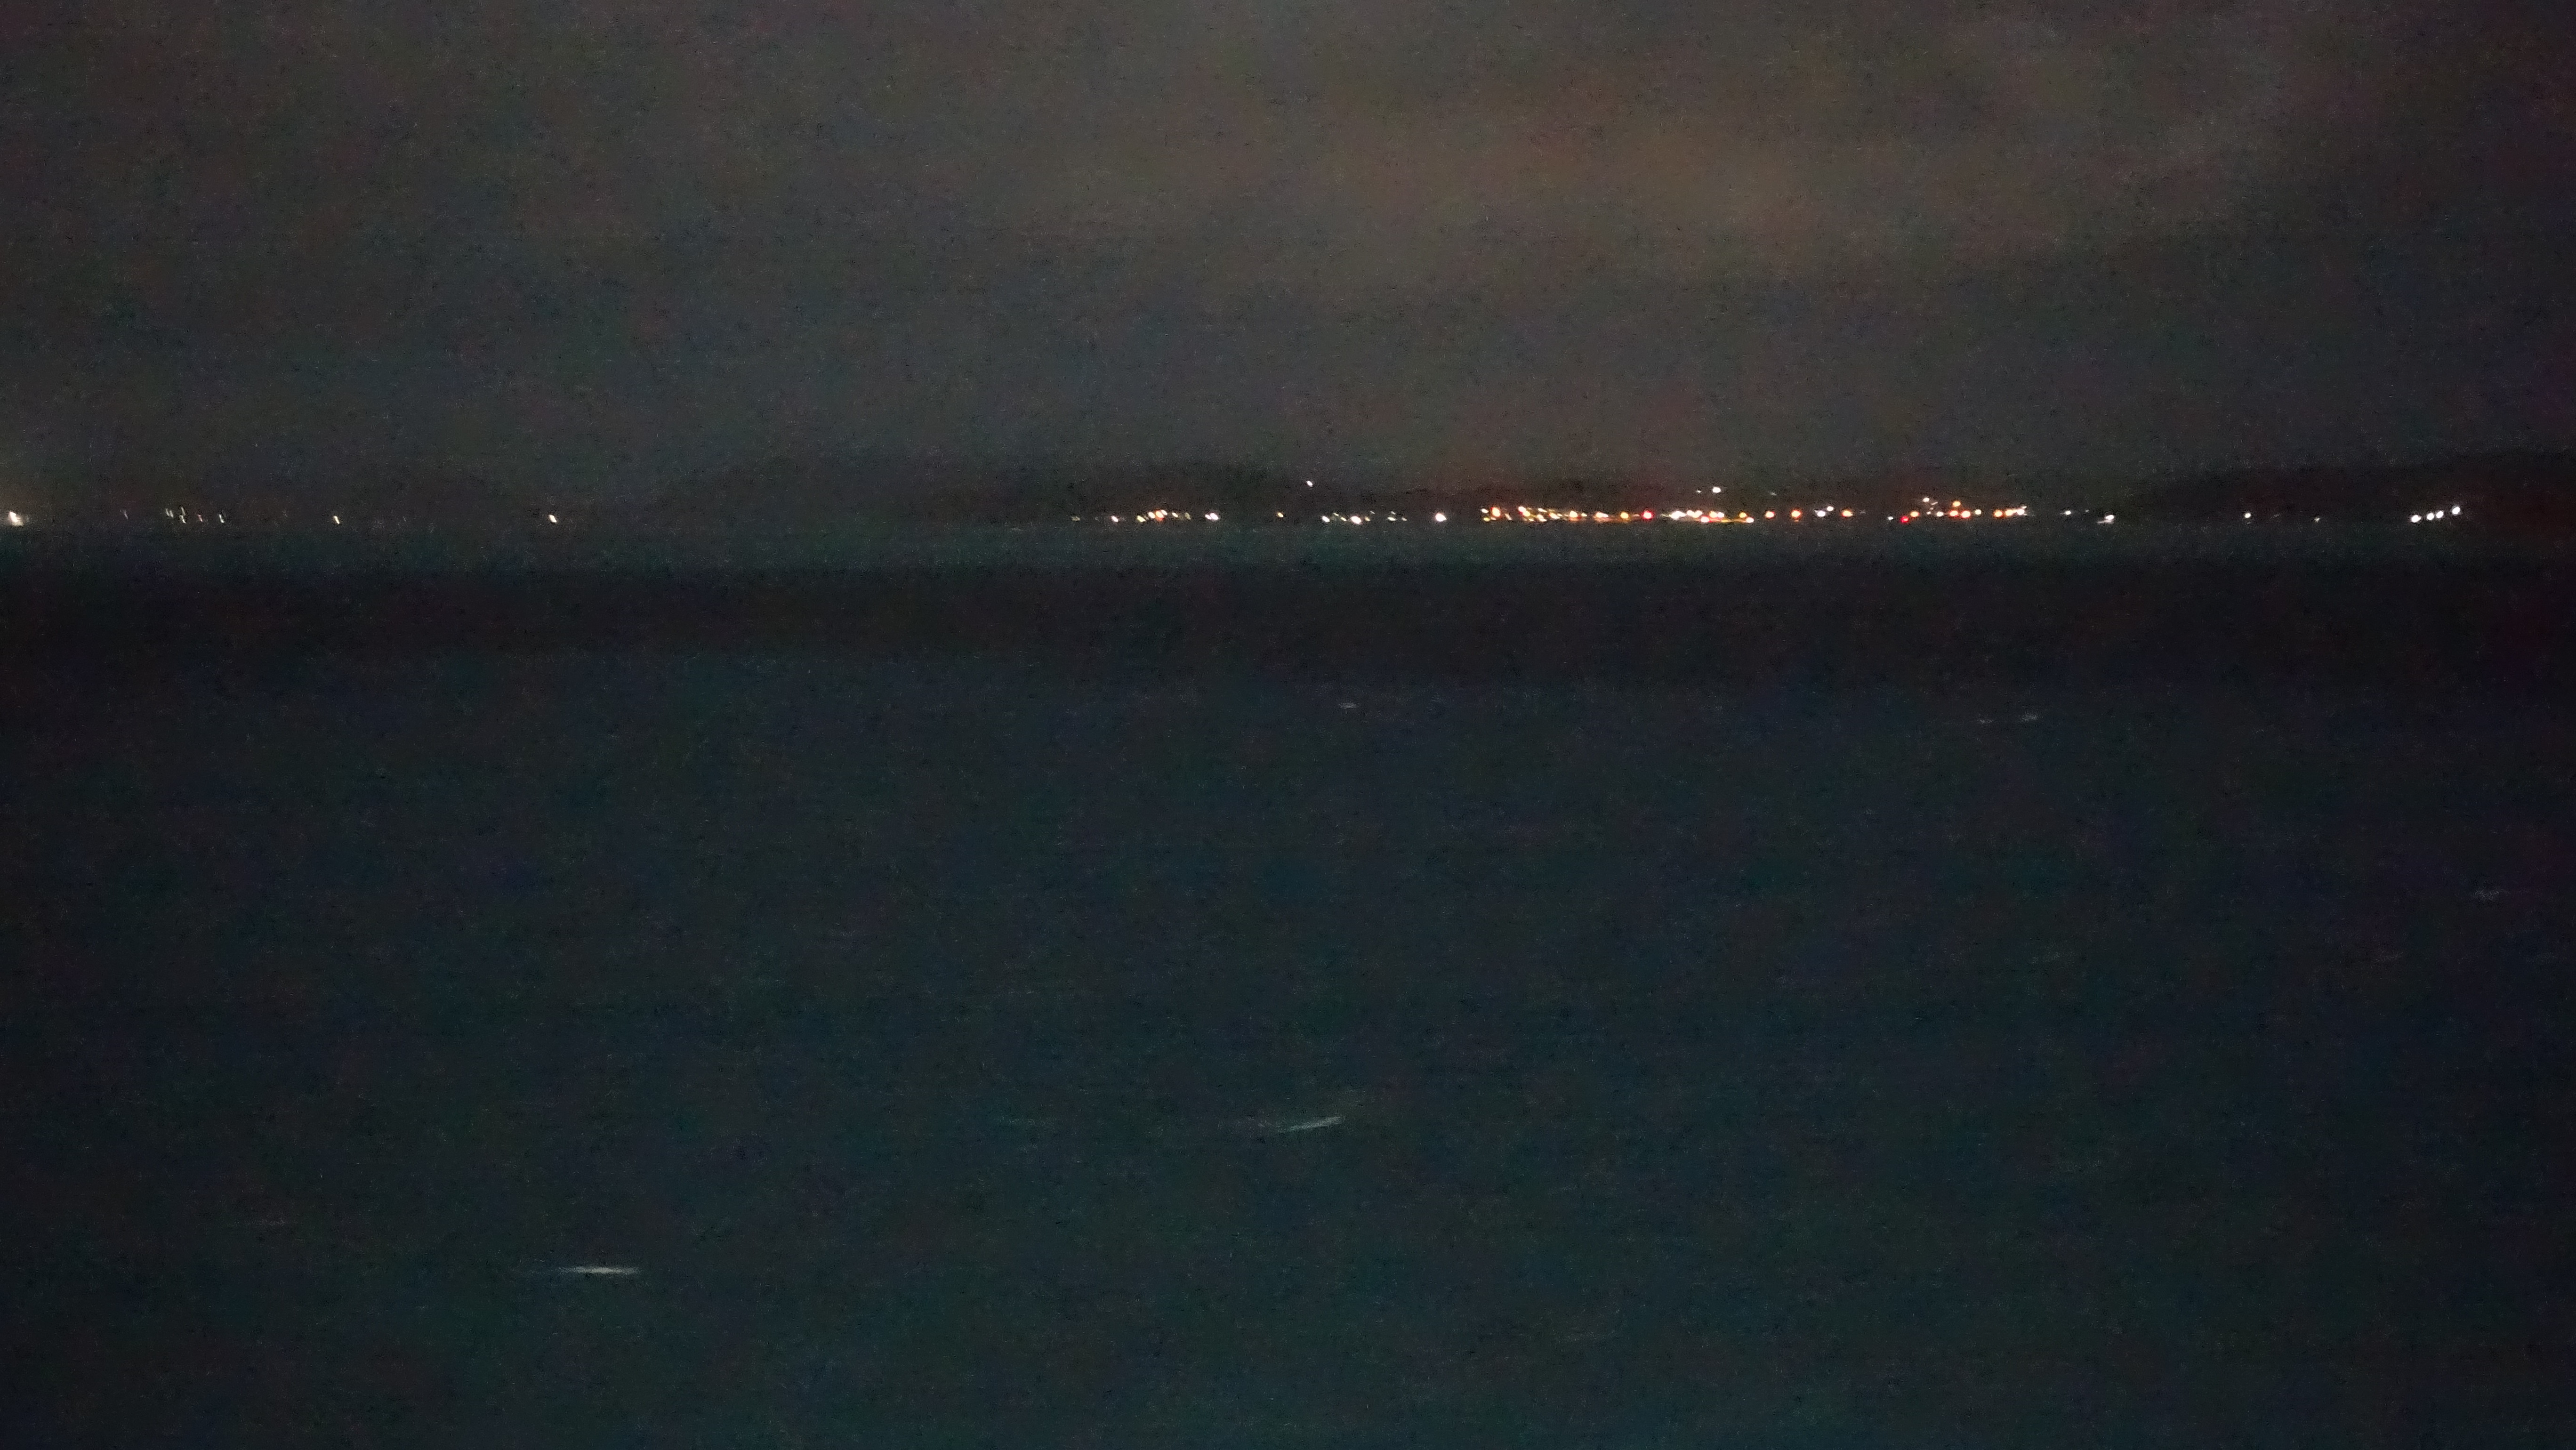
The almost limitless ability of modern digital cameras to increase sensitivity of the chip when light levels are low can deliver some amazing effects. Here is a photo taken by moonlight of the small settlement of Thursday Island from a cruise boat passing through Torres Strait, using the channel known as the Prince of Wales passage.
Note that the flash was set not to fire, the brightness of the ship's side on the right comes from a little soft light from the ship's cabin.
Not zoomed in, focal length 24, 1/4 second, 12 800 ISO, F1.8
Sony RX100 II, sensor size "one inch" (116 mm2)
Photo: Don Hitchcock 2017
Note that this (zoomed in) photo demonstrates that the ability to cope with low light conditions is not infinite. The photo is darker, and much more noise is evident.
The reason for this is that when you zoom in, you are asking a lot more of your camera. Effectively there is less light available, so the camera bumps up the ISO, and increases the time of exposure. Both of these are likely (or certain) to degrade the resulting image.
Even when the camera is rock steady, as when it is resting on the glass of a museum display, a shutter speed longer than 1/30 second increases noise, for reasons I am unsure of - but it is empirically demonstrable on the cameras I use.
Zoomed in to focal length 62, 1/5 second, 25 600 ISO, F2.8.
Photo: Don Hitchcock 2017
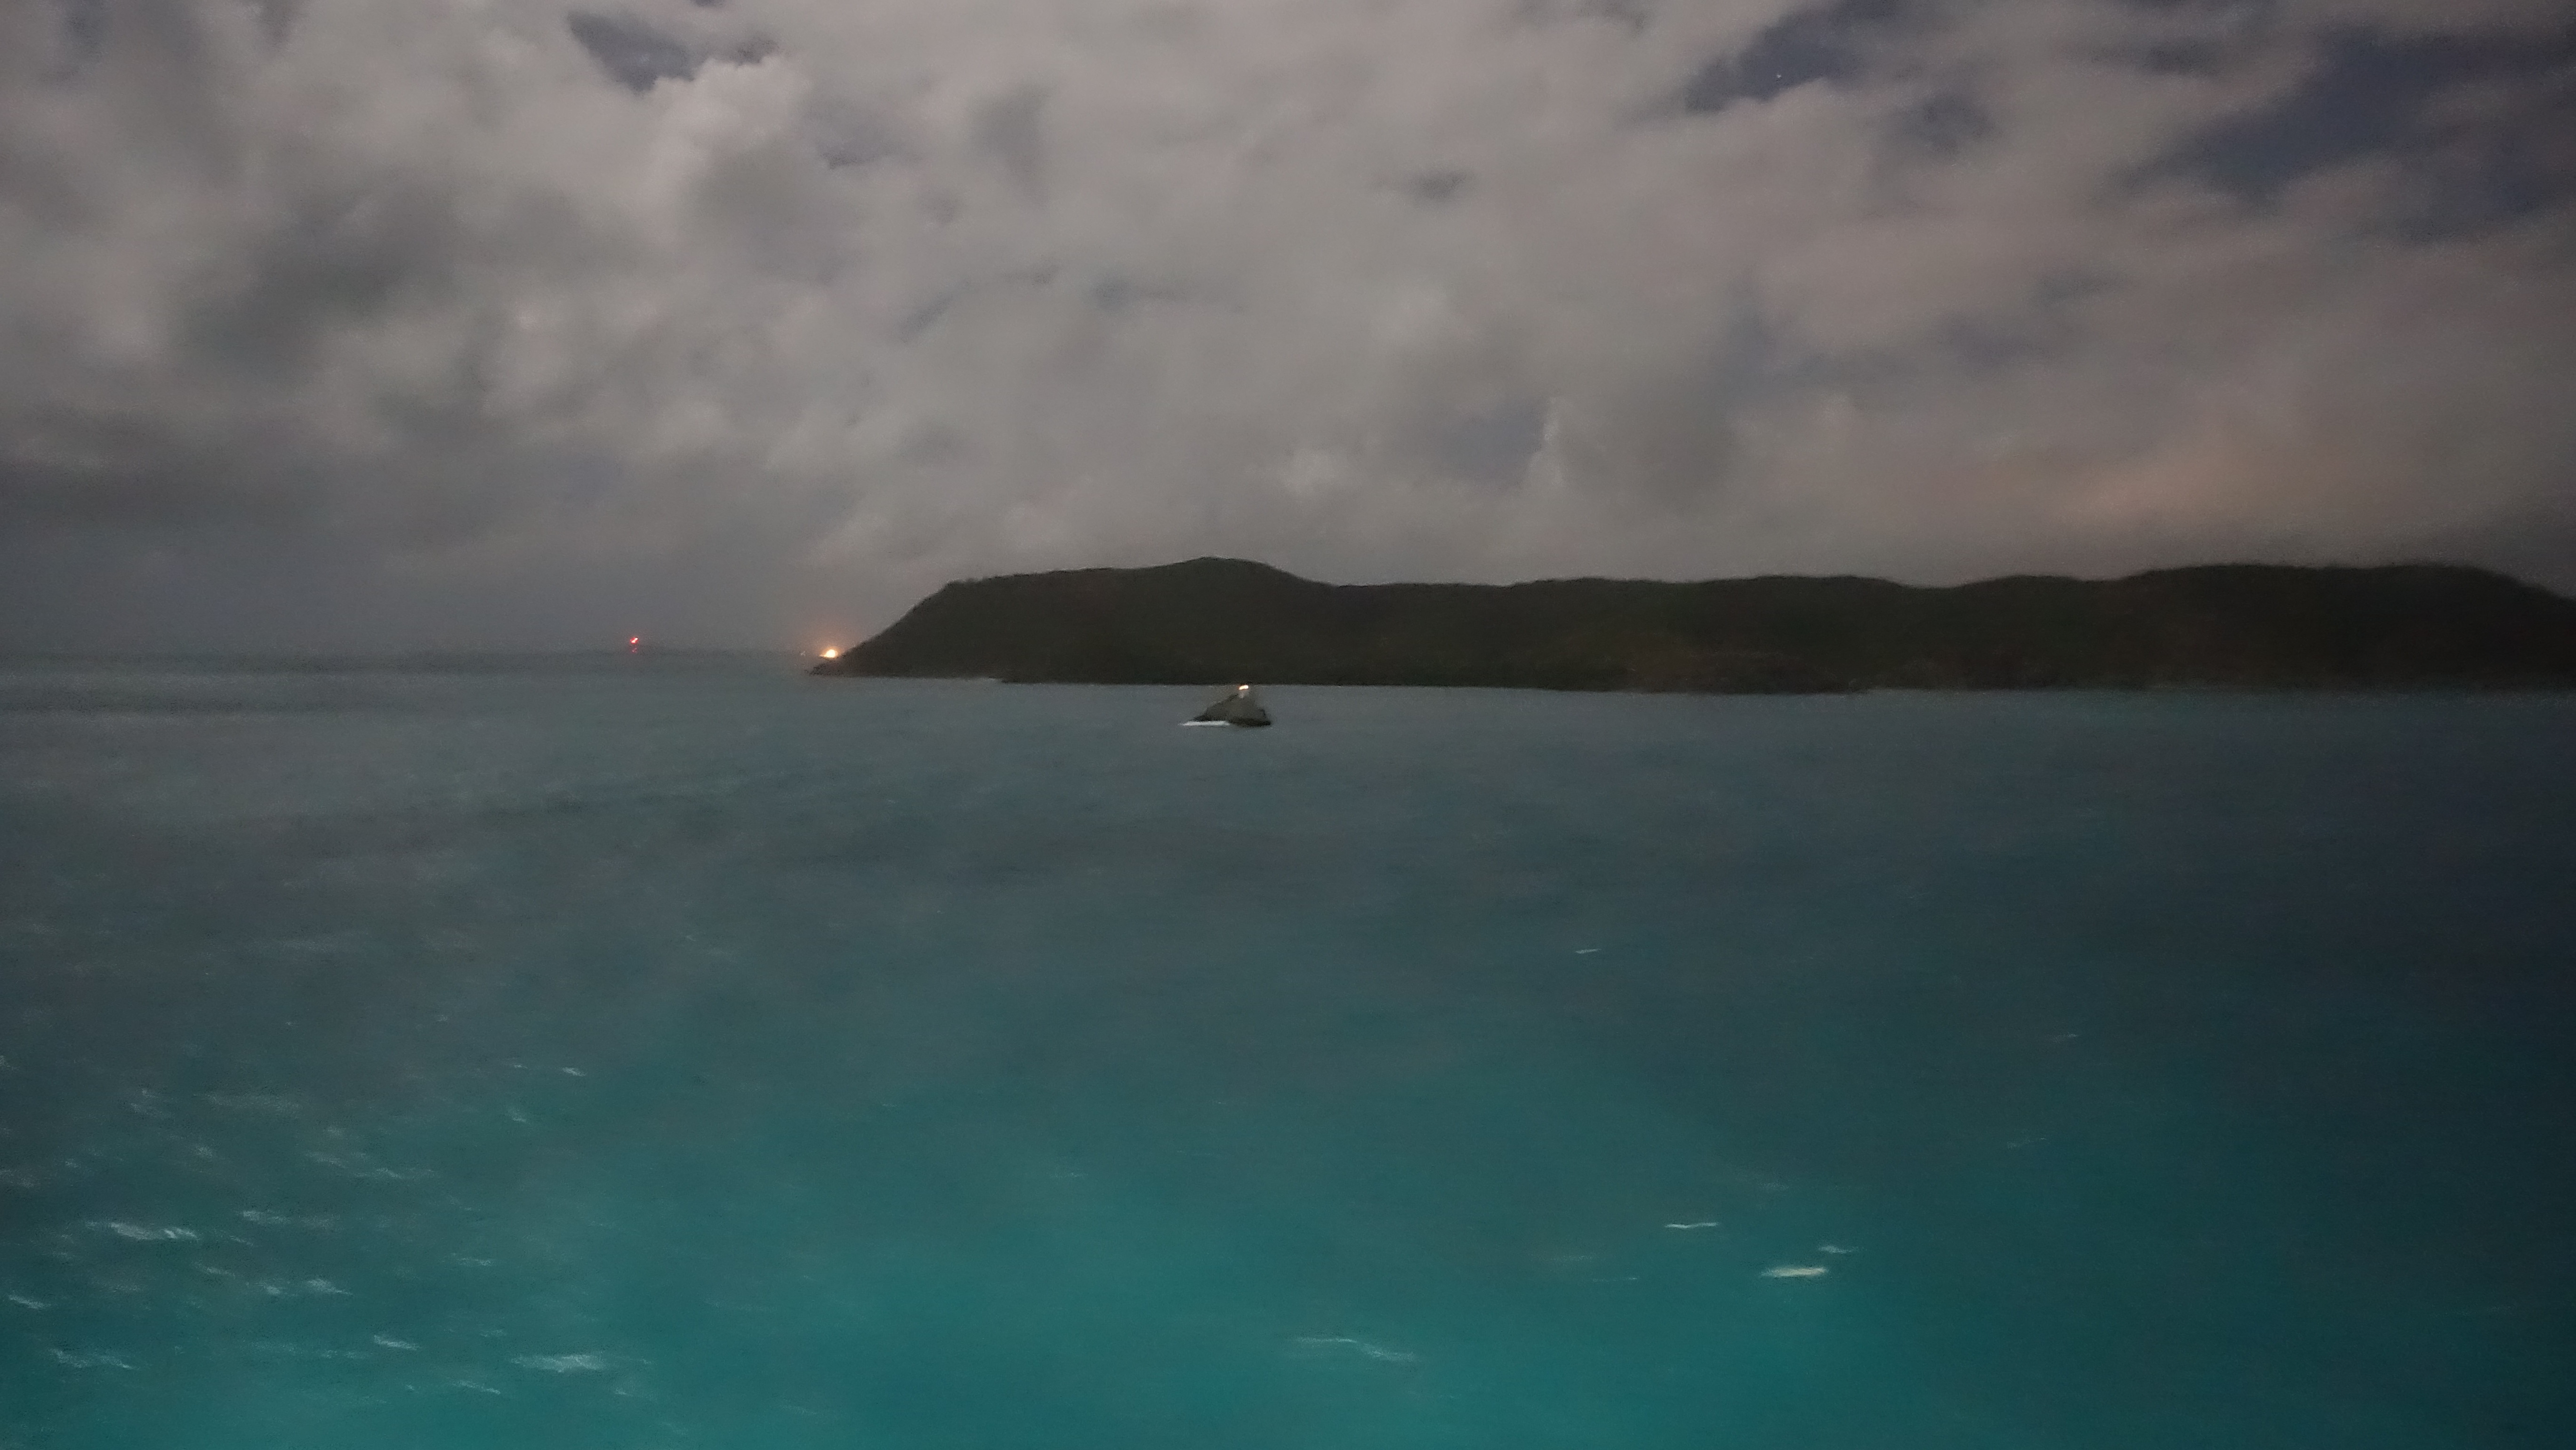
The navigational hazard of Hammond Rock with Hammond Island behind.
The ability of modern cameras to take hand held photographs like this with nothing but moonlight for illumination is nothing short of astounding to someone who used to use black and white 125 ASA (now 125 ISO) film for preference.
Focal length 24, (not zoomed in), ISO 10 000, 1/4 second, F1.8.
Photo: Don Hitchcock 2017
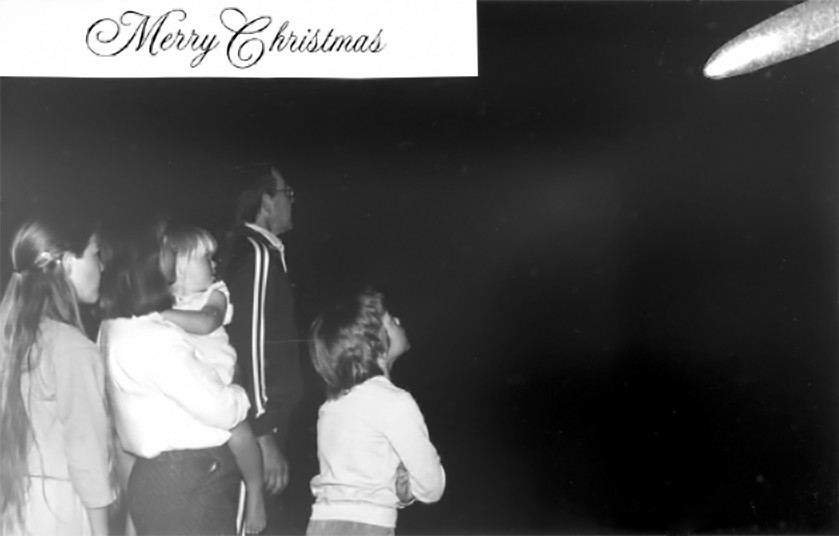
I developed and printed my own photographs in a home darkroom for many years, choosing the exposure of the image in the enlarger and the contrast of the print, which gave good control over the final image.
I did my own 'Photoshopping' by dodging or burning in on individual exposures, and added extraneous material, such as a cut out of a long exposure of Halley's comet to a later photo of my family looking earnestly into a dark night sky, shown at left, for a Christmas photo, to create special effects. I regarded it as a bit of fun, never thinking that anyone would take it seriously.
I was amazed how many of our friends and relatives did not realise that the photograph was faked. German relatives wrote that Halley's Comet was not nearly so clear and bright in Europe!
This technology was overtaken and made obsolete by digital cameras and manipulation by image processing software such as Photoshop.
Photo: Don Hitchcock 1986
Why does the camera need to change the ISO anyhow?
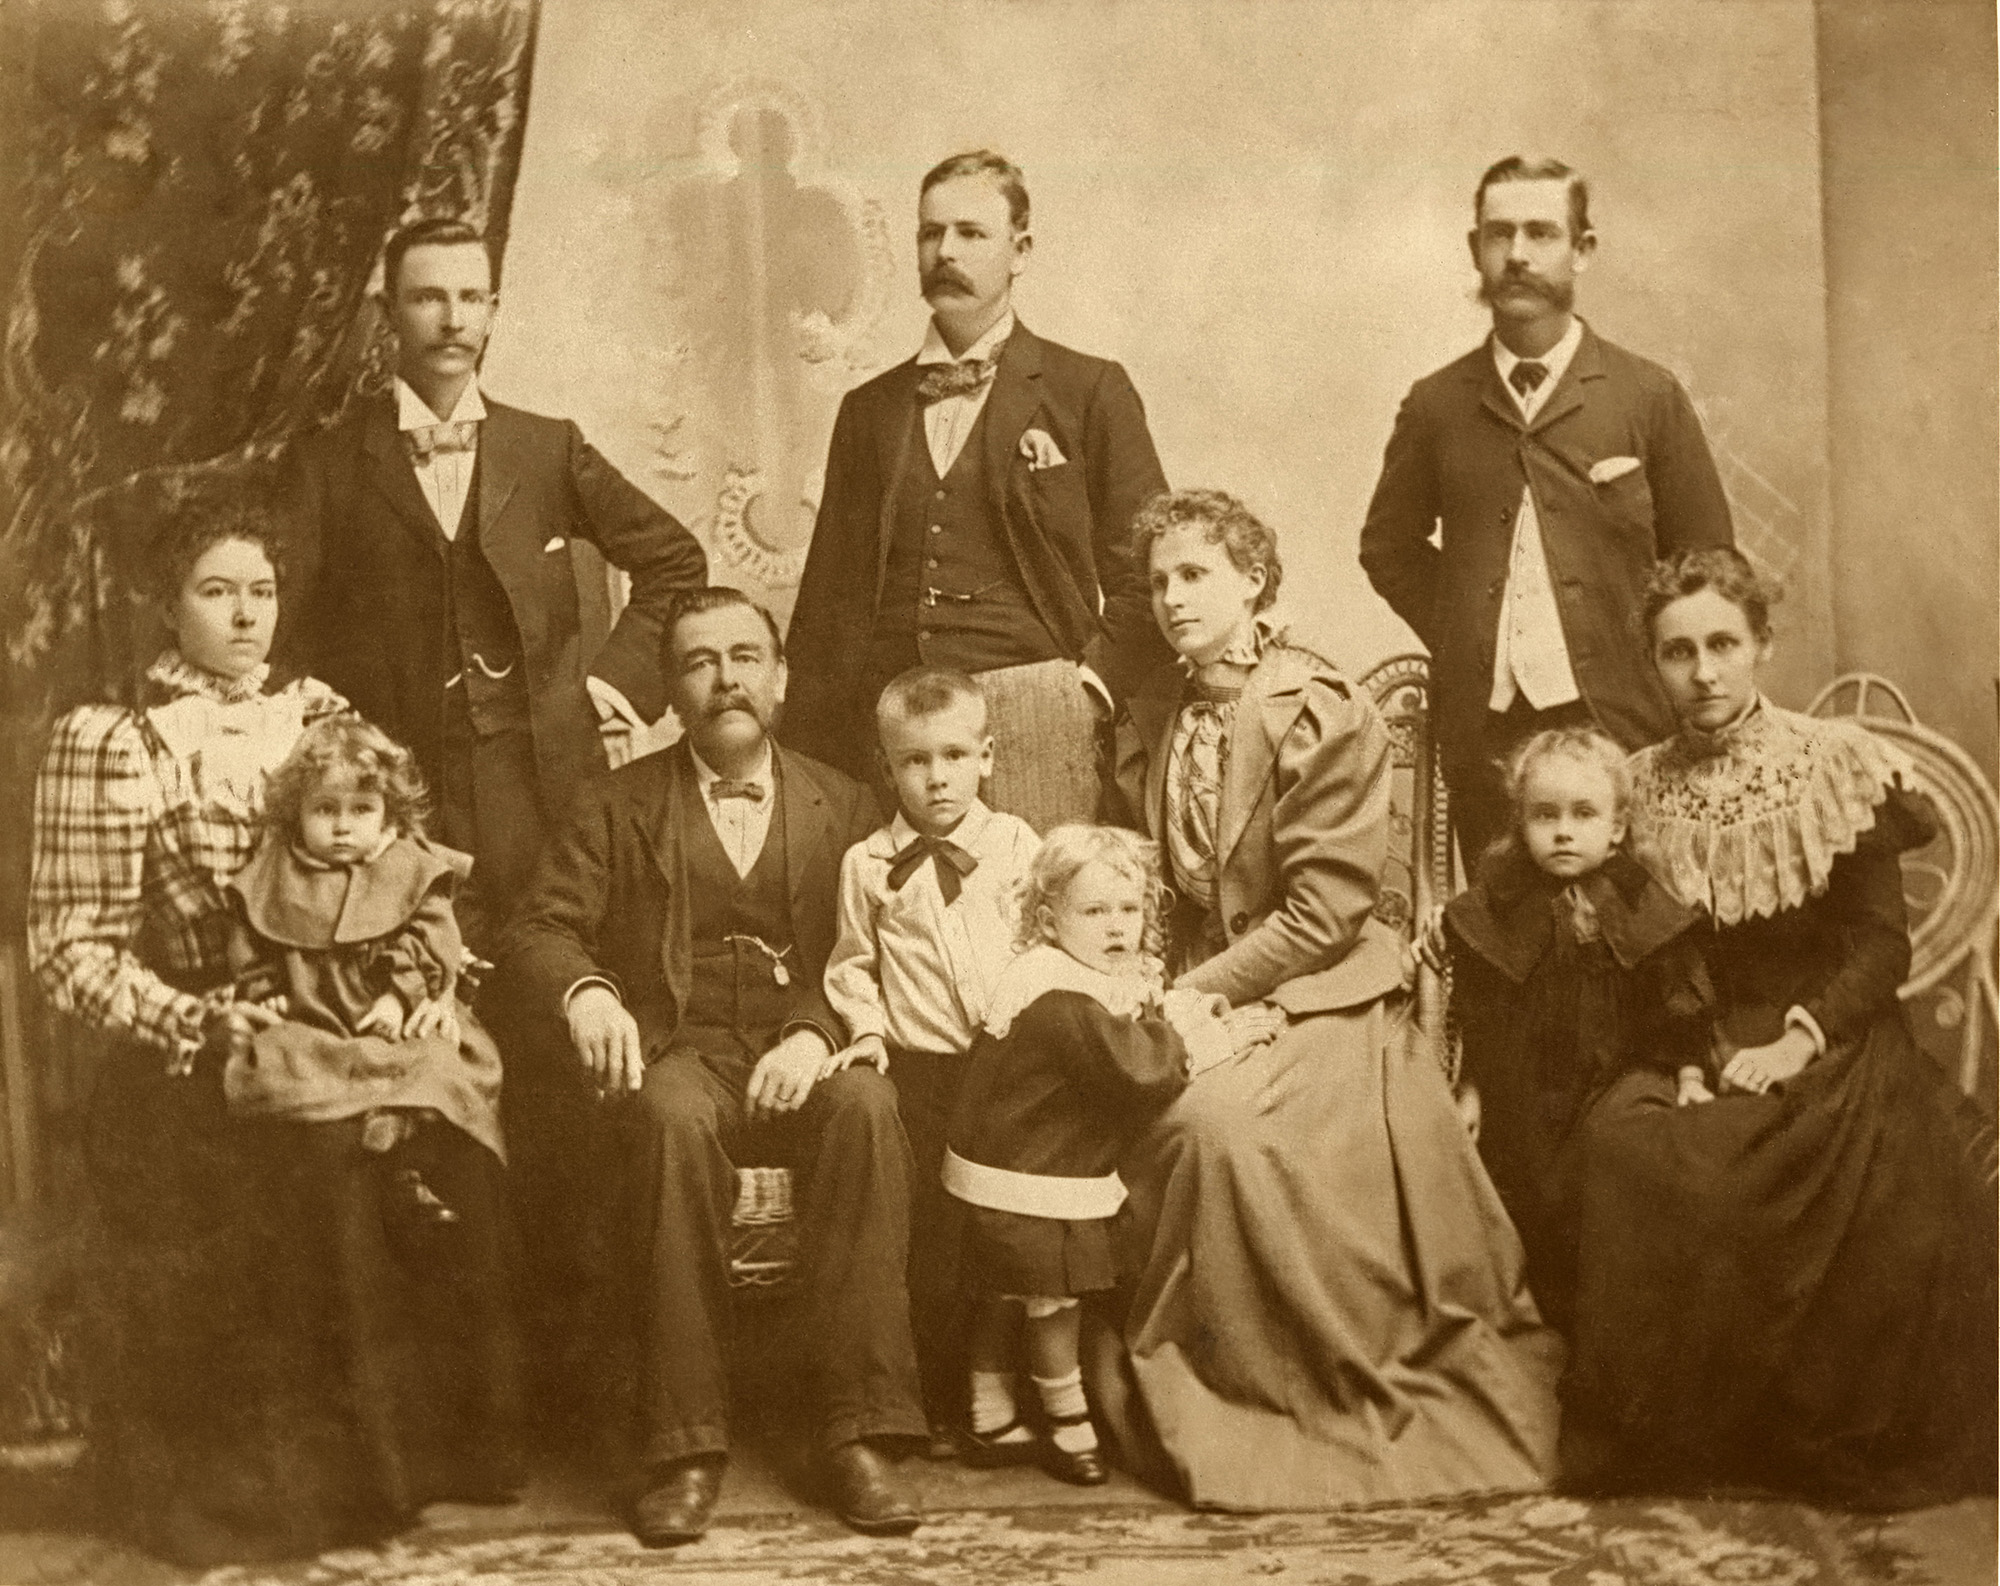
Early photographers, working with extremely low ISO glass negatives, used long exposures, of a few seconds up to minutes. This meant that those who were having portraits done had to sit still for a long time, and since a smile cannot be held for more than a second or two, all these 18th century photographs show subjects with very serious expressions, as may be seen in this 1899 family photograph. Unusually, the positive image shown here was also printed on glass.
This changed with the immensely popular Kodak 'Brownie' series of cameras and roll films, which brought photography to the masses at a reasonable cost, and created domestic photography.
Previous to the emergence of digital cameras, in black and white and colour emulsion film cameras, film typically came in a range from 64 ISO (formerly designated 64 ASA, as in Kodak slide film from 1962 onwards) to 100 ISO for ordinary purposes in black and white film. This low value of ISO meant that photographs could only be taken in well lit situations, typically outdoors. To take shots indoors or at night, flash or other lighting had to be used.


'Faster' film was reserved for special purposes, and was often anywhere from 200 to 400 ISO, such as Kodak Tri-X. To achieve this, the grains of the emulsion were (typically) made larger, which meant that although shots could be successfully taken in smoky dark nightclubs and jazz venues, the resulting photograph was inevitably 'grainy', and usually high contrast as well.
'Pushing' the film with longer development times could boost this ISO rating considerably, to 800 or even 3200 and above, at the cost of grainier photos. Many photographers made a virtue of this necessity, and produced some excellent work, taking advantage of the grain to produce fine art.
The Tri-X look: Photographed by the author in 1976, this photo was shot on Tri-X during a street photography workshop with Garry Winogrand.
Photo and text in italics: © Mason Resnick, http://www.thephoblographer.com/2017/02/22/street-photography-kodak-tri-x-film-62-years-going-grain/
And then there was digital.......
When digital cameras were released, the opportunity existed to have extremely high ISO ratings, of 1000 ISO to 16000 ISO and above. Unfortunately, a price has to be paid for this as well, at least at the present.
'Noise' in the context of colour images, is the occurrence of randomly coloured spots on the image which bear no relation to the reality which was meant to be recorded. They are usually more obvious in darker parts of the image. The equivalent for audio is the scratchiness heard on an old vinyl recording from the 1920s, or the buzzing of a poorly adjusted or cheap microphone/amplifier setup.
The problem is that light is not infinitely divisible. It can be thought of as minute individual particles called photons, which impinge on a computer chip, which then converts them to red, blue and green values for each pixel, the pixels or dots making up the image. If each receptor on the chip is thought of as a bucket, there will be a finite number of photons for each bucket. More photons, less 'noise', less photons, more 'noise'. Noise is bad. In modern digital cameras, it shows up as a washing out of detail, of which more later.
Larger chips allow for more pixels (good) and more photons per pixel (good), but they are difficult to fit into the camera so that the lens focuses correctly on all portions of the chip, and, more importantly, a large chip is difficult to use with an 'optical zoom', that is the ability to zoom in on an object without loss of clarity.
Digital zoom simply increases the size of the original image, without increasing clarity or useful pixels. The original pixels are simply repeated, and an algorithm is applied which smooths out the resulting pixellation. In my opinion this is not worth having if you have image software which can achieve the same or a better result later, such as Photoshop.
A small chip can have a very large optical zoom (good) fitted to the camera, up to 100x at the moment, but it will suffer in terms of either fewer pixels (fewer is bad) or graininess (lots of grain is bad) or both. Typically both.

When digital cameras first became popular, this graininess was apparent under low light conditions, when the ISO is automatically bumped up by the programming in the camera.
This was the case in 2007/8 when I had a Canon PowerShot SX110. The sensor is small, of the 1/2.3" type, (~ 28.5 mm2). This photograph illustrates this graininess, if you click on the thumbnail to see the original, or click on the cropped full size image on the right.
Photo: Don Hitchcock 2008, ISO 800, 1/50 second
Source: Original on display at Le Musée National de Préhistoire, Les Eyzies-de-Tayac
However by 2014 this graininess largely disappeared, and was replaced, unfortunately, by what I call the 'smearing' effect, as shown in the photo on the left, and further up this page for the iPhone and the Canon PowerShot G15.
When the ISO was 100 ISO or below, there was still marginal graininess in the out of focus background, easily fixed by using a Photoshop filter, but there is no way to recreate detail which is not there, which is what happens when the camera pushes the ISO above 800 ISO on a camera with a small sensor, and especially if aggressive noise reduction is used in-camera.
It is most noticeable in 'flat' or 'featureless' parts of the image. Parts of the image with a lot of texture are, to some extent, immune from the worst excesses of this smearing feature.
What seems to be happening is that the computer chip in your camera is trying to get rid of the pixellation, or noise, and where there is good texture, this succeeds to some extent, but it does not succeed at all when the area lacks definition, when, for example, it is a flat, featureless surface such as a smooth part of a sculpture or wall.
I suspect that, although this will always be a problem, improvements in the detector chips that accept light from the lens will cut down on the noise, and thus the loss of definition.
With the Sony Cyber-shot RX100 II, graininess even at 800 ISO has largely disappeared.
Photo: Don Hitchcock 2015, Canon PowerShot G15, ISO 800, Twelfth Dynasty: 1 991 BC - 1 802 BC, Praying statue of Tetu
Source: Original, Staatliche Museen zu Berlin, Neues Museum, Germany
Text: © Card at the Staatliche Museen zu Berlin, (CC BY-NC-SA 3.0 DE)
Check what the automatic setting does on your camera
The Sony Cyber-shot RX100 II does an excellent job in museums. I now find that it is rare that I can do a better job by adjusting ISO and EV values than the camera does on the automatic setting. In low light conditions, which is the case in most museums, the camera sets the shutter speed to about 1/30 second, and the ISO value to the lowest value consistent with that speed.
However I cannot have both automatic and my own EV values at the same time, so for specific shots, with some experimentation, I can do slightly better than the automatic setting. It is usually not worth the time involved.
It should be realised that older cameras often do not have the sophisticated software that the Sony does. You will have to experiment with your camera.
In practice, it is difficult, usually impossible, to satisfy all of the above requirements when taking photographs in museums. A compromise is needed for sharp photos.
The ideal of F8 for aperture is always the first to be abandoned. The small improvement in the image obtained by using F8 for the aperture is completely swamped by the effects of the other restrictions, except in perfect conditions.
The easiest way to get reasonable sharpness is to manipulate the ISO which your camera uses.
If you have a camera equivalent in Artificial Intelligence (Automatic Mode) to the Sony RX100 II, the following is probably of academic interest only.
It is usually, though not always, better than my estimate of what will give the best and sharpest image, even after manipulation in PhotoShop. In contrast to earlier cameras, it uses the slowest shutter speed that can be compensated for by its excellent camera shake technology, which means that it uses the lowest ISO.
The only time I can get a better image is by resting my lens assembly against the glass of the display cabinet, which allows me to use ISO 80 and an EV value of, say, -2/3, which sometimes allows me to get a sharper image than, say, the ISO 400 which the camera has determined - unless the choice of 80 ISO means that the shutter speed slows to a value significantly slower than 1/30 second, in which case the quality is degraded.
But for hand held images, the automatic mode has no equal. I suspect that it takes multiple photographs as well as the normal 'image stabilisation' magic tricks to achieve this result. Often there are multiple clicks, followed by a message 'processing image' on low level light photographs.
The use of flash

Many museums do not allow flash photography, but some such as the British Museum in London do. May their tribe increase.
Some do not allow photography at all. May they rot. This is a very short sighted attitude, and reflects the attitudes of a former time. I turn around and walk out when that is explained to me by the attendant. Life is too short to bother with such foolishness. Normally they are the poorest museums, the two things go together.
Where photography is allowed, the museum will get more visitors than where it is not - there is a little museum at a famous French site which does not allow photography, and no one knows it is there, and I for one will not give the museum publicity.
They get few visitors, because no one knows of it. No one knows of it because there are no photos on the web. There are a few good pieces there, but they are poorly displayed, since there is no money for good displays, because they get few visitors, because they don’t allow photography, because no one knows it is there, and round and round the descending spiral goes.
In marked contrast, the British Museum gets seven million visitors a year, due in part to their photography policy. And, it must be said, their free entry, central location, and superb and extensive exhibits!
Photo by DAVID ILIFF. License: CC-BY-SA 3.0
Source: The British Museum, London
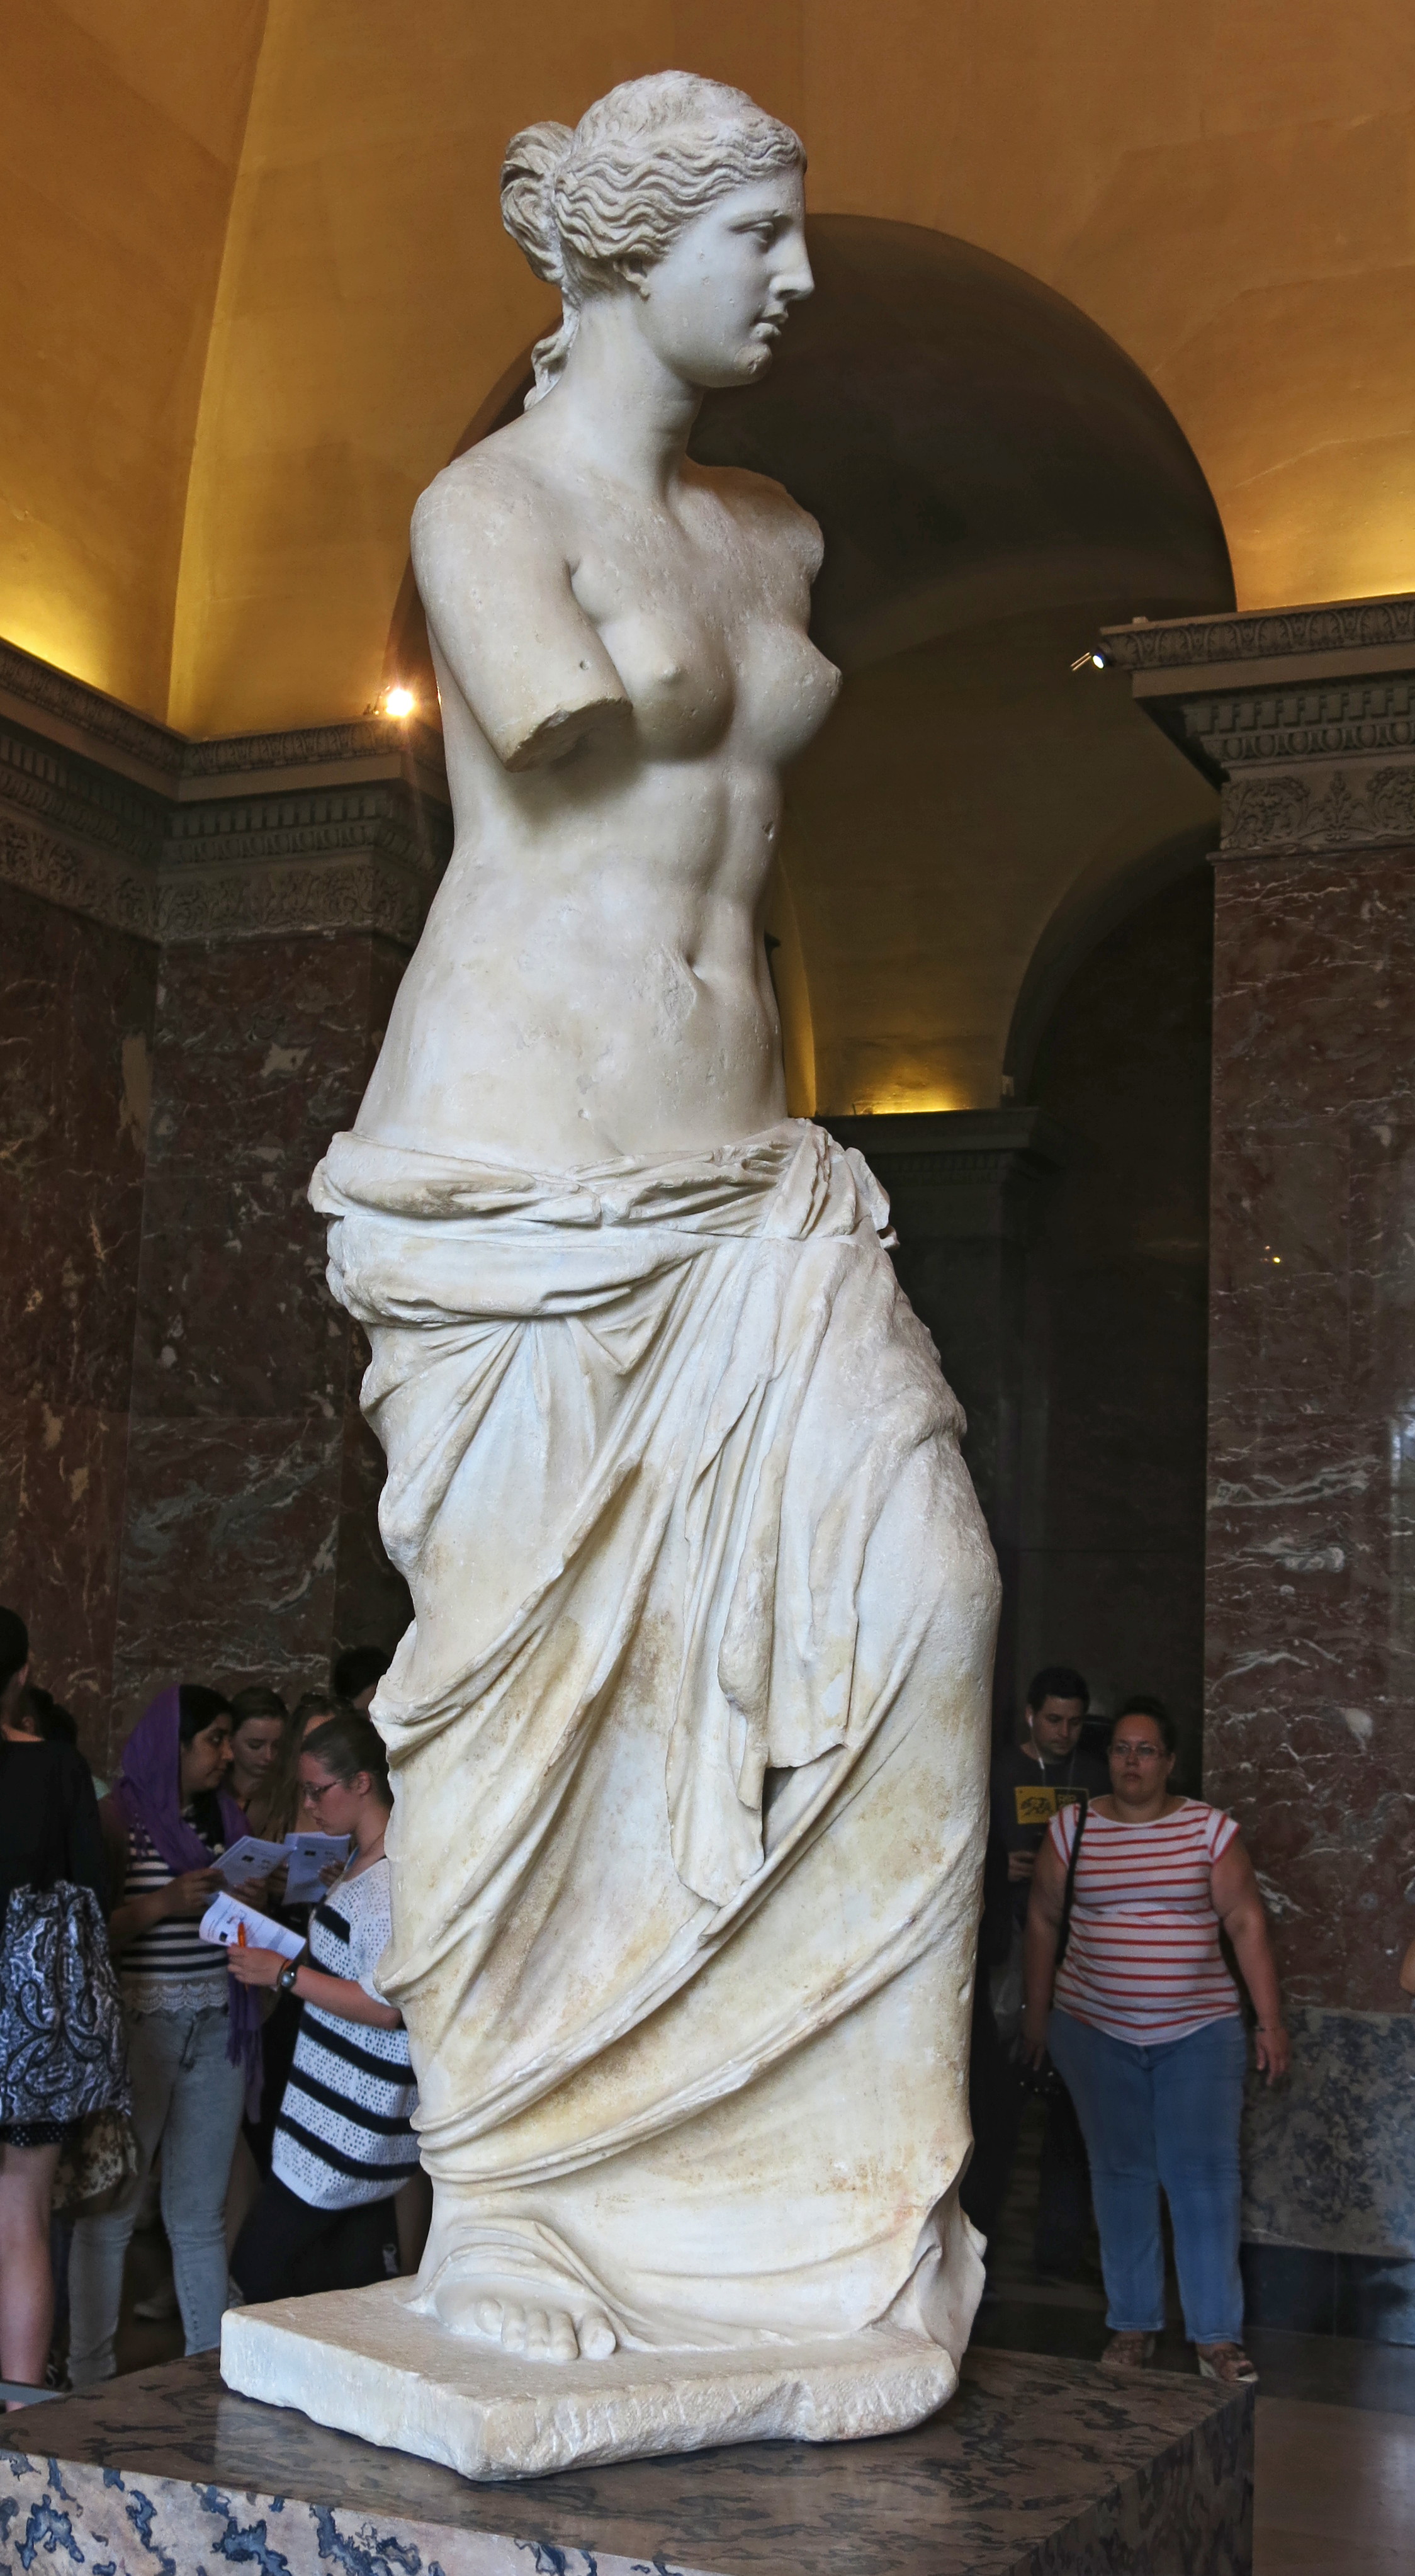
Photos on the web bring visitors - rooms such as those holding the Rosetta Stone at the British Museum, or that holding the Venus de Milo at the Louvre, are always jam packed with visitors taking photos (mostly selfies!)
The allowing of flash at the British Museum is icing on the cake. While the Louvre officially bans flash, this stricture is routinely ignored by visitors.
Flash allows you to take worthwhile photographs under difficult conditions. Museums are the definitive place where difficult conditions apply.
However, as shown here, if there is enough available light, photographs of three dimensional objects are usually better if taken with no flash.
Flash removes the 'modelling' that you get with available light.
Every room will have a different level of light, usually carefully organised by the curators who are charged with the objects under their care. Constant high light levels will damage fragile exhibits such as organic materials including paints and textiles, and this applies to flash photography as well. The last thing we need is the degradation of important objects from this cause, or the alternative, their locking away in a dark drawer somewhere.
Objects such as massive granite statues of pharaohs are essentially unaffected by light, and are often in courtyards in sunlight, or in rooms with lots of overhead glass. In cases such as this you are usually better off without flash anyhow - flash integral with the camera tends to wash out all contours and modelling of the object. In this case set your camera to its lowest ISO setting, typically 80 - 125 ISO. So long as the camera then takes a photo at a speed unlikely to be affected by minor camera shake, you will get good photos.
Artist: Alexandros of Antioch
Photo: Don Hitchcock 2015
Details: ISO 80, 1/50 sec, EV -1, F2.5, no flash, Canon PowerShot G15, 1/1.7" sensor
Source: Le Louvre, Paris, France

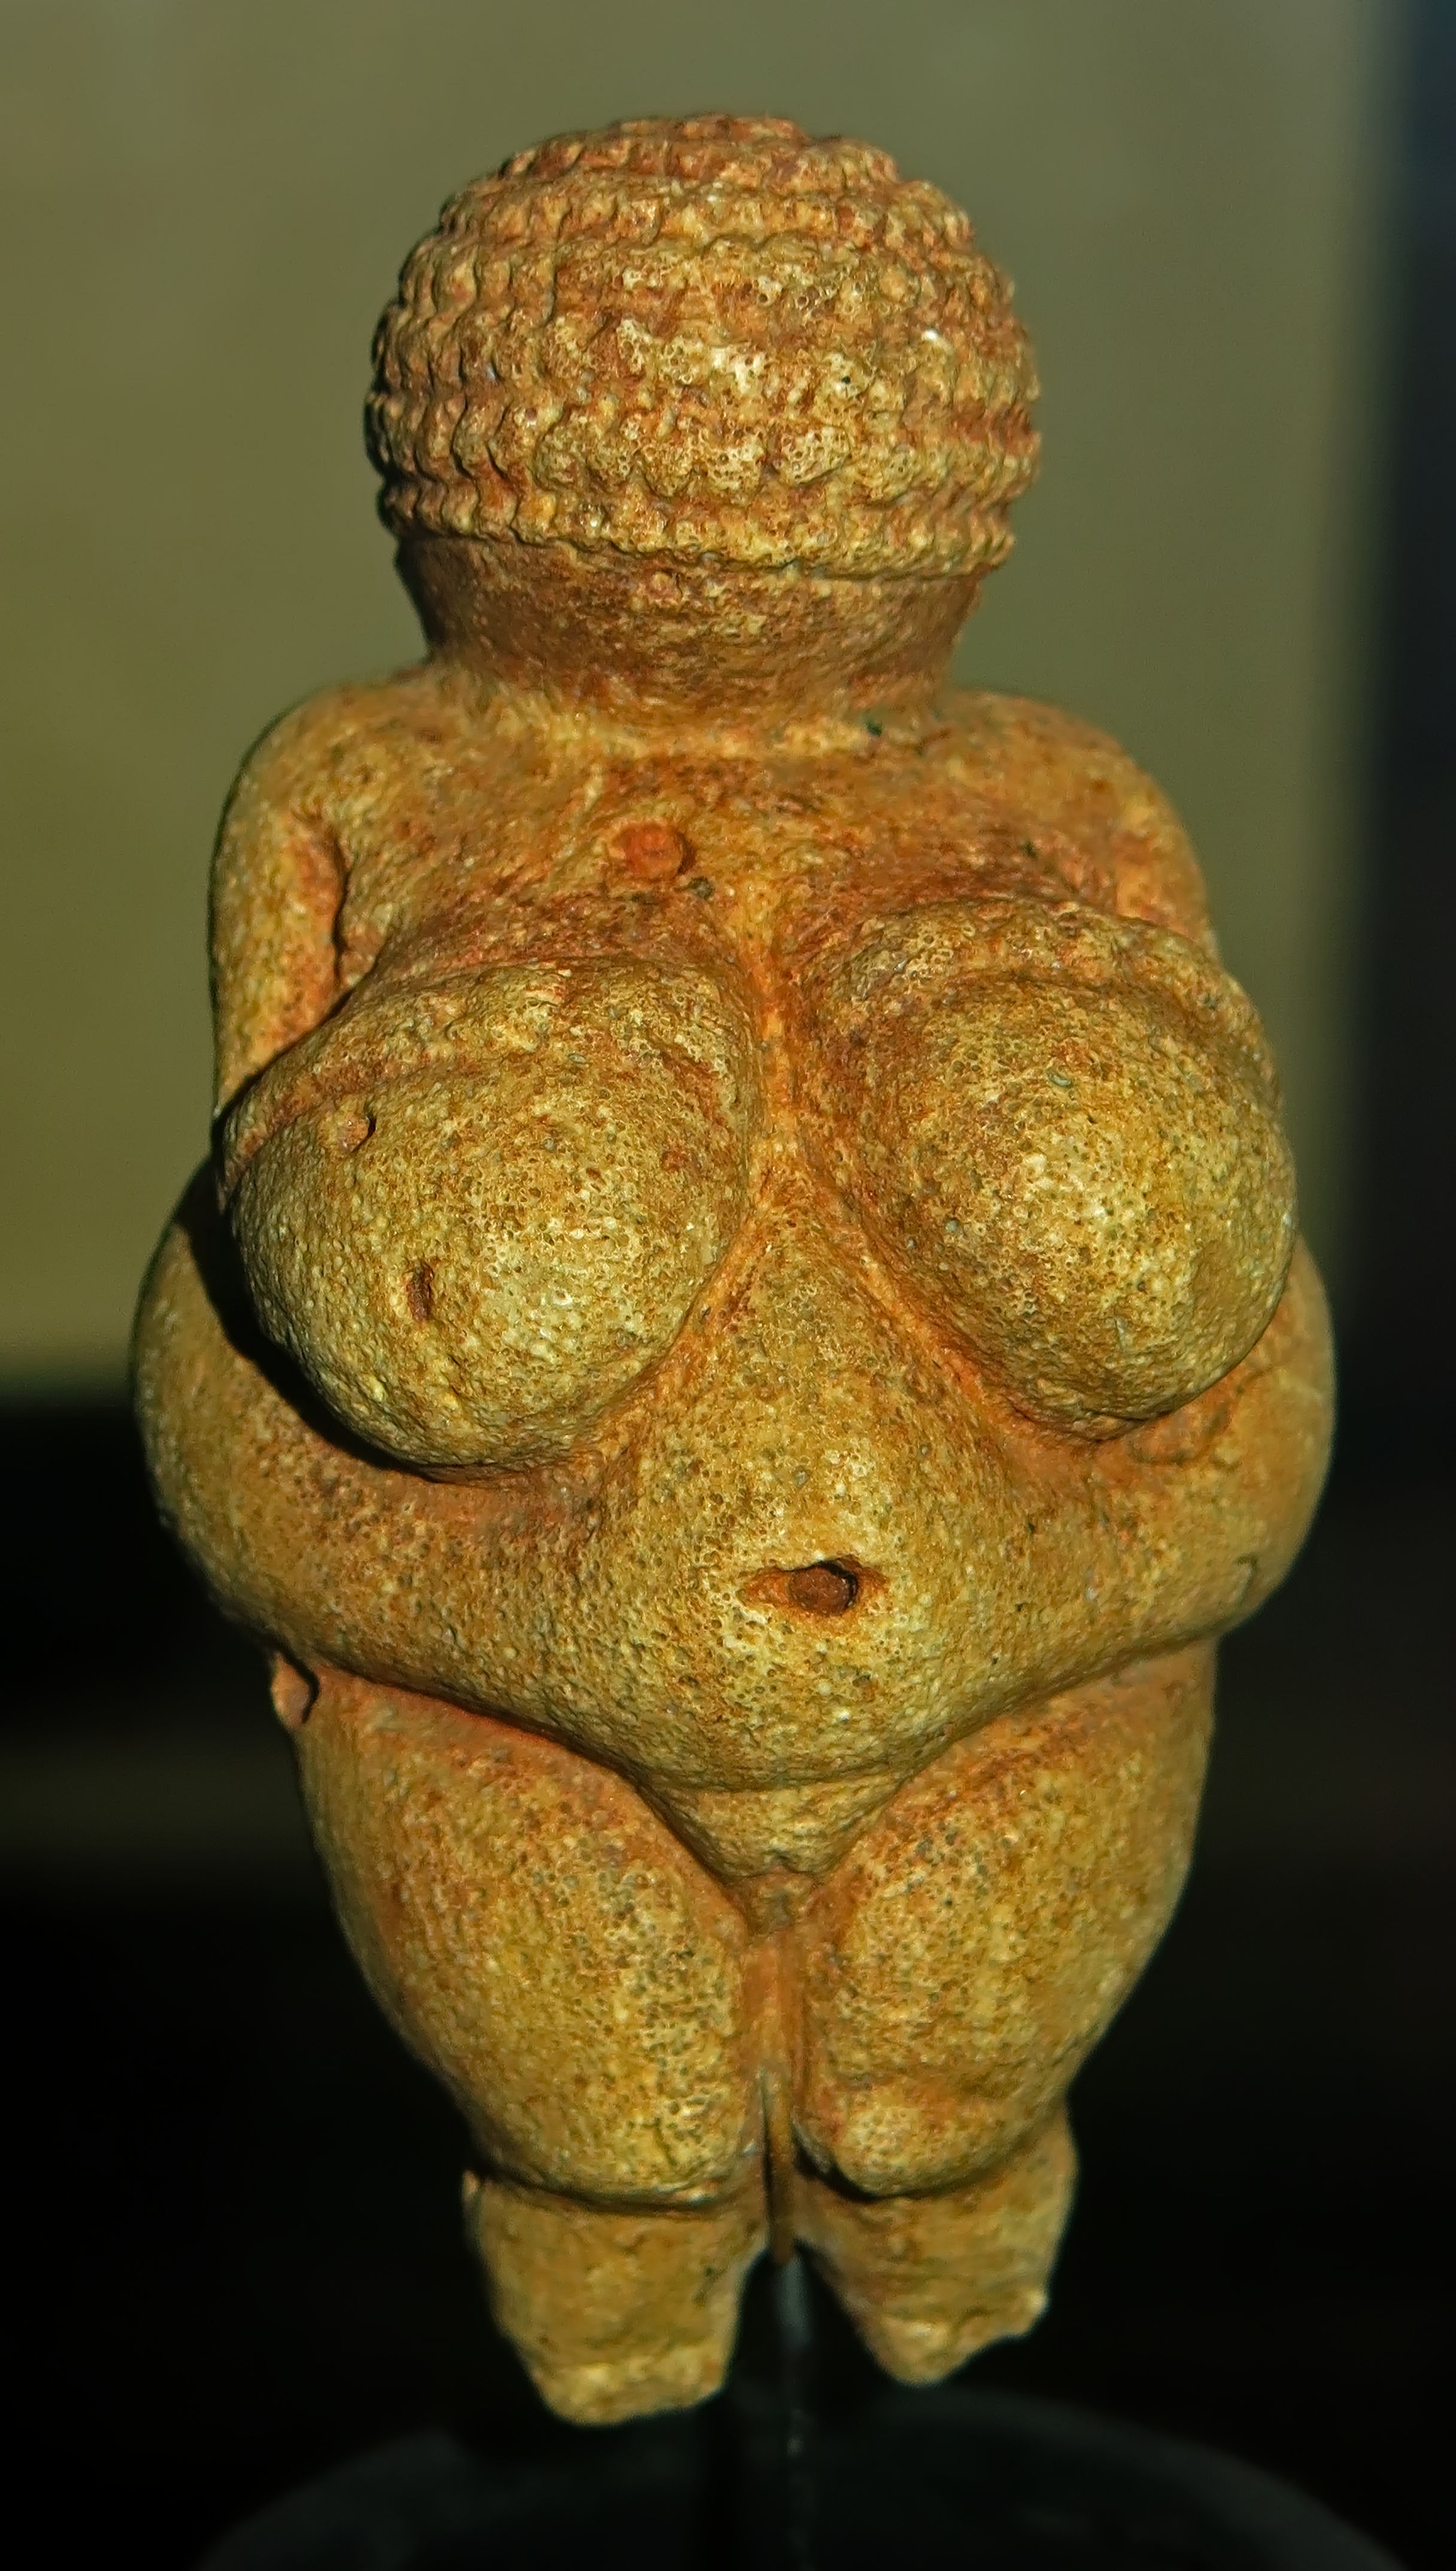
2008: Canon PowerShot SX10 (left): ISO 80, 1/60 sec, EV -1/3, Flash Compensation -1, F 3.5, 8MP, Sensor 1/2.3", sensor area 28 mm2
2015: Canon PowerShot G15 (right): ISO 200, 1/125 sec, EV -3, Flash Compensation -2, F2, 9MP, sensor 1/1.7", sensor area 41.51 mm2
Note that despite the very similar values for the image, the more modern camera has a sharper image.
This improvement is most likely due to better software and a larger sensor as well as a better lens.
Note, however, that the F3.5 setting which the older camera happened to use rather than the F2 of the modern camera, gave a slightly better depth of field, even if the image itself was 'softer' in focus.
Photo: Don Hitchcock, 2008, 2015
Source: Original in the Vienna Natural History Museum
Where flash is permitted, it has advantages and disadvantages.
The disadvantages are that the object tends to be 'flattened' with an integral flash, that is, one which is part of the camera. Objects lose modelling and contours very easily when flash is used.
In addition, the flash often shows up as a bright spot on the image from reflections from either the object itself or from the glass of the display case, as shown in the image at the left. Although taken from one side, the flash shows its ugly presence on the image.
You certainly cannot stand square on to a glass display case when using flash, there will always be strong reflections from the glass unless you are very close indeed to the glass of the display case.
This means taking the photo at an angle. This is not necessarily a disadvantage with a three dimensional object, but it is definitely a disadvantage with a flat rectangular object. I often have to use photoshop afterwards to reinstate the proportions of, for example, a photo or a map so that it looks rectangular again, and it is not always easy to decide on the exact dimensions of the rectangle. Circles are a godsend in this instance.
Catalog: EA55489, Photo: Don Hitchcock 2015, Serpentine shabti of King Taharqo, Source: Original and text: British Museum
Another huge help with restoration of the correct proportions are photos from online museum catalogs, which typically are taken from the front, without glass in between the photographer and the object, and from a distance away so that proportions are correct. Create another layer in photoshop, reduce the opacity of one or the other layers, and make your photo fit the proportions of the standard photo. Alternatively, measure the proportions from a textbook photo for example, and tell photoshop to have that ratio for your photo. If all else fails, use your judgement. Have the figures of people or animals look natural, if there is text, have it look reasonable, if there is a circle on the image, make it circular, and so on.
Get as close as possible to the glass, and reflections will be minimised. The ideal is to rest the lens assembly on the glass itself where this is permitted or condoned or ignored.
Remember that there is flash correction available in your settings menu. For objects which appear washed out with flash, reduce the flash setting to the minimum, typically -2 (F stops).
This often occurs when photographing objects close to the lens. As the object gets further to the back of the display case, or worse, higher up and further back, increase the setting by stages to -1, 0, +1 and +2 so that the object is sufficiently illuminated for a good photo.
Another advantage of flash is that you can usually use the lowest ISO rating, which gives a better quality image, and there is no possibility of camera shake.
Those museums which do not allow you to use flash make photography in low light conditions completely impossible in some cases. Usually this is because of poor design of the museum and its lighting. It happens.
Other techniques to improve your museum photographs
To avoid camera shake, speeds of 1/125 or better will mean that, so long as you hold the camera as still as possible, you will get a good photo. If your camera has image stabilisation, you can often get excellent photos at 1/30 of a second.
Really stabilising the camera such as putting it on a tripod (often not allowed in museums except by prior arrangement, sometimes out of normal opening hours, it impedes free flow of visitors to crowded museums, which is fair enough) or resting yourself or part of the camera case against something solid such as a wall will allow you to take photographs at even slower speeds.
Some museums turn a blind eye (or they don’t care!) to people who put the front of the lens assembly onto the glass. May they get many huge bequests of multiple millions of dollars.
The front of your lens assembly is typically of high quality plastic or of steel, both of which are softer than glass and will not scratch it. Even very hard steel is softer than glass. When lens assemblies are coated with diamond dust, then we will have problems.
In fact, vanishingly few people actually use this technique, so any objections are quite academic, the vast majority of visitors are there purely to take selfies in front of Egyptian mummies, Easter Island statues, the Mona Lisa, and the Venus de Milo.
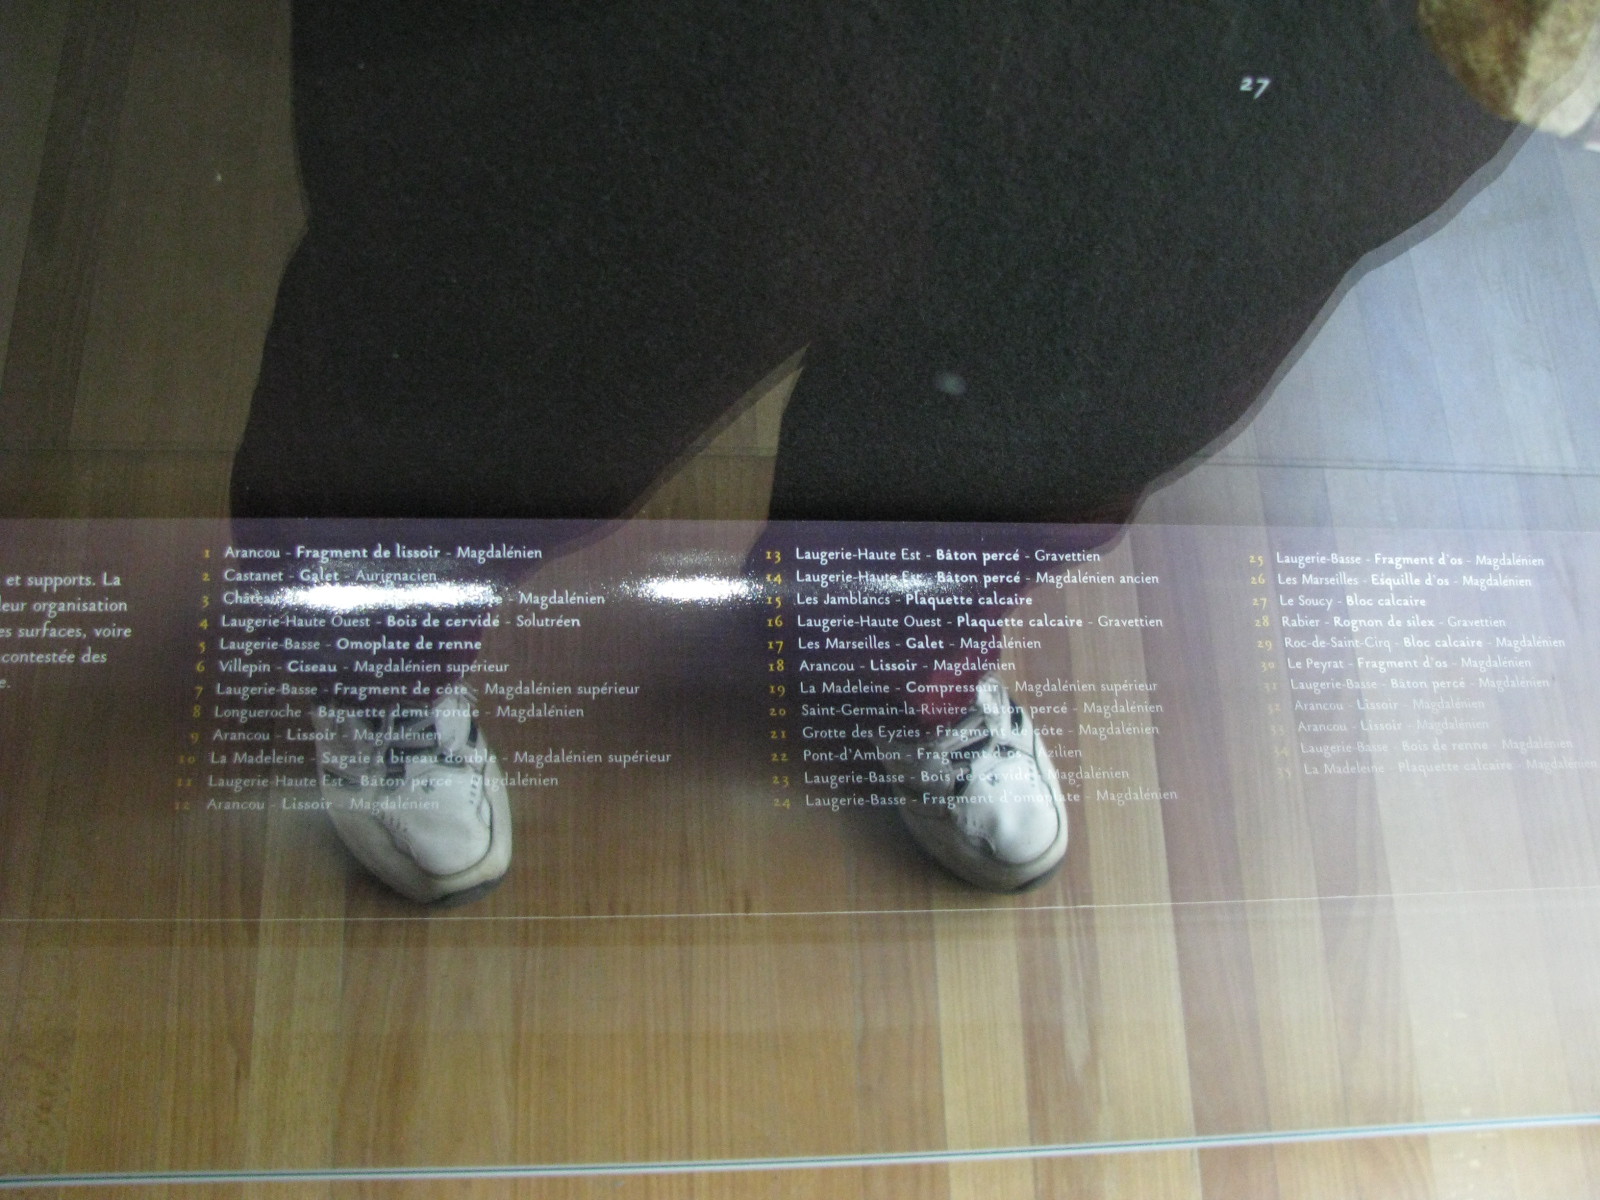
This photograph has the trifecta!
Reflections in the glass of the surroundings, reflections of overhead lighting on the glossy (!) museum card, and the dreaded white shoe image.
If you look carefully at the reflections of my (thankfully) dark trousers, you can even see a double reflection - the primary one from the front of the glass, and a secondary reflection from the back of the glass!
Reflections of light sources in the museum (typically lights and windows) can force you to walk this way and that, holding the camera high, low, and tilted. Often a good photo can be obtained under these conditions by choosing another side of the island display, typically an end which faces a blank wall, or even behind the island display case if you can squeeze in. There will be few reflections if there is just a blank wall behind you.
Another technique is to go to the other side of the room, and zoom in on the display you are after. This works so well so often that there must be more than chance to it, there must be a good reason involved.
Photo: Don Hitchcock, 2008, Source: Le Musée National de Préhistoire, Les Eyzies-de-Tayac
Brightly lit, large signs in a position guaranteed to be reflected in the glass are an invention of the devil. As are people wearing very white or loudly coloured clothing.
There is a huge advantage in being able to rest the front of your lens assembly flat on the glass. It instantly removes reflections from passing visitors, and from the flash from your camera if it is allowed. You will still get reflections from the other side of the glass case if it is an island display, but at least one source of reflections is removed. Often these reflections from the other side can be avoided by moving so that the object being photographed itself obscures the reflection. Otherwise, take the photo at an angle.
Often you will not be able to rest the front of the lens assembly flat on the glass in any case, because the object is high up on the back of the display, and even stretching up on tippy toe with the camera at the full stretch of your arms is not enough to get the object in frame, or it is only visible between two other objects at a particular angle. In this case resting part of the lens assembly on the glass, or at least close to it, will help with reflections, but will usually not eliminate them completely, and you get the dreaded glass flare.
Glass flare occurs because the front of the glass is never completely clean, and has a film of dirt and oils on it, even if the glass is cleaned regularly. Your flash or even the available light is usually sufficient to put a veil of unwanted light in front of the image. Hunching your shoulders, waiting patiently for no visitors to be nearby, getting your body close to the glass to partially remove the reflections can help a lot. I have often wished for a large dracula-like black cape and high stiff collar!
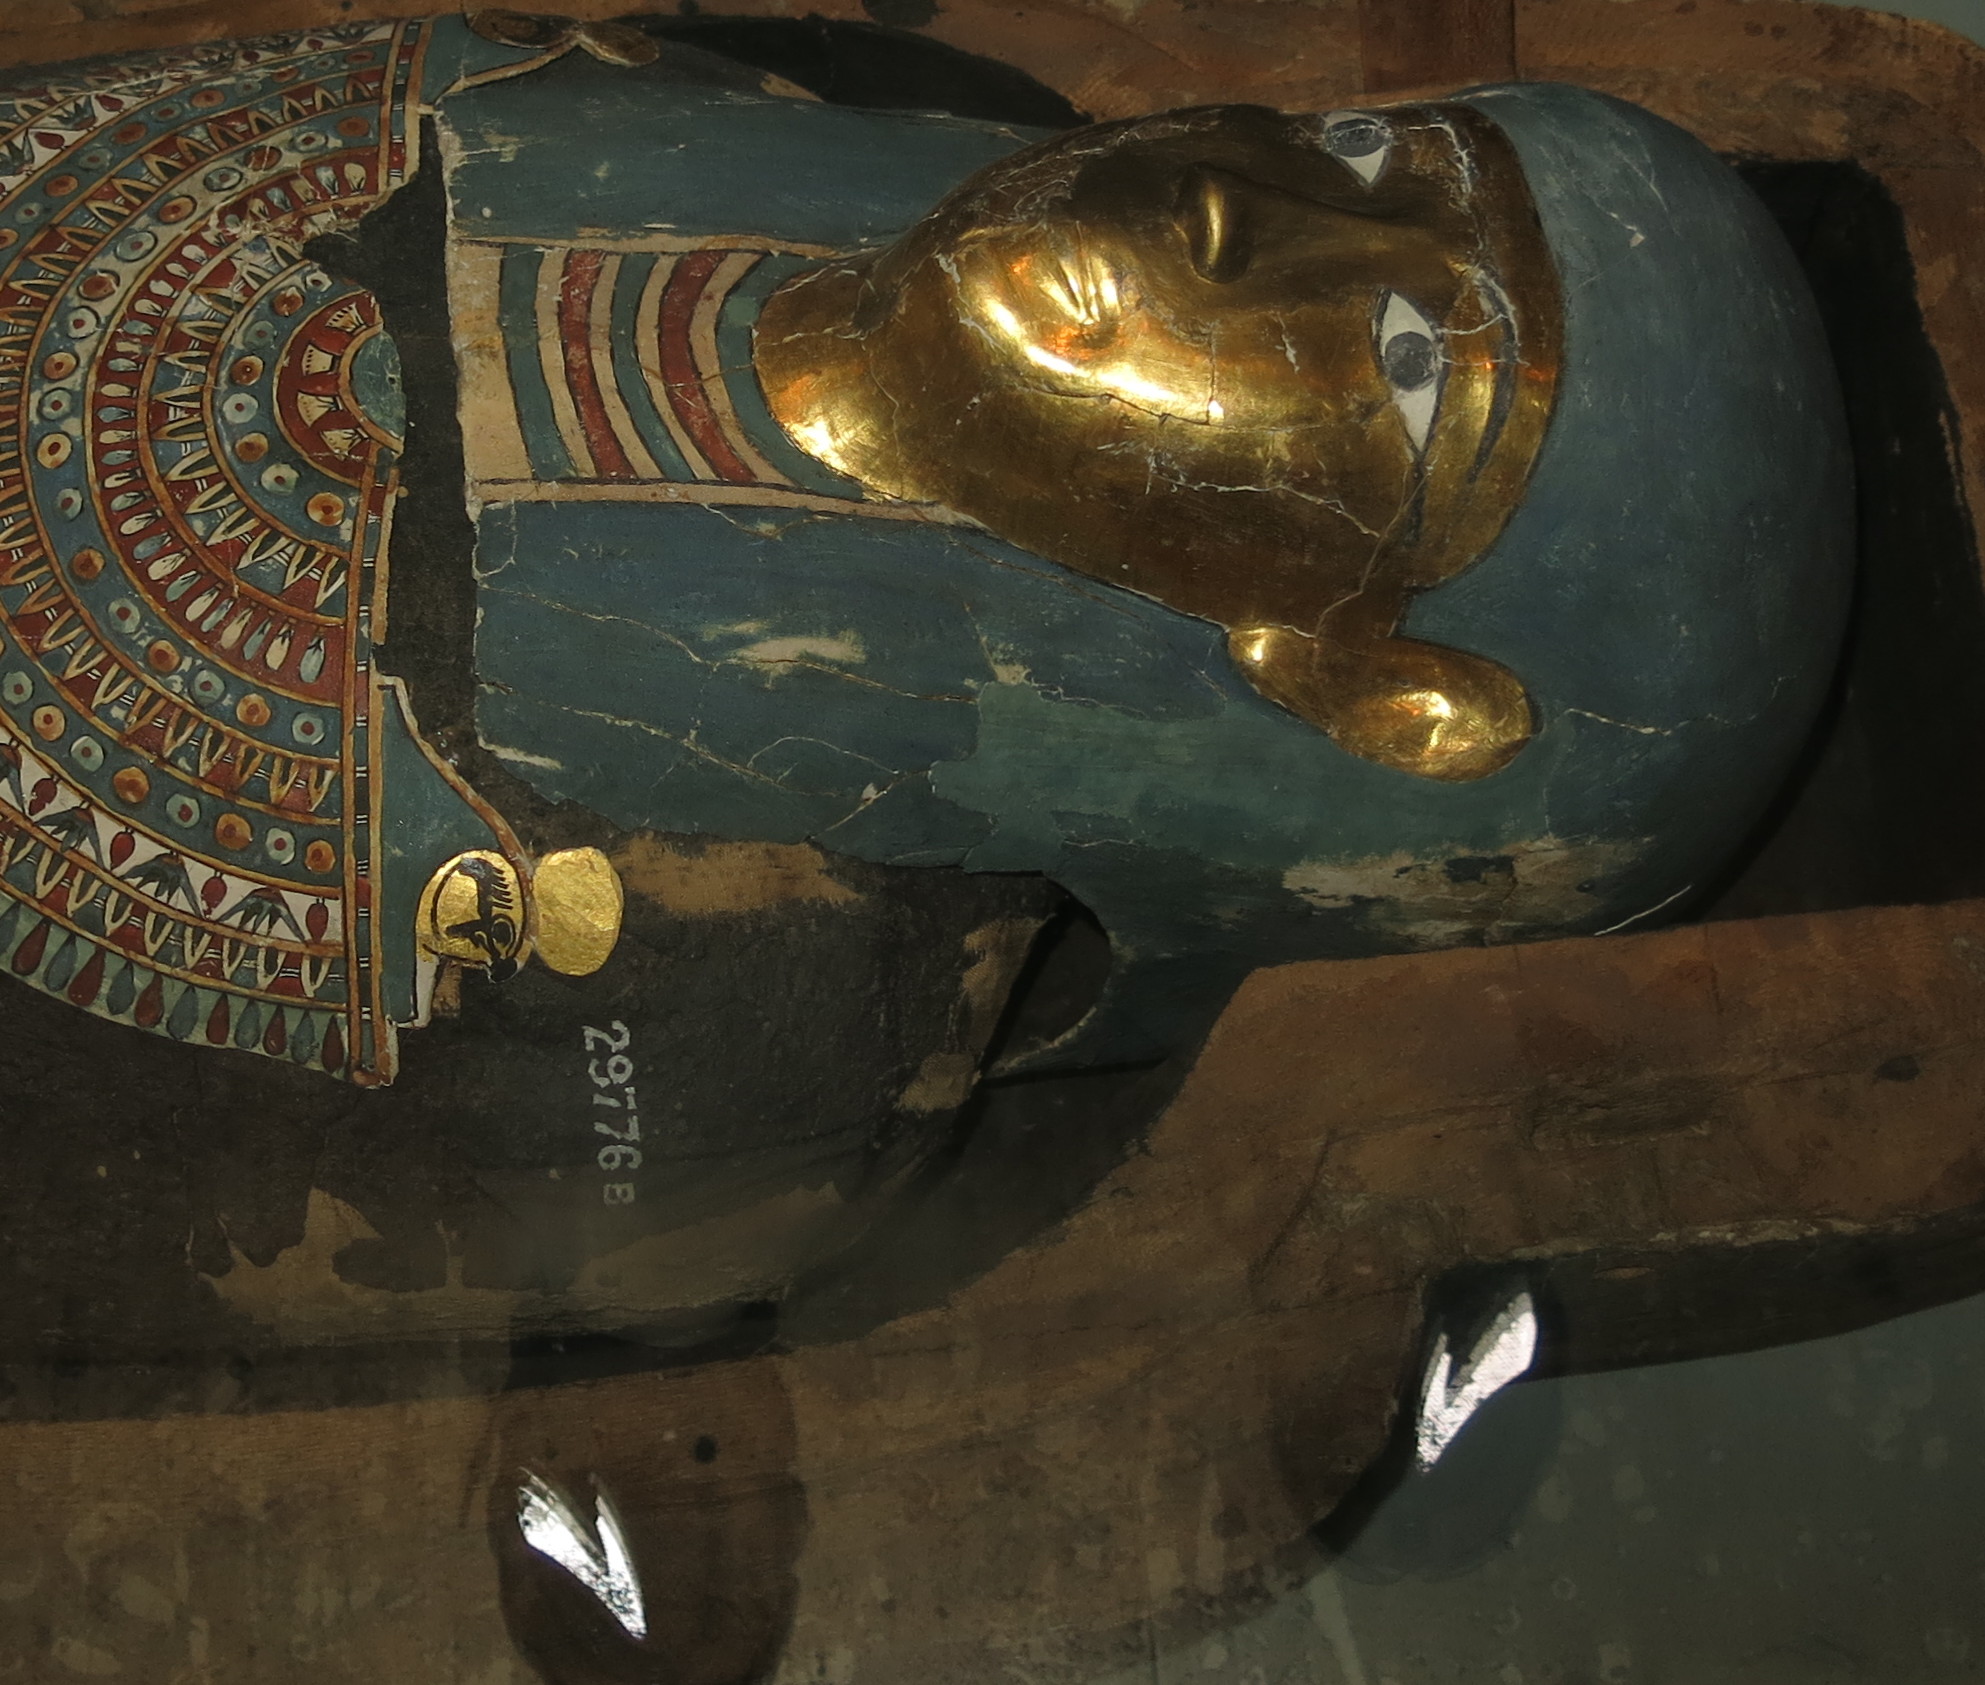
Check your shoes too - if you have joggers on, they often have reflective parts so motorists can see you in the dark when jogging.
These will sooner or later turn up in your photos, as shown here.
I tried spraying my shoes with black paint before I left Australia to visit Europe, but it lasted only a week or so. I ended up putting sticking plaster (elastoplast, for dressing wounds) over the offending swoosh mark. It didn’t look real flash, and you have to replace or at least check it for adhesion at the start of each museum visit, but it worked well.
Most people are only concerned with how they look, not how others such as you look, in my experience.
I then bought some cheap dark brown vinyl artist’s paint in a plastic tube, and smeared that on with a tissue, which worked well and lasted for a long time. Two coats are necessary to completely eliminate flash blow back, but even a single coat is pretty good.
Photo: Don Hitchcock, 2015, Ptolemaic Dynasty: 305 BC - 30 BC, Djedhor, EA29776, Source: British Museum, London
As T.S. Eliot wrote:
I grow old… I grow old…
I shall wear the bottoms of my trousers rolled.
Whatever it takes.
Remember, over 40 and invisible. If you are younger than that - pretend it is fashion, like ripped and dirty jeans, and you are a trend setter. Older than that, who are you trying to impress? Go for it.
Or get some shoes which are matt black, like cheap black fabric shoes from the supermarket. White shoes, and those with reflective appliqués, will certainly turn up unwanted in your photos, I can guarantee that.
Stitching Photos - an important technique
(left) Image consisting of two images stitched together. This can give a much more detailed photograph, and allows you to avoid glass reflections.
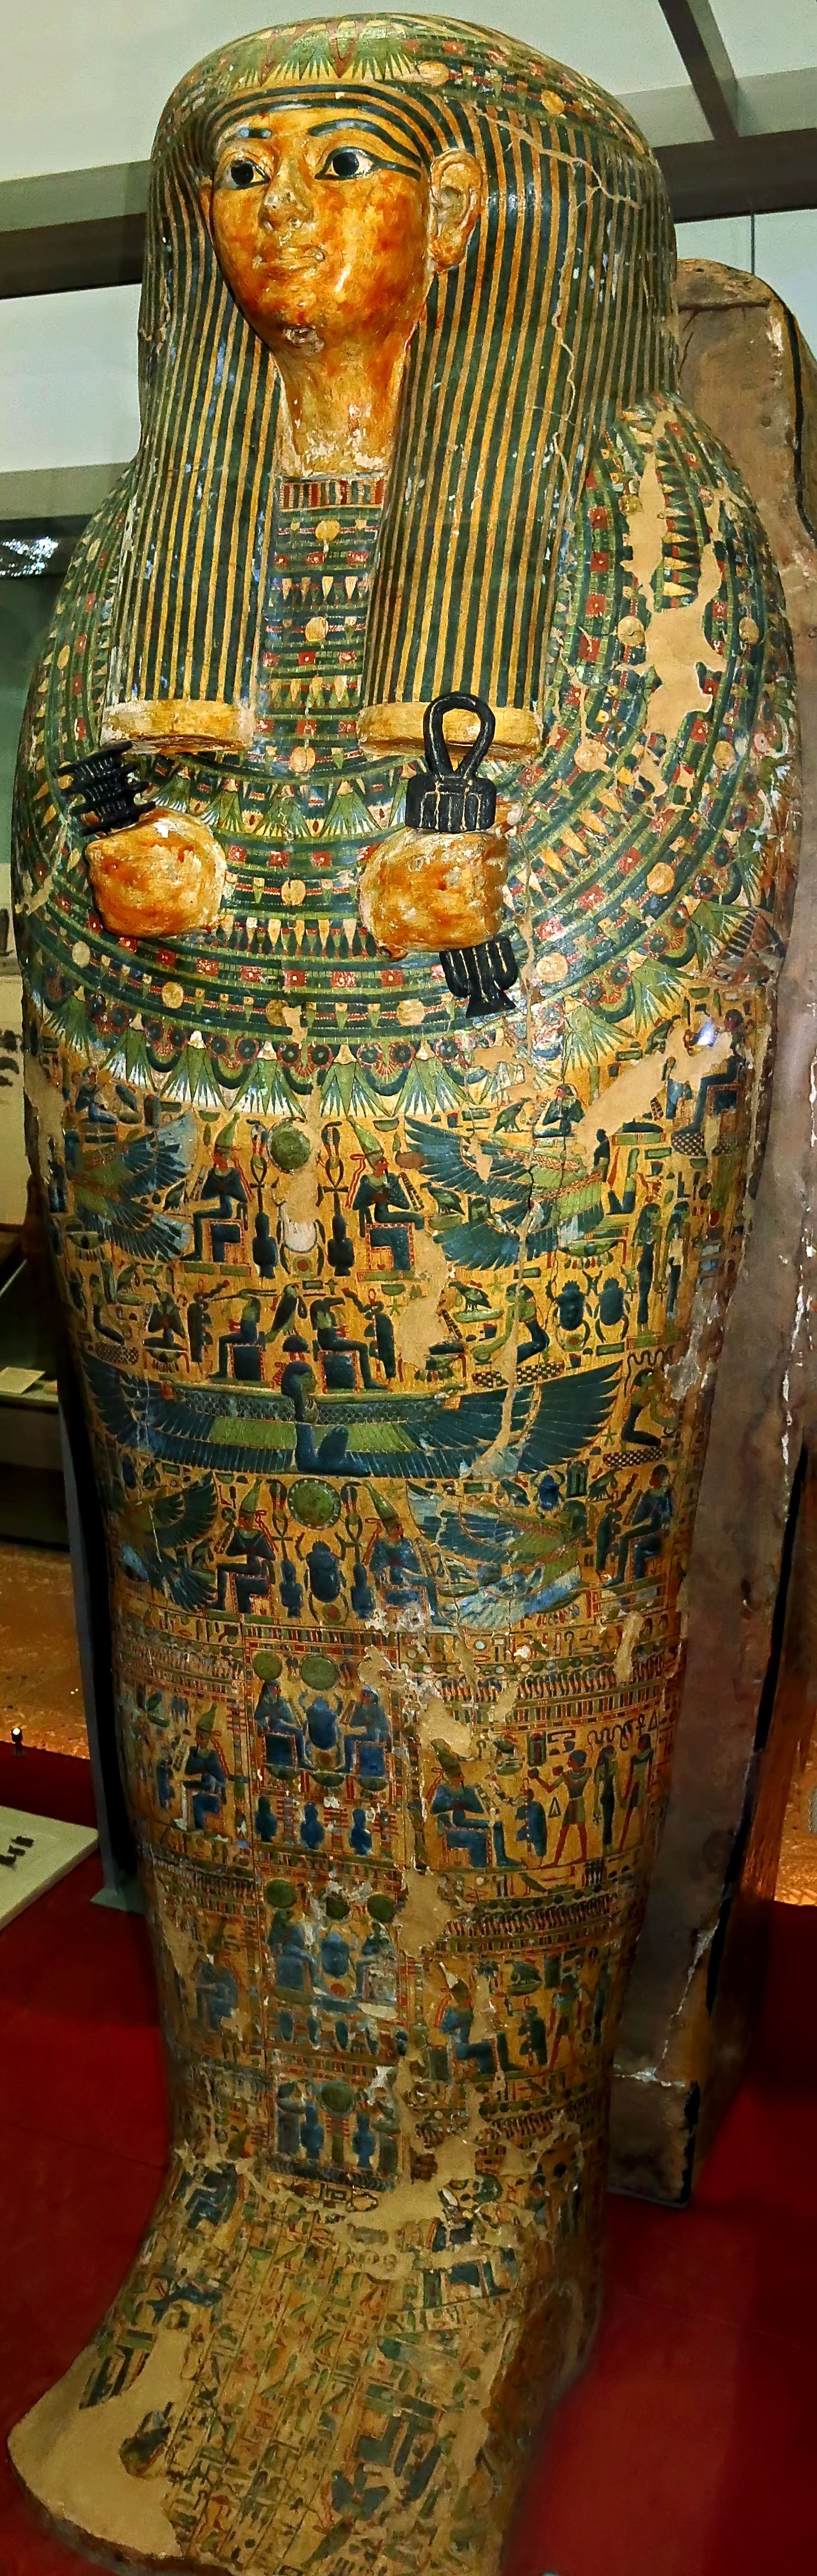
A brilliant technique for large objects too large to fit in the frame, for example a mummy sarcophagus (these can be amongst the most beautiful objects in the museum), where you are allowed to put your lens assembly against the glass, is to take multiple photographs.
Before you start, set the camera aspect ratio to a value which will take in all the width of the object, such as 16:9 or 3:2 or 4:3.
Do a test run, moving the camera up and down the full length of the object to make sure you have centred the camera correctly, without taking any photos.
Then begin, start at the top, make sure the top of the object has clear air above it, on the tips of your toes if necessary, take a photo, slide vertically down the glass, take another photo then another, allowing lots of overlap between the shots. Don’t wander back and forth in a zigzag motion, go vertically down the glass.
At the end you might have a dozen images for a typical Egyptian sarcophagus.
Now download these to a computer, and open them in an application such as photoshop which allows the images to be stitched together. I have a few of these programs, sometimes photoshop is best, sometimes one of the others I have bought is better.
Even if it turns out that for some reason the images cannot be stitched, you will at least have a series of superb quality closeups without any reflections.
Forget stitching a panorama with a mobile phone - more often than not, there are stitching errors which ruin the photo for any serious purpose.
Photo: Don Hitchcock 2015, 21st Dynasty: 1 077 BC - 943 BC, Bakenmut, Source: Original, British Museum
If you are allowed flash as well as resting your camera on the glass, you are home free. The flash on the camera is in a position where the reflection is not visible to the lens, you will have plenty of light, and you can set the ISO to the lowest setting available on your camera, ISO 80 or 100 or whatever.
You will need to constantly change the flash compensation as well, it typically ranges from EV -2 to +2. (these units are in what photographers call F stops, that is, an apparent change from F11 to F8 will translate as a +1 compensation) Mine is usually set to -2 because most objects in museums are close to the camera and are overexposed at anything higher.
However objects at the back of the display case, especially small ones you have to zoom in on, will come out badly underexposed unless you bump up the flash compensation to EV 0, +1 or +2 .
Note also that the normal rules such as ‘1/30 of a second with image stabilisation will give a sharp photo’ no longer hold if you have zoomed in a lot.
Zoomed in photos need to be at a faster shutter speed under such conditions. They also need more light. Your camera may give a warning of camera shake at 1/30 of a second for a zoomed in shot, but it is perfectly fine with a wide angled shot at the same speed, since there is less likelihood of camera shake being a problem, so long as your camera has image stabilisation.
Under exposure is usually much better than over exposure. With under exposure, certainly the image may appear dark - but there will typically be no pitch black areas. You can then lighten the image to something suitable using photoshop.
On the other hand, when you overexpose significantly, the image loses detail in the highlights completely, and the information is simply not there. The highlights cannot be darkened enough to make the detail visible. When the data has not been recorded in the first place, you cannot recreate it.
For much the same reason, I set the exposure compensation, a quite separate modification, typically in museums to EV -1 (i.e. one F stop underexposure). I have found that even outside landscape shots with plenty of light sometimes benefit from a setting of EV -1/3, the image comes out with more tonal range and sparkle, and the highlights have detail that is lost when the camera is set to zero for exposure modification.
Setting the exposure compensation even lower, to EV -2 or -3 gives the advantage of the camera automatically setting the speed higher, which means that camera shake is reduced. This is only an option when the resulting image is not so dark as to be unable to be resuscitated by photoshop. But it is often a huge help in getting a decent photo when resting the camera on a support is not an option.
Three dimensional objects are the most difficult to photograph, if, like me, you are after the maximum depth of field - that is, all of the object appears to be in focus, or nearly so. You want everything to be as sharp as possible, as well, which is subtly different.
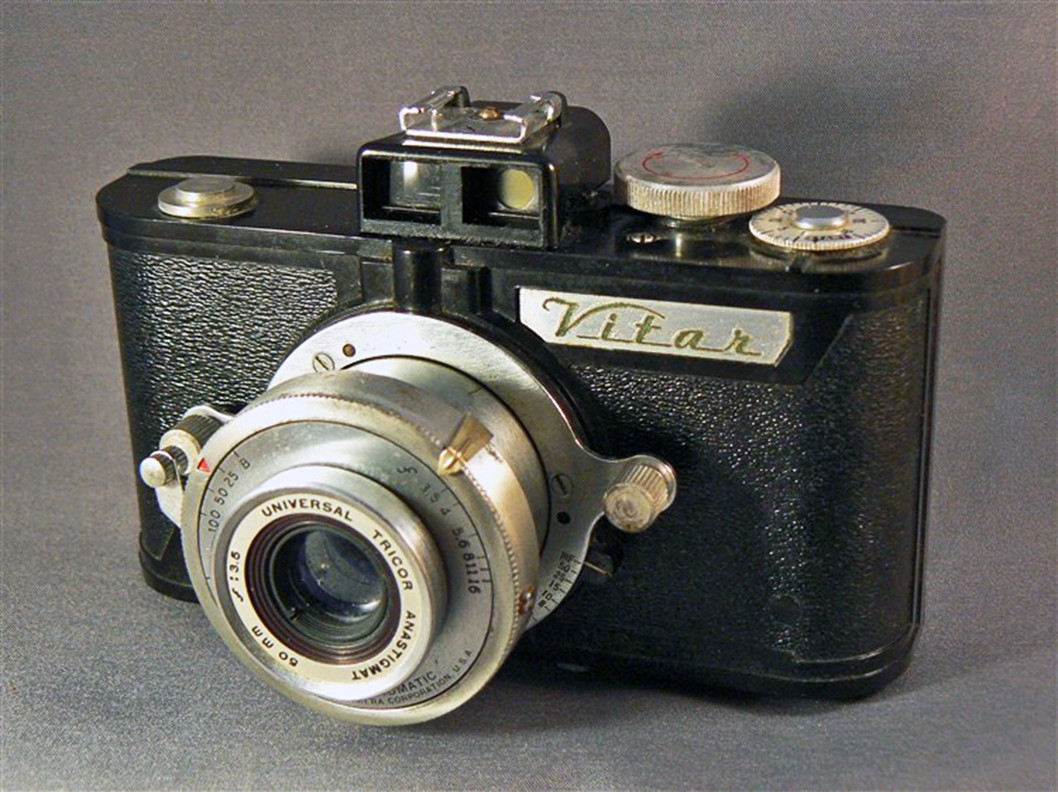
This photo is of the Universal Vitar, a 35mm full-frame camera with the standard 50 mm lens that was produced by Universal in 1951. The user set both the aperture (F number, from F3.5 to F16 on this model) and the speed (from 1/100 of a second to 1/25 of a second, with a 'B' or bulb setting, which allowed the user to take long exposures. One click opened the shutter, the next closed it). Many photographers also carried and used an exposure meter in order to take the guesswork out of setting the aperture and speed.
The ideal for sharpness and depth of field combined is F8.
F16 and F32 give a greater depth of field than F8, but are not quite as sharp, because of basic principles of optics.
In most compact cameras, you are never going to have F8 available anyway, and even if you could, you could get no decent photo without flash - light levels are typically much too low for a good photo at F8 under museum conditions without flash. For all practical purposes, you are stuck with F numbers in the F2 to F3 range unless you are able to use flash.
Photo and camera specific text: © Dana Kennedy, https://oldcameras.wordpress.com/
You can improve the depth of field by setting the camera to its maximum size, say 12 or 20 megapixels, and standing well back from the object. It will occupy only perhaps a total of one quarter of the area of the frame, but the depth of field is increased significantly. This is important for highly complex, very three dimensional objects such as some African figurines.
Crop the resulting image, and you have what you were after, perhaps only a 5 MP image, but with good sharpness and depth of field.
Note that standing well back and then zooming in so that the object fills the frame will not necessarily improve the depth of field. It will be exactly the same as if you stood close to the object provided that the F number does not change - but in fact, most cameras increase the F number when zoom is used, which usually means that yes, zooming in will improve the depth of field to some extent.
What it will also do is remove distortions created by some parts of the object appearing larger than they should be because they are significantly closer to the lens. The object appears more 'natural'.
This technique is used by portrait photographers so that noses (for example) do not appear disproportionately large, nor the ears too small.
You can improve the apparent depth of field by standing square on to a relatively flat object, rather than standing close to one end and looking down its length. Sometimes this is impossible because of reflections from the glass, which are usually reduced by shooting at an angle to the glass and thus the object, but it is certainly something to bear in mind.
However standing square on to the glass will almost certainly give reflections, and is a disaster if you use flash, unless the lens assembly is resting on the glass of the display cabinet.
See the image above.
Remember that often some parts of an object are often more important than others. Take several photos of important objects, you may not pass this way again. If, for example, you are photographing a venus figure, zoom in on various parts of it that are interesting or important - the face, perhaps, or the arms, the vulva or the legs.
Photo: Don Hitchcock 2014
Source: Original, Rijksmuseum van Oudheden, National Museum of Antiquities, Leiden.
If it is an Egyptian mummy sarcophagus, zoom in on the face, of course, and perhaps some part of the decoration - the wings of a god, a beautifully made frog or hyena for example. If you see something interesting, zoom in on it and take a photo.
Treating your photos as data
There is not much point in taking photos for further use unless you know what they are of, and as much information as possible about each exhibit. After a while, one photo of a 'parrot beak' burin looks pretty much like another.
This means that the second most important (though only marginally less so) photo you take of an object is the card beside it in the museum case. Museums arrange these in very many different ways.
Some have an identity card for each object. Others group them into sections such as ‘handaxes found at la Micoque’. Others have numbers beside each exhibit, and a legend at the bottom.
Some have no numbers near the objects, but outlines of the display, with the outlines numbered, and the numbers are then identified.

Make sure that you take a general photo of the display. If you only have a zoomed in photo of an insect fossil for example, without a photo of the entire rock in which it is found, but the legend only has the outline of the piece of rock it was found on, identification can be difficult. If you want to make life easier for yourself later, take the photos in the order of their number in the legend.
When you are taking photos of the objects, you should be primarily interested in getting the best possible photograph or photographs of the object. There are a lot of parameters to take into consideration. Identifying the object is necessarily way down the list at that point, you have a lot to think about.
But if you can contrive to include the object’s identifying number in your image without compromising the quality of your image, do so.
Whether you do this or not, the next step (or the first!) is to take a high quality image of the window, standing back from the display, but making sure that the identifying numbers are clearly visible in your image.
Sometimes, as at the superb display at the Saint-Germaine-en-Laye museum outside of Paris, much of the important text is at the bottom of the display case. Take high quality photos of this text, it is invaluable when you are putting your photos into some sort of logical order when you get home.
Thus, take photos of the entire display case, all of the identity cards, and whatever other information has been provided, often on separate posters on the wall, which give background and meaning to what you are photographing.
Check your photo to make sure that all the text is legible!
Photo: Don Hitchcock 2015, Source: Original, Musée d'Archeologie Nationale et Domaine, St-Germain-en-Laye
When I first started my website, I was determined that it would not be just a photo album.
There are literally millions of these on the web, all useless. No text, just pretty pictures of postage stamp size.
Most people with websites of archaeological items make up pages that are no better than the old ‘shoebox’ method of storing photos from the pre-digital age - if you have ever had to assess for preservation or destruction the memorabilia of a deceased relative, you will know what I mean.
There is a place in heaven for all photographers of the silver/gelatine black and white (or colour) photo print era who wrote on the back of photos things such as the date, who it was, where it was, and what was the reason for the photo. Family historians bless them.
If you are making up a web page, each photo or group of photos of the same object should have a caption with text about the object, who took the photo, where the photo was taken, the year it was taken, and any other pertinent information such as whether it is of an original or a facsimile, where the object is normally housed if it is on loan for a particular exhibition, and so on.
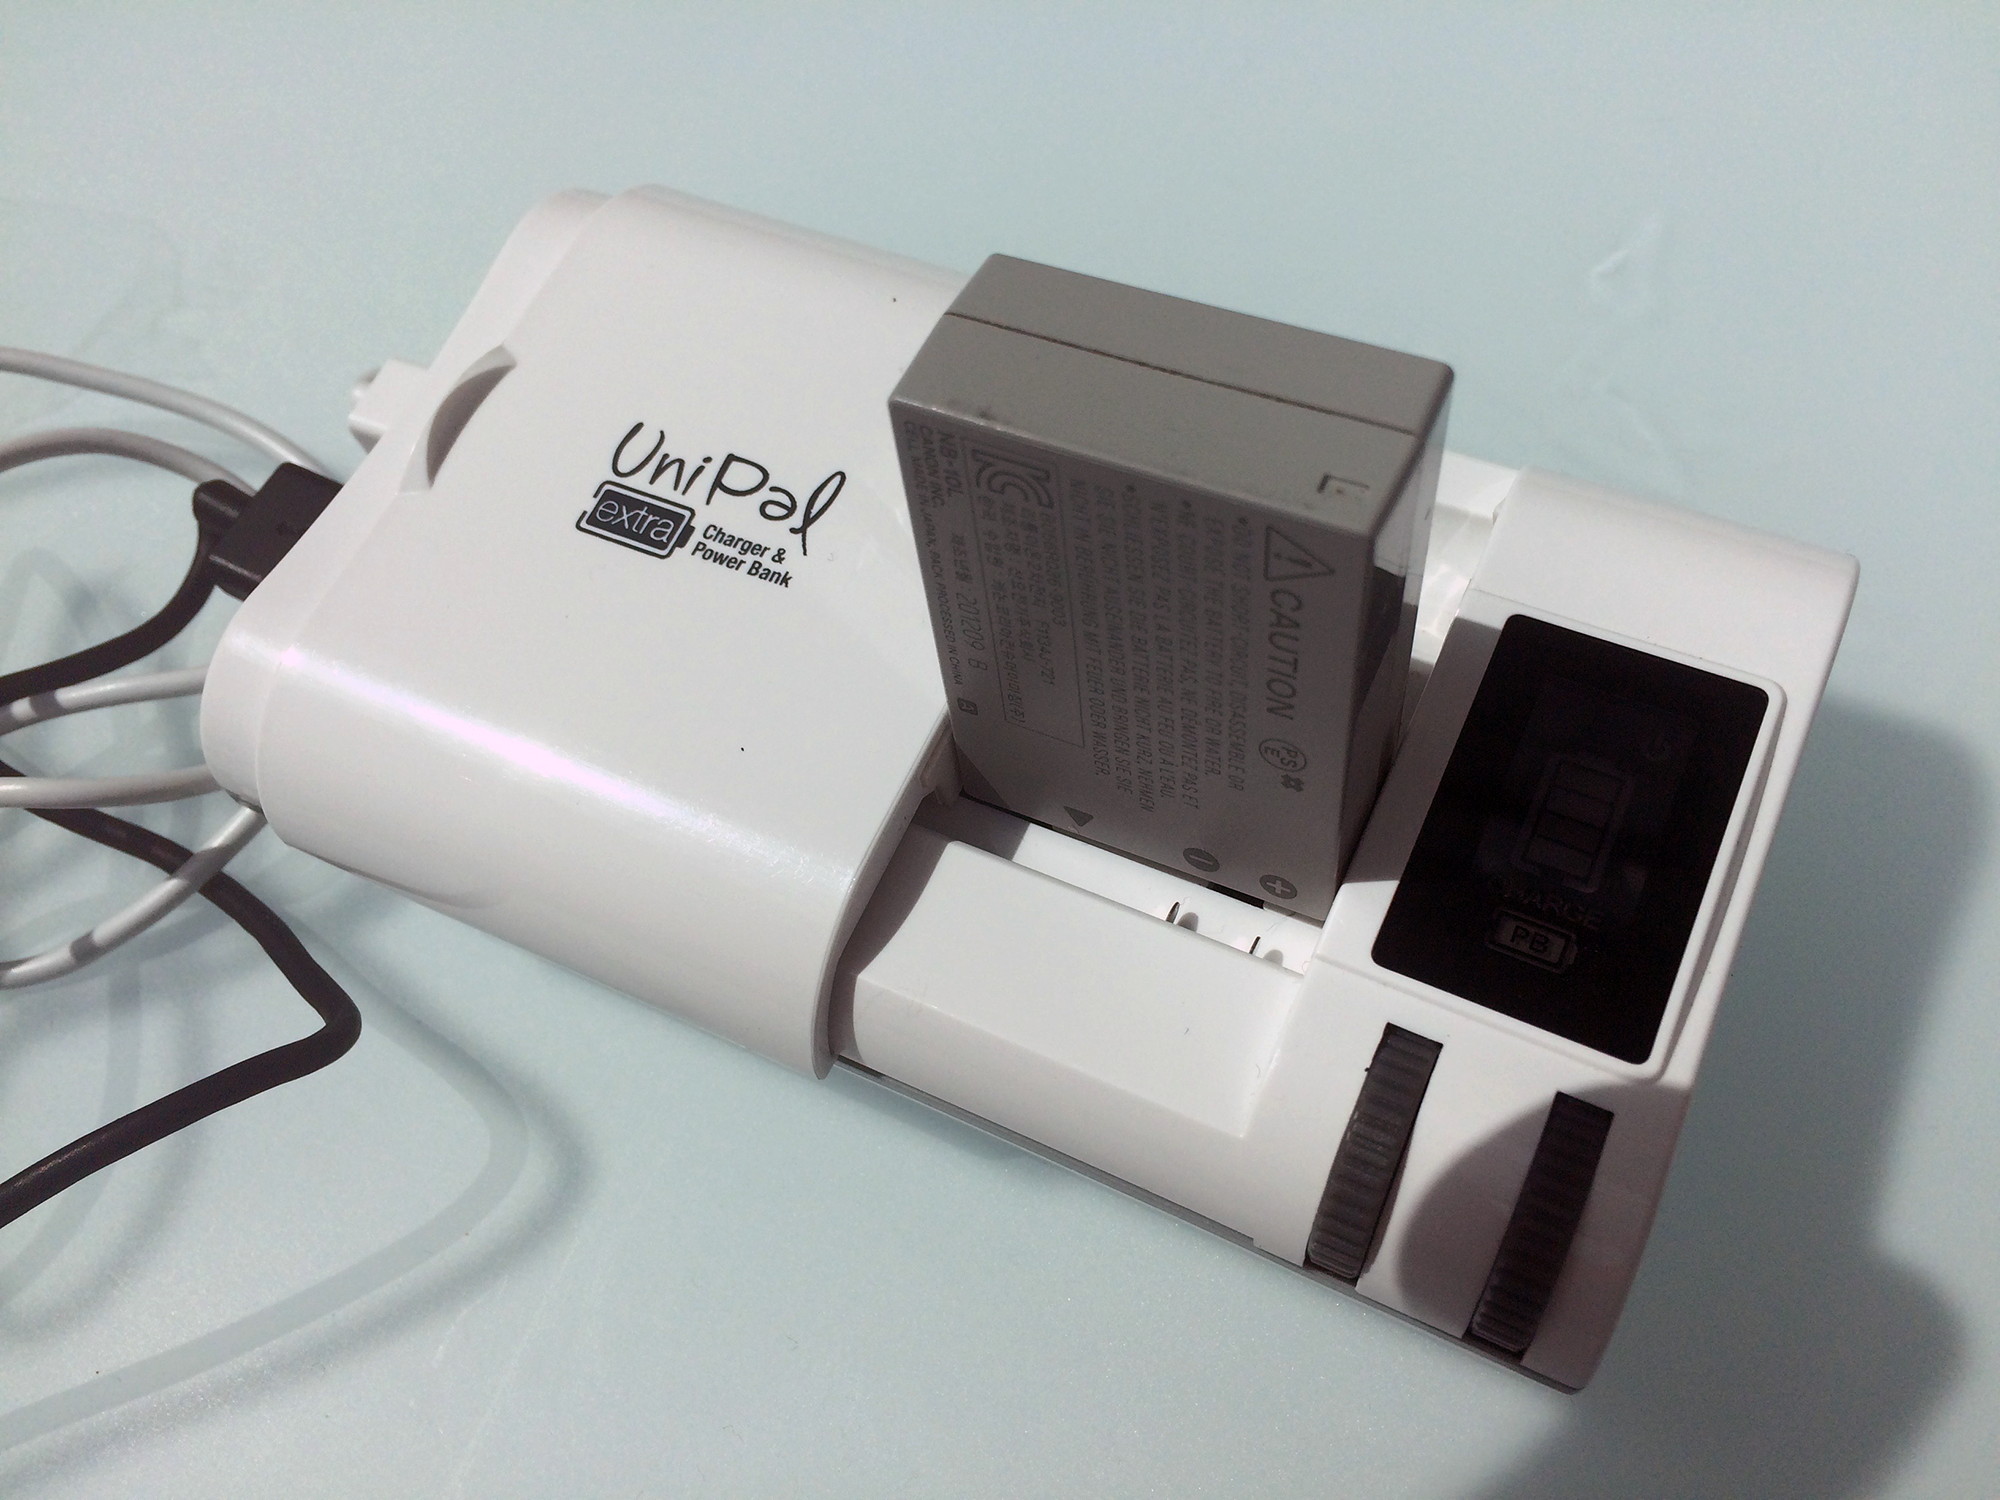
Keeping everything charged up
This is a daily necessity.
As soon as you get back to the hotel room, charge the batteries of your camera, and attach your iPhone (or similar) to your laptop to be charged, where as a side benefit any photos you have taken using it of street scenes or whatever get automatically downloaded to your drop box. I generally leave my laptop connected to the charger in the hotel room, uploading images to my Dropbox account while I am at the museum.
I use a battery recharger, shown at left. I bought a 'photographer's' vest, and the recharger lives in one of the pockets, together with the cord for charging it up and the cord for recharging my iPhone.
iPhones just work. They are a necessity for getting around in cities, using google maps. I find that a small compass attached to my waterproof watch is invaluable as well - I get north and south mixed up when I am in Europe, where the sun is in the south instead of the north.
The best system is to have a spare battery or two for your camera, but if not, this is a solution, and you need it for your iPhone anyway.
The battery recharger I have is not intuitive or easy to use, but it does work, with care, and of course it needs to be charged overnight as well, ready for the following day.
It will charge any camera battery, you just adjust sliders until they match up with the + and - contacts on your battery. Then you switch it on with a very inconspicuous, hard to use button. The problem is that you cannot then just drop it into a convenient vest pocket. It must sit on a table or bench, with the battery sitting vertically, just so, and making sure that it is still charging is a constant task.
I know I sound like a broken record, but the Sony RX10 II has a much better system - when you buy a spare battery, get it with the charger case which plugs into a USB port. However, the battery on the Sony only lasts for about 300 photographs, not 600 like the Canon. Lots of spare batteries are a must.

The battery on my Canon PowerShot G15 goes flat after about 600 - 700 shots. I must then stop, and recharge the battery. If there is a cafe associated with the museum, I have coffee and cake, or a more substantial meal, and combine the two things. Half an hour’s charge will give me about an hour more of photos.
For this purpose, I can highly recommend the restaurant at the Vienna Natural History Museum, shown at left.
No restaurant could have a more elegant setting, and the food and service are superb.
Photo: Don Hitchcock 2015, iPhone5 vertical panorama, Vienna Natural History Museum, Naturhistorisches Museum Wien
Recharging the backup battery I have with mains electricity is by no means easy. It usually takes three or four attempts with pressing the tiny button, and wiggling the connections before the display shows that it is charging.
Most such equipment is intelligent or unintelligent enough (such as an iPhone in the first case, or in the second case a cheap battery charger hooked up to mains electricity) to realise that when it is connected to power, you want it to recharge. Not so the backup battery I have. With care, it works, but there is often a lot of fiddling about involved.
Keeping your photos safe
There ain’t no such thing as too many backups.
After each day at the Museum du jour, I get back to the hotel room and start to ‘feed the chooks’ - that is, do the necessary housework that will ensure that my hard work during the day is not lost. Food and drink are of secondary importance.
I pull out the battery of the camera, and start to recharge it. I pull out the SD card (many cameras now communicate wirelessly by bluetooth to a laptop or mobile phone, do it that way if you are able to) put it into a card reader, attach it to the laptop, and drag the day’s photos onto the hard disk.
I have a series of folders inside the main one, titled something like 'Europe Trip 2017'.
The first of the folders inside the main one might be 01frankfurt1, the second 02frankfurt2, the next 03stuttgart1, the next 04stuttgart2, and so on.
Putting the numbers in front on the folder name keeps everything in order, and easily findable. It is easy to forget which museum a particular photo was taken in. You can recreate it from the date and time on the photo’s EXIF file, and your emails and hotel reservation confirmations, but try to make it easy for yourself.

Dropbox is easy to use and a reliable backup method. (image from www.dropbox.com)
I keep two sets of these photos, one sitting on the desktop, the other in the dropbox section. In the dropbox folder, the folders are labelled 01frankfurt1dropbox, 02frankfurt2dropbox, and so on. I find it easier to keep track that way.
In addition, this method means that you control the way dropbox loads photos. It uploads the smallest photos first, so if you keep today’s photos on the desktop only, until the previous day’s dropbox files are all uploaded, you will only ever have the latest files not uploaded, not bits and pieces from various folders. Then when the earlier dropbox files are all uploaded, make a copy (select all plus option plus drag on the mac) of the files to the empty but named dropbox folder, and dropbox starts working on the latest folder, with all the others totally up to date.
I set Dropbox to come on automatically at startup, so whenever the laptop is on, and wifi is available, my photos are uploading.
If you have a slow internet connection at the hotel (as was normally the case for me in 2015 at budget hotels throughout Germany, Austria, France and London) then size of the photos becomes important when you are uploading them to some safe place in the cloud such as 'Dropbox'.
If you have the time, you can go through the identification photos and reduce them in size with a graphics program such as photoshop of GraphicConverter, while still being able to easily read the important text. This is usually not worth the trouble, and often the vital catalog number becomes unreadable. In addition, you often need the photo on the card or poster, not just the text.
I found that I did not have the time. I was taking upwards of 900 photos each day, and I needed food and drink and rest more than uploading photos faster. They were long days, I was up early and I did not get to bed until very late most nights, there was too much to do - as well as taking photos, you are also organising a train ticket and hotel accommodation for the next night, getting a meal somewhere, finding a supermarket for essential supplies, catching up on emails, and washing out and hanging up your clothes to drip dry for the next day. And collapsing into bed.
It is counterproductive to try to reduce the size of the photos at the time of taking them, of photos of text. It is far too easy to forget to turn the image quality back up, and you take another dozen photos of objects before realising that they are at 1 megapixel quality instead of 12 megapixels. Then you do it all over again at the right size.
I have a series of 32 and 64 Gigabyte USB thumb drives, which I keep in my passport holder in a small plastic ziplock bag, permanently around my neck whenever I leave the hotel room. The folder method means that it is easy to see what I have backed up and what I have not. I keep the used, full SD disks from the camera there also.
I also have a (small physical size, light weight, USB powered) Terabyte (1000 Gigabyte) Toshiba USB drive, which I have set up with Time Machine on my mac laptop, so all I have to do is attach it to the computer, tell time machine to do a manual backup, and in a few minutes it is done, the whole laptop is backed up. For a short trip of a month, you will get a snapshot of the disk for every day. For longer than that, you get the last month daily, then weekly before that.
Don’t forget also that major train stations often have very fast free wifi, sometimes for only a limited period of use, but valuable even so. In Germany, some trains have very fast free wifi. Cafes and restaurants often have free wifi as well, and are often very much faster than hotel wifi. You should think about using a VPN when using any wifi you don’t trust. I use Witopia, which works well.

Food is often very hard to find when you are on the move. More than once I have gone to bed hungry. It might be good for me, I guess, but it doesn’t always feel that way at the time.
Occasionally, however, an opportunity for a good feed presents itself, and Germany has wonderful food, as shown here. Wiener schnitzel, hot chips and beer were on the menu in the Munich Museum Cafe, and the meal was delicious.
Photo: Don Hitchcock 2015, Ägyptischen Museum München, café and restaurant.
In most of Europe I stay in budget hotels such as the Ibis chain. They have basic but standard rooms, and the wifi is reasonable, though not fast when I was there, and the air conditioning is ineffective or nonexistent. You cannot open the windows more than a crack to let in fresh air.
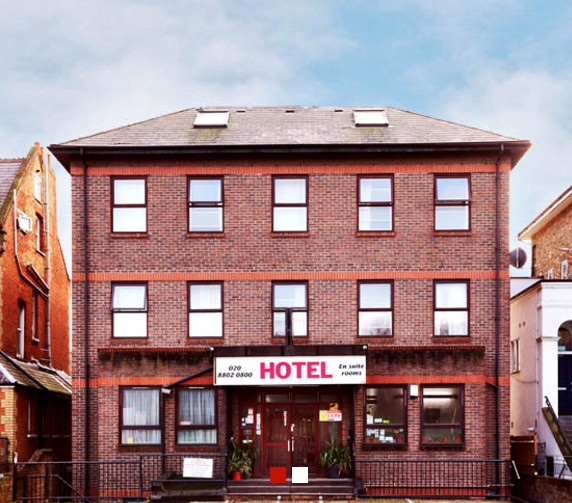
In London, I can recommend the Kent Hotel. It is cheap, old, and central. I had a basement room, which was ideal because it was cool in the middle of a heat wave. In my room I even had a refrigerator!
The proprietor is very competent and professional, and she keeps singles beside each other and doubles elsewhere to minimise noise between rooms, which have very thin walls, and the breakfast is great. Phone works much better than email when reserving a room. The Manor House tube station is almost outside the door, and it is a fast run on the Tube to the British Museum, and there is an excellent Indian restaurant not far away. The rooms are very basic, don’t expect the Ritz, but I will certainly go there again when I am next in London.
Photo: https://www.kenthallhotel.co.uk/

It is worthwhile paying for breakfast at budget hotels in Germany and Austria. The unlimited espressos, orange juice, the superb quality seeded rolls, the eggs, the choice of cold meats and cheeses, the tomatoes, the apples, make breakfast very worthwhile there. (image from www.ibis.com)
In France, getting breakfast at the hotel is a waste of time, effort and money. What you get is poor quality filter coffee and good quality bread.
That’s it.
For 6.50 Euros.
You can do much better by buying a baguette the night before at a local supermarket, '8 à Huit' or whatever, a little cheese and ham, make your own coffee with an immersion heater (essential, there is no tea or coffee making facility in most budget hotels). I boil the water in an enamel mug in the bathroom, then add very finely ground turkish coffee. It even foams up with a crème on top!