Back to Don's Maps
Photoshop Basics - a beginner's guide
I know the basics of Photoshop, enough to enhance the colour and contrast, crop it, remove unwanted parts of the image, and a few other things. I have learned this as part of preparing images for Don's Maps, making mistakes, and fixing them. In particular, I have learned how to fix some common problems with images taken in museums, but most are general methods which can be applied to any photograph.
Nothing here is beyond a rank beginner. I have tried to put the instructions into some sort of order, from the simplest to the slightly less simple. Good Luck!
Cropping and rotating an image
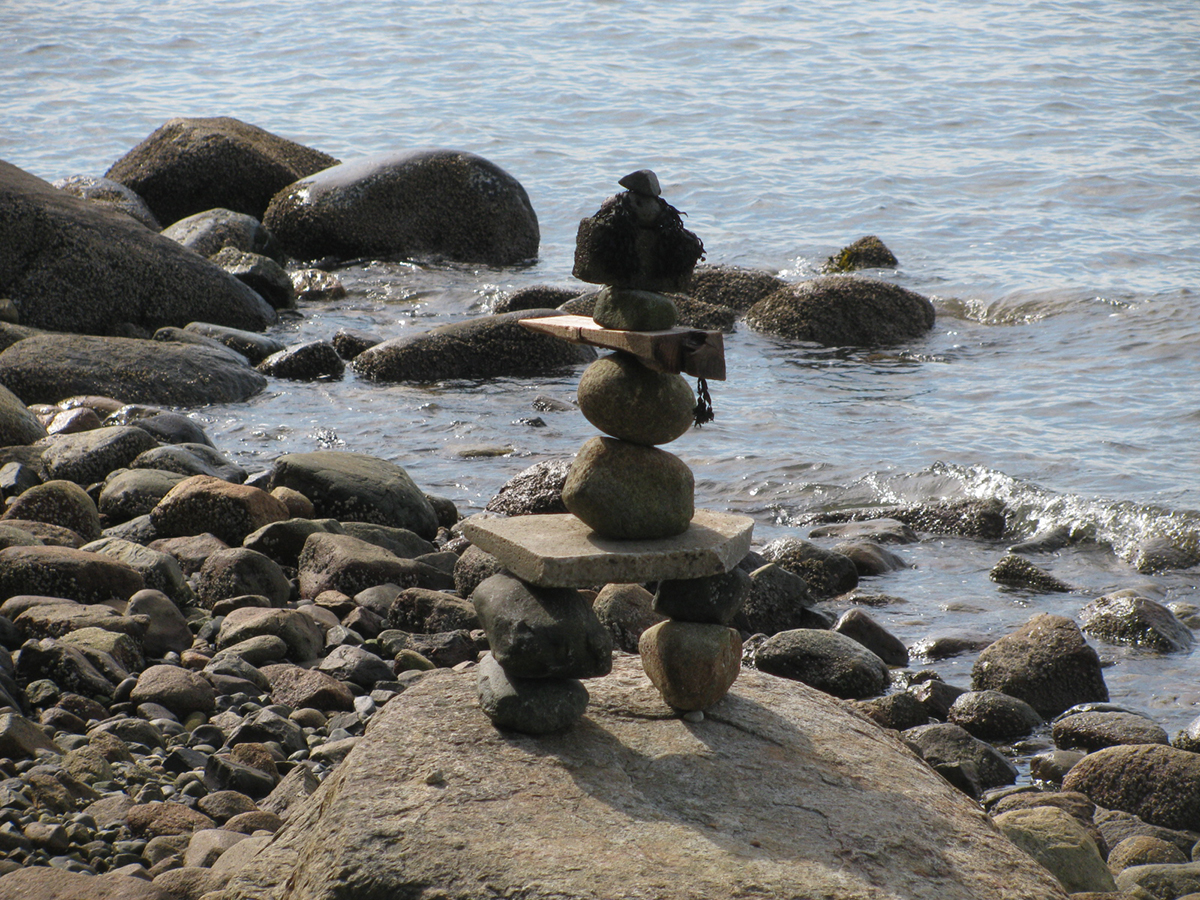
Seldom is a photo completely vertical.
This one is no exception, it is about two degrees off vertical, and I would like to rotate the rock sculpture to be vertical, and crop it to the image I want.
Isolate and emphasise is a basic rule in photography.
To see the full size image with all of these images, click on the image, when the full size image will appear.
Photograph: Don Hitchcock 2012
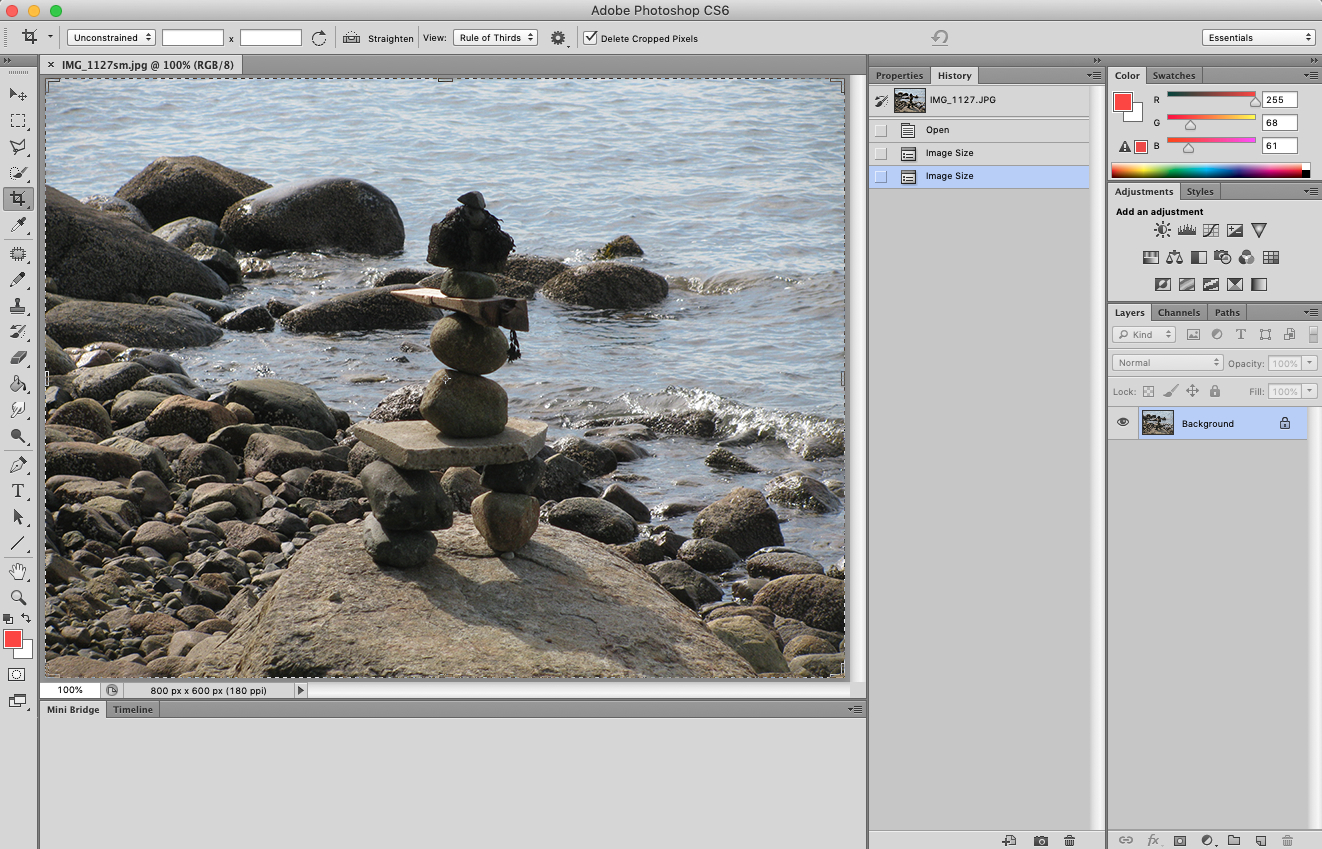
This is what the photograph looks like in Photoshop.
To see the full size image with all of these images, click on the image, when the full size image will appear.
If you cannot see the tools or layers, press the tab key, which toggles them on and off.
The crop tool is chosen, and so it is highlighted.

Now, with the crop tool chosen, if you move the cursor outside the image, it will change to an arc with arrows on each end, and if you click and hold, then drag, the image will rotate. When it is in the right position, take your finger off the mouse, and you can save the aligned image. Photoshop will ask you if you want to crop the image before saving, and you click on the crop button.
You then have the option to save with the same name, or with a new name, and to choose where you want the image to be saved.
Note that if you are in the middle of cropping, you can't choose much until you choose another tool, or double click the image you are cropping.
This applies in some other instances, when Photoshop decides (it has a mind of its own, but doesn't tell you what it is thinking...) that you have chosen something such as a size which it disagrees with, or mis-hit a key.
But then it sulks, stops talking to you, and cuts off all ability to make any change at all until you work out what it is upset about.
It won't tell you why it is upset, you have to guess. The parallels with some human-human interactions I won't go into here.
However the problem may be resolved if you are able to choose another tool from the tool bar, such as the lasso tool or the marquee tool, something innocuous like that.
Sometimes you can't even do that in what is now a semi-frozen image.
It is a good idea to keep at least one extra tab in the Photoshop screen with a different image open at all times. Then you can choose that other image, choose a different tool in that image window such as the rectangular marquee tool, then go back to your semi-frozen image, and all is well, you are given control again. Sometimes Photoshop will even tell you what it thinks you did wrong (later, after the event, when it no longer matters) - but you did no such thing.
Resistance is futile, just swallow your pride and be glad you are now able to get some work done again.
I have said it before...
(and the first computer I ever used (back in the 1970s) only accepted punched cards, and even a simple program in the Fortran language was on about a hundred such cards. You put in your deck of cards on Tuesday, and if you were lucky, the printout was on Wednesday, with the comment "error in line 5".
The cards had to be in order. Drop them, and you had to sort them into order. Smart programmers drew a diagonal felt tip pen line across the top of a deck before doing anything else, so if the deck was dropped, sorting was easier. Some decks were several yards long, it was probably easier to type them all up again from scratch ...),
...And I will say it again - computers only ...just... work.
But you must hold your tongue right....

If you are in crop mode, you can now drag one corner down (and the other up) to get the cropped image you are after.
When View: ... Rule of thirds is chosen from the upper menu bar, the default grid for (just) cropping is three by three, and is toggled on and off by pressing the return key while crop is selected.
Pasting an image and saving it as a jpg
Easy, right? Well, no, actually. See below.
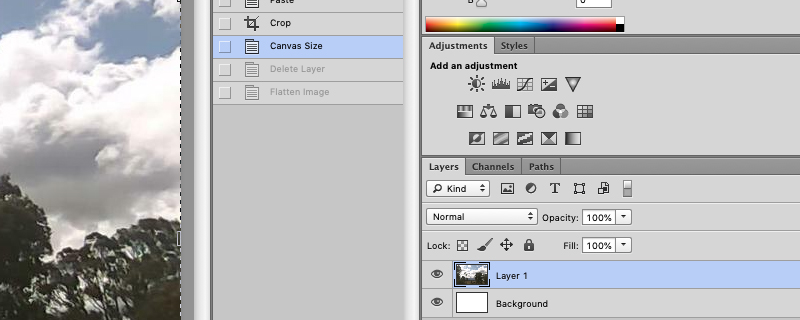
Find an image, copy it, and paste it into Photoshop.
As shown, there are two layers, the one I want above and a blank Background below which I do not want.
When I try to save it as a jpg, I get this warning message:
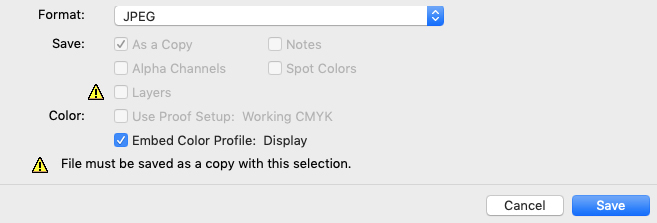
The problem is that jpg files do not support layers. The remedy is to flatten the image, at which point you can save it as a jpg.
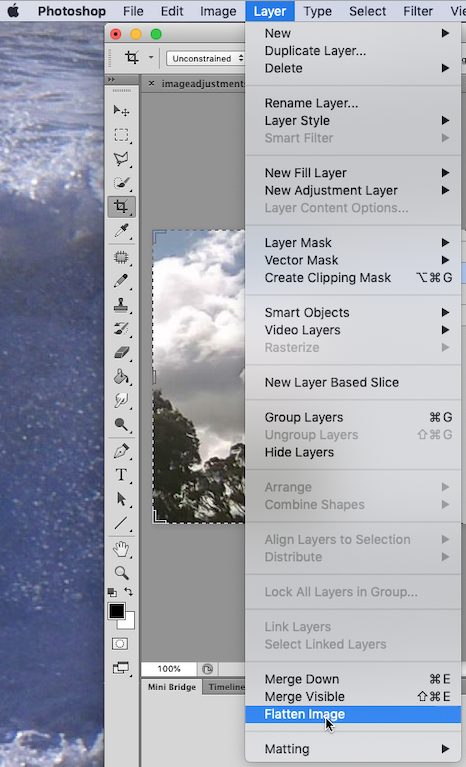
As shown below, choose Layer... Flatten Image...
and then you can save it as a jpg.
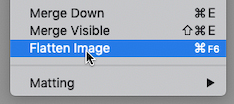
I got so sick of this (there are many other occasions when you need to flatten images) that I made a shortcut of command+F6 for this operation.
Go to Edit... on the top menu bar, then select Keyboard Shortcuts...
Scroll down to Layer... and select Flatten Image... (it will be highlighted).
Click on the white space beside Flatten Image to select that, hold down the command key and press the F6 key. Done.
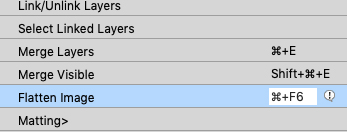
And the new shortcut will be added to the 'Flatten Image' command, so you won't forget it:
Showing and setting the grid lines which can be shown on the image
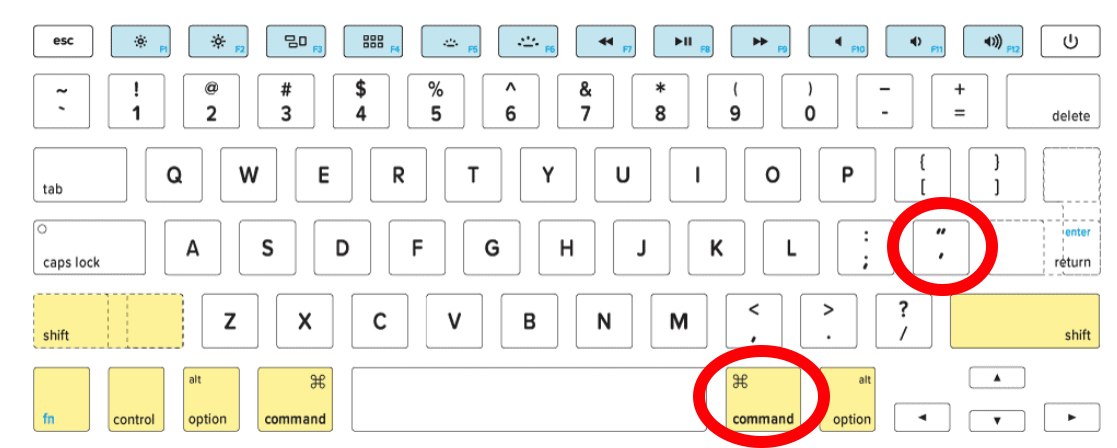
Grid lines may be toggled off and on by holding down command and pressing the ' key, that is, ⌘' as shown.
This shortcut is often written as:
Cmd + ' (Mac) or Ctrl + ' (Windows)
Base photo of keyboard: keyshorts.com
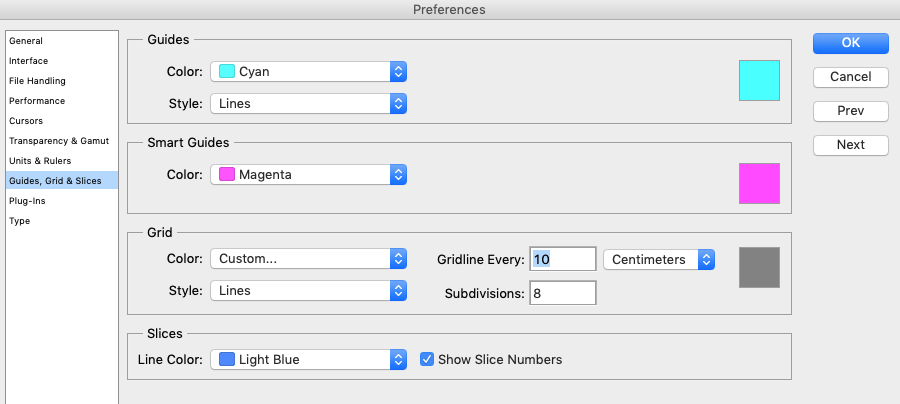
To choose the spacing of grid lines, choose in order from the menu bar initially:
Photoshop
Preferences
General...
Guides, grids and slices...
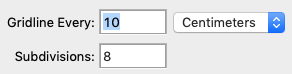
The above gives a good grid for many purposes, but modify as necessary. In the above example try changing the 10 to a 5 or the 8 to a 4 and so on.
Showing grid lines is a very good method to see if something is not as horizontal or vertical as it should be. Rotate as necessary using the crop tool as shown above.
Rotating using the Rotate tool
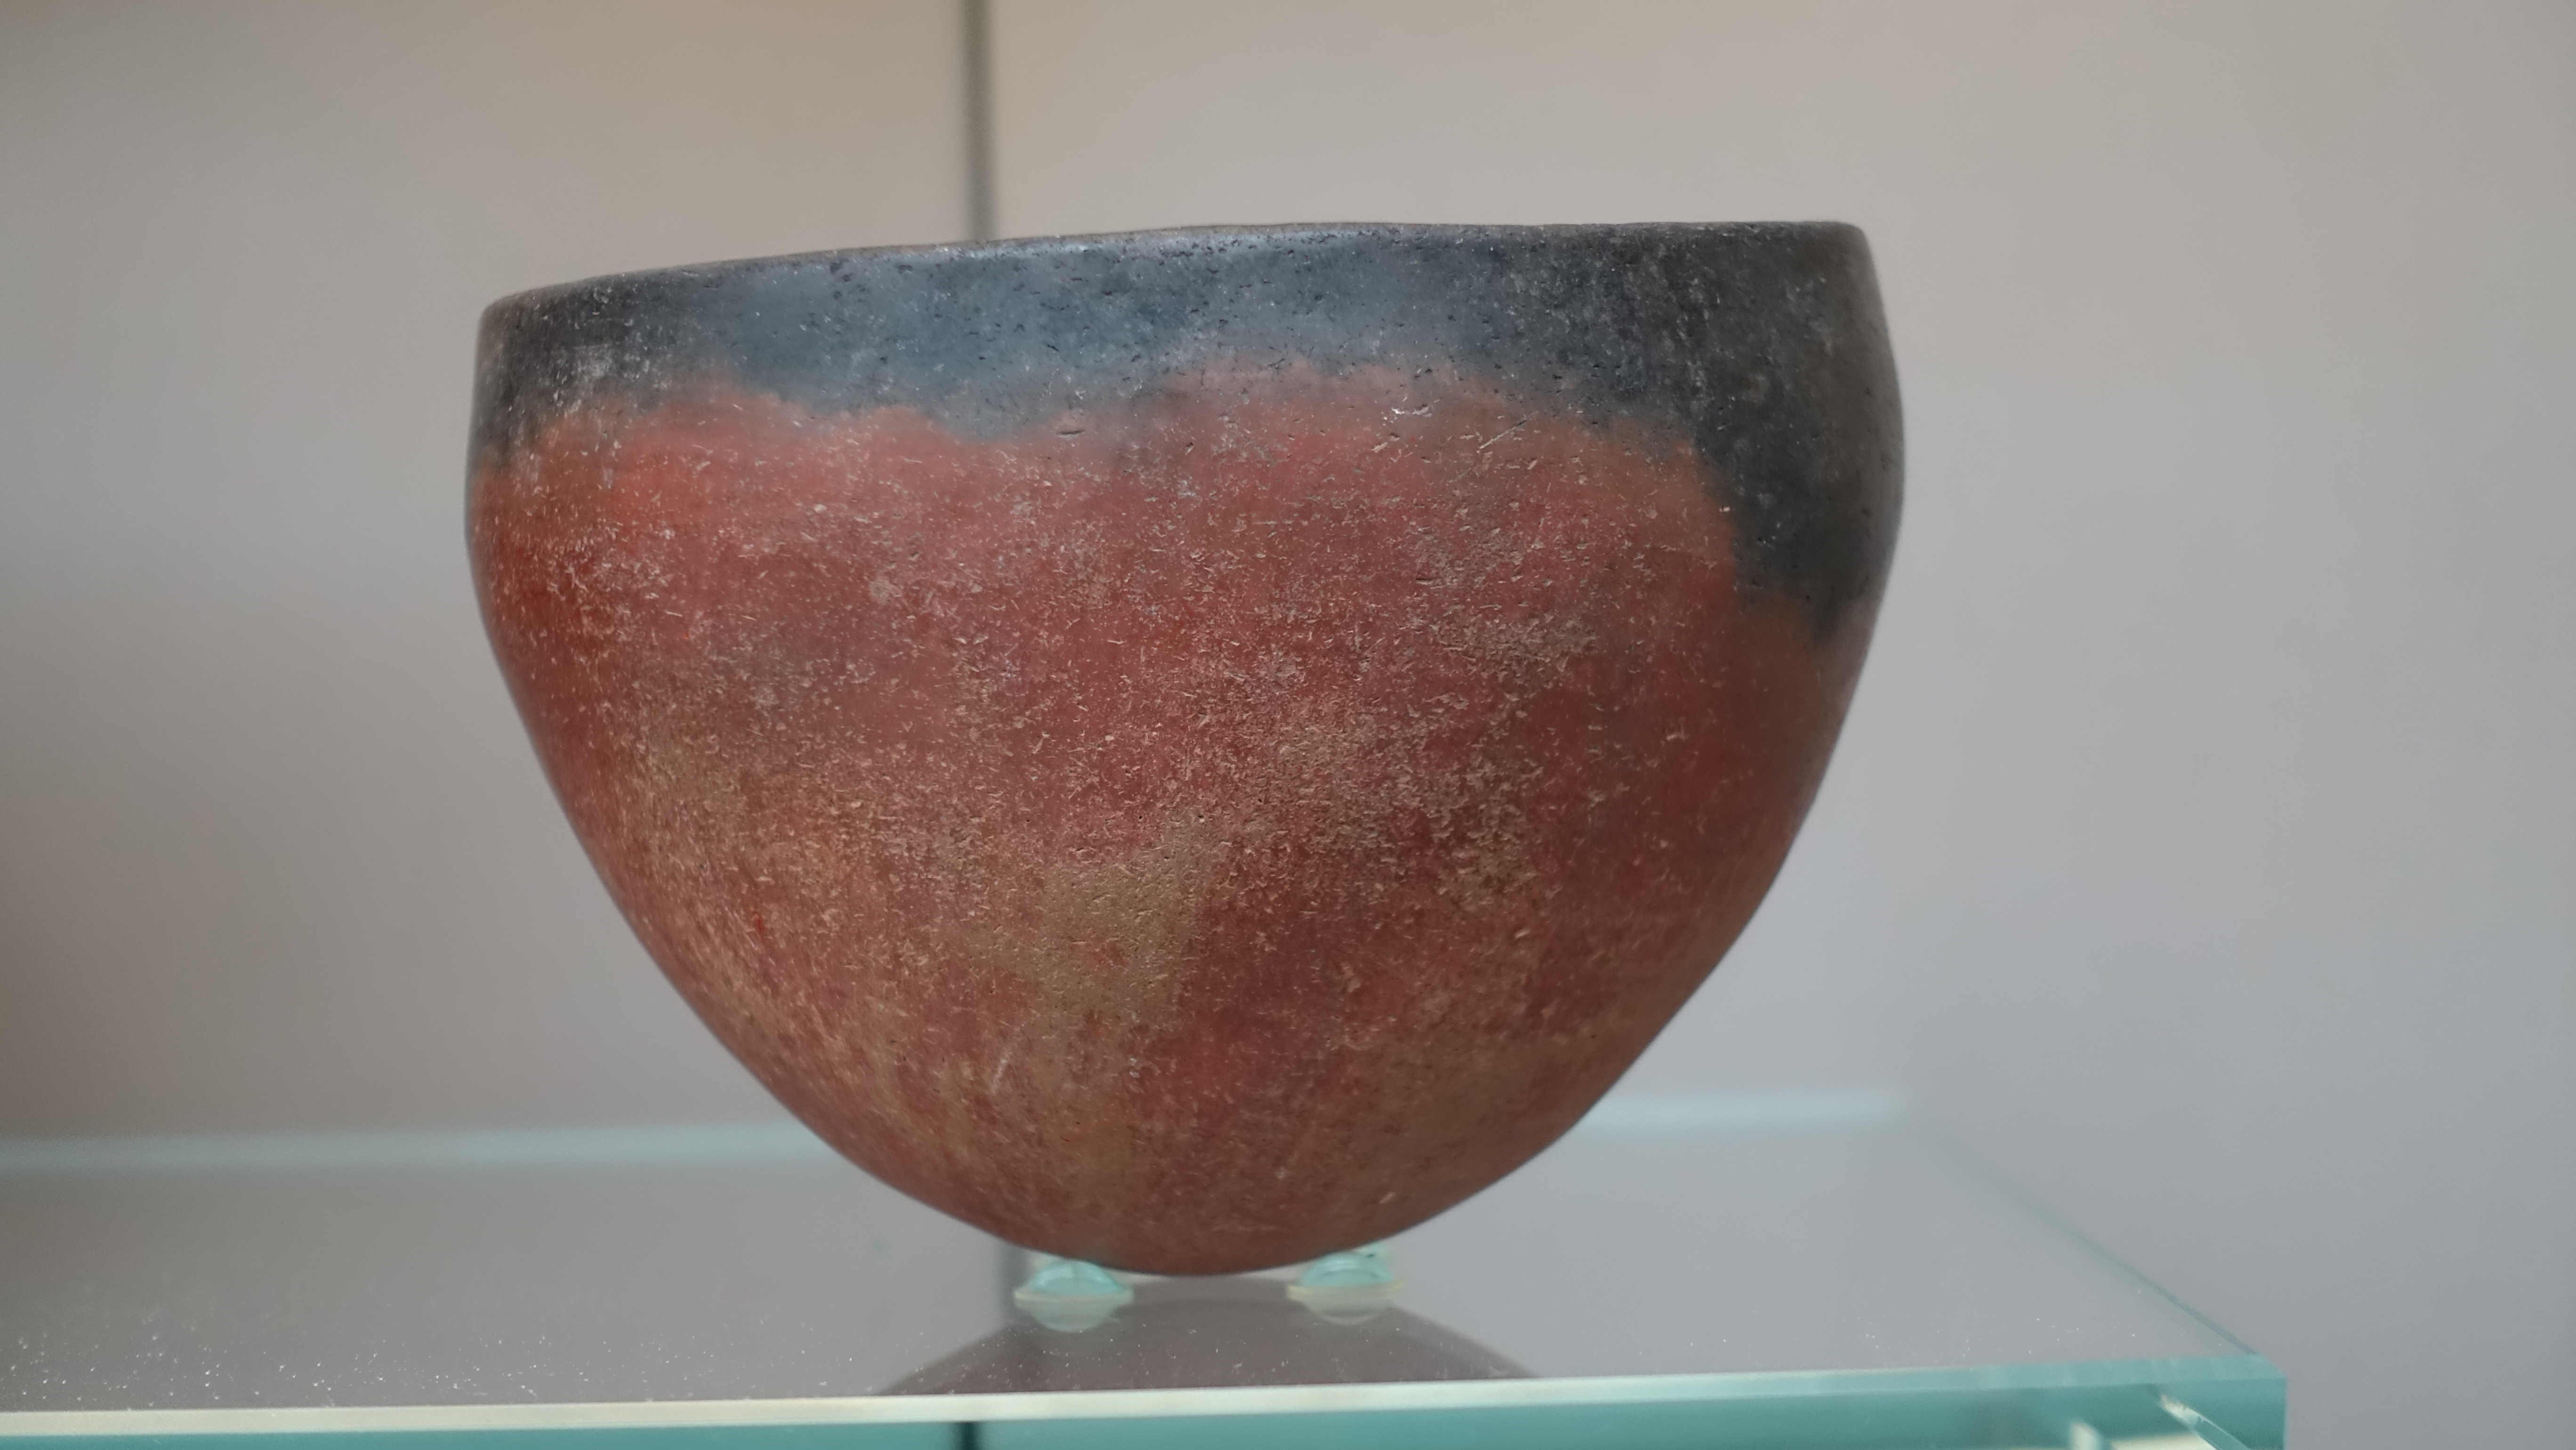
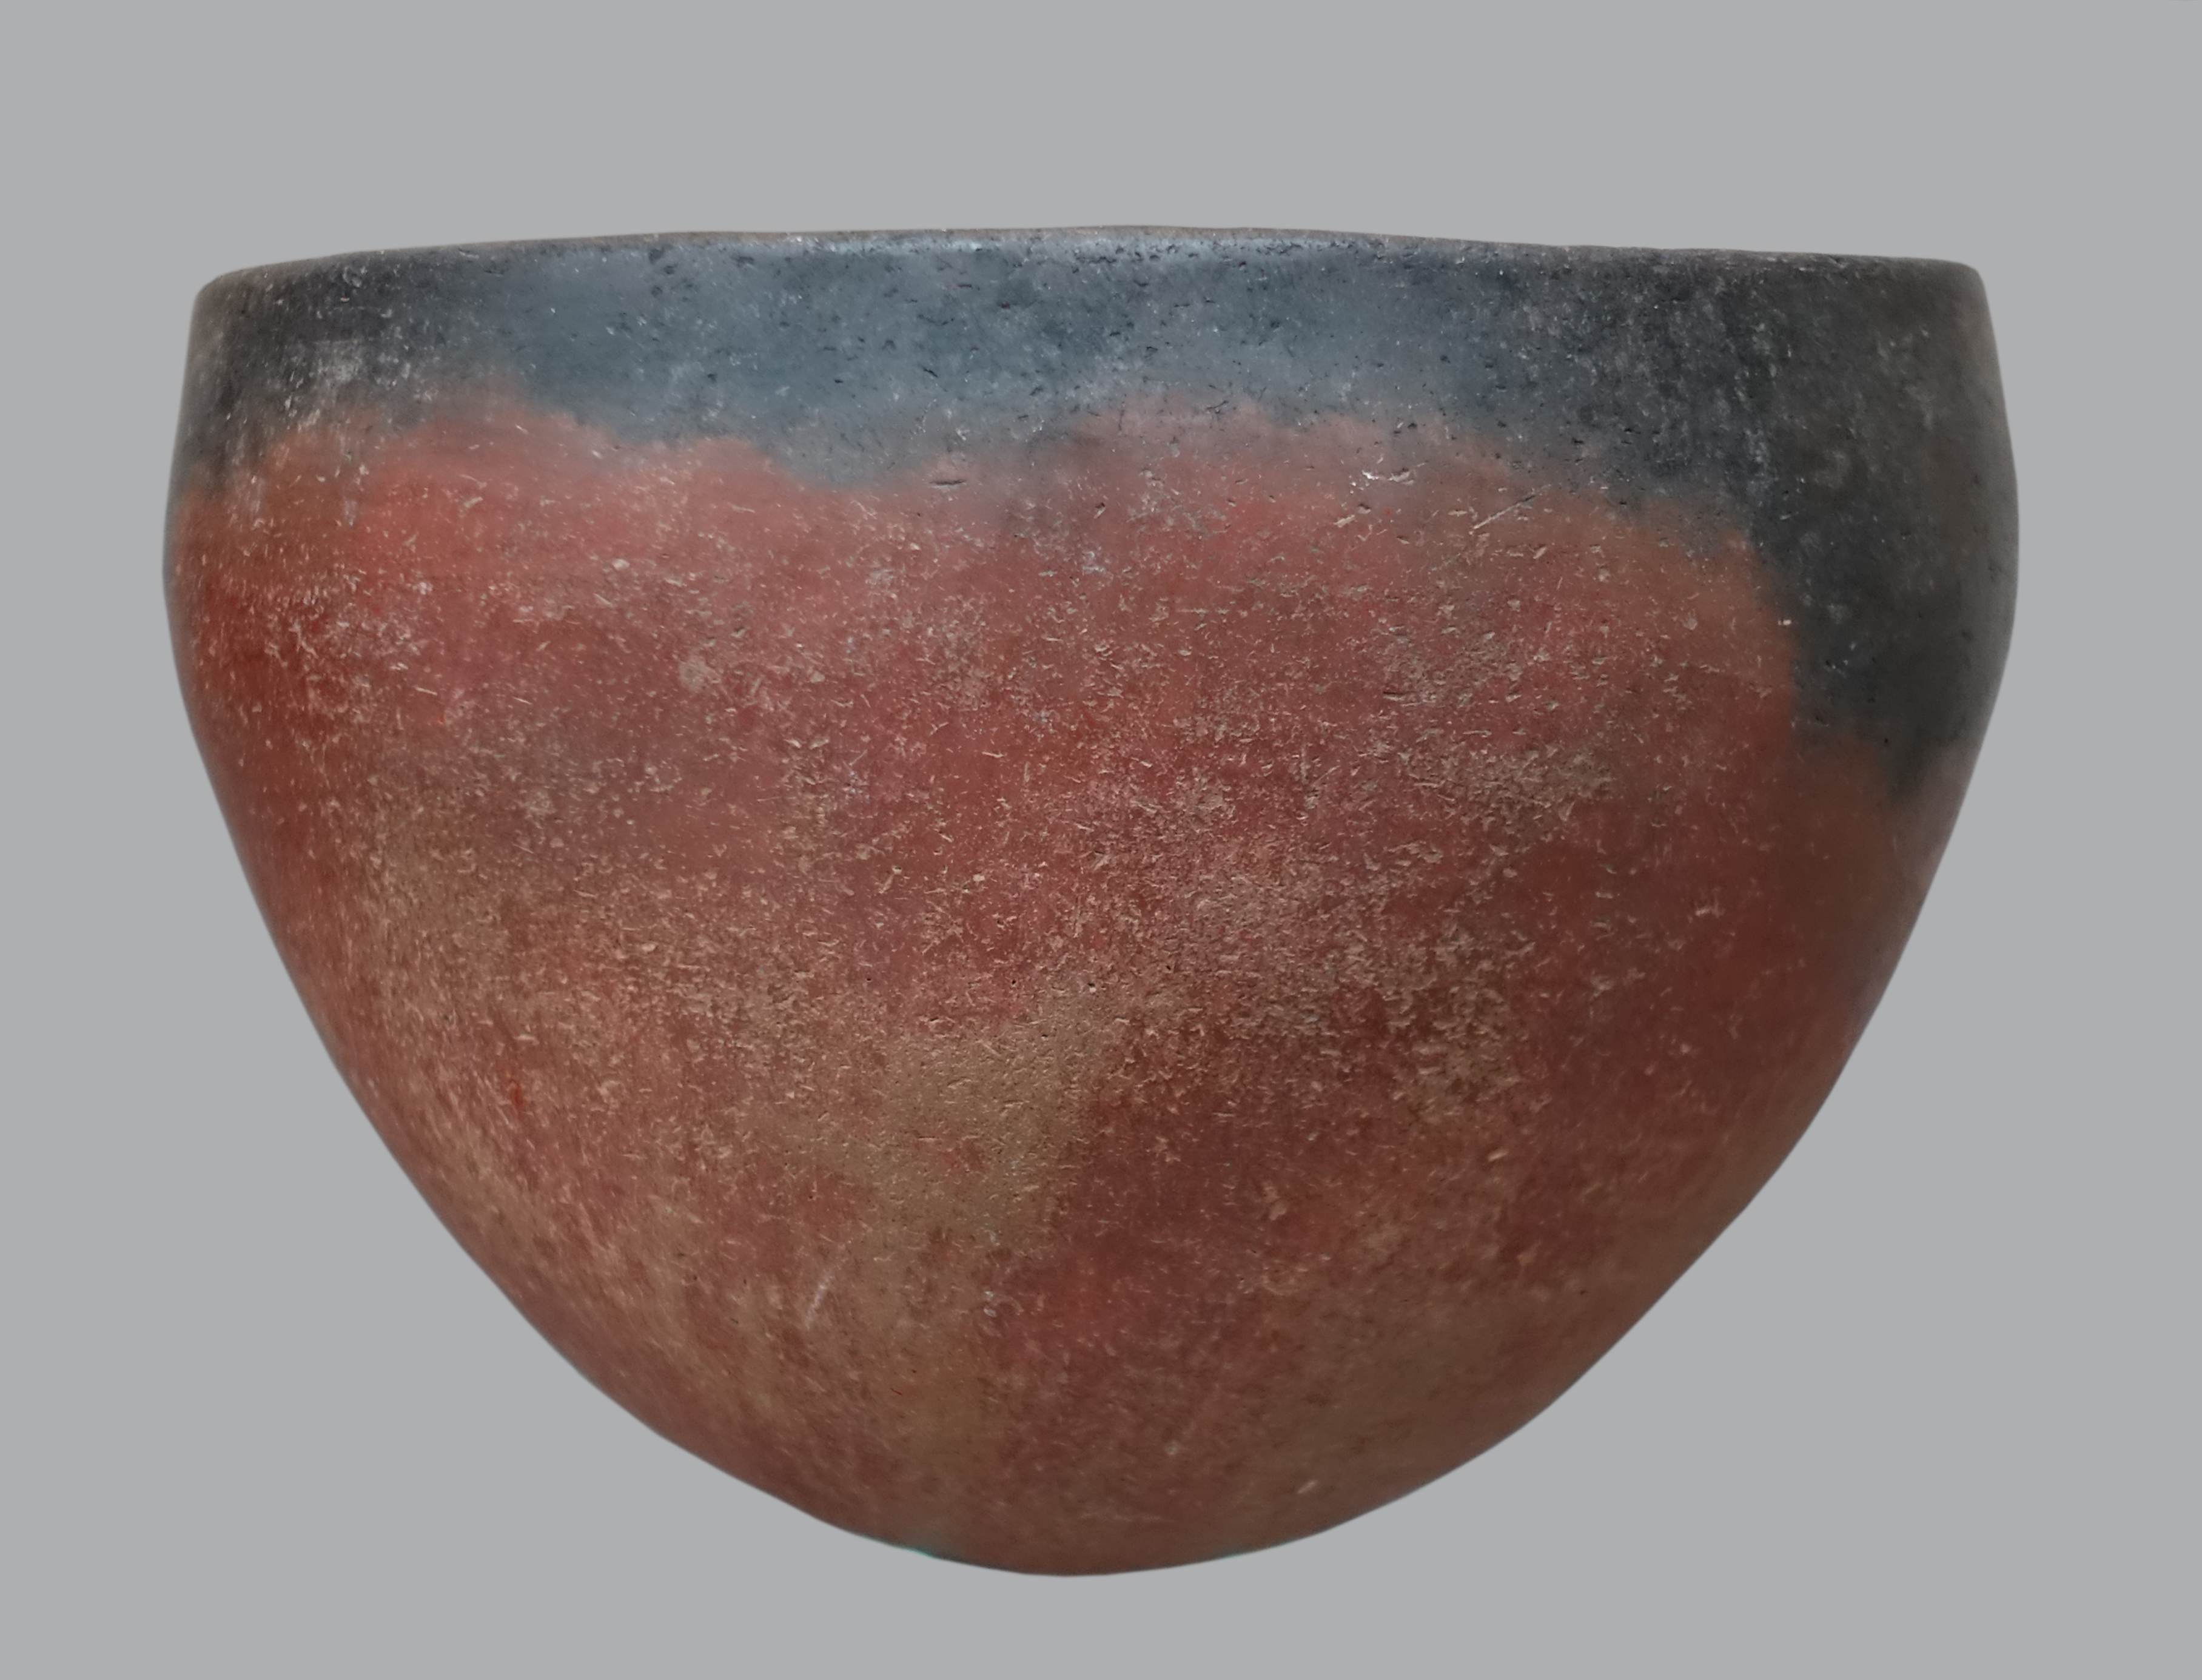
The bowl is tilted, and also needs to be cropped and enhanced.
Though not necessary in this case, the advantage of the rotate tool is that you can rotate parts of the image and leave the rest alone.
Burnished black-topped redware pottery bowl, 2 300 BC - 1 600 BC.
Diameter 125 mm, height 99 mm, weight 286 gm.
Catalog: C-Group Culture, El-Dakka, cemetery 101, Grave 229, EA66710
Photo: Don Hitchcock 2018
Source and text: Original, card at the British Museum, http://www.britishmuseum.org/, © Trustees of the British Museum, CC BY-NC-SA 4.0
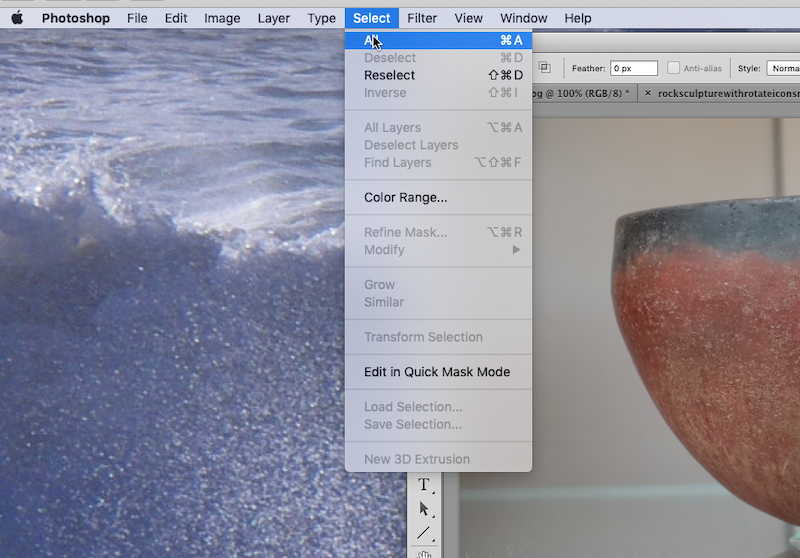
First, we select All as shown.
Turn on the grid with the Cmd + ' (Mac) or Ctrl + ' (Windows) method, or at the menu bar select View... Show... and choose Grid
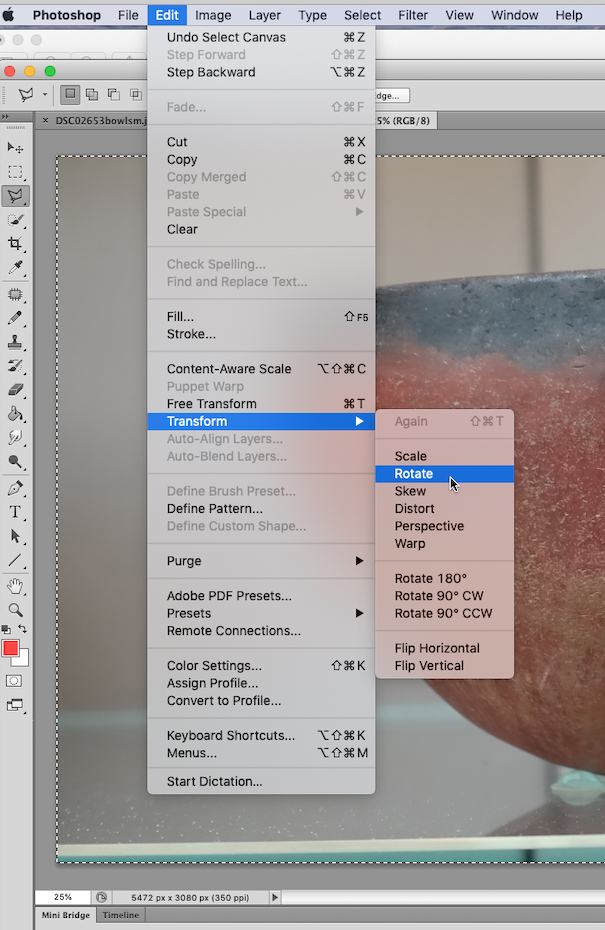
Next, select via the menu bar, Edit... Transform... Rotate...
(The Transform option is a very powerful tool for other tasks, of which more later.)
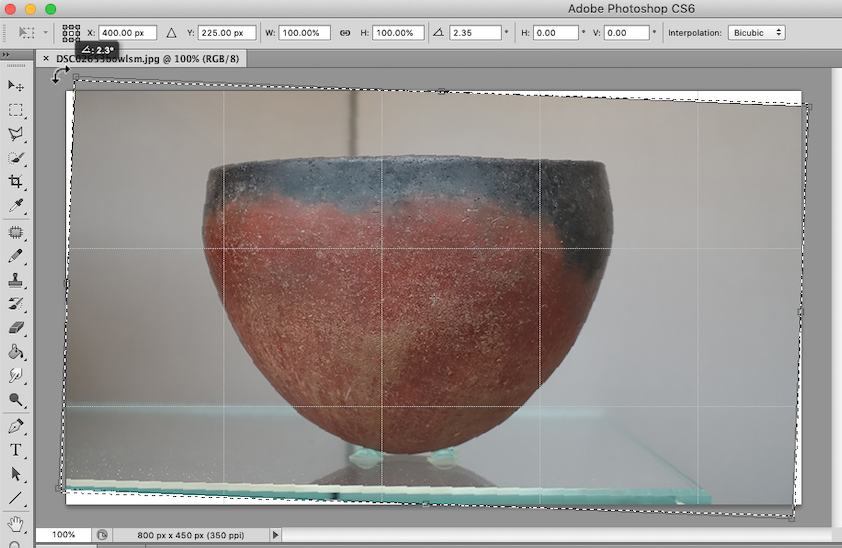
Rotate the image until you are satisfied with its orientation.
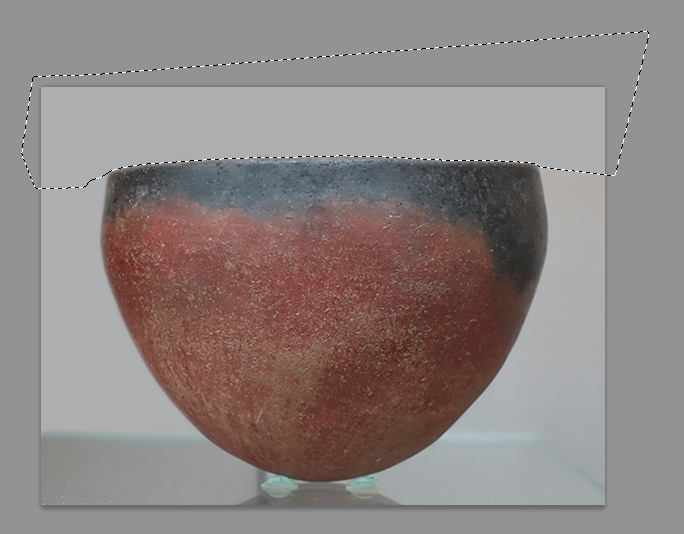
The image cropped. Often you will wind up with the desired image, but with the background colour (I have used white) showing in a strip at one or more sides, as shown here at the top right of the image. We can fix this easily, since the surrounding pixels are almost a monotone.
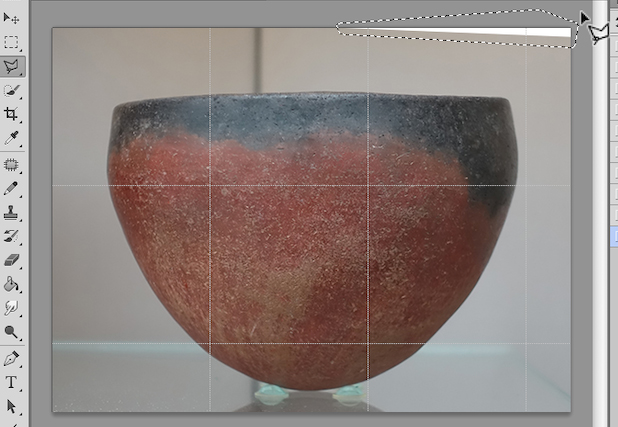
Check that the Lasso tool is set to a 'feather' of 0 px (though in this case it is not important), then using the Lasso tool, select the offending white colour.
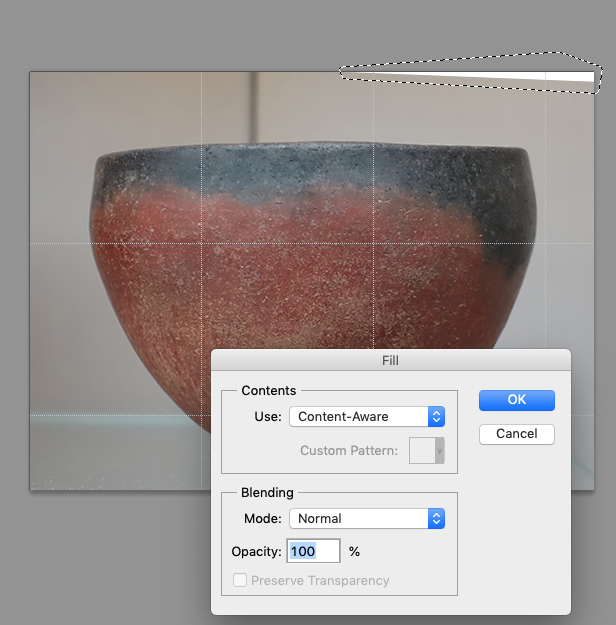
Press delete, and if necessary choose Content-Aware from the list of options, mode normal and Opacity 100 %, then press OK.

And the white narrow triangle has been healed. However, the image is still a bit cluttered, with a vertical black line, a horizontal blue band, and a shadow.
This can be fixed by outlining the bowl in a uniform colour. You can choose white, grey, black, or some other colour. I usually choose a suitable colour from the existing background, since this often appears, though subtly, in the general colour cast of the object.
I find the polygonal Lasso much easier to use, and more forgiving of mistakes for this task.
Erasing the background, and replacing it with a uniform colour
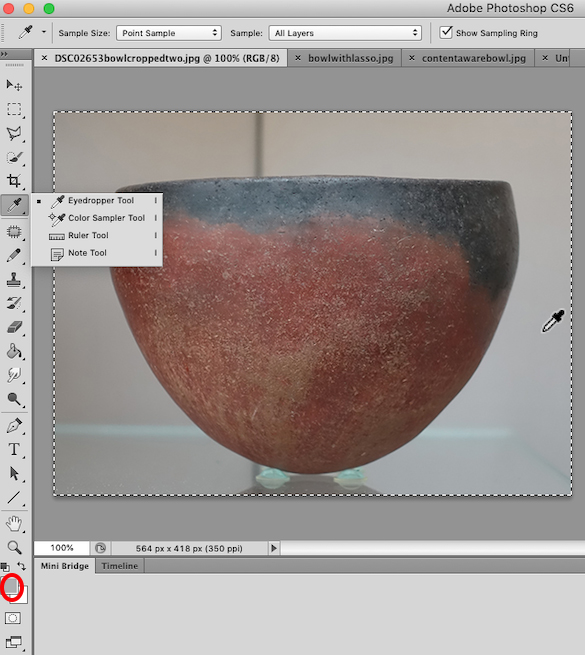
Choose the eyedropper tool, and click on the chosen area. The foreground colour will change, as shown in the red oval I have added to this image. We will choose this foreground colour to be the colour surrounding the bowl.
Note that should you wish you can set the foreground colour to black, white, grey or any other colour for a particular object. Black or white are often chosen for aesthetic reasons. Your call.
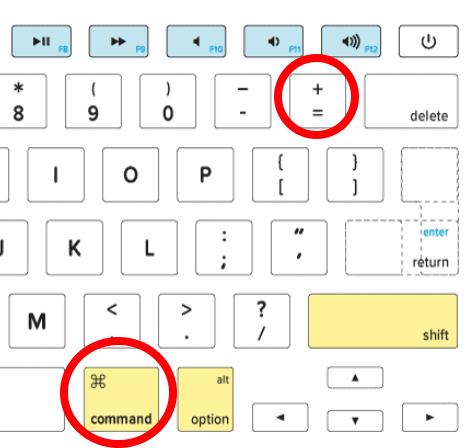
To quickly zoom in and zoom out use these shortcuts: Command + “+” (plus) (Mac) | Control +” (plus) (Win) zooms in. Command + “-” (minus) (Mac) | Control + “-” (minus) (Win) zooms out.
Base photo of keyboard: keyshorts.com
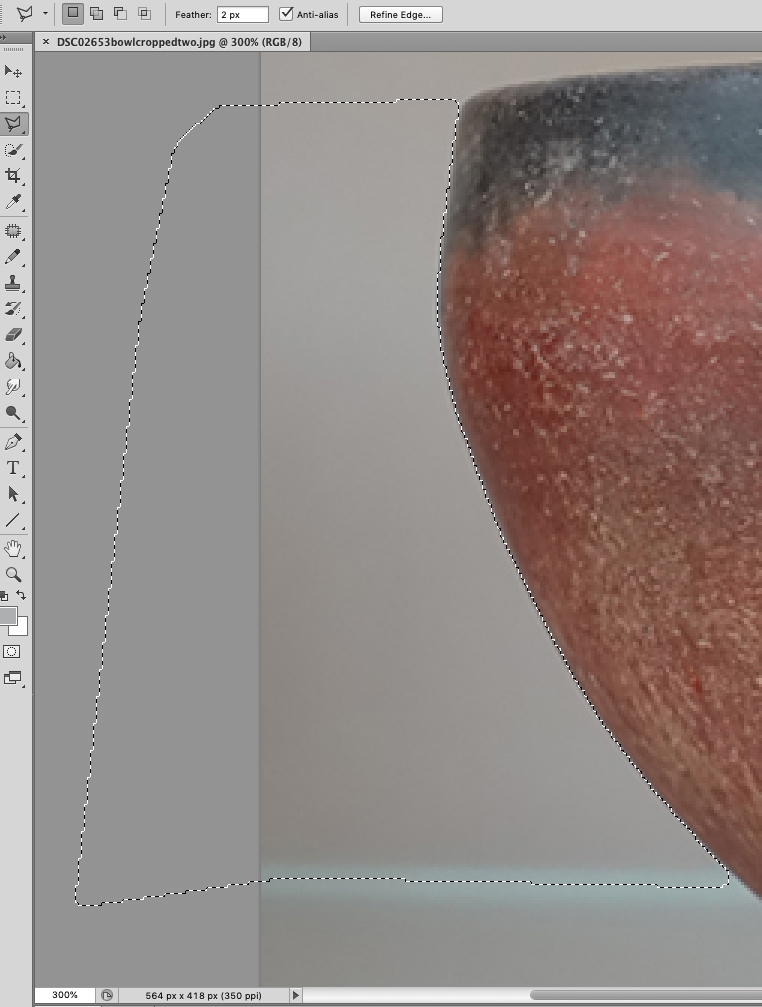
Increase the view to 200% or 300%, choose the polygonal lasso tool, set Feather to 2 px (important) and tick 'Anti-alias (important).
Note, however, that the Feather can be whatever you need it to be. 2 px is good for this particular moderately fuzzy outline, but for a sharper outlined object, 1 px might be better. I have had to use 3 px sometimes on a particularly fuzzy object.
To quickly zoom in and zoom out use these shortcuts: Command + “+” (plus) (Mac) | Control +” (plus) (Win) zooms in. Command + “-” (minus) (Mac) | Control + “-” (minus) (Win) zooms out.
I started at the lower left, outside the image, and then went in through the blue line, so that when I arrive back at that point, it will be obvious where I have been already.
Steadily click in small increments around the edge of the image. The anti-alias feature will smooth the resulting trail.
If you make a mistake, or a series of them, just press delete, and each time it will go back to the previous position. This is what I meant about the polygonal lasso being more forgiving of mistakes. Don't do too much at first, you need to make sure that you are clicking on the correct outer edge of the image.
Then come out to the left and connect the loop.
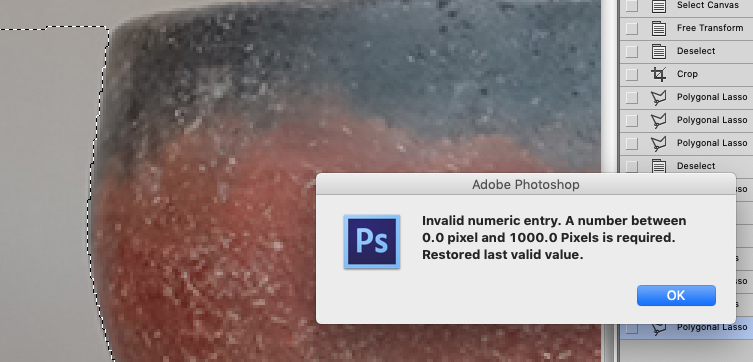
This is what I meant by Photoshop not responding to commands and your having to click on another tool to regain control. I pressed delete, but nothing happened. I clicked on another tool, and got this message. I clicked the OK button.
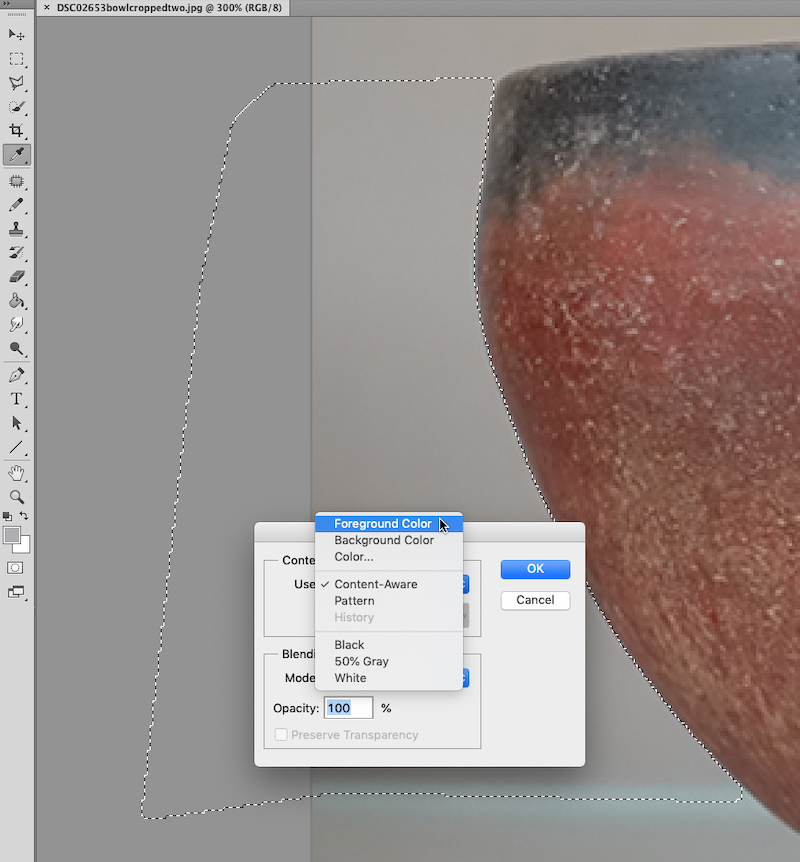
This gave me back control, I pressed delete again, and I chose Foreground Color as the fill.
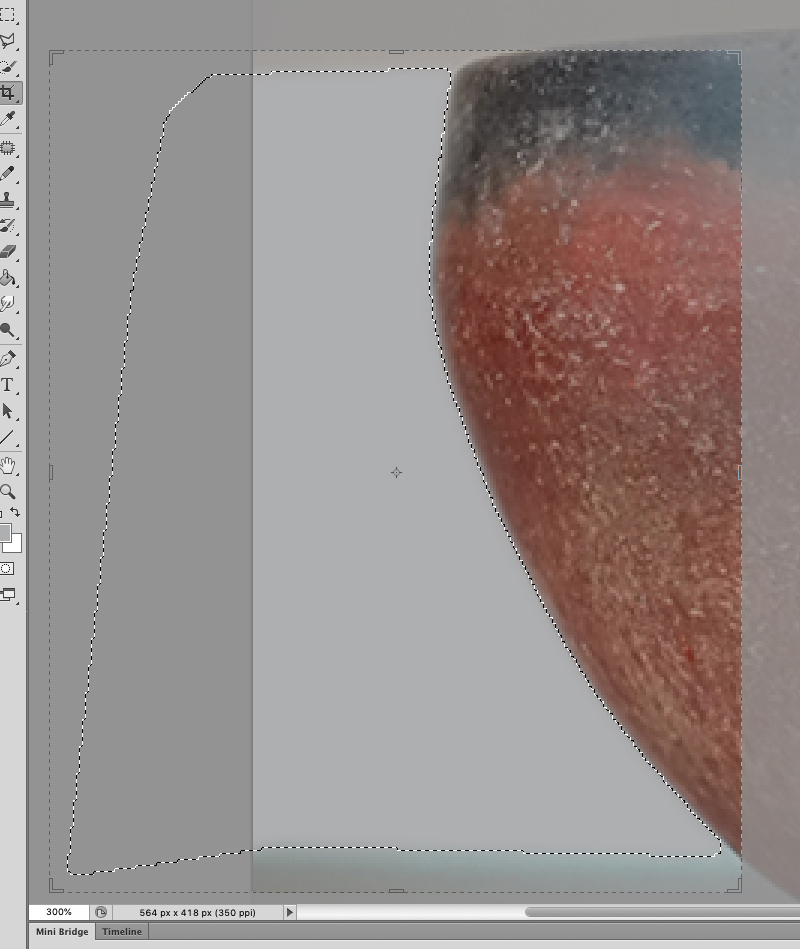
And the selected region was filled with the Foreground Color. Save.
Repeat across the top, and save.
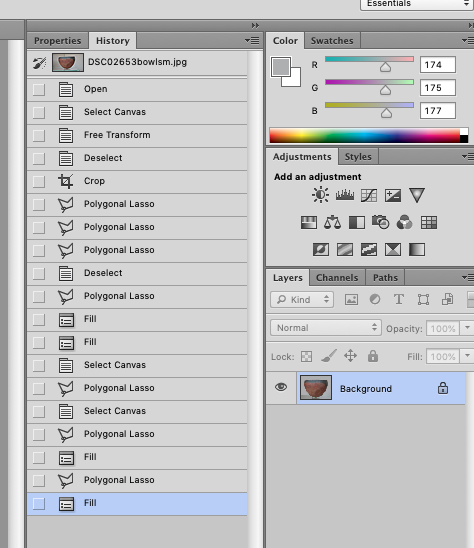
With the history panel enabled, when you realise you have goofed, you can go back to a previous version (a Polygonal lasso or a Fill in this case) and start again from there. That is one of the reasons you do only small bits at a time.
The other reason is that while you can press delete when selecting, and keep pressing till you get back to the goof, once you have double clicked, or joined up the selection, you can no longer undo, except for deleting that whole selection by going back in the history. Small selections mean that little work is lost.
In addition, Photoshop sometimes interprets a click as a double click, which is annoying. Try to arrange matters (see below) so that if this happens, the "return" path does not cross over the object.
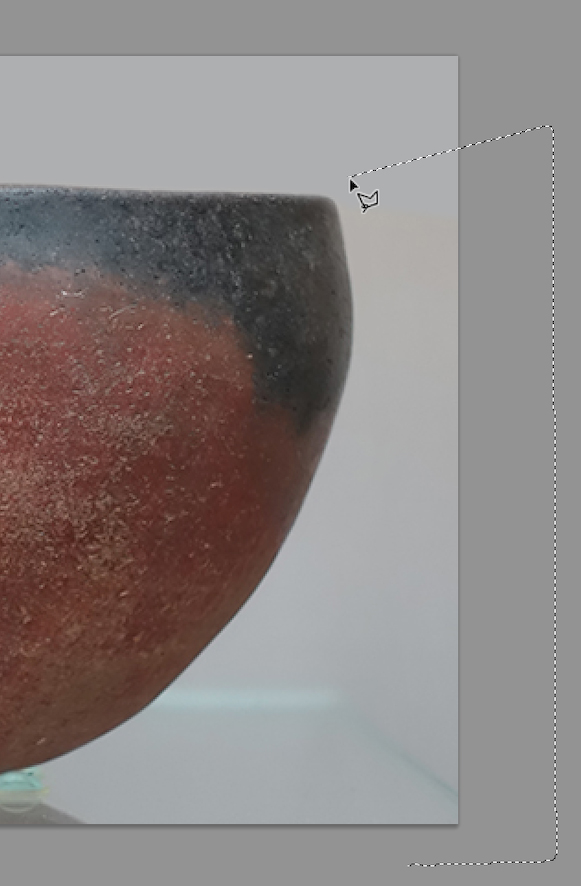
Start the next selection at the bottom right outside the image. Click to the right, then up, then in at the top.
This is an attempt to have any inadvertent double click join up without crossing your image.
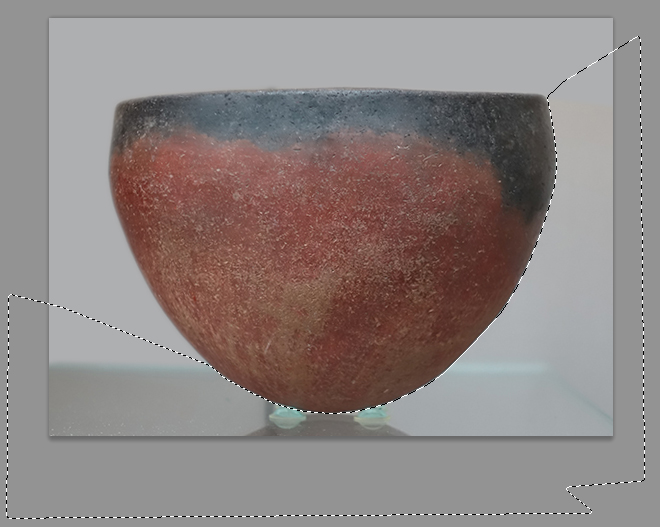
I threw caution to the winds, and completed the whole shebang in one hit. ;-)
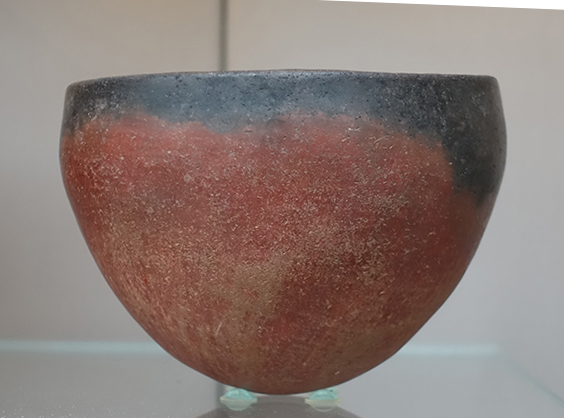
After (semi) final cropping and rotation, the bowl is looking not too bad. Isolated and emphasised, as per the adage.
Now for the cleaning up and enhancement.
Healing the edge of an object
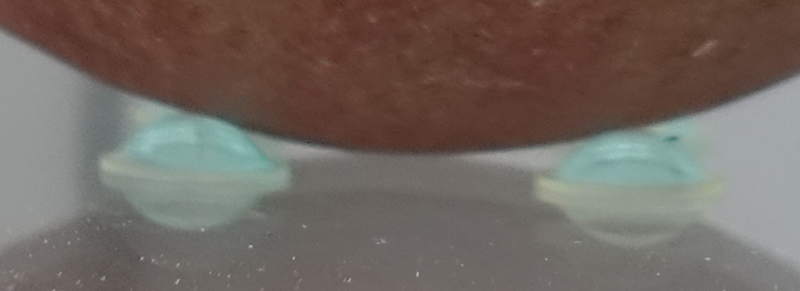
The bowl above was held in place by two blue supports. Both obscured to some extent the curve of the bowl, and are foreign objects which should be removed from the bowl image.
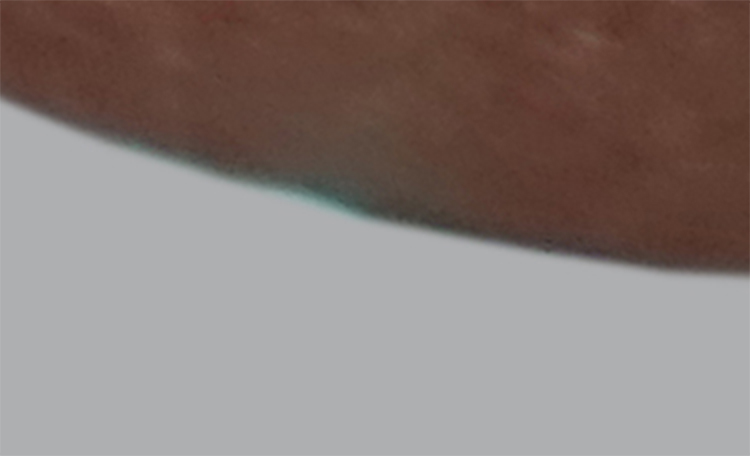
Here we can see the remains of one of the blue supports. The blue colour has also 'leaked' into the bowl, a common occurrence.
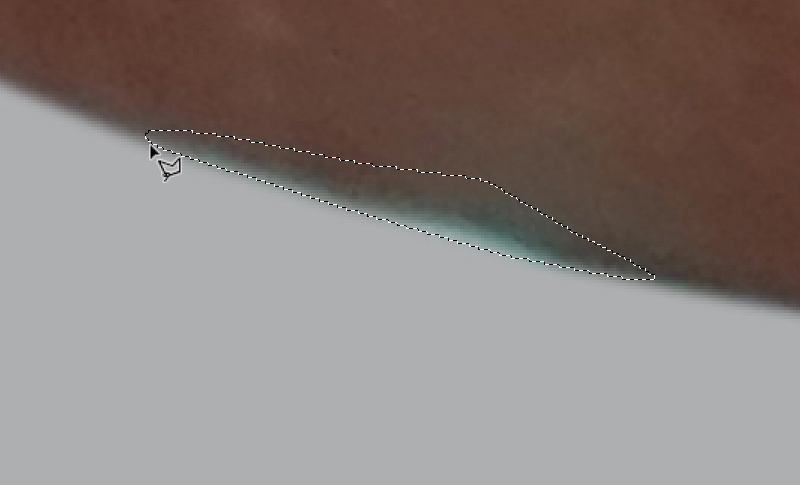
Set the feather on the Polygonal Lasso Tool to 2 px, tick the 'Anti-alias' box, and outline the area which needs to be healed. Make sure that the edge of the selection matches with the proposed edge of the bowl.

Choose the clone stamp tool.
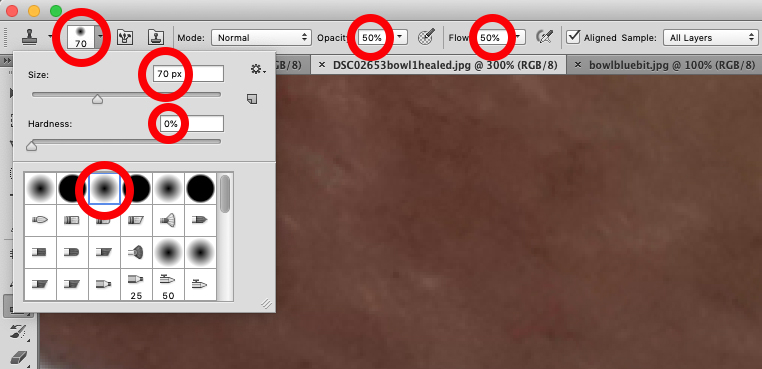
Click the brush preset picker, set the size to 70 px, the hardness to 0%, and choose one of the 'fuzzy' brushes, as shown. Set the mode to 'normal', and the Opacity and Flow to 50%.
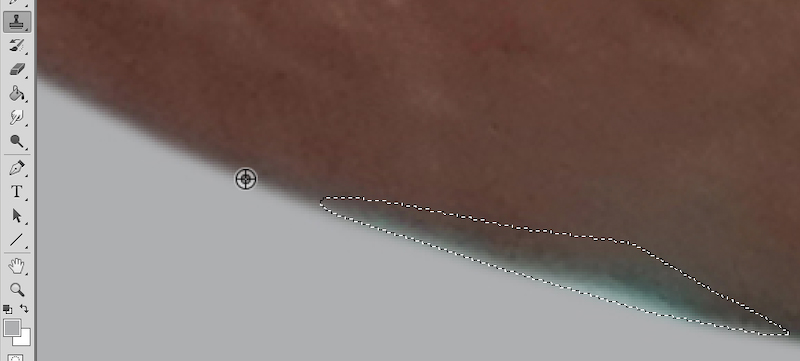
With the clone stamp tool selected, hold down the option key on your keyboard, and click on the edge of the bowl (but outside the selected area) as shown. I will call this the source.
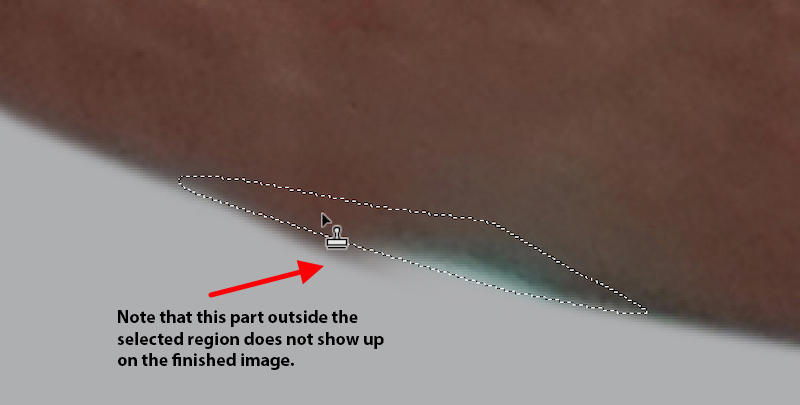
Choose the part within the selected area to be healed so that it lines up with the source, and click and drag the clone stamp tool along the outlined area.
The good thing about this method is that the only area affected is the one you have selected, so you don't need to be all that careful.
Check as you go that the healing is progressing well, and maybe start again choosing a 'source' from the other side after doing half of the healing.
The fact that you chose to set the Polygonal Lasso Tool to 2 px before outlining the required area, means that the fuzziness of the actual edge is not shown up by an artificially sharp new edge.
Works great.
To temporarily hide (and then show) the outlined area, press Command H (Mac) or Control H (Win)
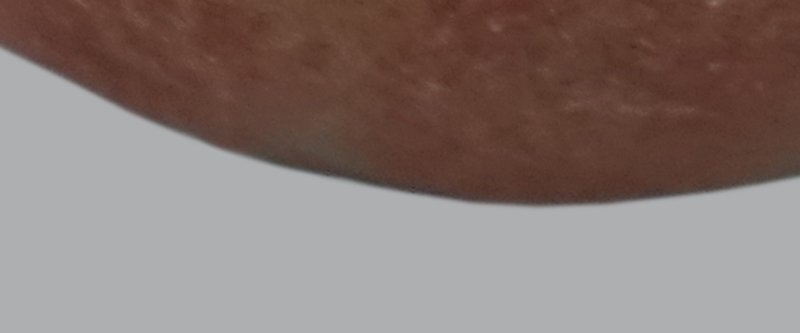
... and the edge is now as it should be.
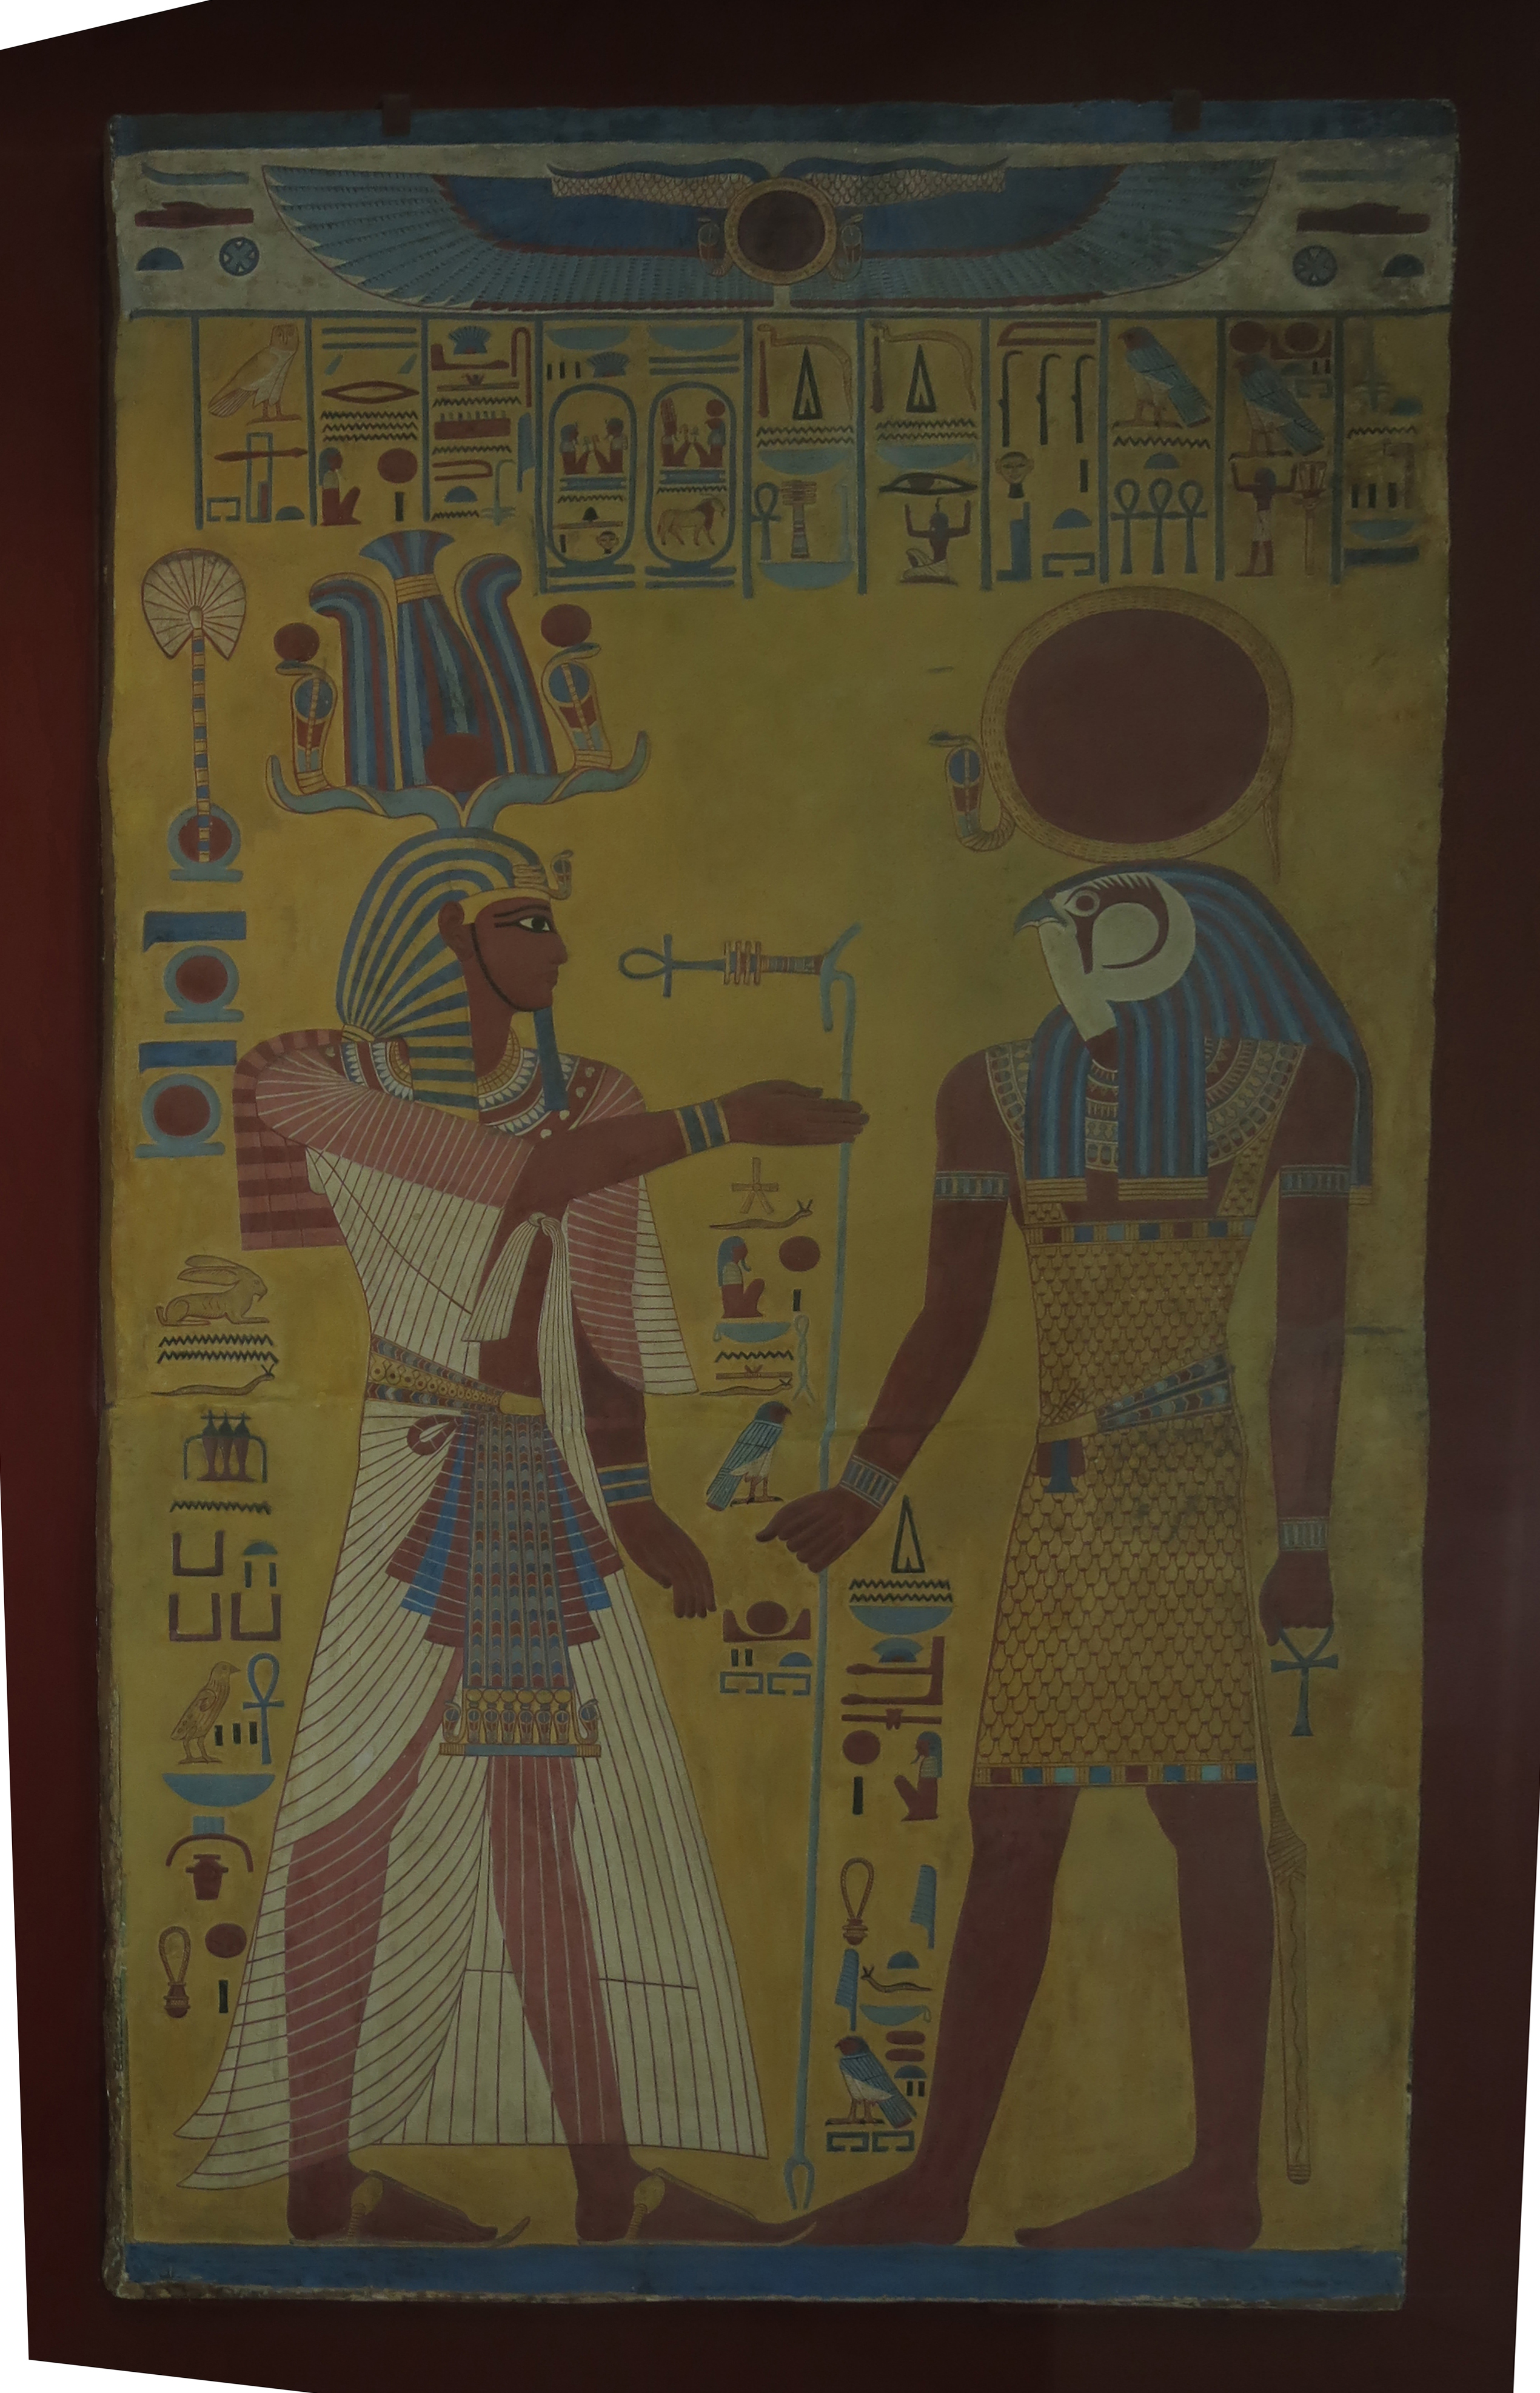
Fixing distortions
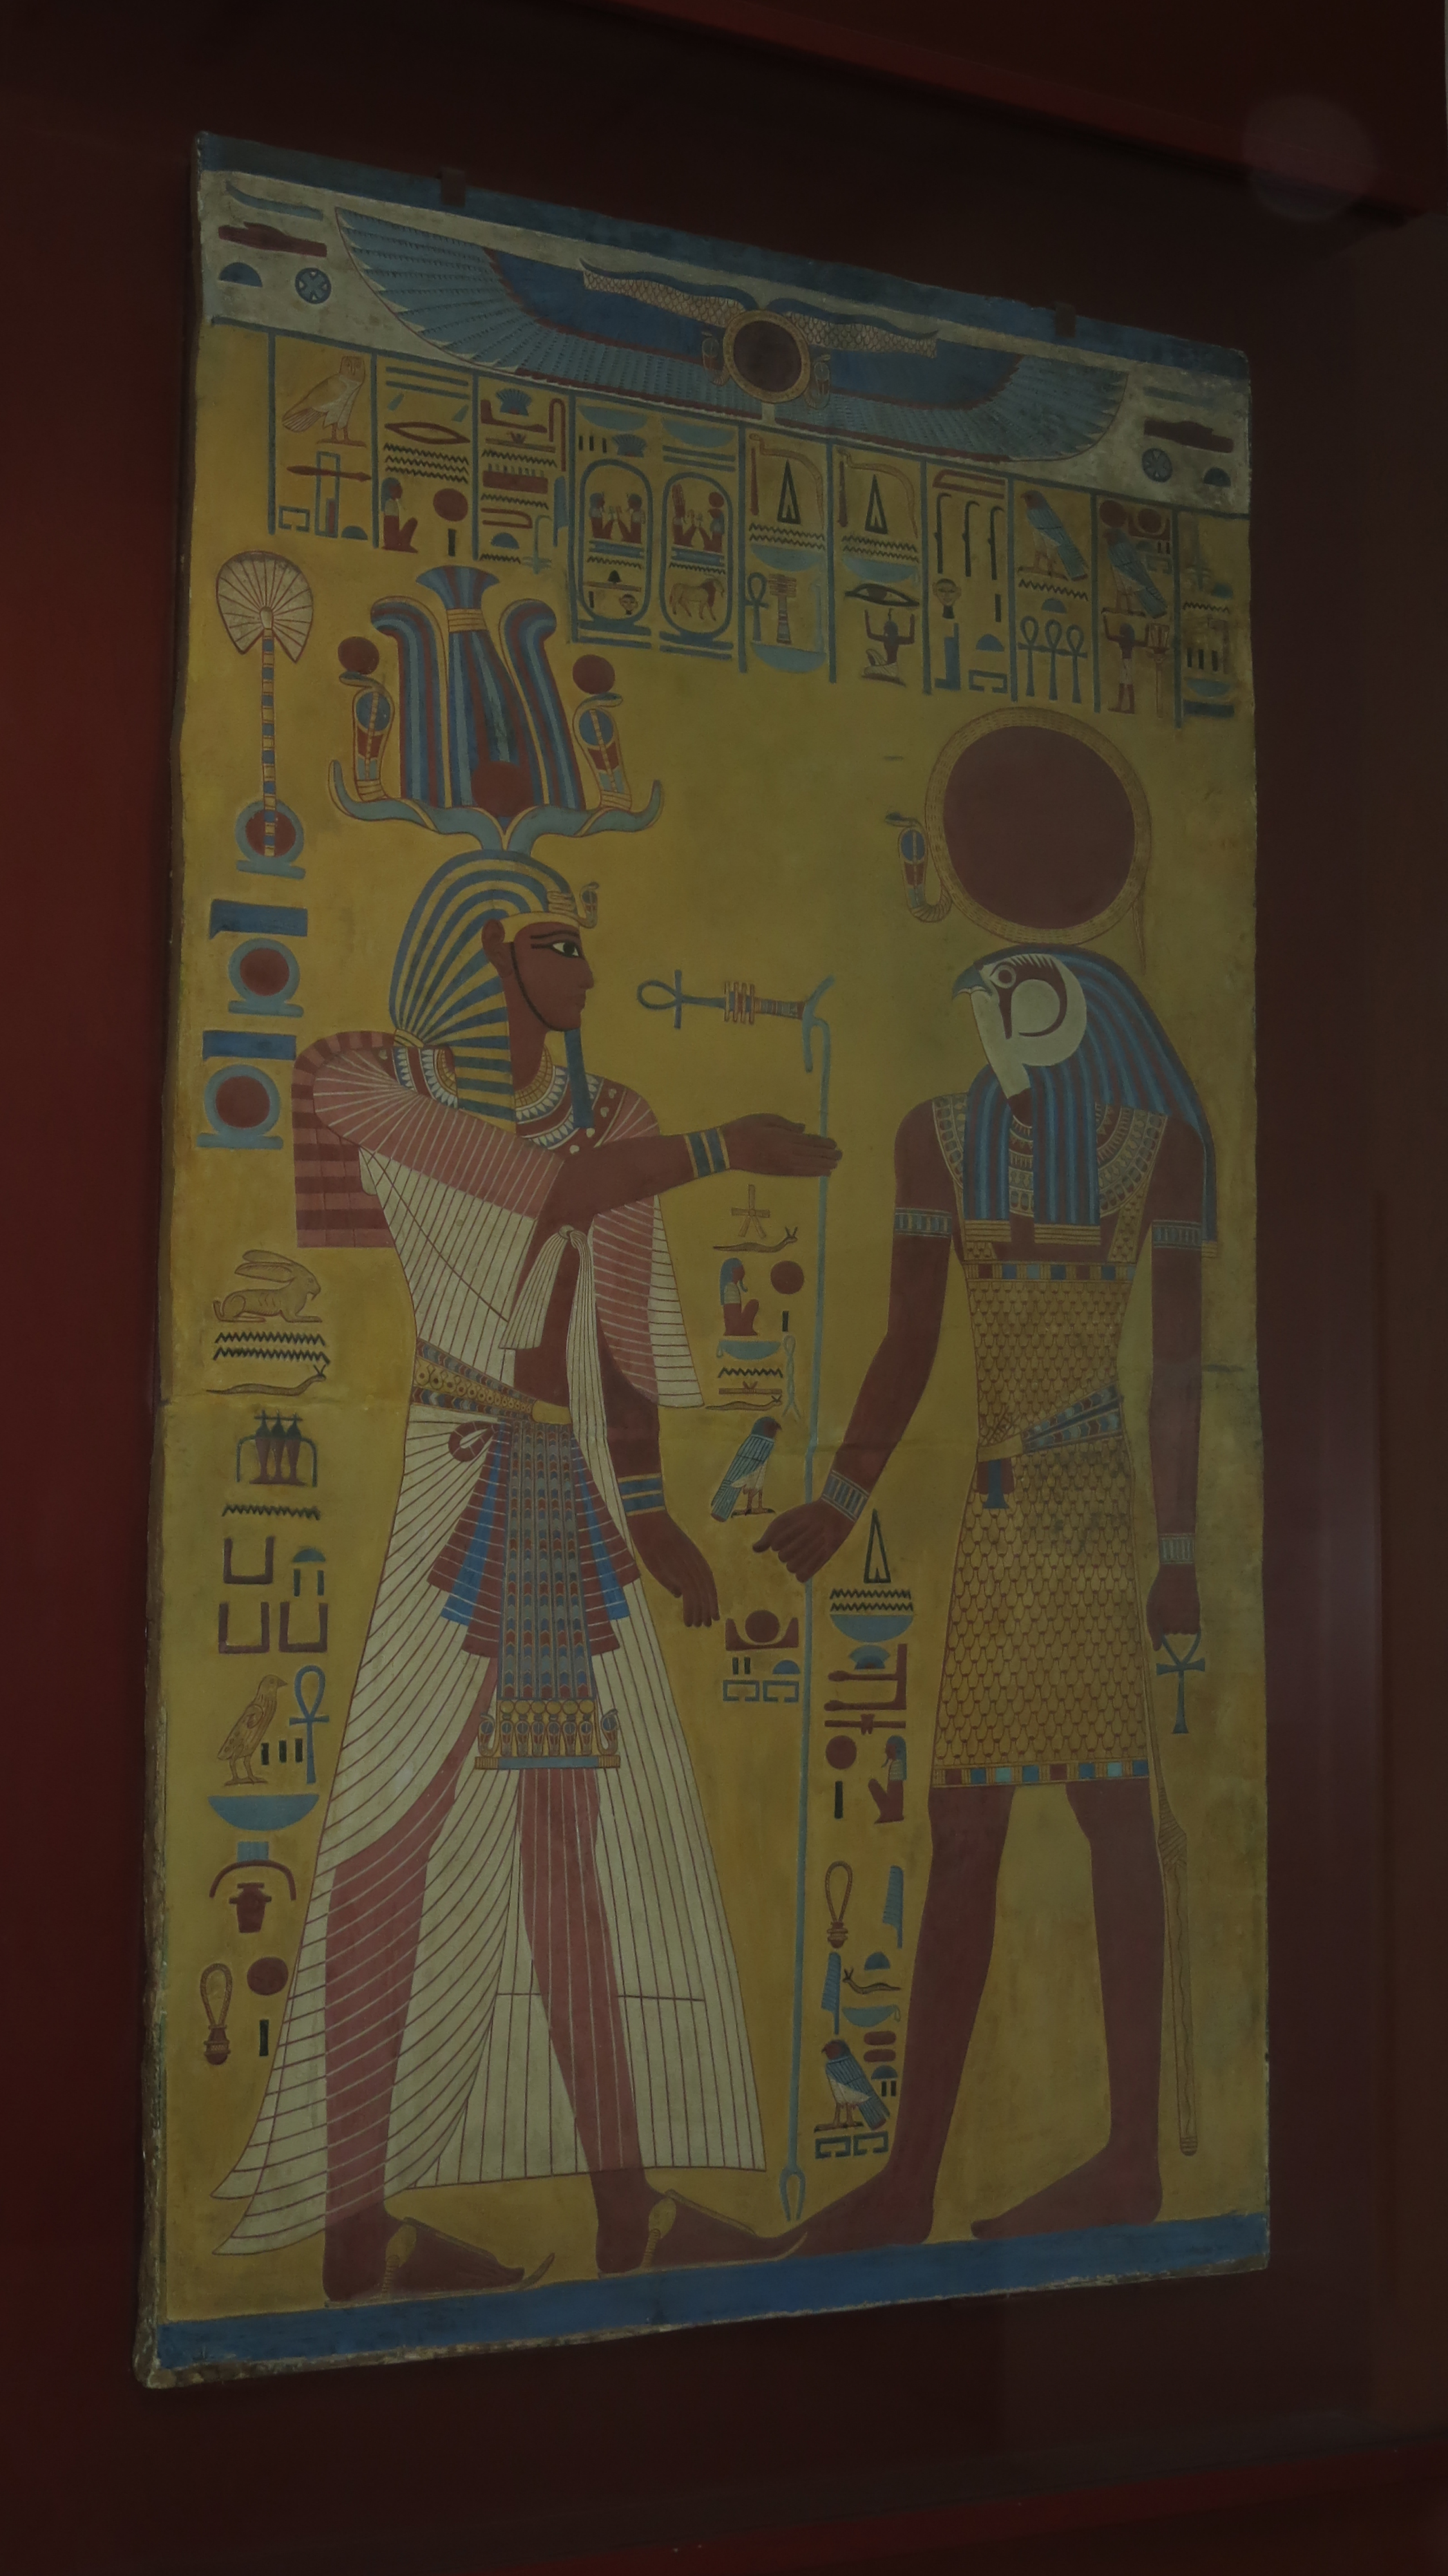
One of the most useful abilities of Photoshop is to remove distortions. This is a flat painting, and therefore it is possible to restore it to its original relative dimensions.
Taking photographs in museums is fraught with difficulties - Most of the exhibits are inside vitrines (glass cabinets) and often there are reflections from both the front and back glass of the vitrine. There are ceiling lights, exit lights - and people.
It is sometimes possible to rest the outer rim of the lens of the camera against the glass to remove the reflection (glass is harder than ordinary steel, let alone plastic, and thus will not be scratched, though most museum guards seem unaware of this fact) but that relies on the object being a minimum distance away from the front of the vitrine.
In a case such as the painting above, the reflections from the glass can only be evaded by taking the photo at an angle, and removing distortions later with Photoshop. Although the British Museum uniquely allows flash photography, this is usually not advisable because of the reflections from glass, and often the object itself.
In addition, flash often 'flattens' an object, removing essential light and shade which provide the eye with contours and an appreciation of the object's three dimensionality.
In this case, we can see that the photograph is distorted, dark (museums are often dimly lit to preserve the colours of paintings and painted objects), and desperately in need of tender loving care to restore it.
Plaster cast from the Tomb of King Merneptah
Catalog: Plaster cast made by Joseph Bonomi 1824 - 1834, Hay Collection AES
Photo: Don Hitchcock 2015
Source: Original, British Museum
Text: Card at the British Museum, © Trustees of the British Museum, CC BY-NC-SA 4.0

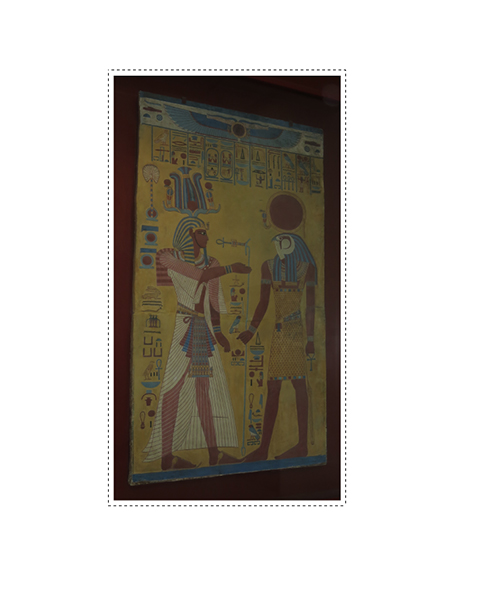
First crop it a little if necessary, then drag the edges of the cropped area out, to create a white border, as shown.
The white colour of the border when doing this is set by the background colour.
At this point I have the foreground set to black, and the background set to white as shown.
Rectangular Marquee Tool
Choose the Rectangular Marquee Tool, and drag it around the coloured part of the image as shown.
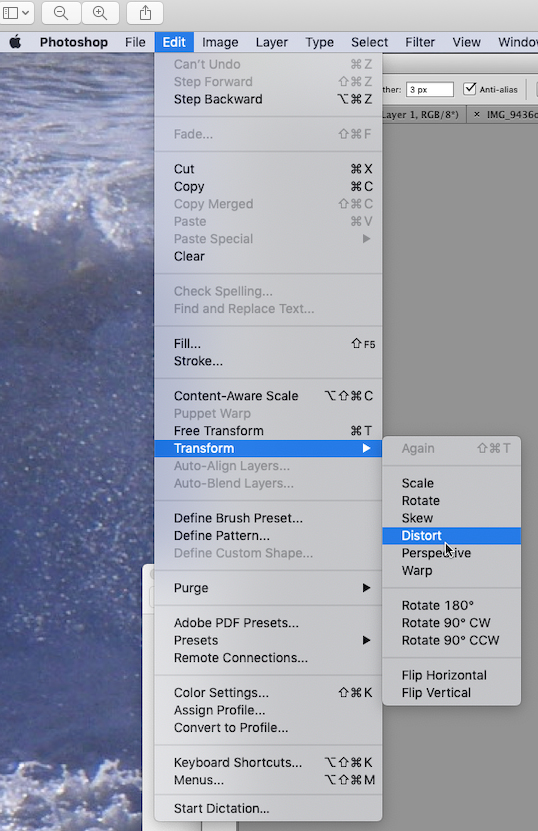
Now choose Edit... Transform... Distort... as shown.
Turn on the grid with
Cmd + ' (Mac) or Ctrl + ' (Windows)
as previously on this page.
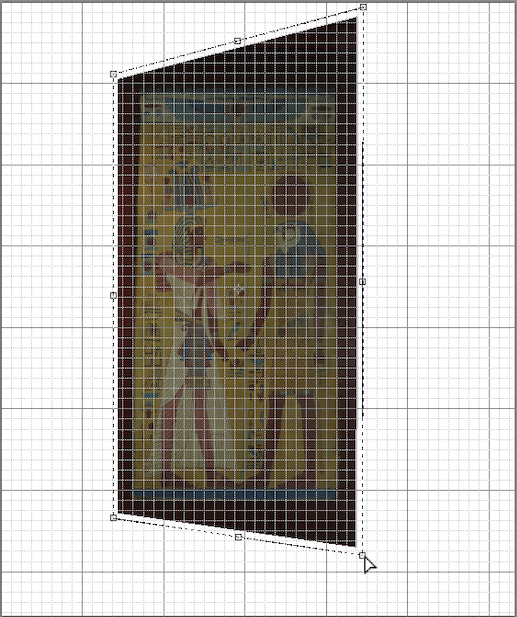
Click and drag the top right corner until the image lines up with the grid.
Click and drag the bottom right corner until the image lines up with the grid.
(At this point I will need to change the grid to be less detailed, as per the instructions further up this page. )
Click and drag the other corners until the four edges are vertical/horizontal as needed. You will find that dragging one corner puts another side out a little. Continue until all are rectilinear.
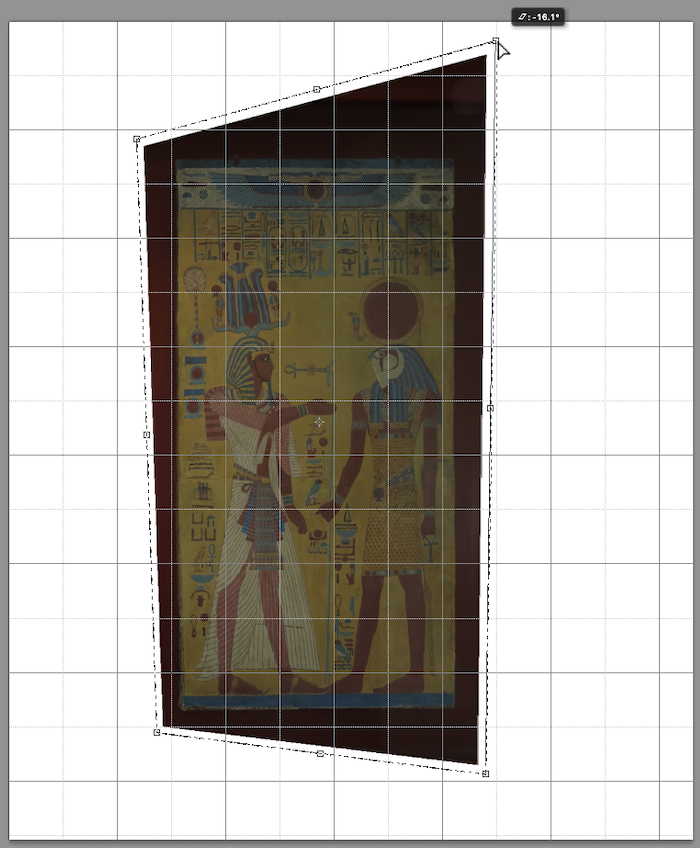
Now we need to increase the width of the image. Notice the trapezium shape - you will be dragging the right hand middle handle to the right in the next step, until the image 'looks' right.
If the artist has put in a circle that really is a circle, that is a godsend at this point.
Otherwise, use your judgement.
Again, you will need to go round all the handles until the image is satisfactory - it will at least be a great deal better than it was.
Occasionally you will have access to a professional shot of the object, taken from some distance without distortions, and you can use that as a guide. It is even possible to set the other shot up as a transparent layer, and make yours fit it. More on that later.
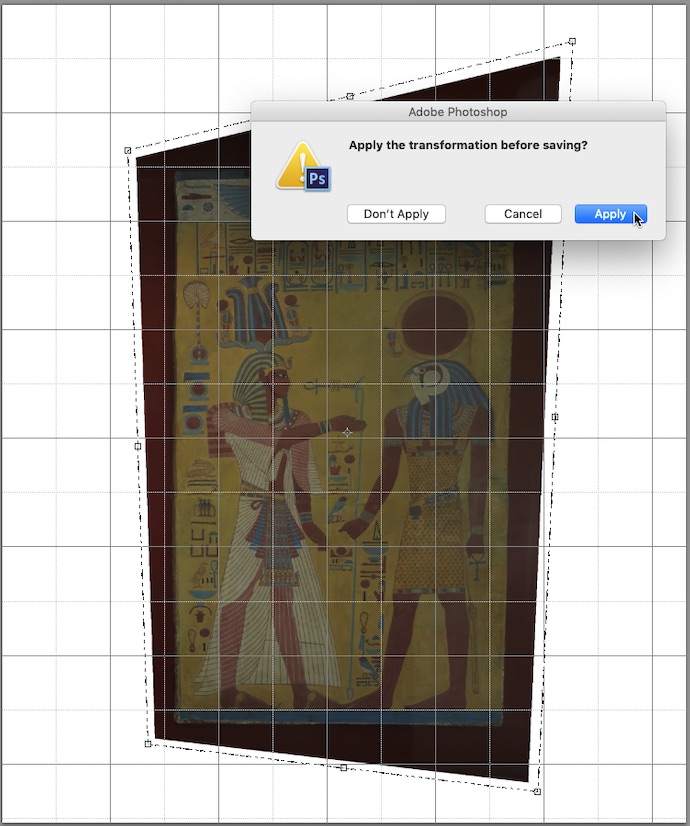
Save, and click Apply to have the transformation saved.
Crop, but leave a fair bit of leeway outside the main image to allow for further adjustments.
Enhancement methods - colour, contrast, and others
First, Levels:
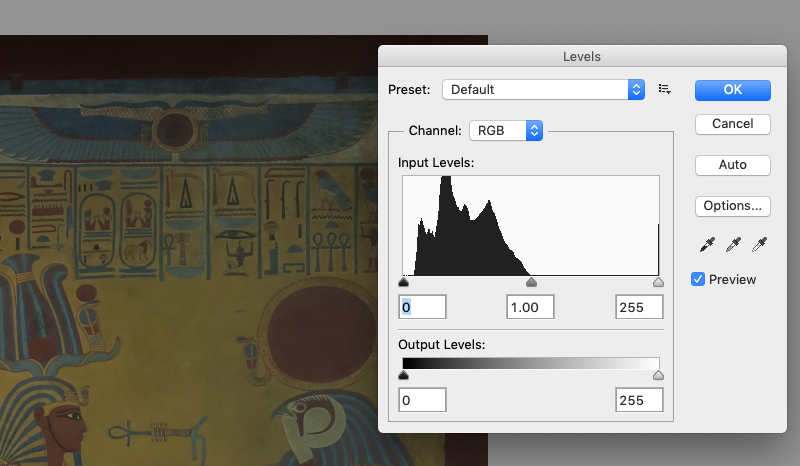
Open the levels window by using command+L (Mac) or ctrl+L (Win).
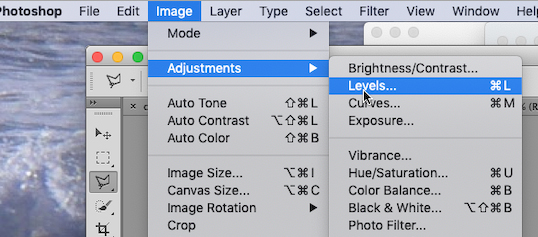
Or use Image... Adjustments... Levels... as in this screen shot.
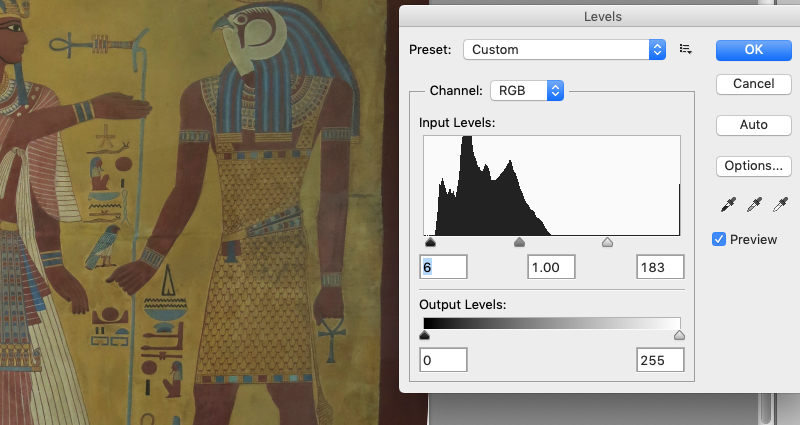
A good first step is to move the left and right sliders to half way along the respective base of the graph, as shown. Click OK.
Next, Auto Color:
Levels (as above) can be easily adjusted, since we can see the result of any movement on the slider. This is not so with 'all-or-nothing' changes such as what follows, Image... Auto Color (and Curves after that).
Auto Color tries to remove colour casts from the image. It usually works well with an image with a wide range of colour and especially of natural objects, but it is of limited value with images which are essentially only one or two colours, such as an engraving of brown sandstone in low incised relief set against a uniform black background.
However it is often of some use, so long as we can mute the drastic changes it sometimes causes. We do this by creating a copy of the base image as a layer which floats above the base image. Then we move the slider until the desired effect is obtained.
Go to Layer... Duplicate Layer...
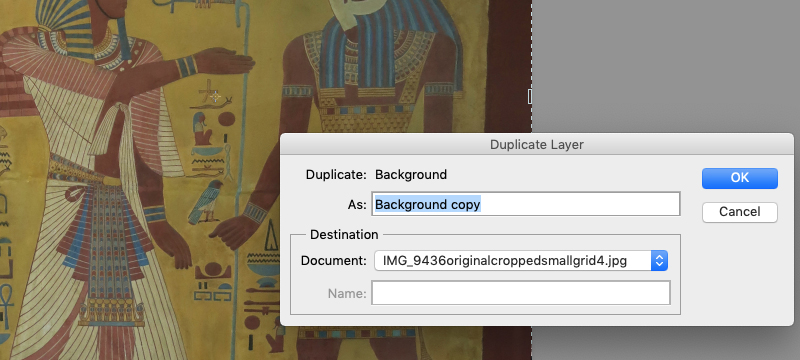
... and click OK.
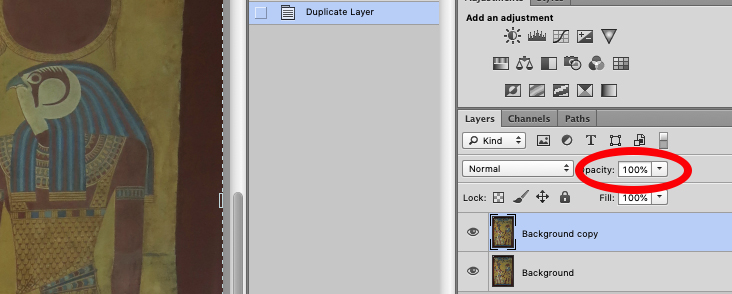
The top layer, the Background copy, will be highlighted, and that is what we will be altering, by changing its opacity.
I have circled (or ellipsed!) the layer to be changed in red.
The bottom layer, the original, (Background), will gradually show through until we have the effect desired.
Go to Image... Auto Color and let go the mouse.
This is one of those times when a disaster ensues. The image has far too much blue.
I tried sliding the opacity in increments (decrements) from 100% to 0%, and there was no joy.
We abandon Auto Color at this point for this particular image.
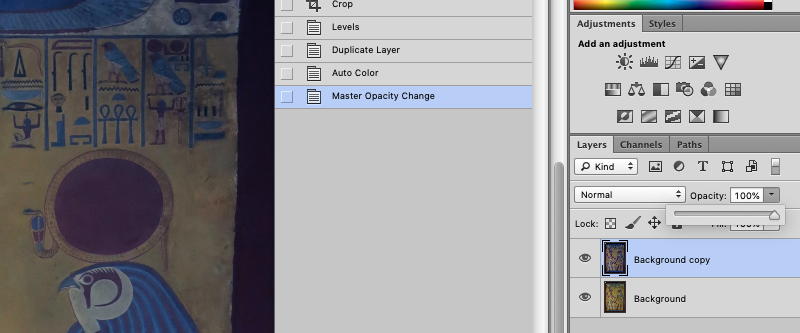
Click on the history section at "Duplicate Layer".
This will undo the Auto Color, and we can try "Curves", below, which is also an all-or-nothing change, so we need the duplicate layer in place.
Next, Curves:
Choose Image... Adjustments... Curves...
A Curves palette will open. Select Auto, then OK.
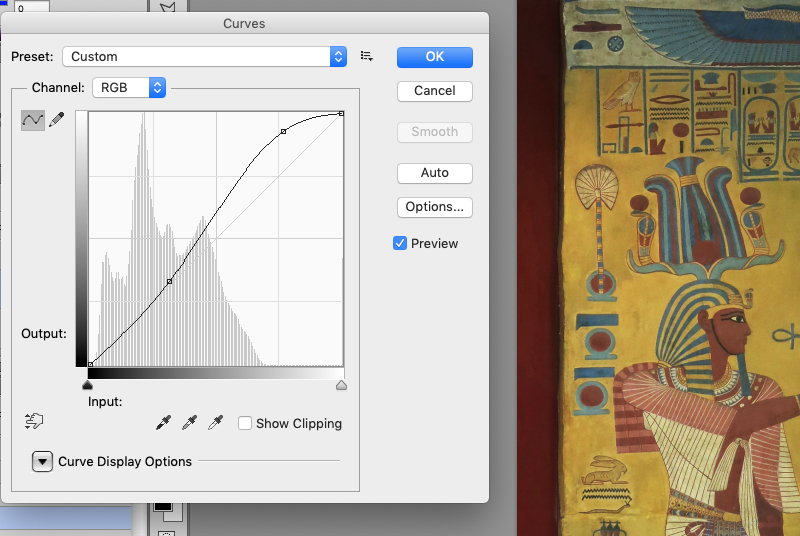
A much better result ensues. I tried sliding the opacity down from 100%, but 100% was best.
Most other enhancements do not need a duplicate layer, since they can be readily adjusted.
Next, Shadows/Highlights:

Start with both sliders at zero. I generally do the highlights first, and shadows last. It is a better result, but it is by no means the final version.

The image has lost a bit of contrast in this case, but that can be fixed.
Next, Exposure:
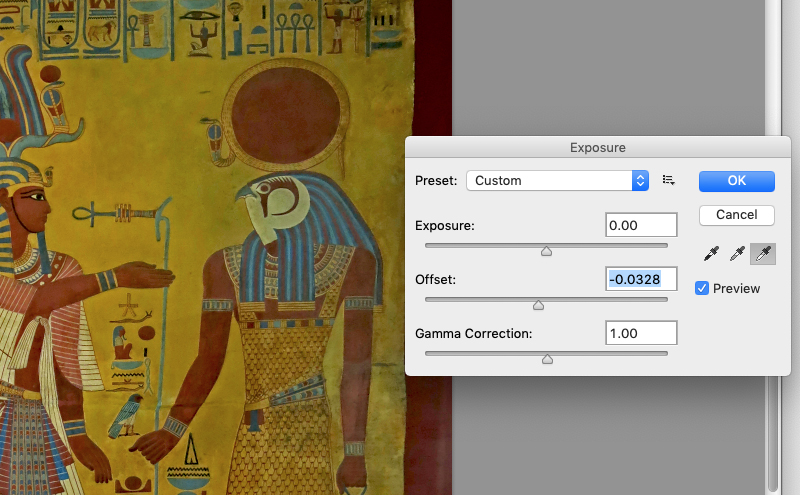
Choose Image.. Adjustments... Exposure...
And drag the offset to the left, which decreases the exposure, and often gives a better result in terms of colour saturation and contrast.

-0.0328 is a little over the top, so I reduced it in small decrements to -0.015.
Next, Brightness/Contrast:
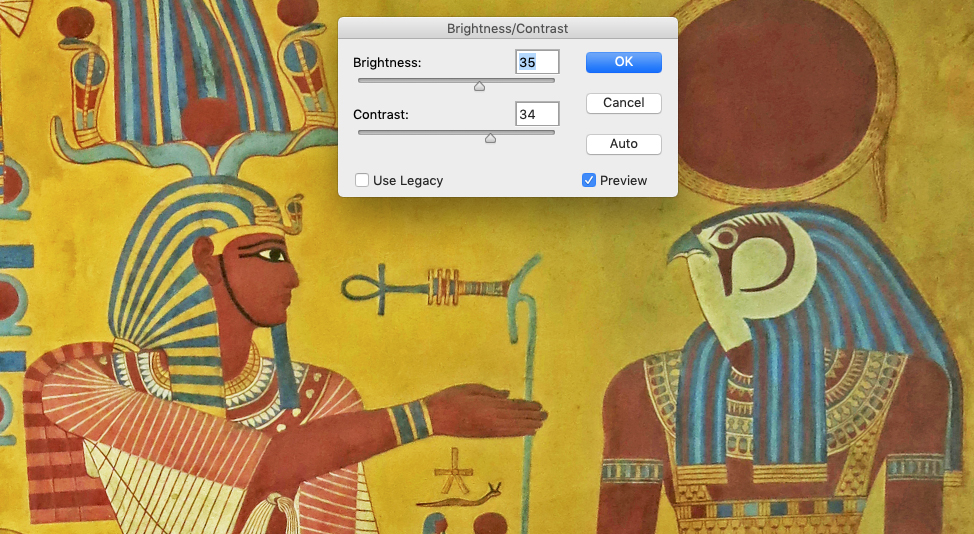
Choose Image.. Adjustments... Brightness/Contrast...
I used auto, which gave a good result with brightness of 35 and contrast of 34.
I use the program Noiseless CK on Mac OS Mojave which is unfortunately reported as not being available for use on the Big Sur operating system. It is an excellent program for reducing noise in images, especially when they are taken in low light, as this image was.
The latest digital cameras (2018 to the present) are very much better in low light than those of, say, 2008 vintage.
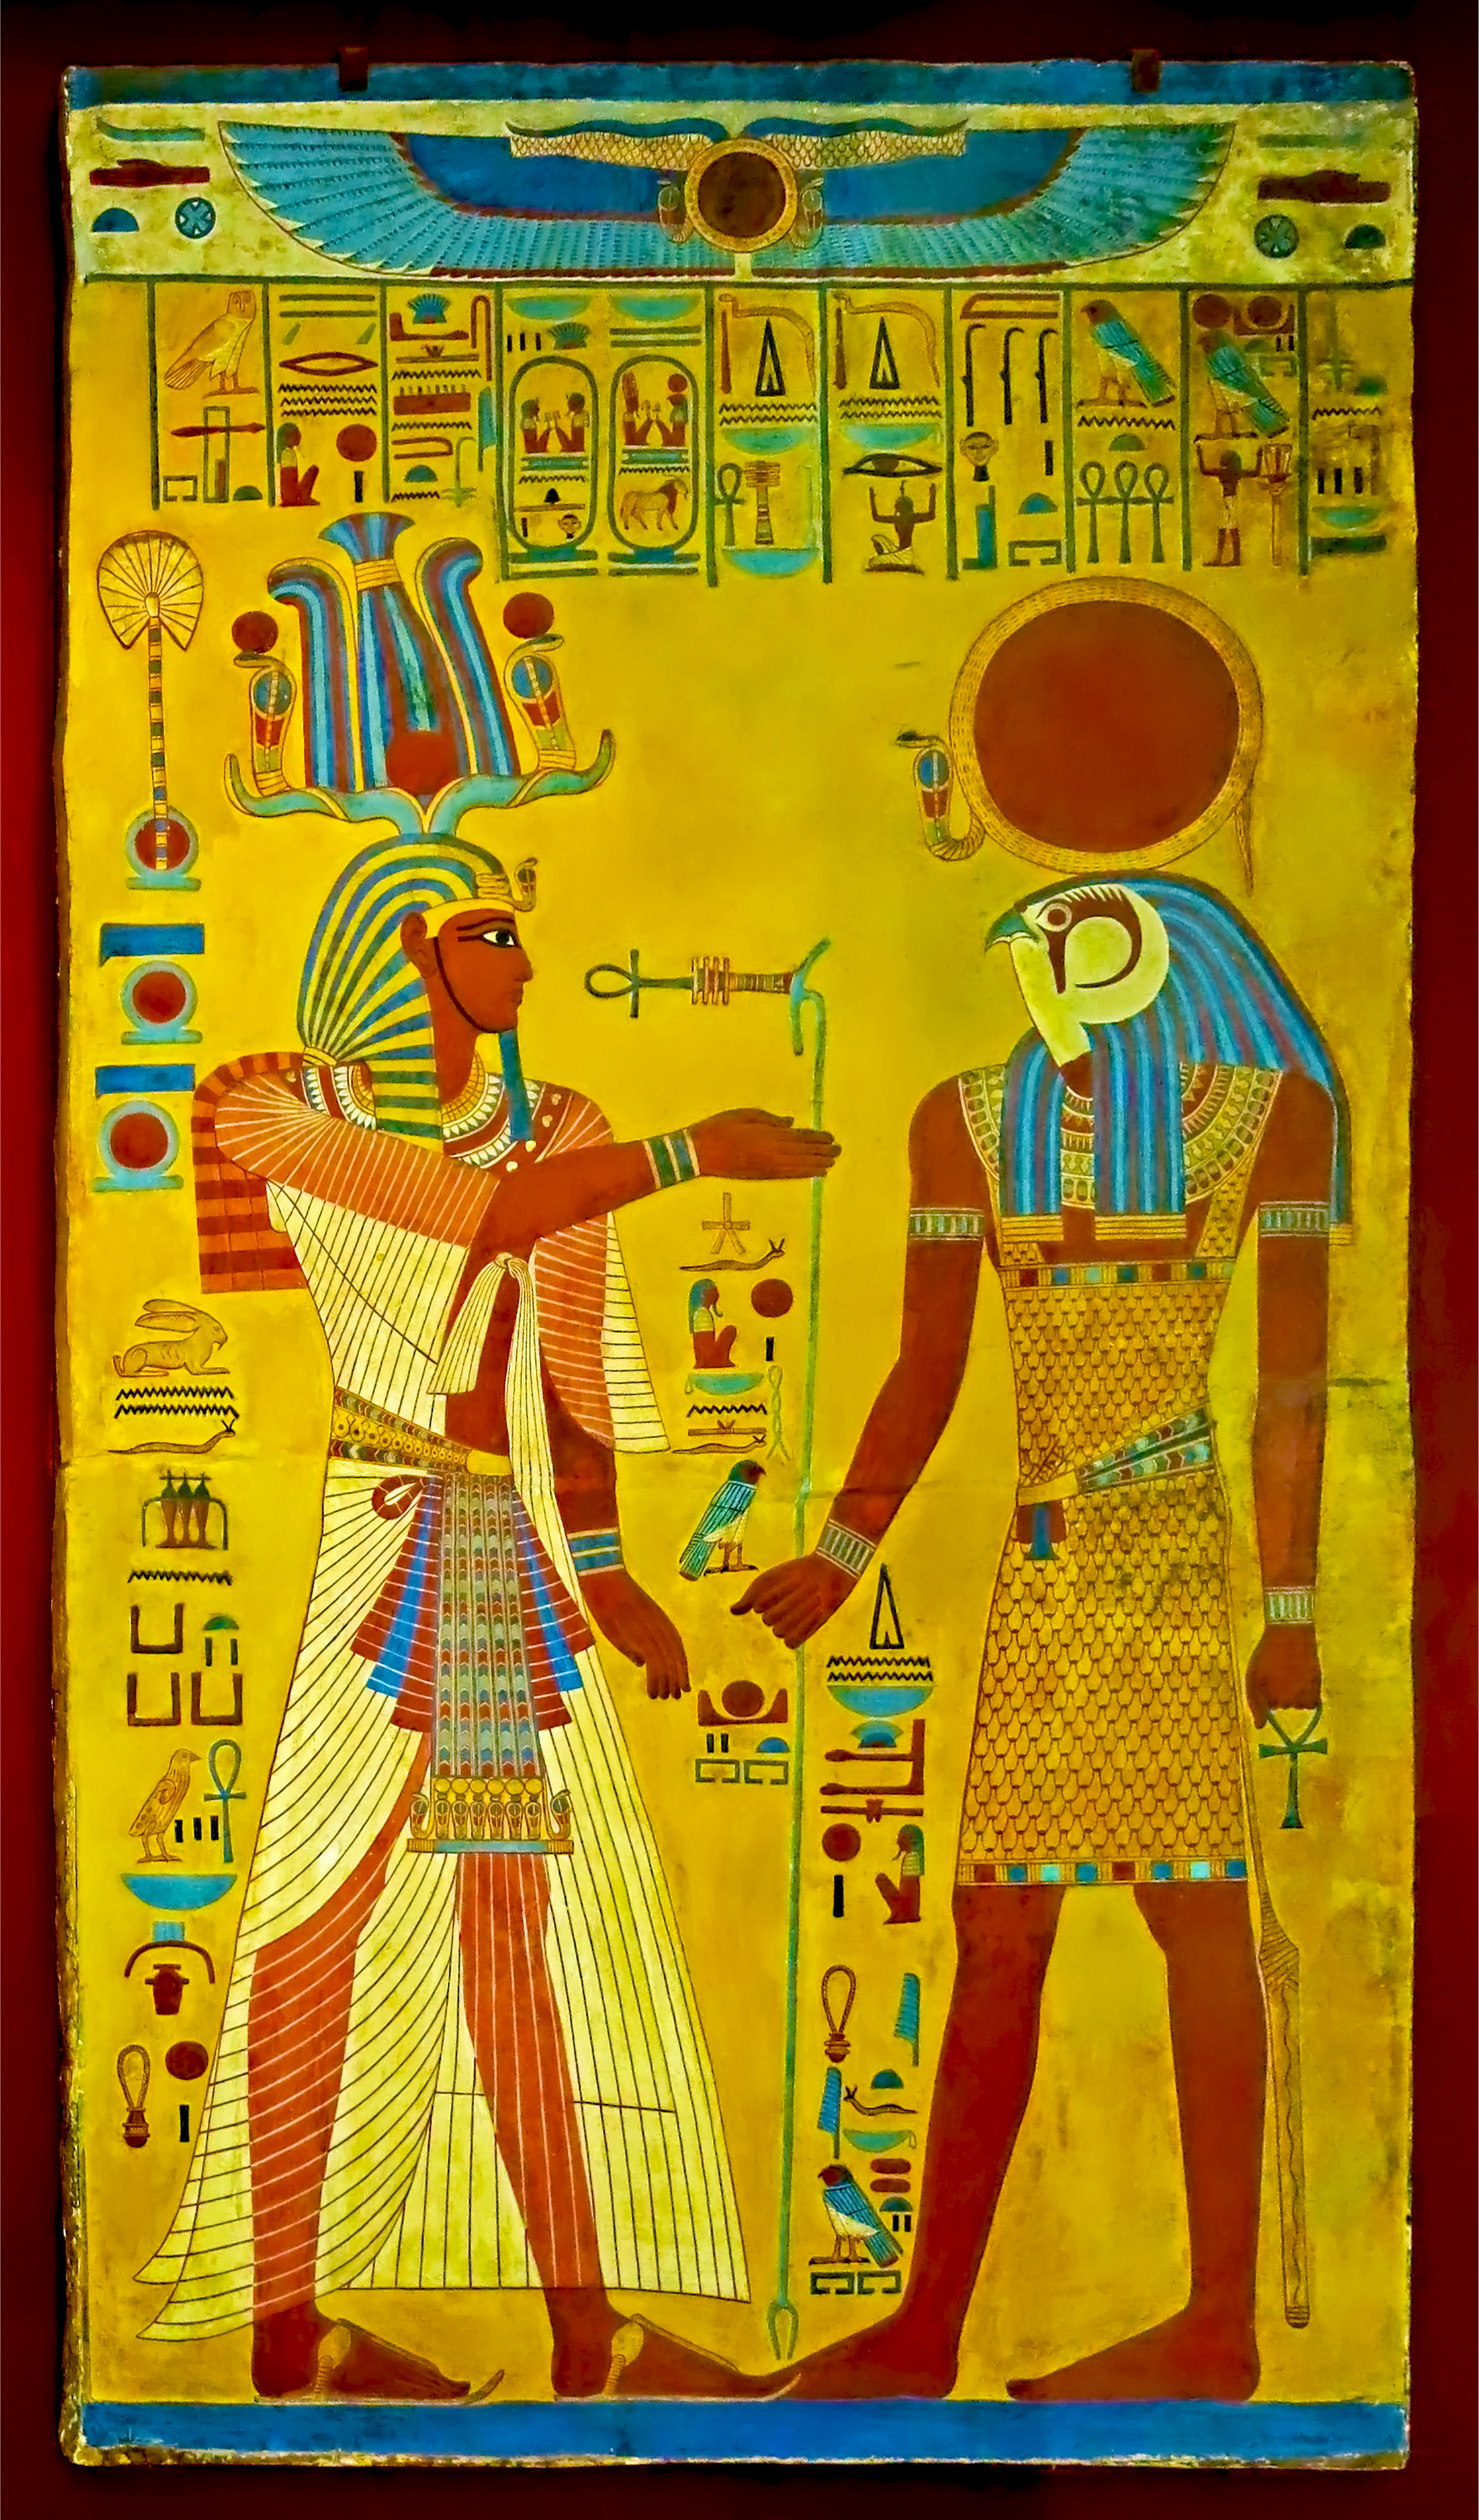
The final result after noise reduction, further adjustment, and cropping.
A vast improvement on the original dark and distorted image!
Taking screenshots with the cursor showing:
This is not straight forward.
If you are trying to show someone how to use photoshop (or any other program) then at some point you are going to need to take a screenshot with the full image of your pointer and so on.
Command shift 3 (the whole screen) works for some things, and Command shift 4 (then select what you need) works for some other things, but not for ephemeral pointers.
I use the Preview program, readily available on the Mac.
With Preview open, select File.. take screenshot... from entire screen. If you now go to the program (in this case Photoshop, but it works for any other program) and get set up ready to do the process using the program, a little window appears saying 'Countdown to screenshot has started'.
![]()
Do whatever you need to do, until the message disappears, and a screenshot appears. Copy the bit you need from the screenshot, and add it to a file in photoshop, ready to put it where it is needed on your website or power point presentation.
References
- Adobe, 2022: www.adobe.com/au/products/photoshop/free-trial-download.html,