Back to Don's Maps
 Back to Archaeological Sites
 Back to Pacific NW Coast index
Kayak Diary...
Building a Traditional West Greenland Kayak
This photo diary shows the step-by-step construction methods used in building a traditional 17 foot by 22 inch ( 5.2 metres by 28 cm) Greenland-style kayak straight from a standing tree without using any nails, screws or other metal fastenings.
The framework is Northern (Eastern) White Cedar (Thuja occidentalis) with a Black Spruce (Pica mariana) keel and White Ash (Fraxinus americana) rear deck, masik and coaming. Skinning was 7 ounce (or 237 g/m2) ballistic nylon stained and varnished for waterproofing instead of the traditional seal skin with nylon seine twine lashings in place of rawhide.
The wood was milled directly from the log using hand and power tools with methods developed as the project progressed. A portable bandsaw mill would have been nice but one was not available so improvisation was the key. The results were more than promising and I have no doubt that anyone with time and care could achieve lumber of equal quality. This also resulted in considerable cost savings: Not having to buy lumber the total out of pocket expense for the kayak was around $115 - $125 in 2008 Canadian dollars.
The first photos show the process of making quality timber straight from the tree - without heavy equipment...
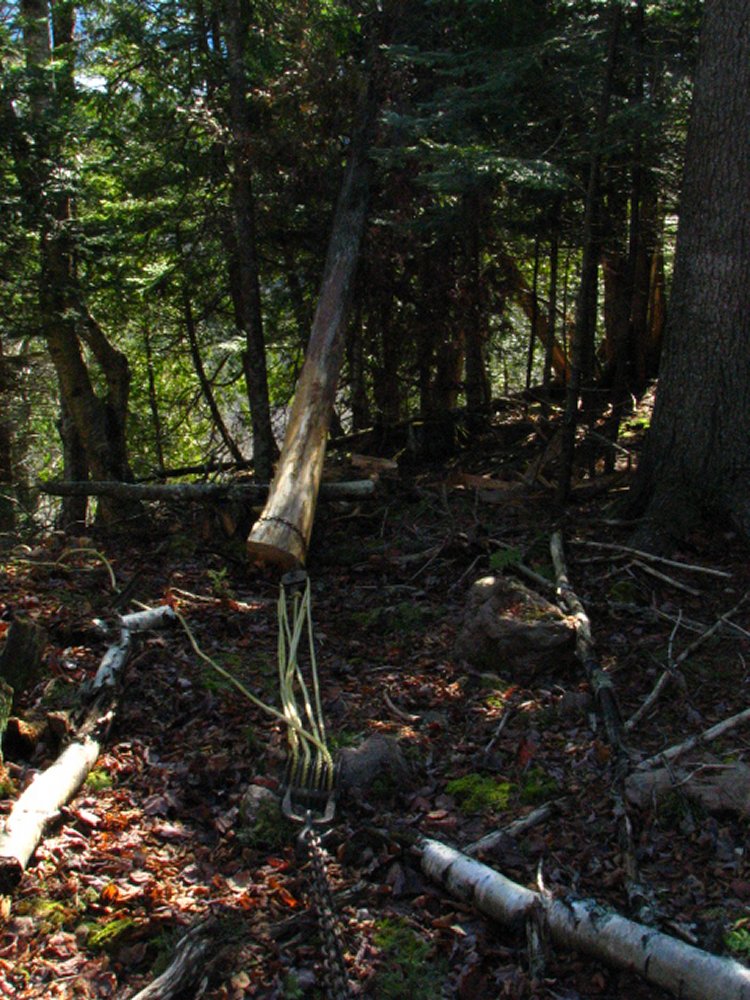
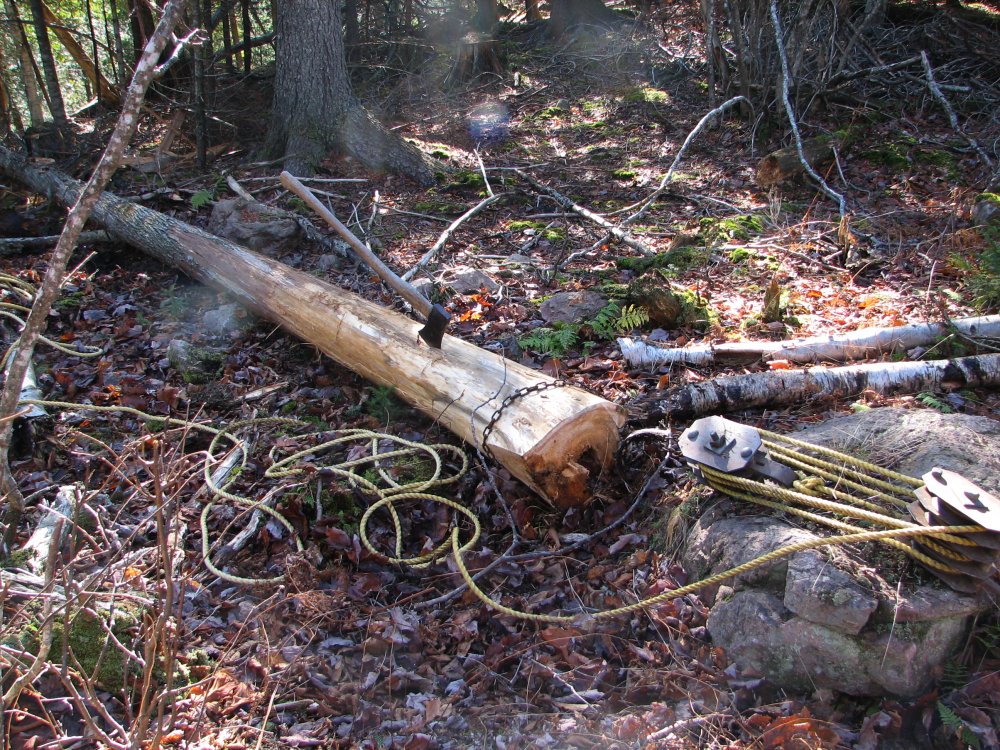
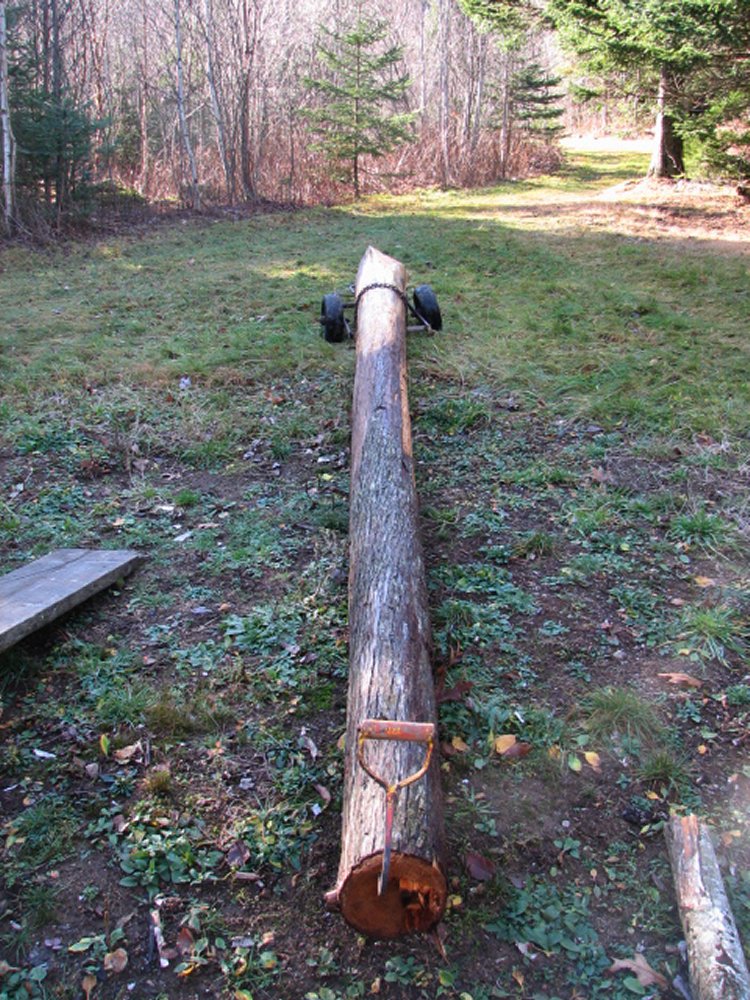
After a couple of hours cruising the back forty, I manage to find a promising Eastern Cedar growing on the shoulder of a cliff: It is straight for at least the first 18 feet (6 metres), mostly dead and has branches only on one side - which means no knots and straight grain on that side...
The chainsaw makes short work of it but with the branches on one side the tree naturally falls the wrong way and hangs up in nearby trees. Since the tractor cannot reach it, the tree cannot be winched down. So block and tackle time by which means the tree - and later the log - is hauled and skidded about 600 feet (190 metres) uphill. This is the hardest part of the whole operation.
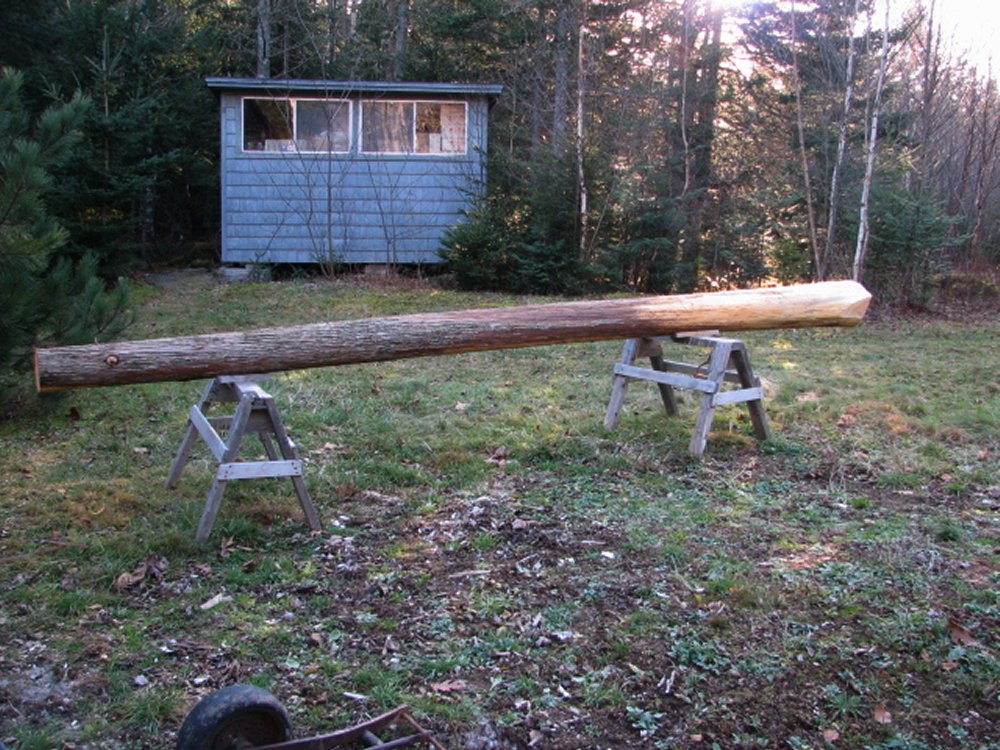

Truing up the flattest side with the hand planer and a straight edge. (First shot November '06; second shot April '07)
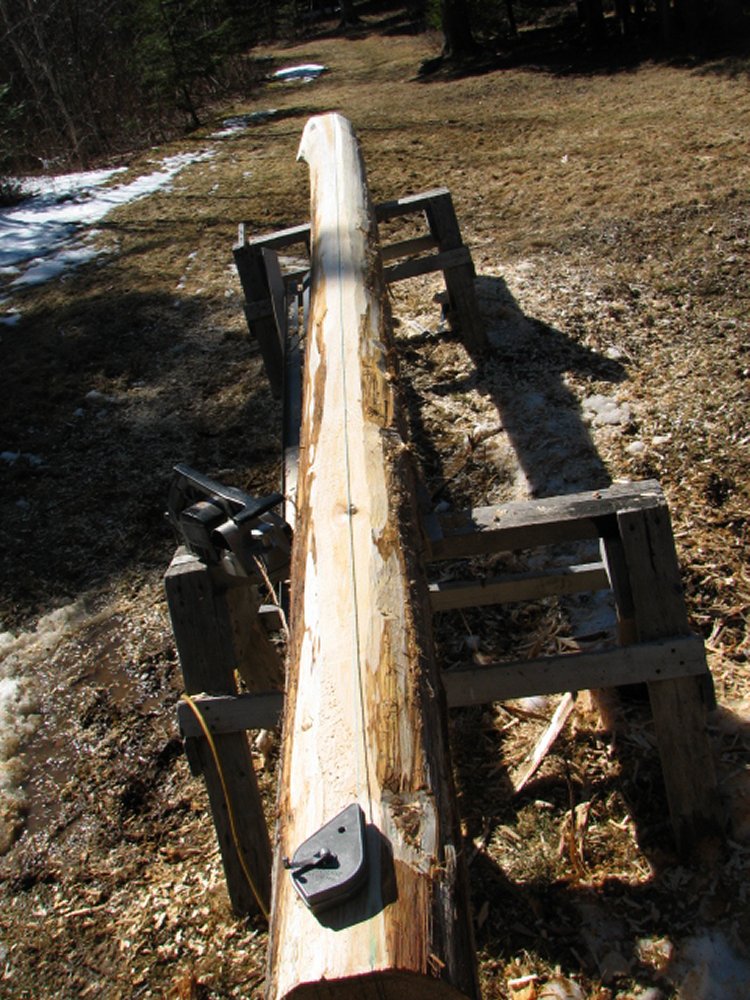
Laying out the first saw cut with the chalk line.
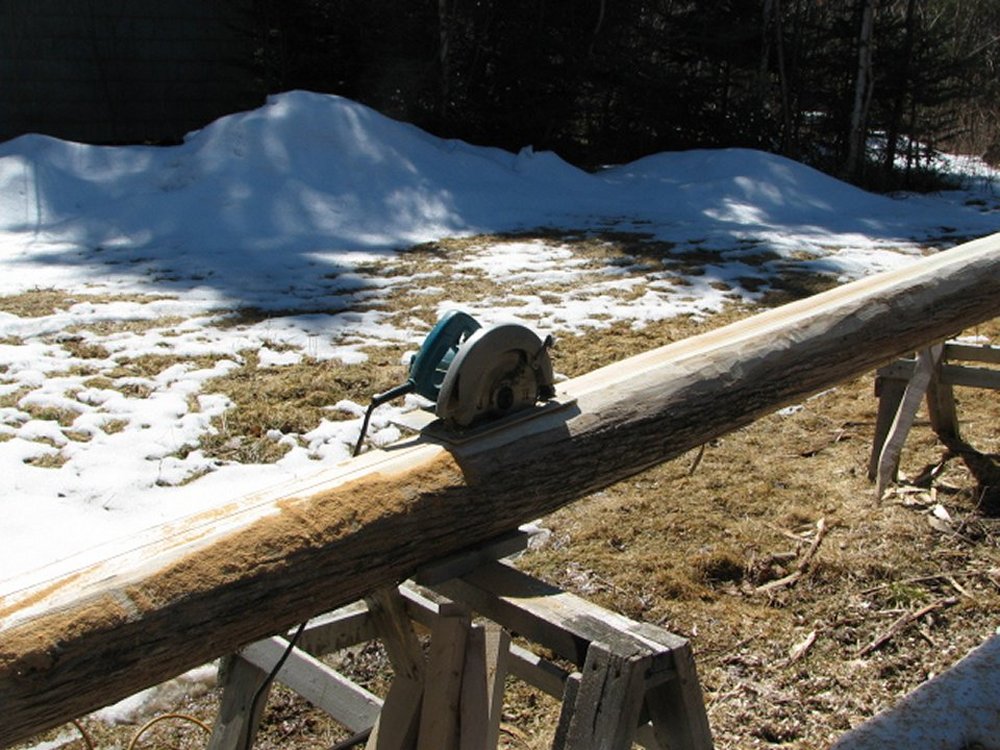
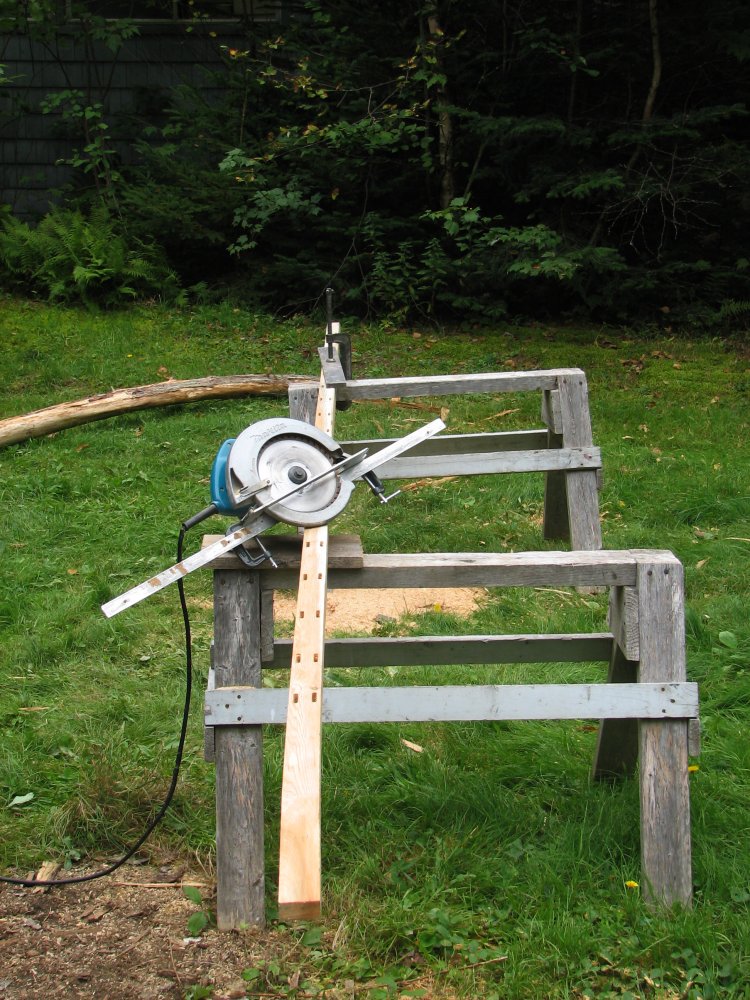
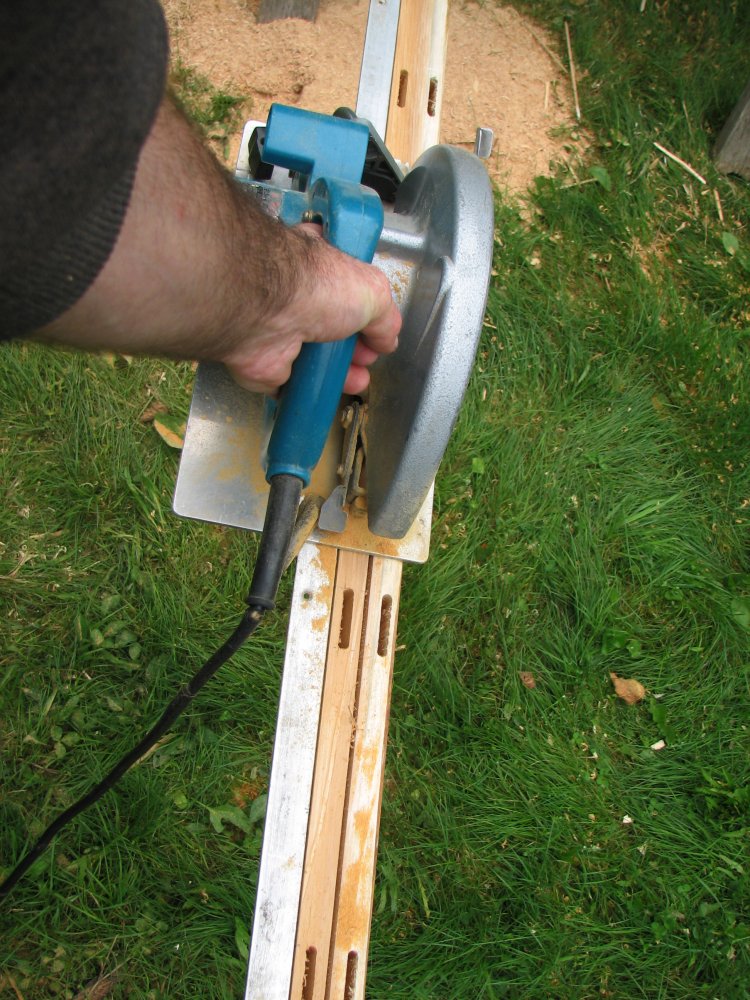
Free-handing the first cut along the chalked line with the saw set as deep as it will go. The important part of this operation is not to overly force the saw but to let it take its own time otherwise you will certainly burn the motor out.
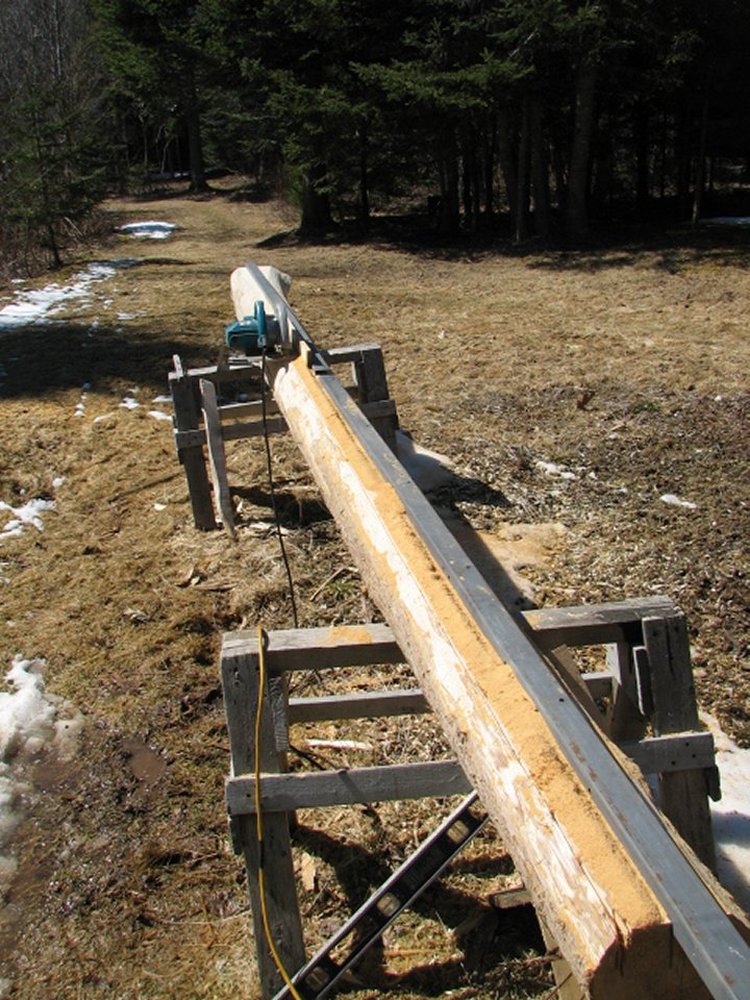
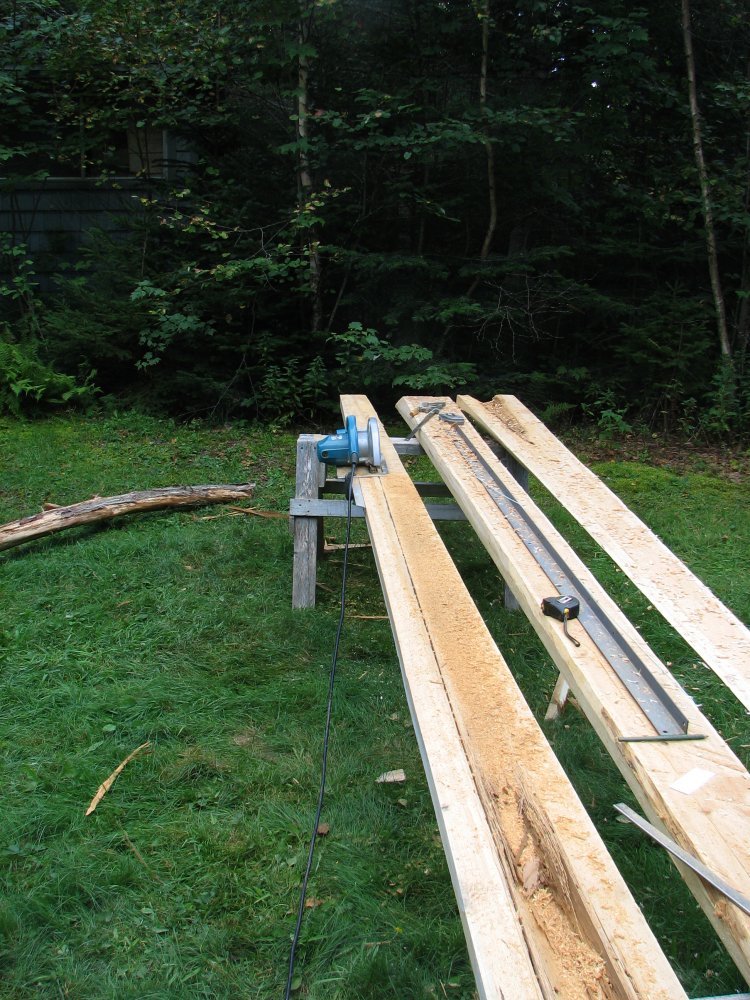
A steel angle iron (two 8-foot lengths of shelving standard - total length just under 5 metres) wedged into the first cut form a fence for the second and third cuts. A wooden shim held between the saw and the fence serves to obtain the proper spacing.
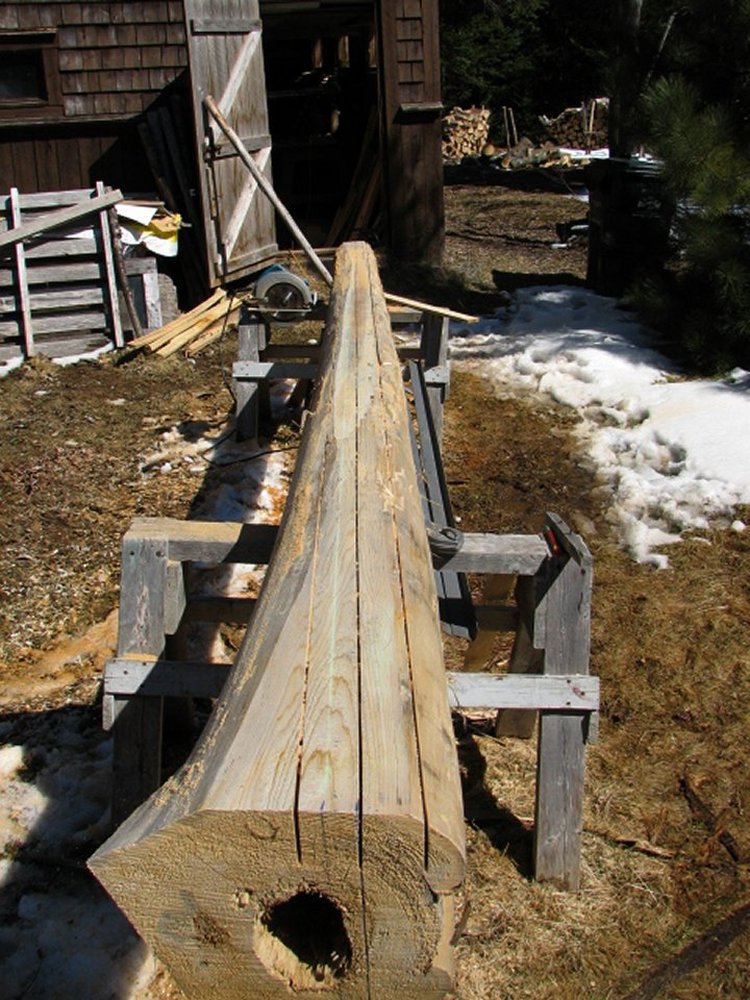
Three cuts done, now turn the log over and repeat the process.

Six cuts later it looks like this. Careful layout with a building square and level is essential to the proper alignment of the cuts - and to the evenness of the resulting plank(s).
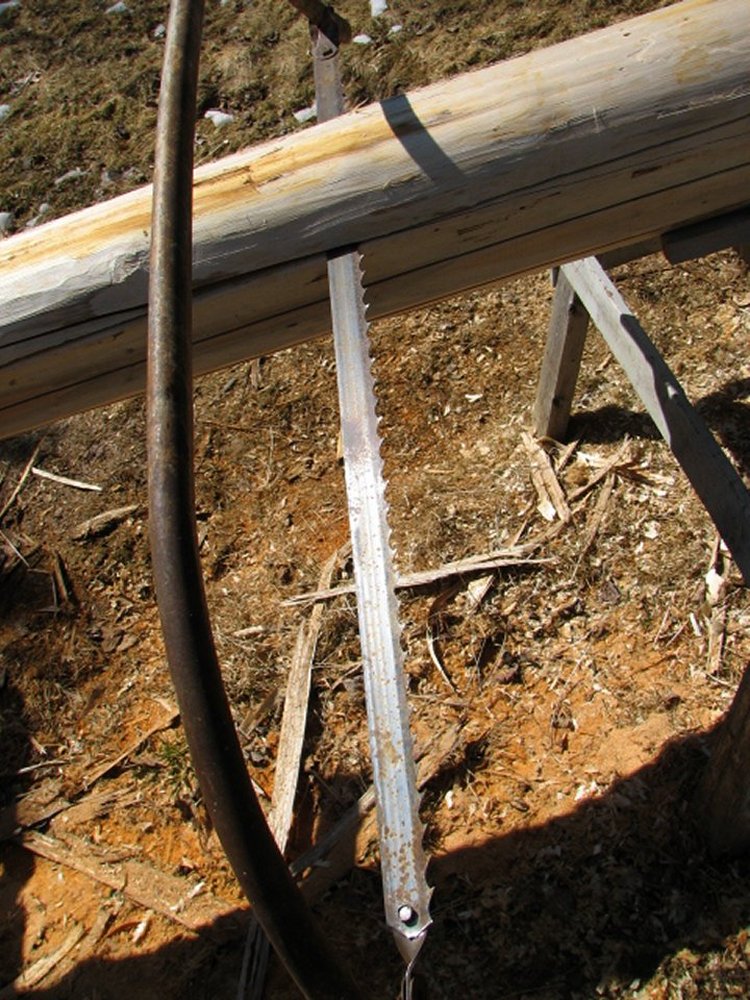
Cutting between the saw cuts with an old bow saw (a.k.a. Swede Saw.) utilizing a broken piece of blade from a portable bandsaw mill.
To hold the rip blade in the proper position, the blade mounts were modified by bending them at right angles to their original axis using a large adjustable parallel jaw wrench as a bending jig.
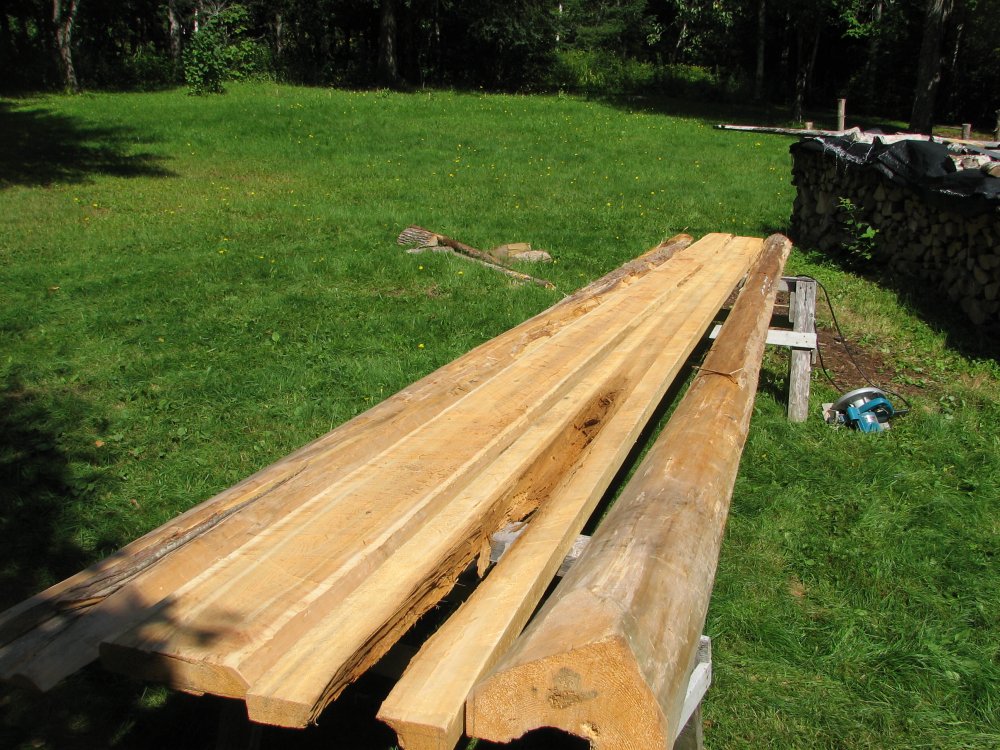
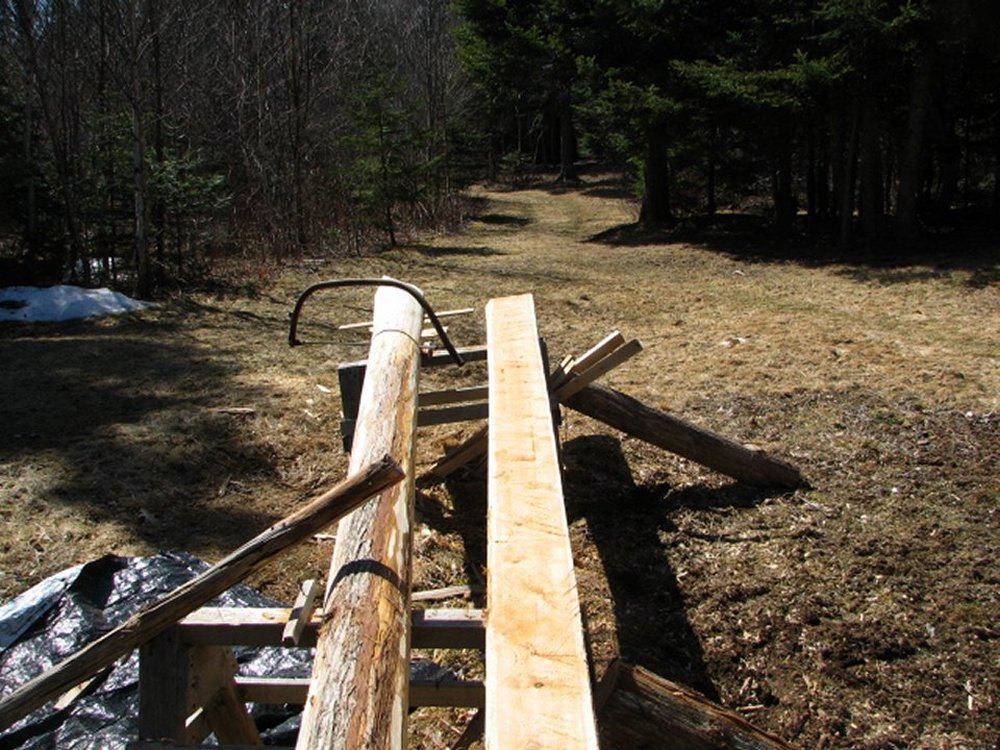
The finished planks and slabs ready for smoothing with the bench planer and ripping into kayak stock with the circular saw and a table saw.
It would have been easier (and done in half the time) if there had been another set of arms on the other end of the saw but still, for the effort, it turned out a quality plank relatively easily - and of a grade which you can no longer buy around here for love - or money...

Cutting the gunnel material out of the best plank. The problem is, once I start cutting, I find the rot goes deeper than expected so I just manage to get the gunnels out of it.
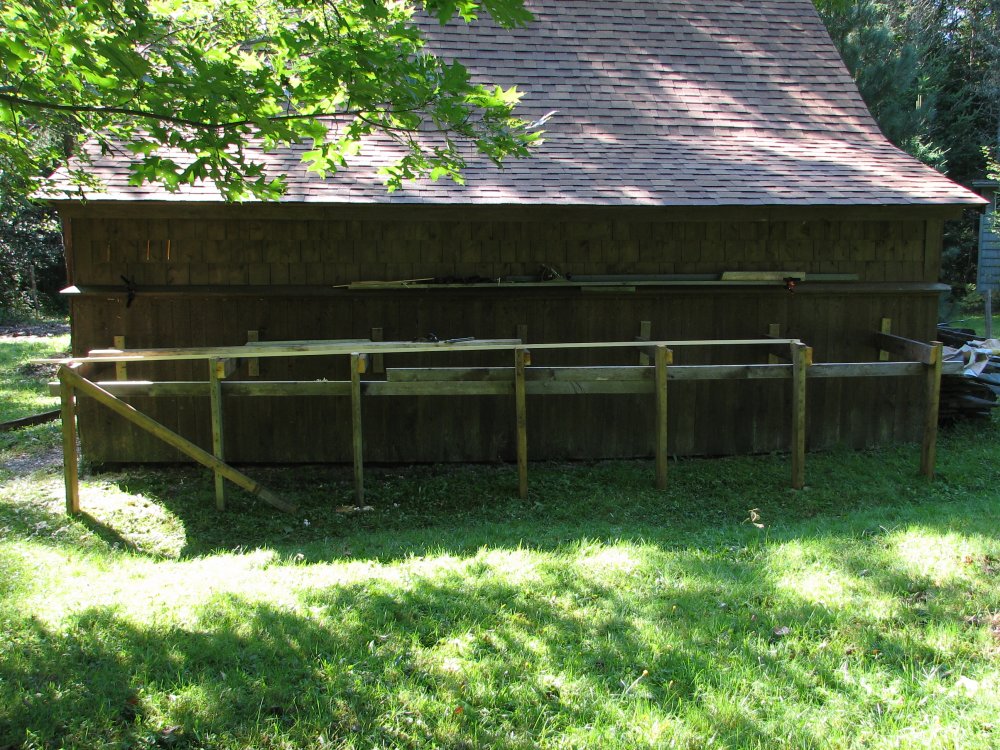
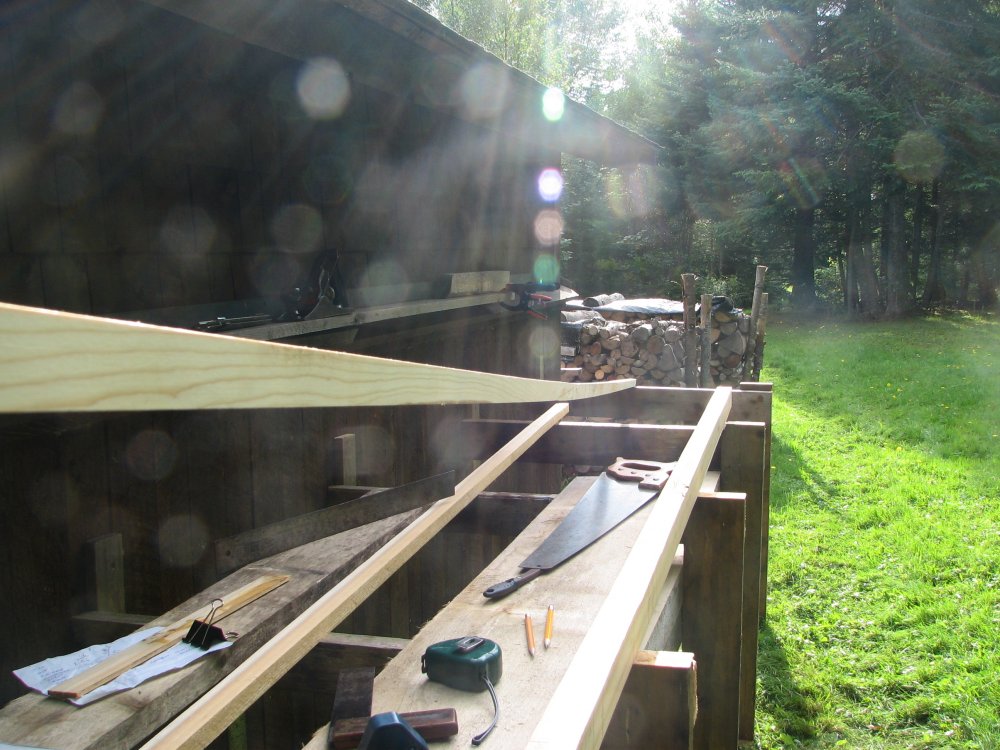
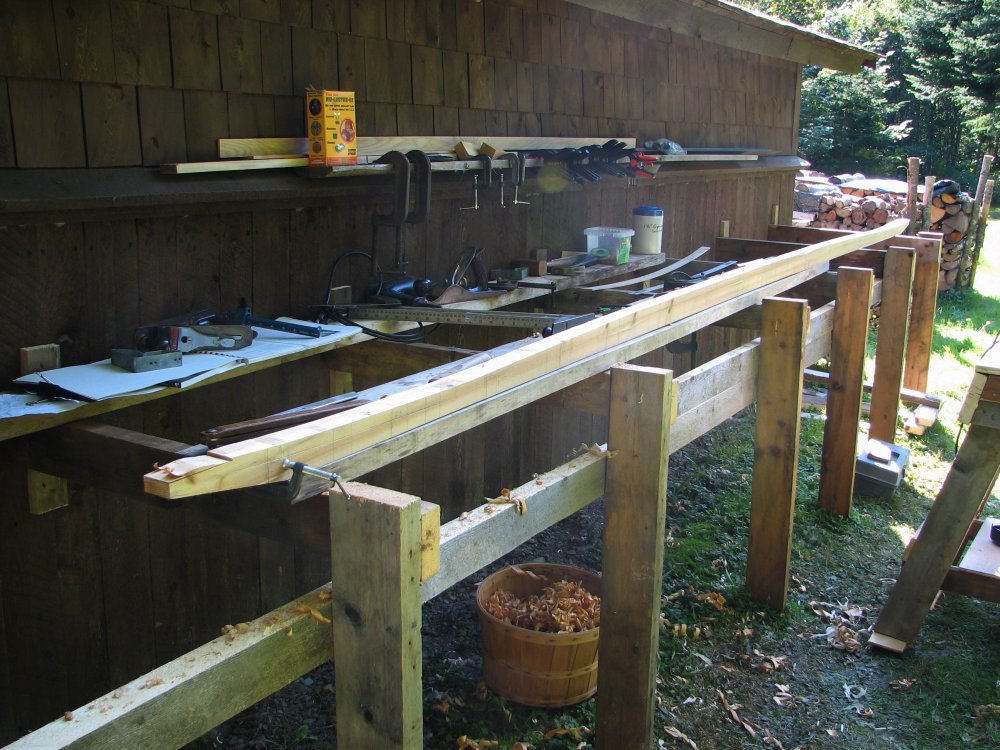
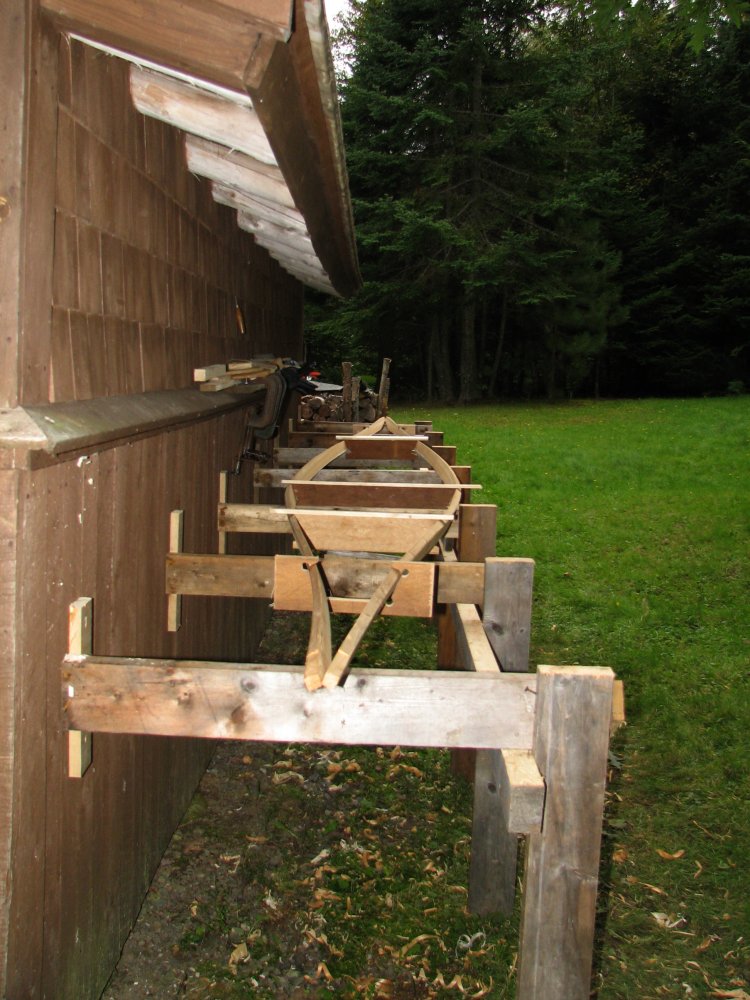
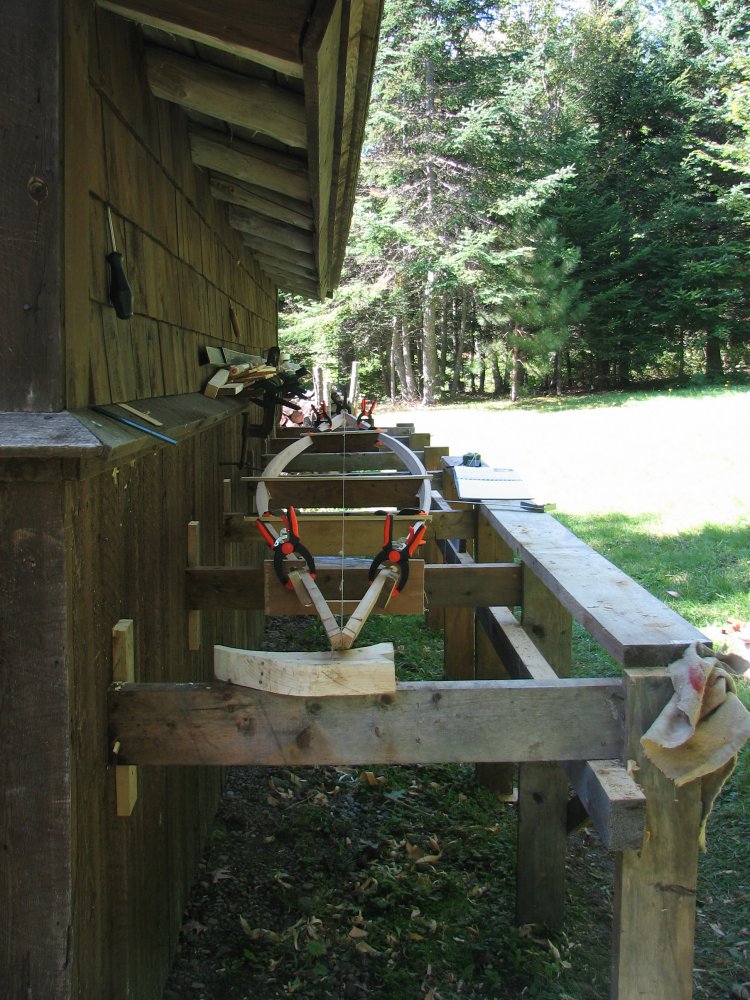
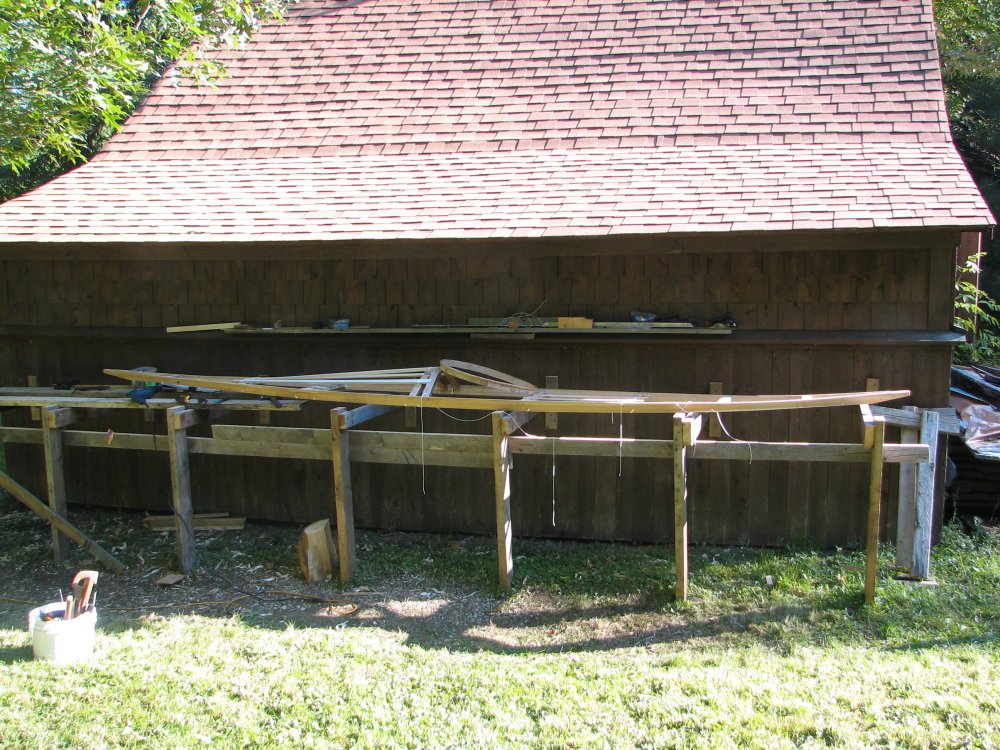
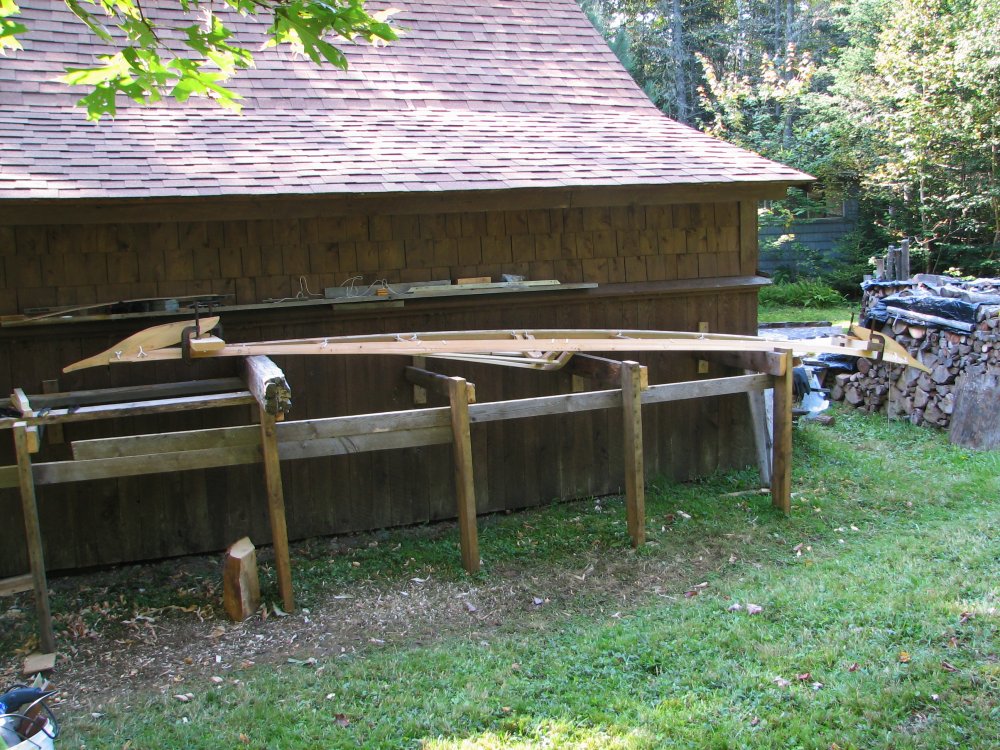
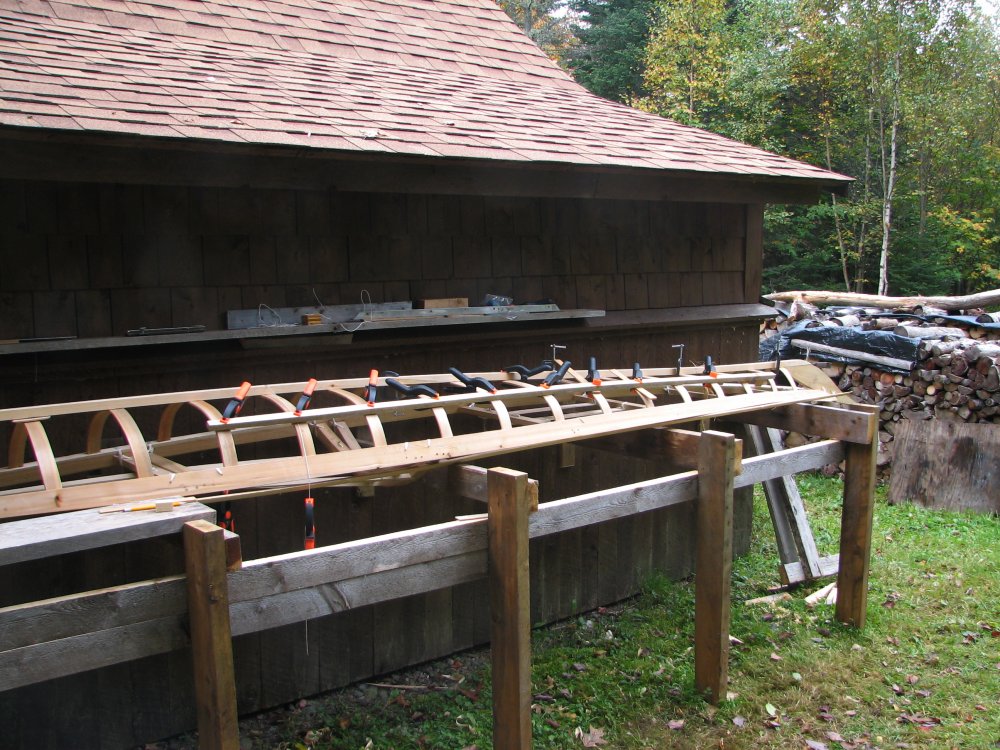
The 20 by 3 foot (6 by 1 metre) temporary spar bench set up to build the kayak on...

Planing the edges of the rib and floor stock, ten strips at once.
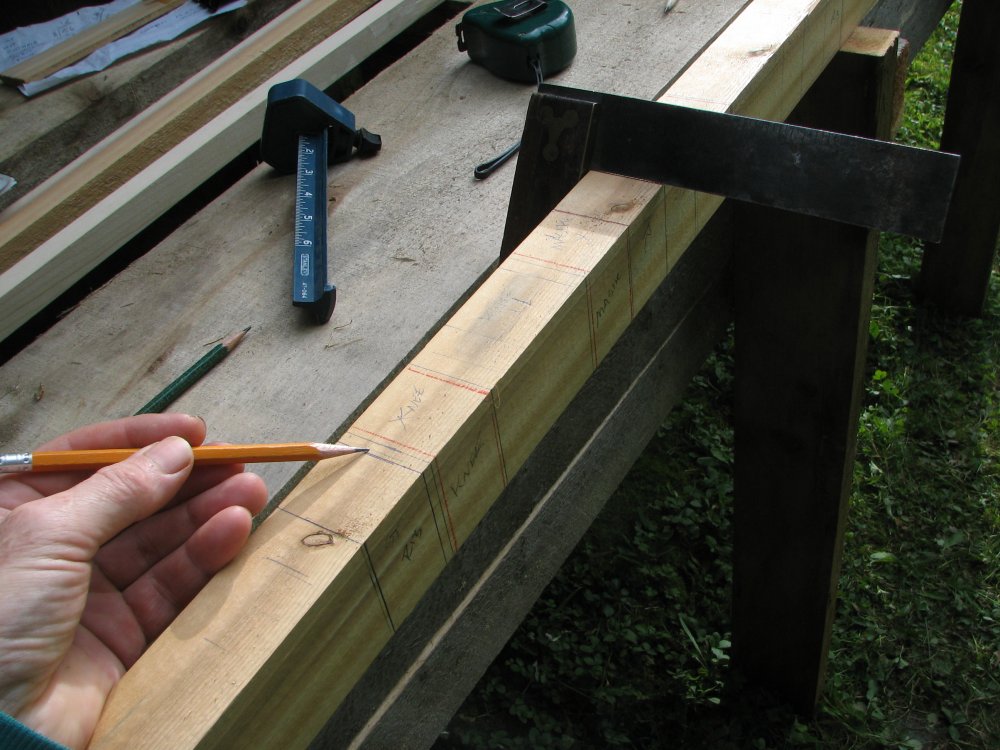
Marking out the positions of the ribs and deck beams on the doubled gunnel.
This layout has to be done several times to make sure none of the deck beams coincide with a rib. The ribs were supposed to be 6 to 8 inches (15-20 cm) apart (a hand span) but when I laid it out with my hand span, I get 9 inches (23 cm) which spaces the ribs too far apart for the length of the kayak.
As the kayak is entirely based on my body measurements, it is unlikely it will fit someone else unless they are my height and weight.
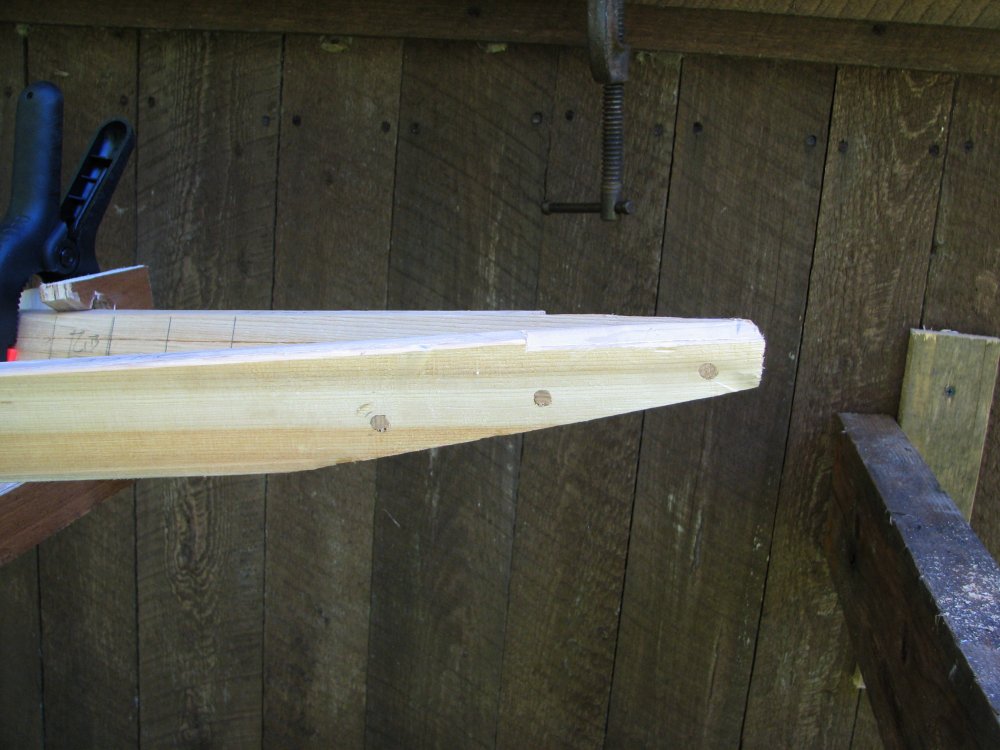
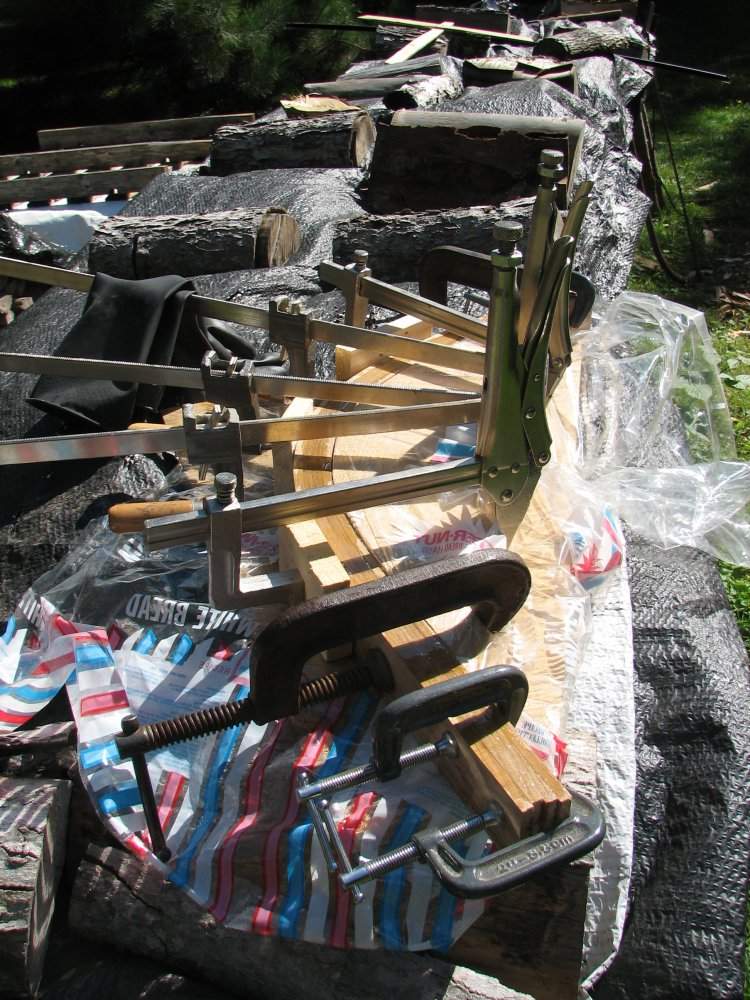
For strength I decide to go with black spruce for the keel and as I only had an eight foot (2.5 metre) piece that was clear of knots, I had to lap join it with a 1 in 12 scarf joint: A length of aluminium angle serves as a clamping guide.
The completed 16 foot (5 metre) keel, dowel-pinned and glued with epoxy and ready for shaping.
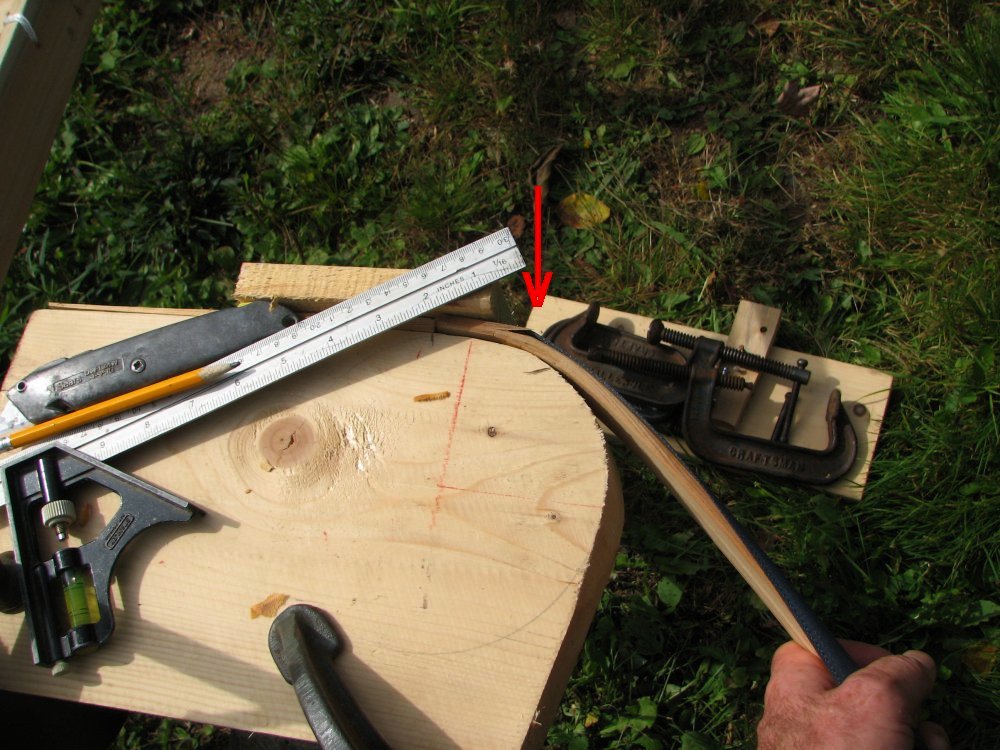
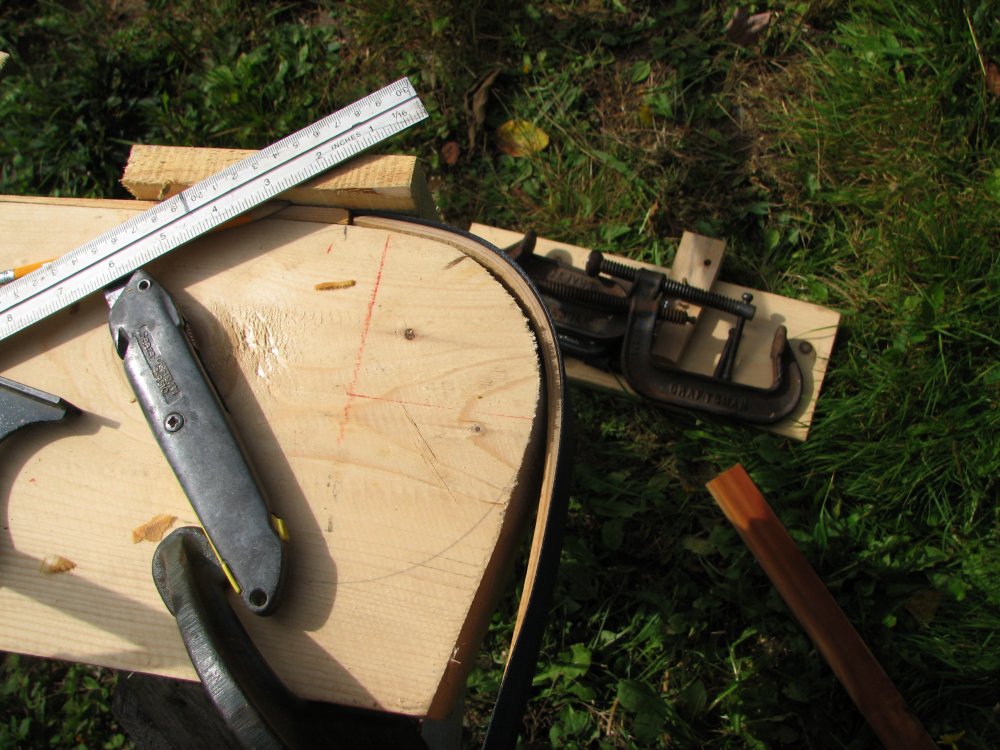
Trial bend of a slat of rib material that has been soaking in the pond for 24 hours.
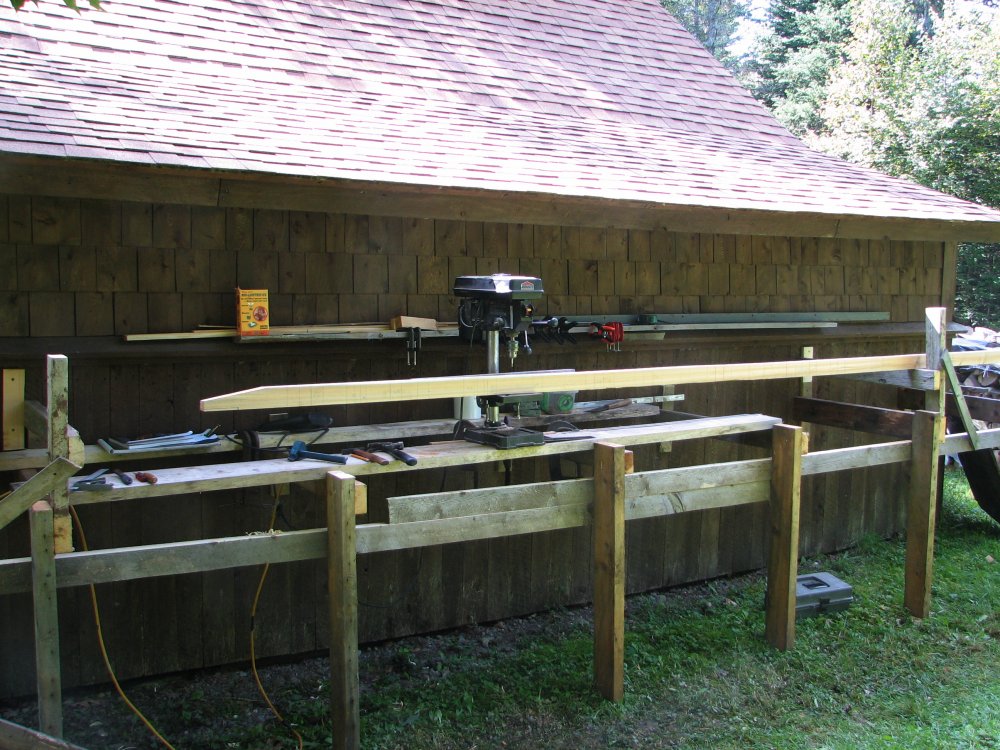
The drill press set up for rib mortising...

Cutting the mortises with the drill press set as fast as will go and a router bit instead of a drill bit...
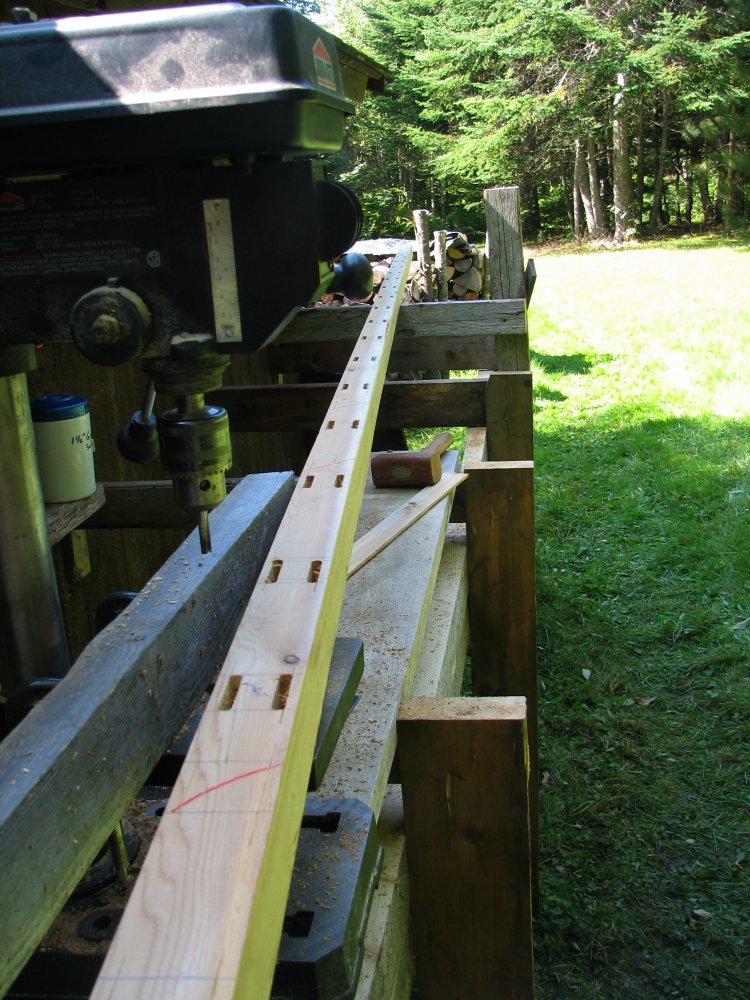
The completed mortises - all two rows of them.

Shaping the top of the gunnels. Bandsaw is an unnecessary luxury. I would not use it again. Besides it quit after the second cut...
Starting to show her lines...
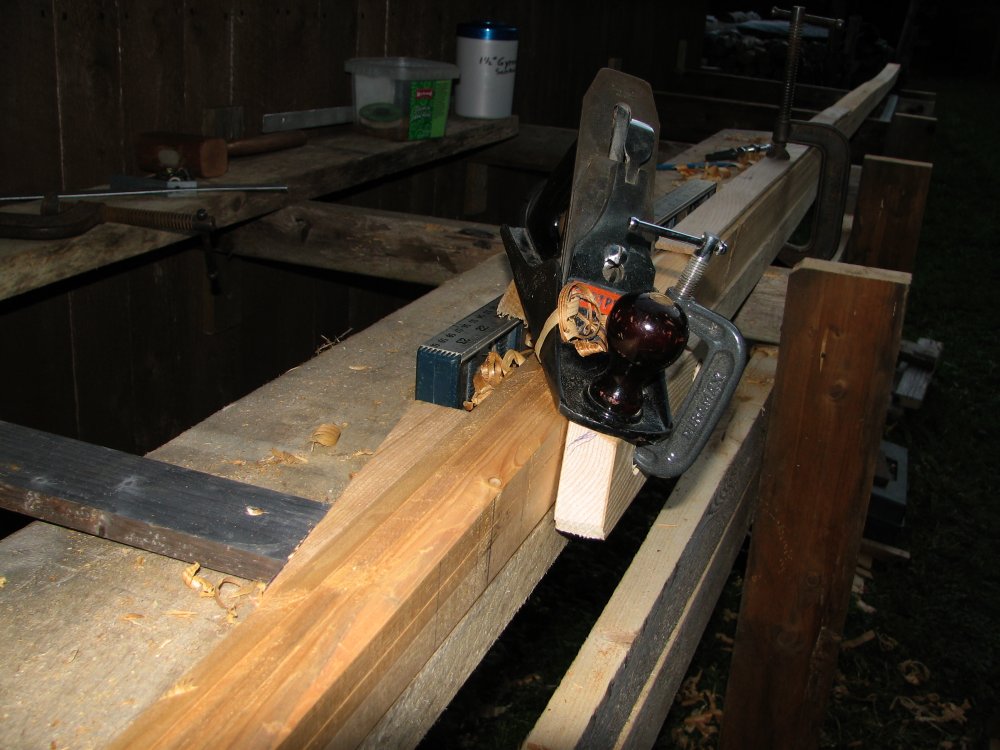
Next cutting the 17 degree bevel on the top edges to accommodate the fabric. A temporary bevelled fence clamped to the plane ensures an even bevel. Skewing the plane at an angle to the wood also eases the cutting...
Which looks like this when completed.
Ready to slit the gunnels. Note the extra-long fence clamped on the saw...
Coming nicely - although it is nerve wracking as one slip and hours of work are gone... Once this is done I will run the gunnels through the planer to smooth up the rough-cut edge.
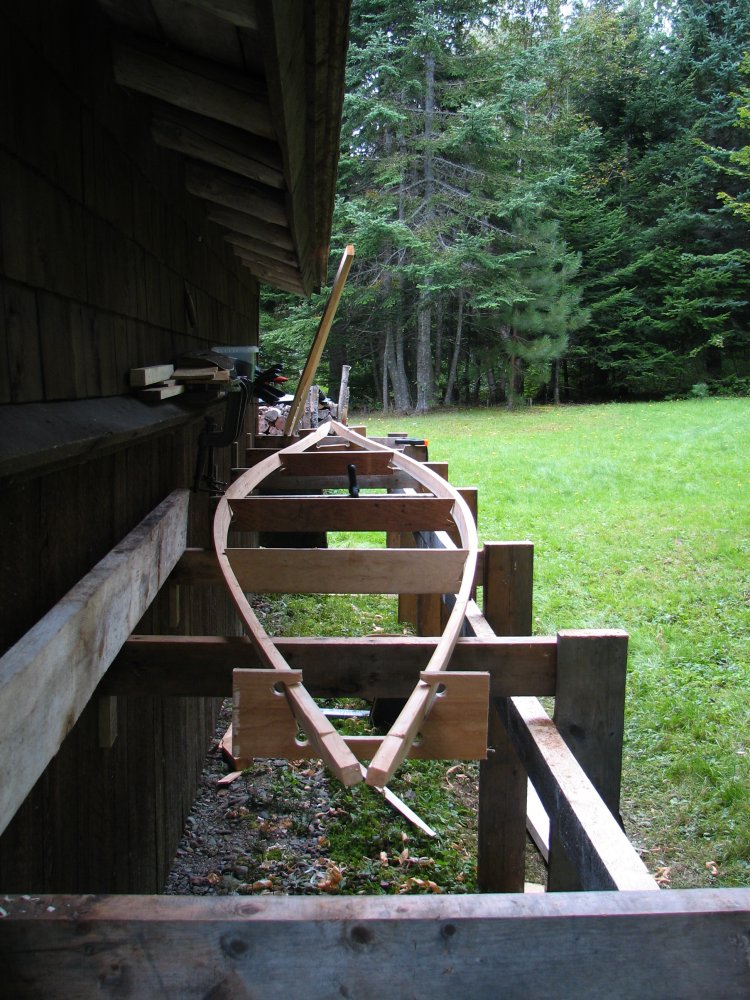
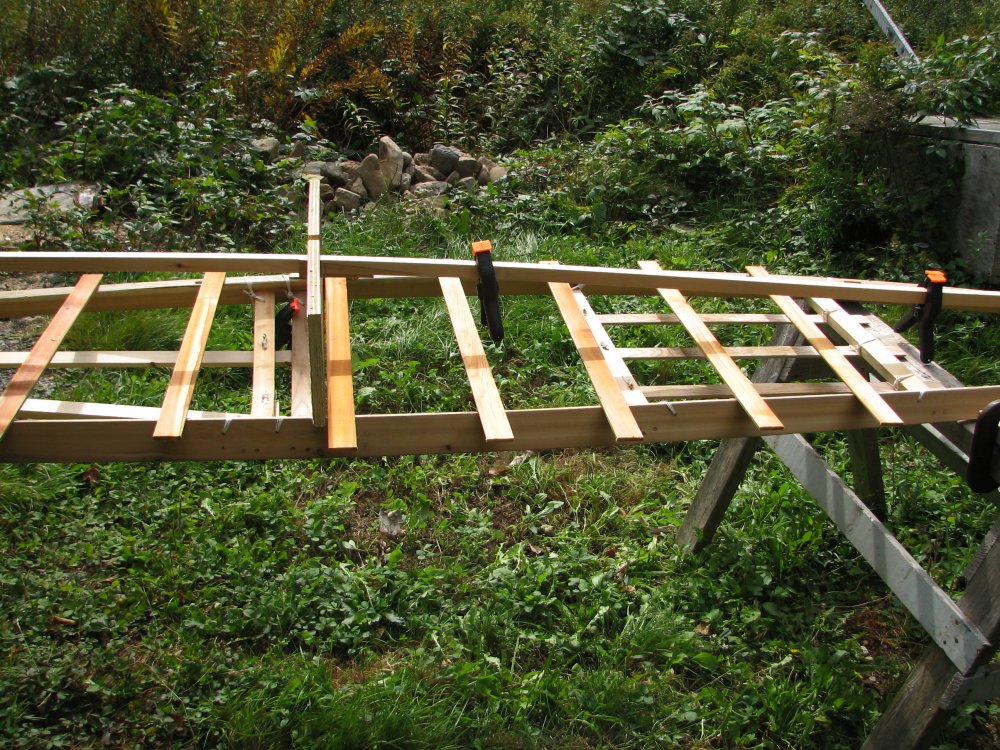
The sides set up with temporary spacers - but something's wrong: This looks more like a St. Pierre Dory... Must have measured something wrong... Good job it's too wide and not too narrow...
Now that's more like it!

Next morning, planing a 1 in 12 lap joint on a piece of quarter inch (6mm) ash which is then bent with glue around...
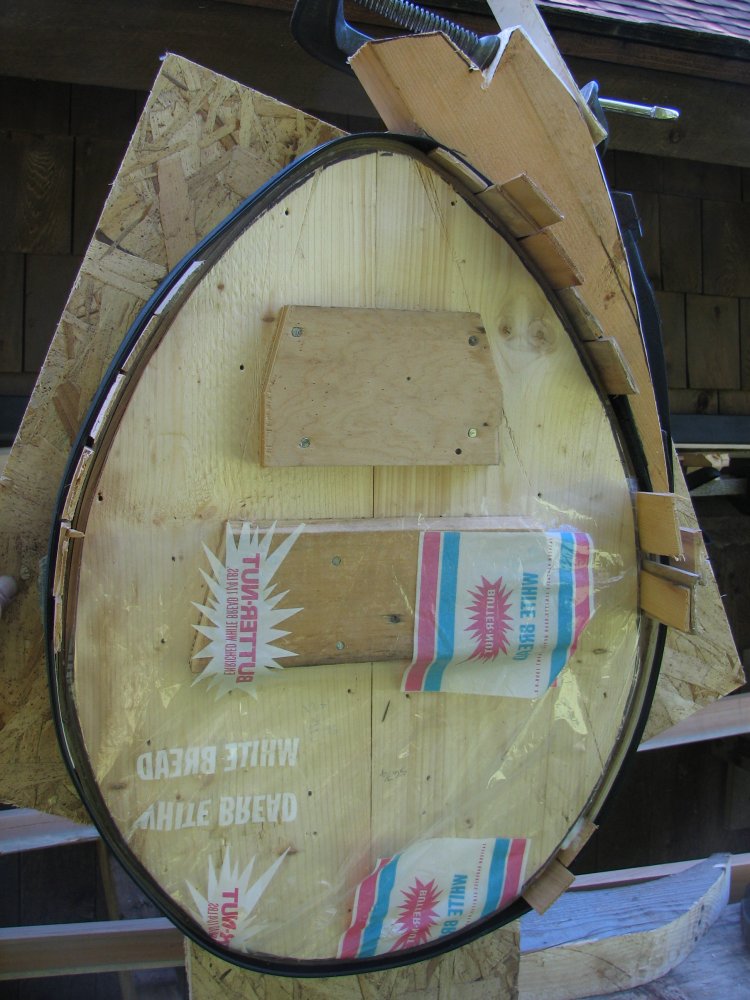
...the cockpit form and left to dry. Would have used epoxy but epoxy will not glue sopping timber (however polyurethane would...).
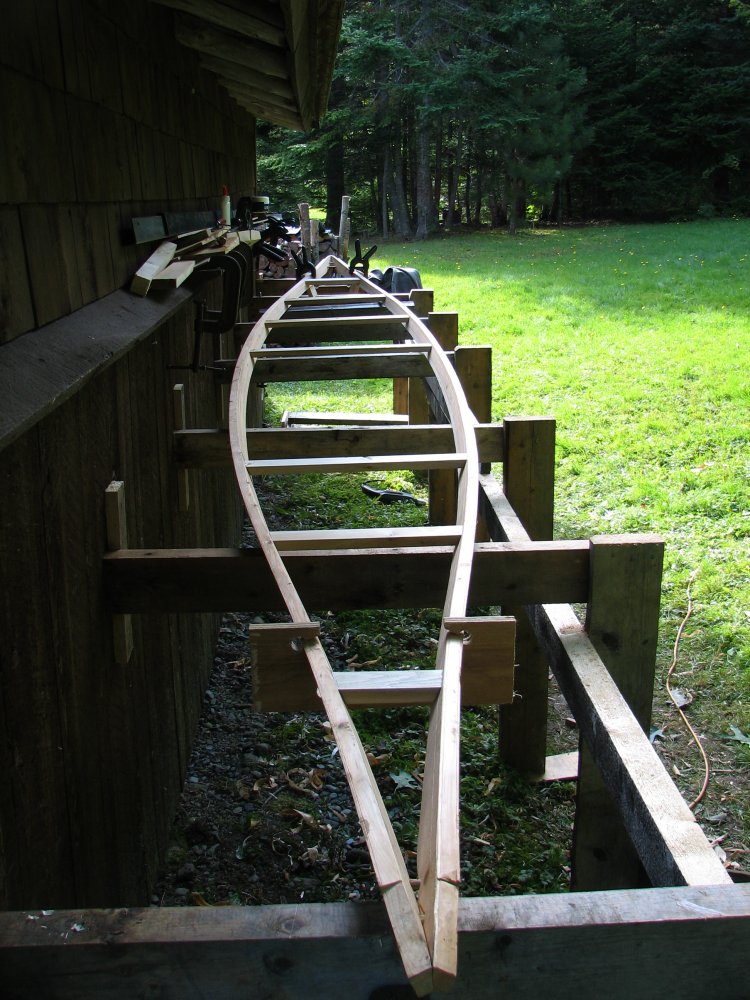
Kerf cutting: making sure the angled gunnels meet squarely at the bow and stern...
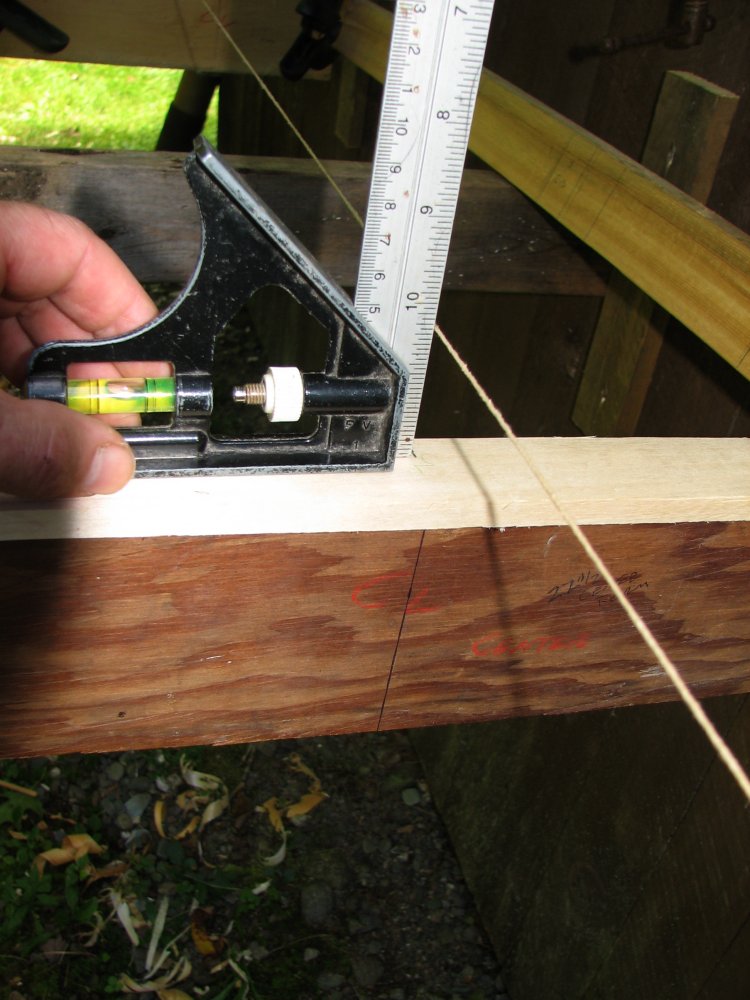
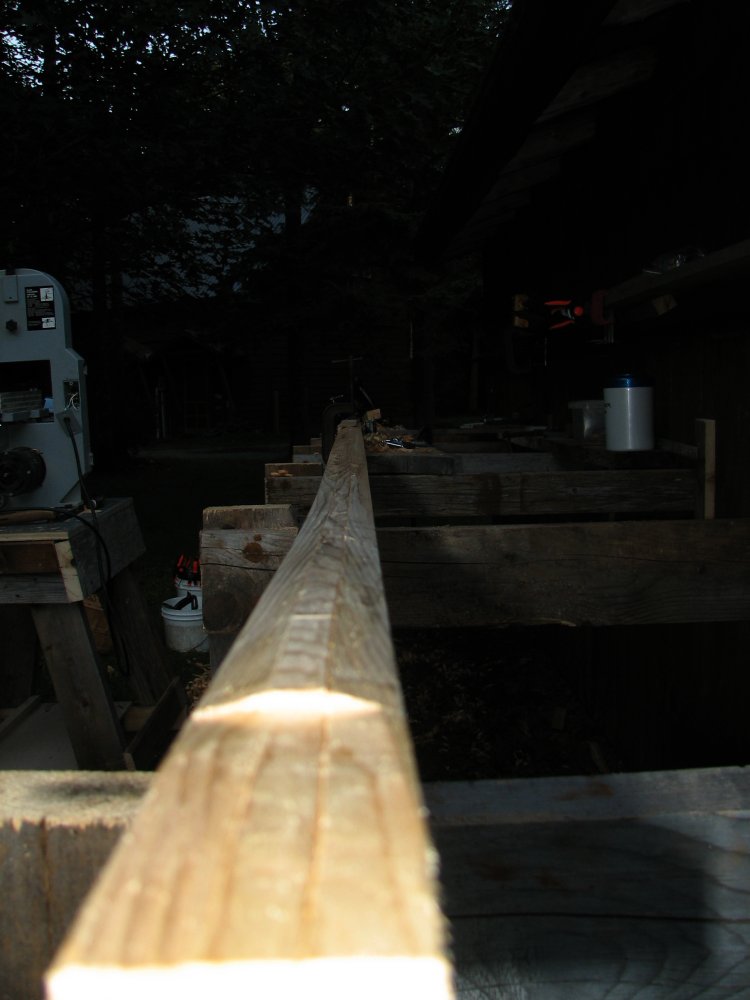
A string is now stretched along the kayak to determine how straight it is. They say a quarter inch out in 17 feet (6mm in 5.2 metres) is acceptable...
How about 1/128th in 17 feet (0.2mm in 5.2 metres)?
The stern is now pegged together as is the bow. None of the pegged joints use adhesive as the lashings will hold the framing in place.
The deck beams are cut next and pegged with pieces of quarter inch (6mm) dowel. The compound curves make cutting the beam ends interesting to say the least...
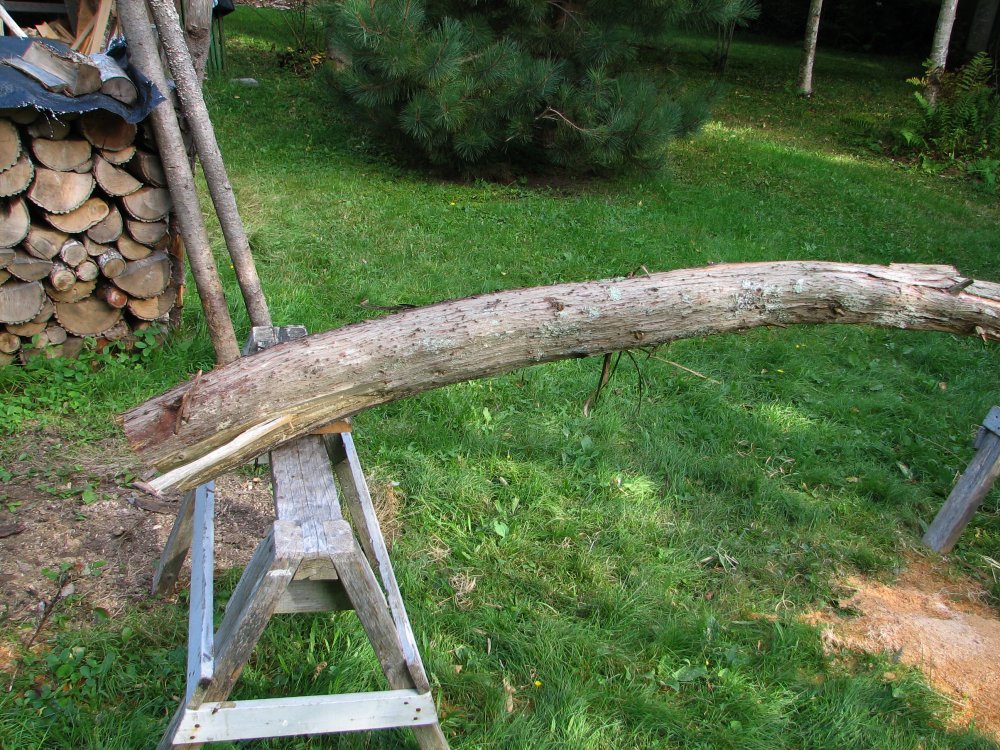
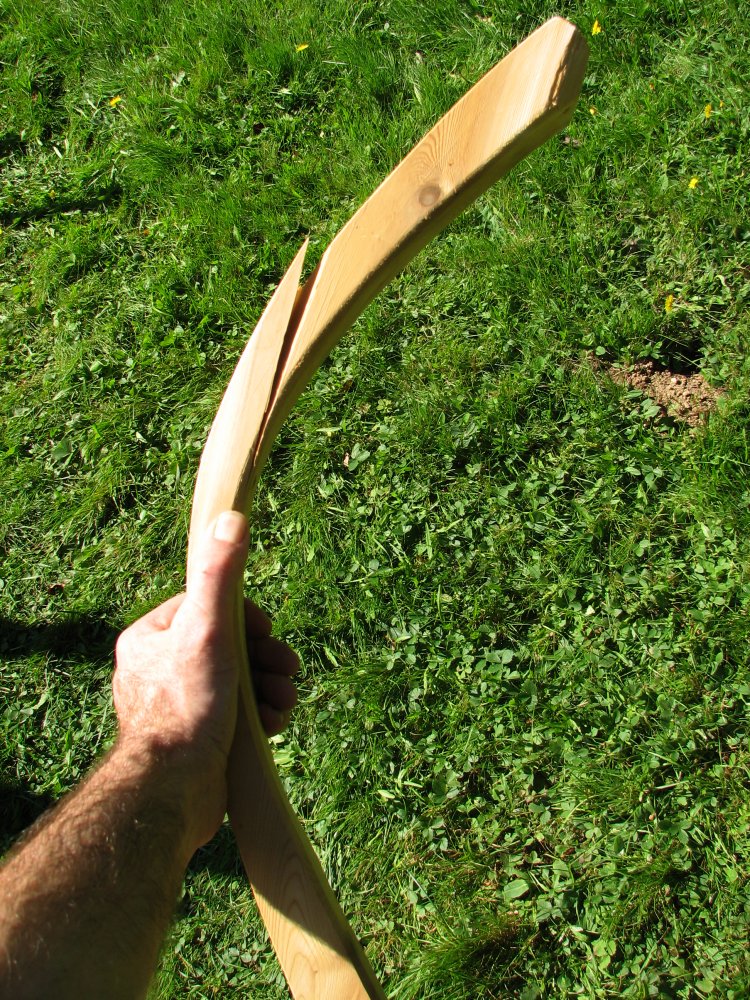
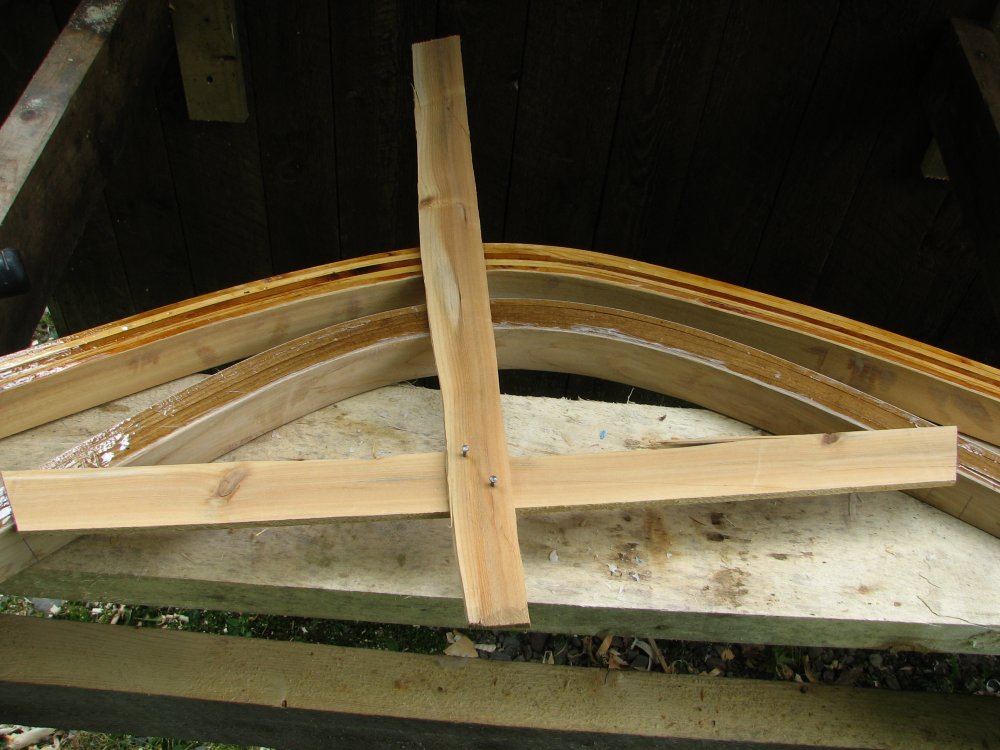
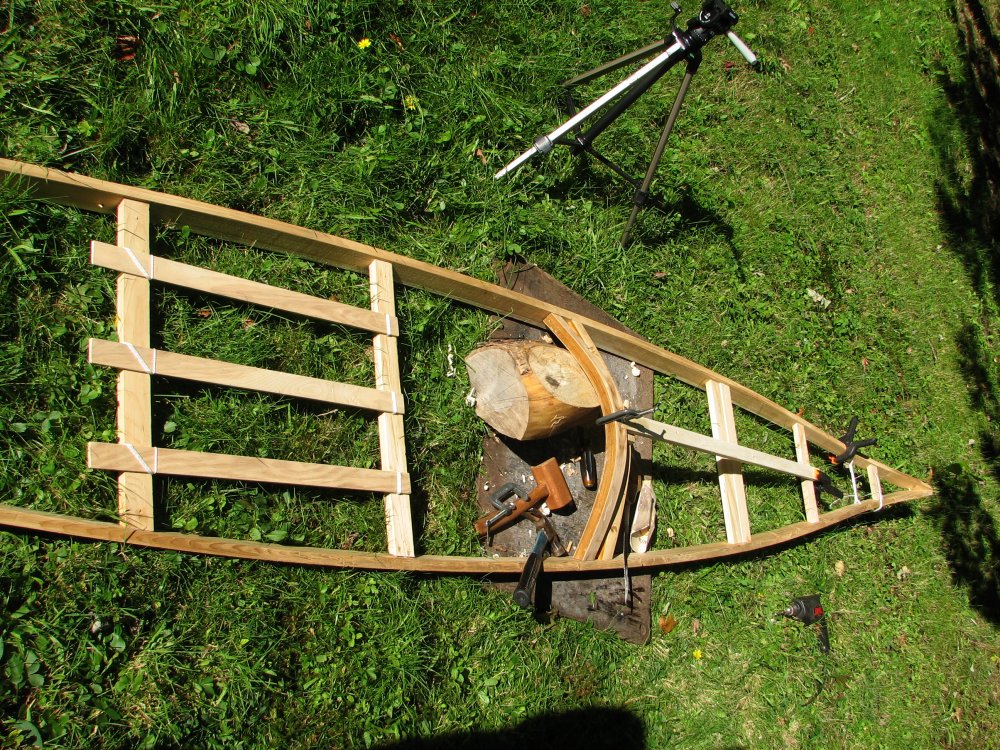
A piece of naturally curved cedar for making the curved "masik".
(Traditional skin-on-frame kayaks have an arched wooden beam across the front of the cockpit called the masik, and this makes an excellent brace for the thighs, which improves paddling efficiency in a Greenland Kayak. In combination with a knee brace, it can transfer the slightest movement to the kayak hull, giving life to the kayak. Both masik and knee brace are also helpful for control when recovering from a roll )
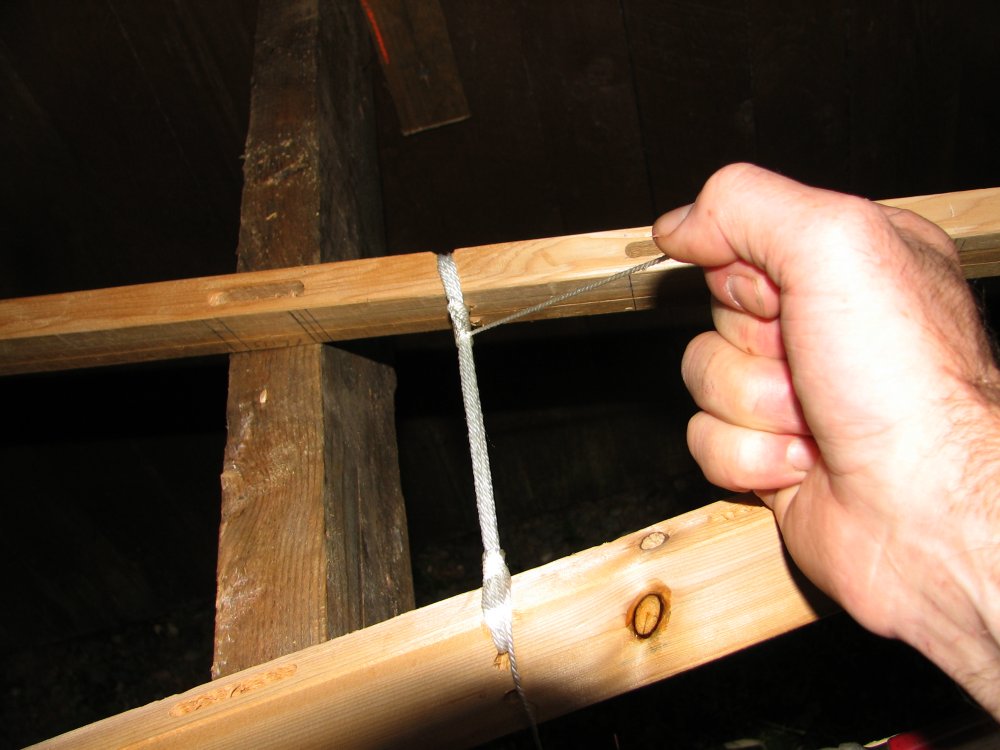
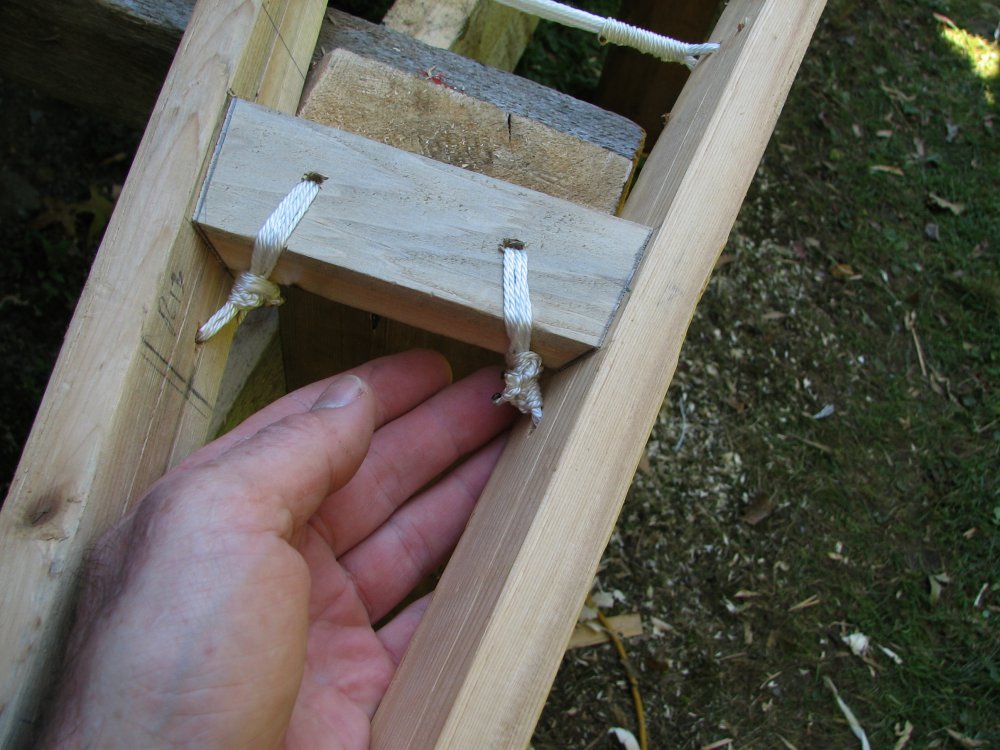
Lashing the tips of the kayak to keep the bow and stern together. Pulling the nylon twine taut is mighty hard on the fingers...

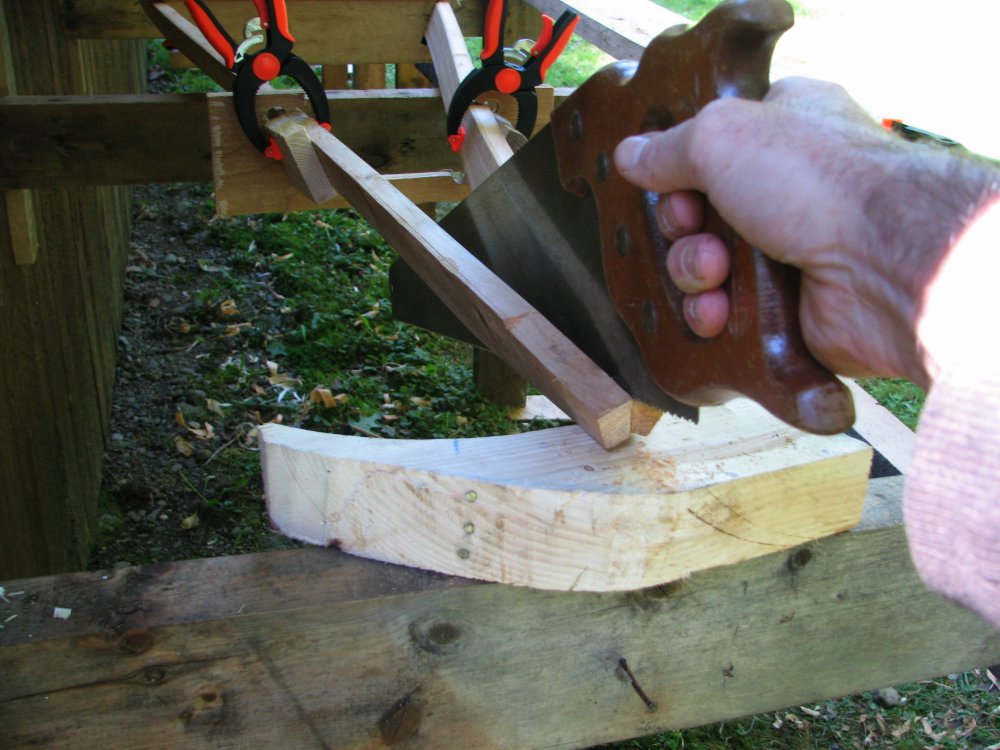
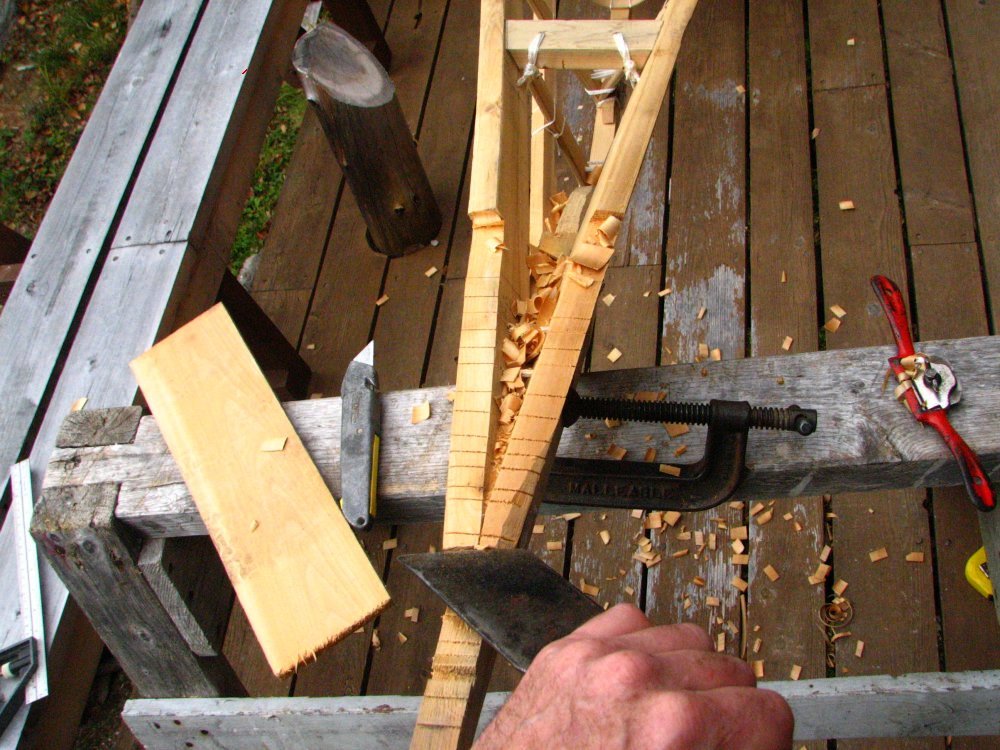
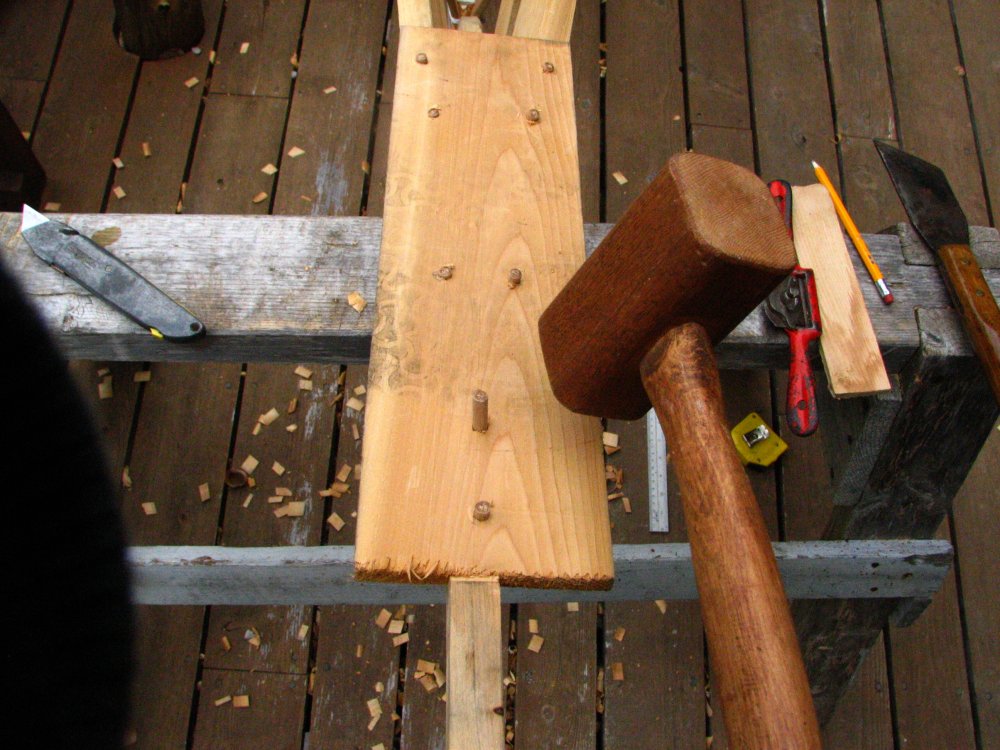
Cutting down the sides of the masik with an axe...
Masik completed, this is what happens after I leaned on to test it... Two hours of work wasted...
After that, I figure the only way to do it is to laminate the masik so I lay up four layers of quarter inch (6mm) ash with epoxy and leave it to cure.
(Another time cedar would be adequate as a cedar laminate is plenty strong enough and the added strength of the ash does not warrant the additional weight. )
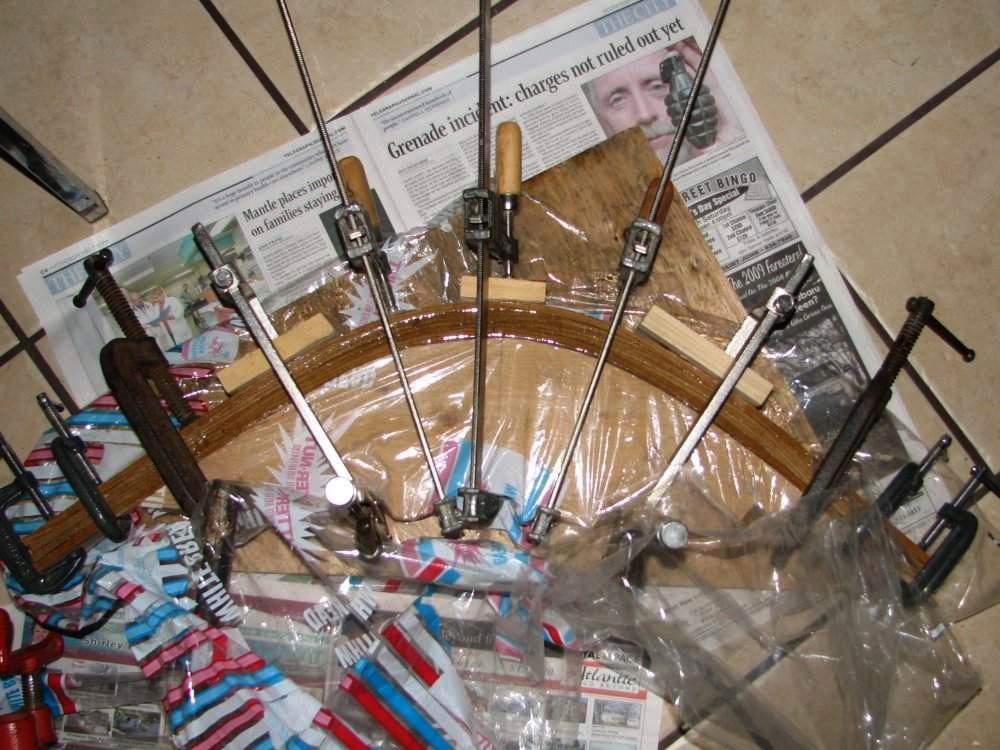
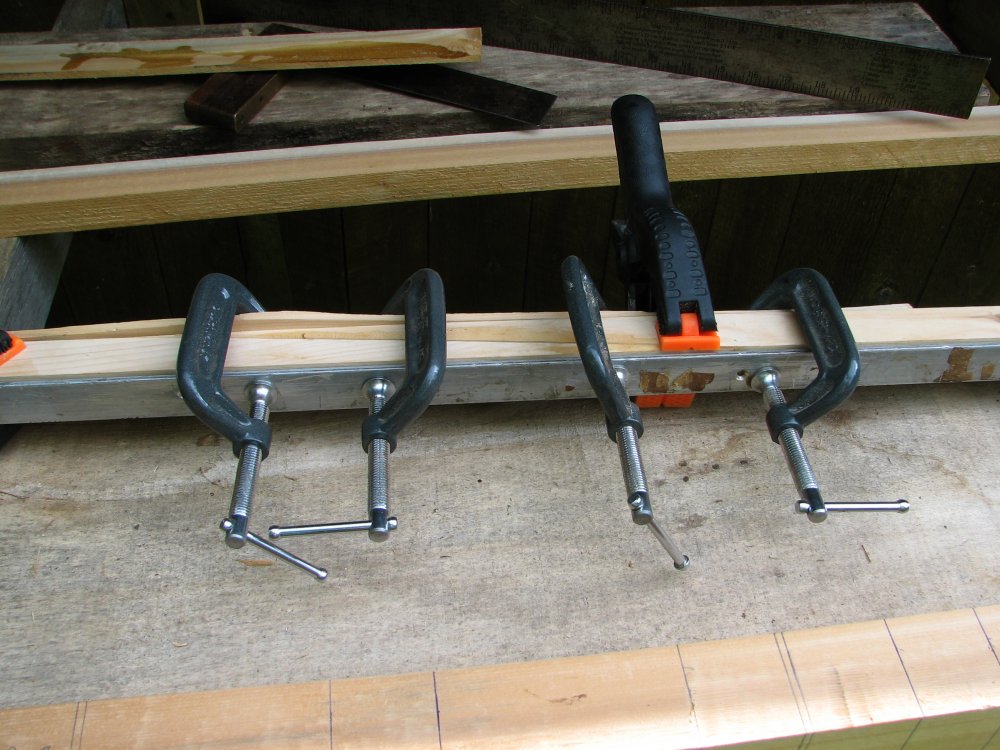
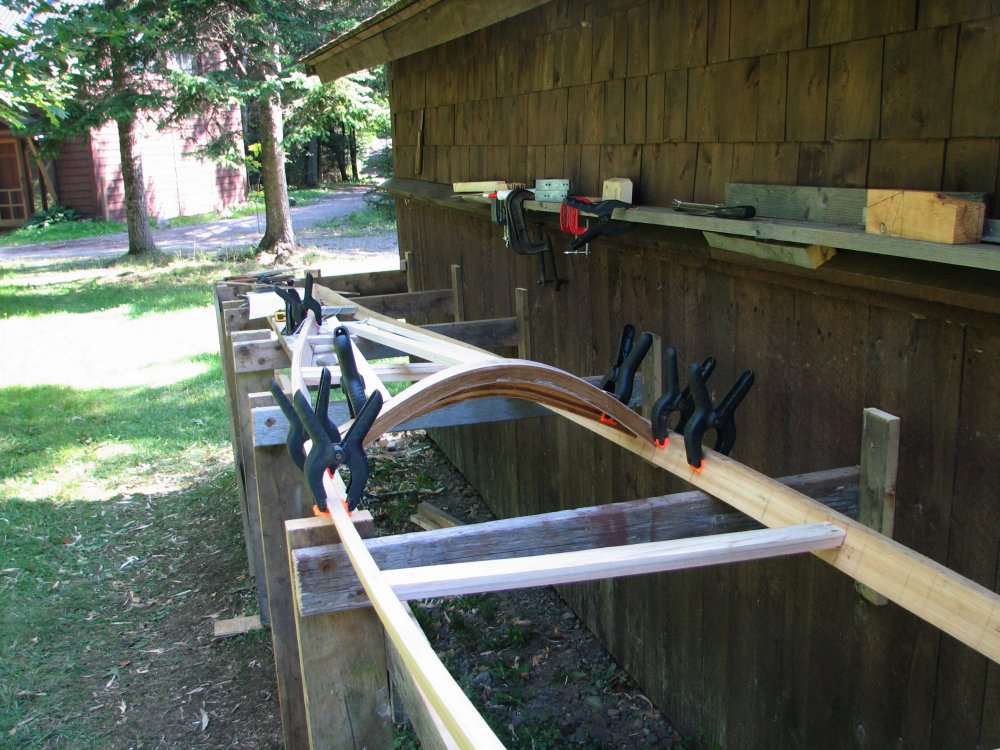
The ash masik clamped with as many clamps as I could find, beg or borrow...
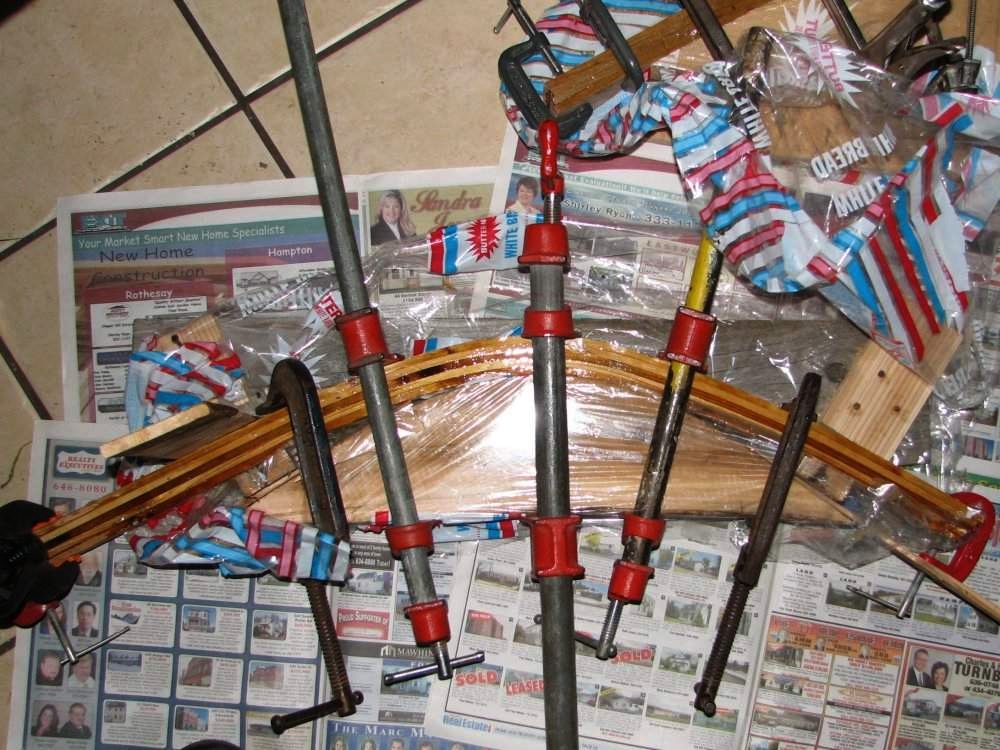
And the laminated cedar knee brace with even more clamps.
The laminates will be run through the planer and trimmed up before installing.
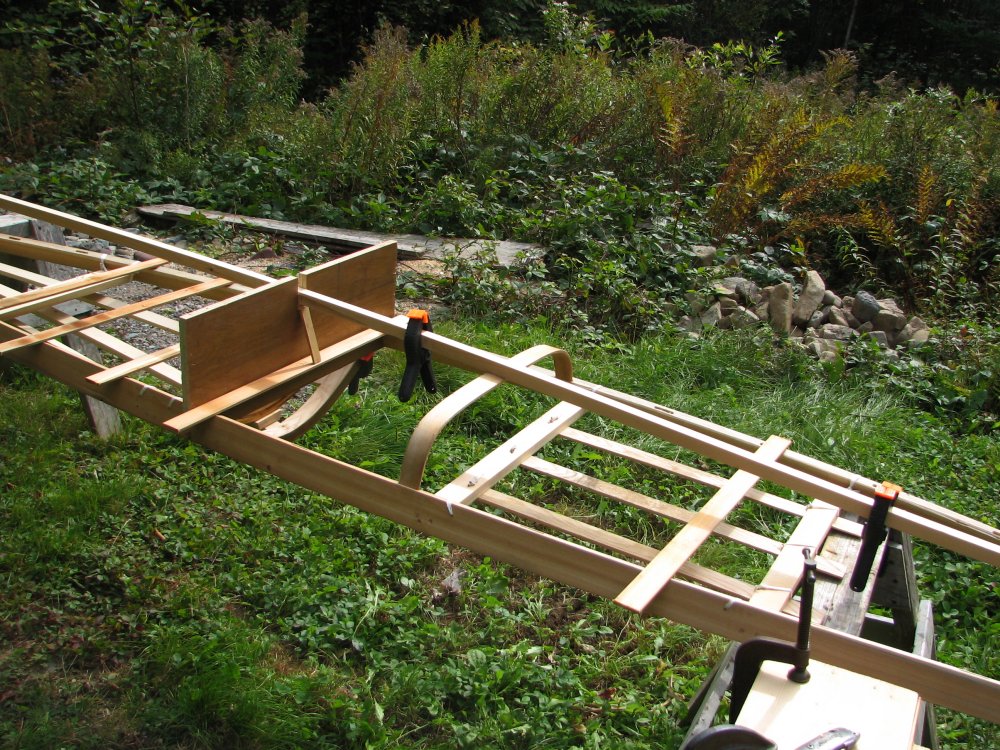
Laying out the masik with a temporary template cut to fit the hull...
The masik and the knee brace fitted before pinning in place.
Stitching on the aft deck with nylon seine twine. Quarter inch (6mm) slats of ash used here for strength as this is what you sit on when you enter the kayak.
Deck completed with the masik and knee brace pinned, the next step is the foredeck...

Fitting up the foredeck. Two stringers are called for in the plans but three are needed to support the camera tripod - which is why they are spruce for strength. (A pipe dream: Two would have been sufficient as setting a tripod on the deck is a forlorn hope.) Once again, cedar would have been strong enough if the grain was carefully selected.
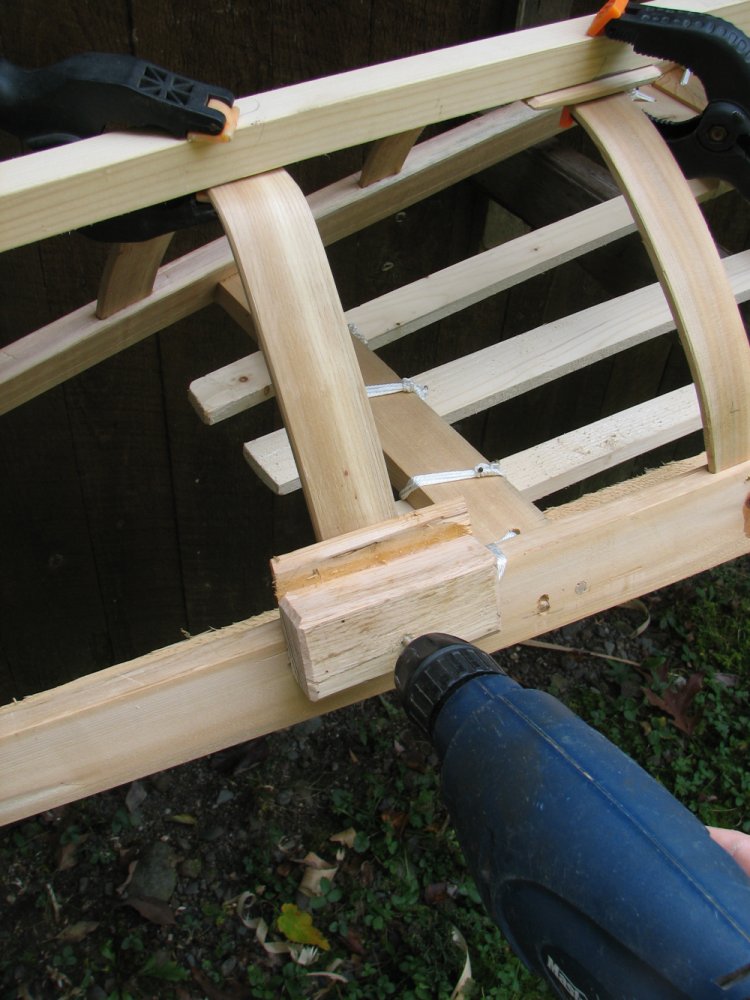
Cutting the mortises in the masik for the foredeck stringers with a hammer and chisel. (Another reason not to use ash: Cutting the mortises in the hard wood is murderous - even with a razor sharp chisel.) The block of firewood under the masik absorbs the blows of the hammer and removes any stress on the pinned joints...
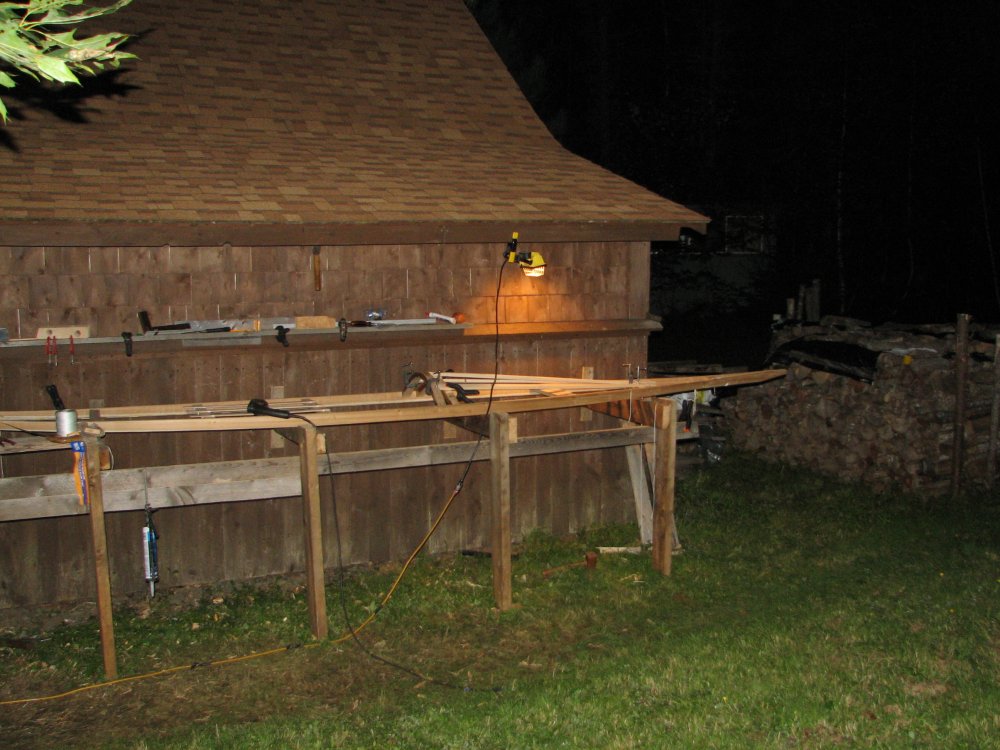
As usual night falls before the job is completed: Lashing on the deck beams under a halogen light. Getting nippy. Feels like frost for sure...

Making one clamp do the work of twenty: Gluing up the second layer of the cockpit with a length of salvaged Honda seatbelt, a strip of poly baseboard and a hook from an old conga drum...
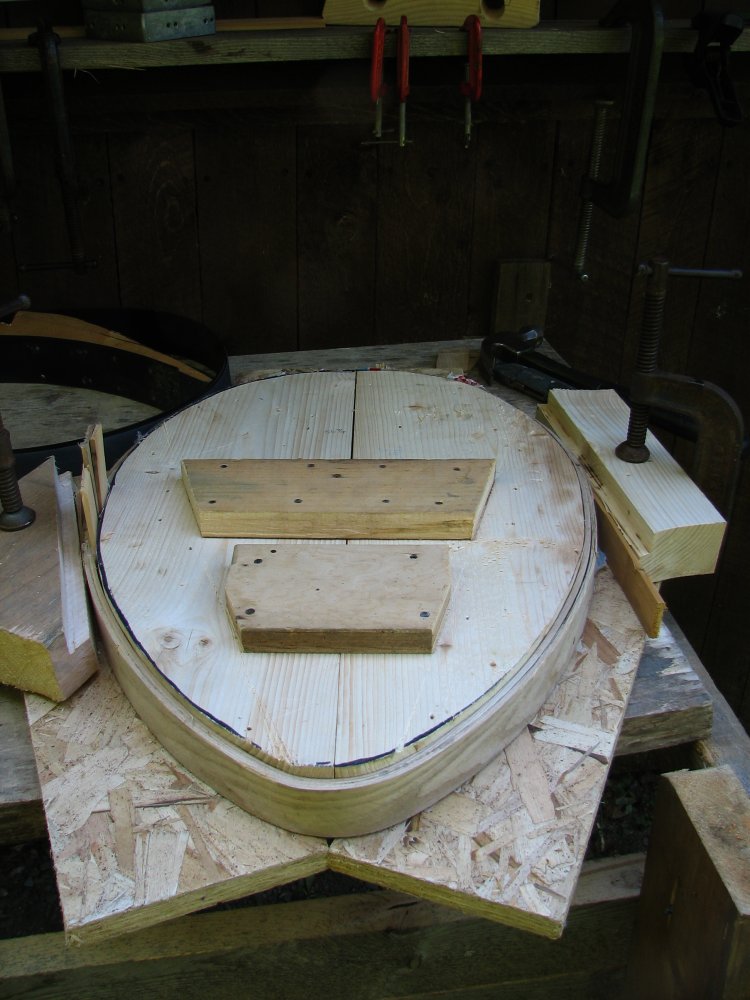
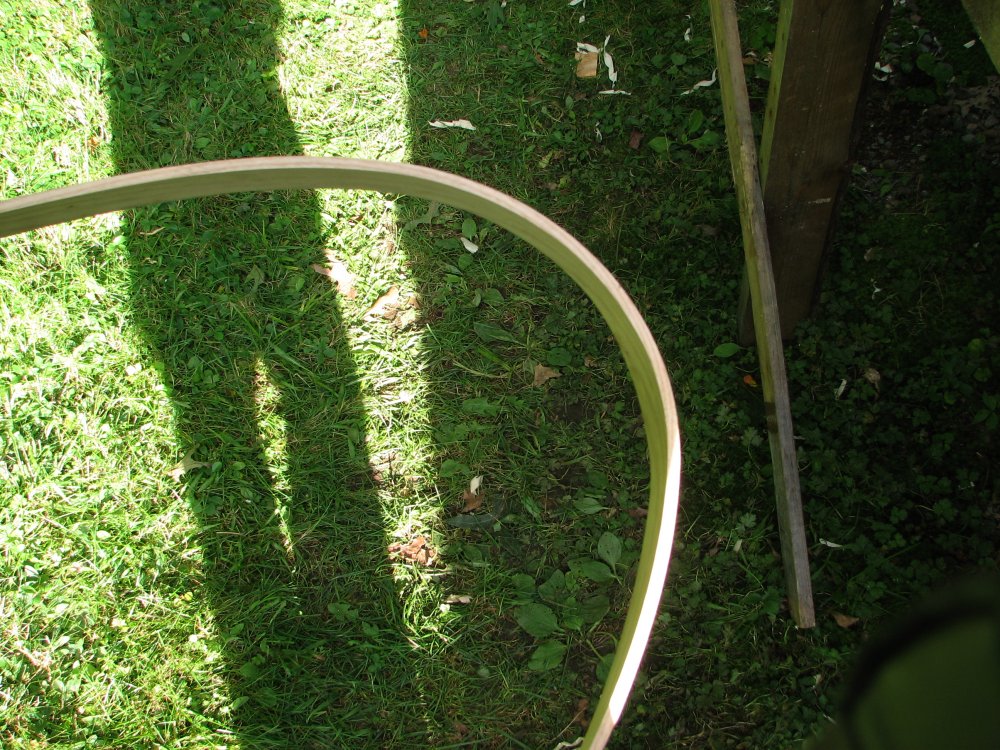
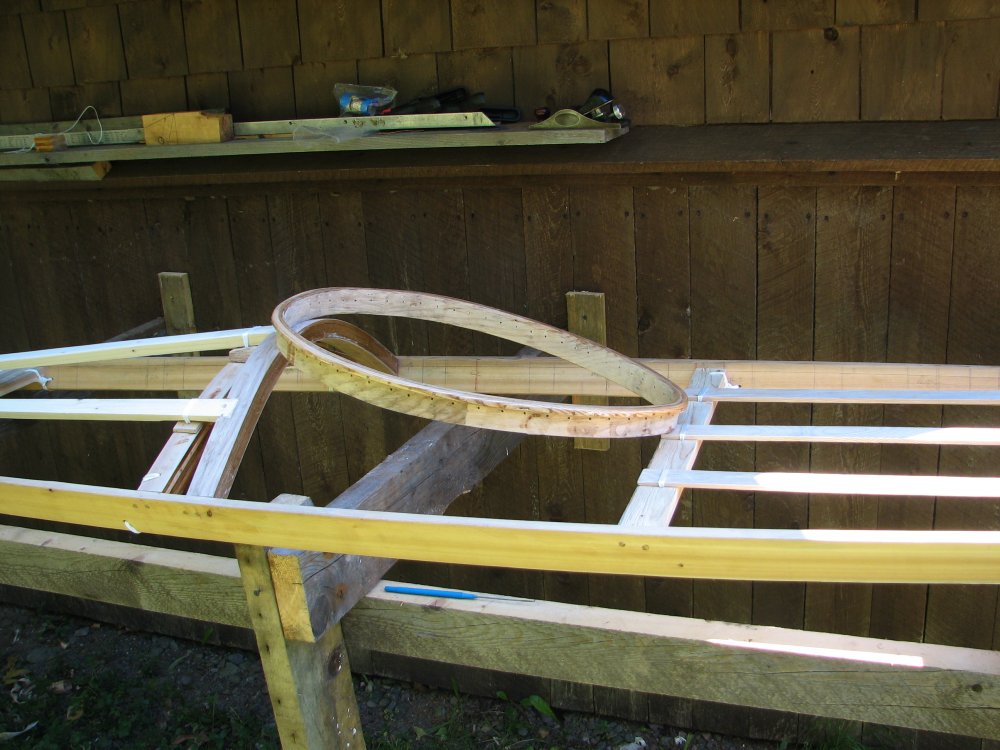
Ready to place the rim - but (naturally) it doesn't go quite the way it should...
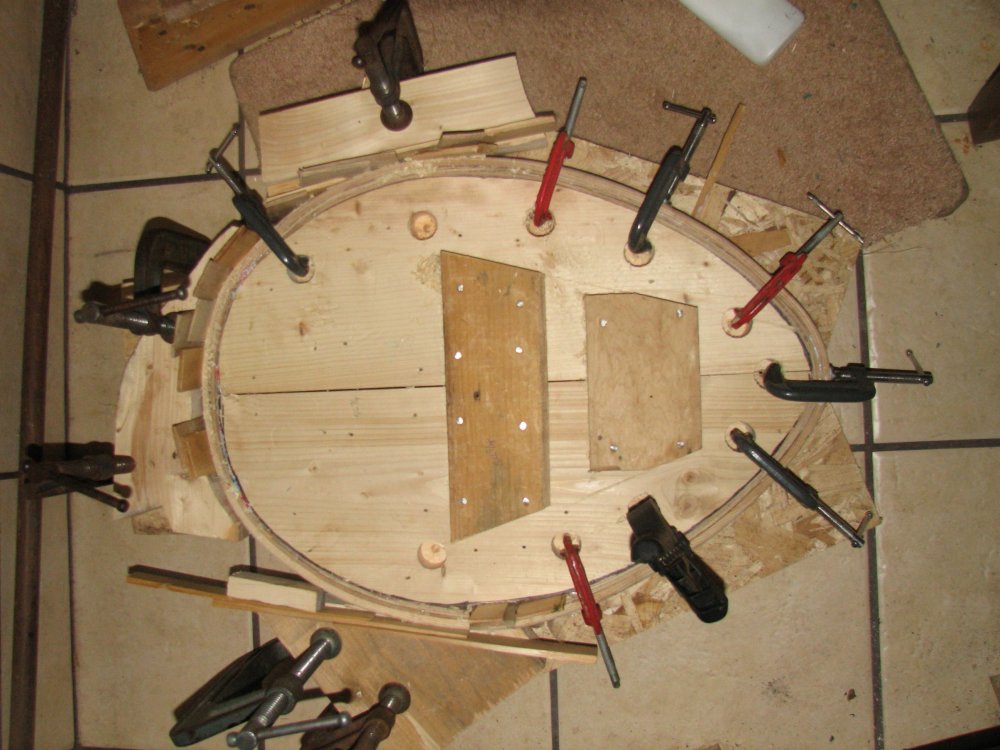
Two sweaty hours later, the coaming rim is glued up and drying: First the piece of pond-soaked ash fractured in three places, so another 3/8 by 3/8 inch (9mm by 9mm) strip had to be prepared.
Then rushing dark (and scratching my head) I grab the largest frying pan in the house, fill it with boiling water, and start feeding wood into the woodstove. Then slowly over about 20 minutes, the rim is rolled into a circle tighter than the form. This time all goes well...

Next morning, pinning the rim in place with 1/8 inch (3mm) birch doweling.
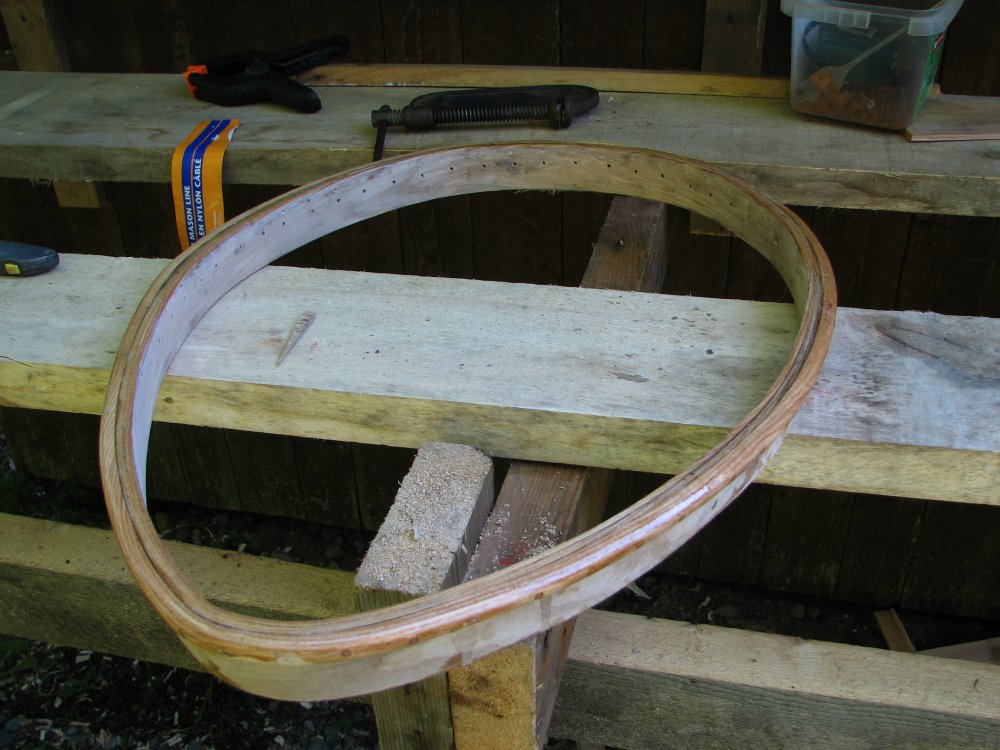
The completed coaming, 114 holes and 57 pins later. The lower holes below the rim are for stitching it into the fabric.
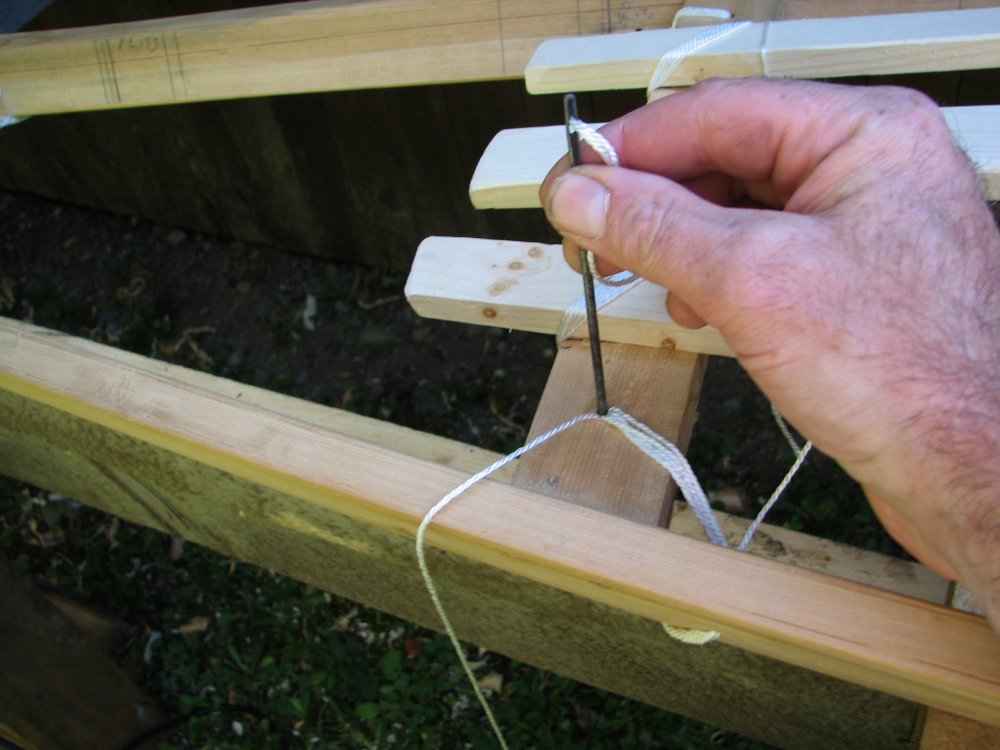
Starting to lash the deck beams to the gunnels...

The lashing almost complete. Crochet hook made from an old bicycle spoke is a helpful necessity...
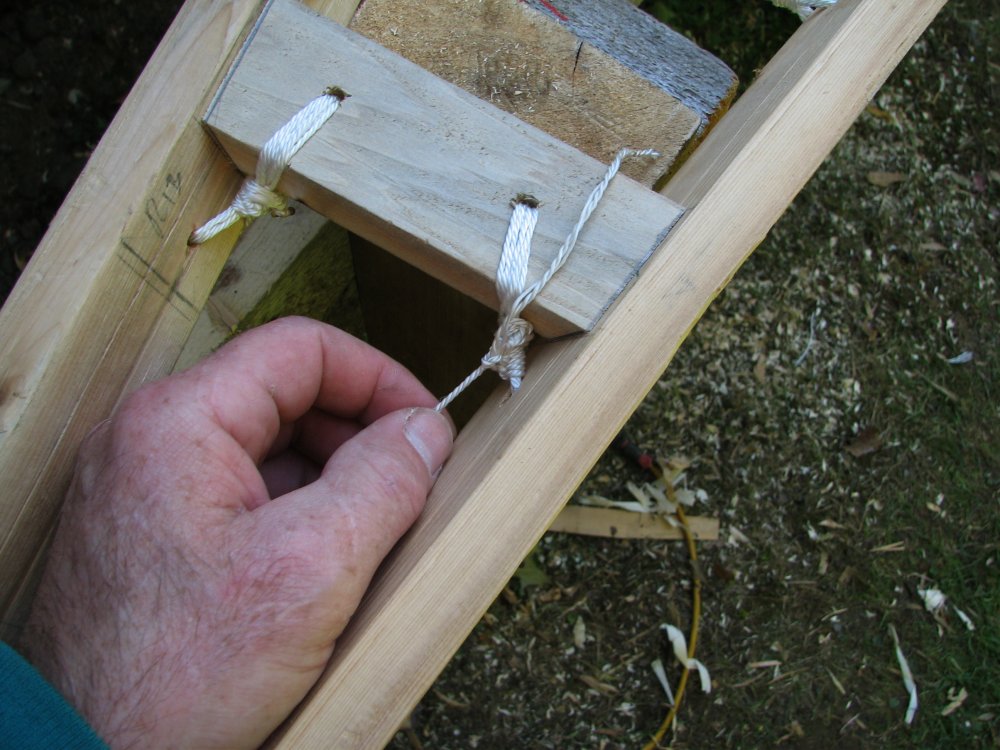
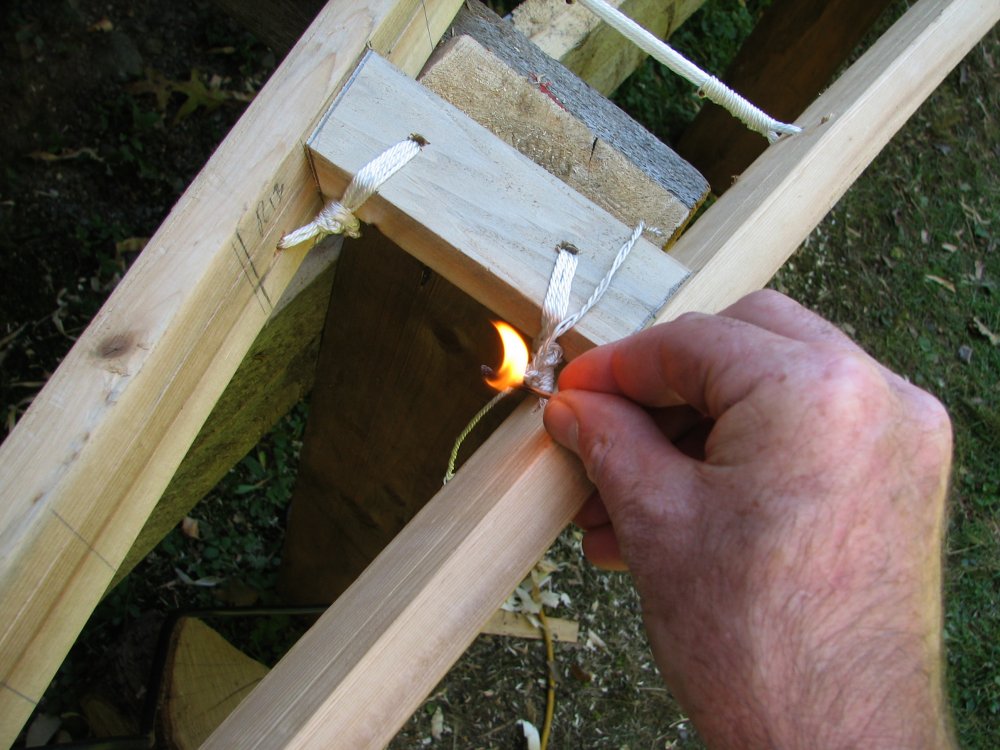
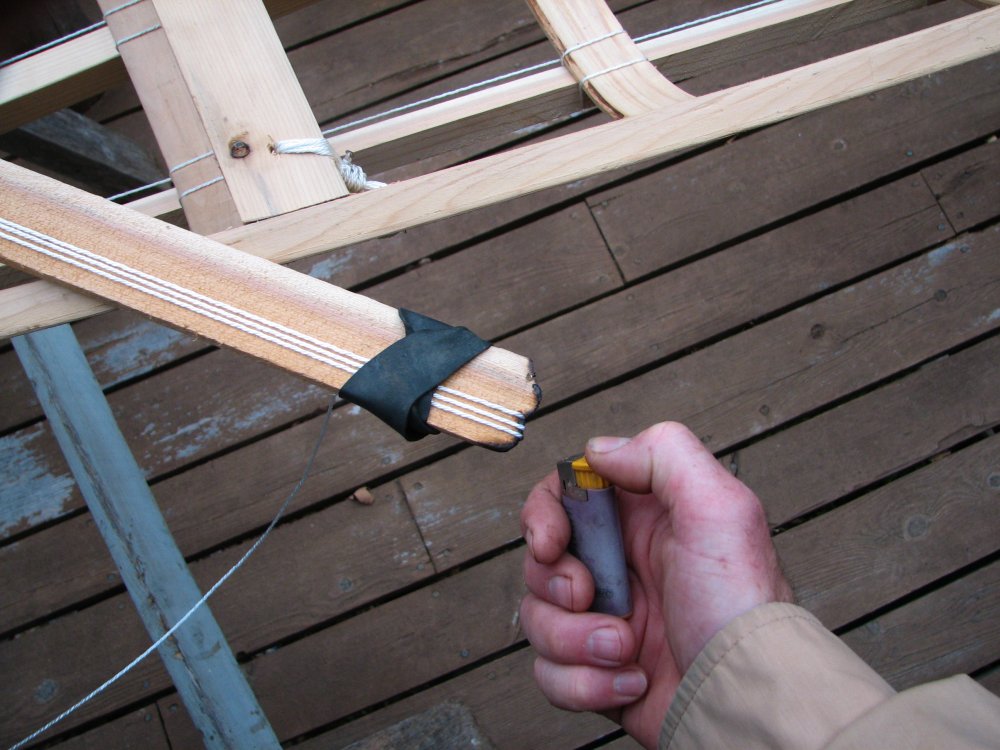
Not one to trust a bunch of half hitches so I'm closing off the bitter ends with a reef knot and searing the ends for good measure...
(Yes, I'm fussy. But I don't like the idea of a lashing coming adrift at sea...)

One side lashed, start the next... Surprising how the framing tightens up with just half the lashings done...
The cockpit rim set in place...
Starting to show her lines. Next, (once the lashing is complete) start the keel.
Adding the stern keel support which will be lashed to the gunnels.
Stem piece now added - although this one proves to be too shallow.

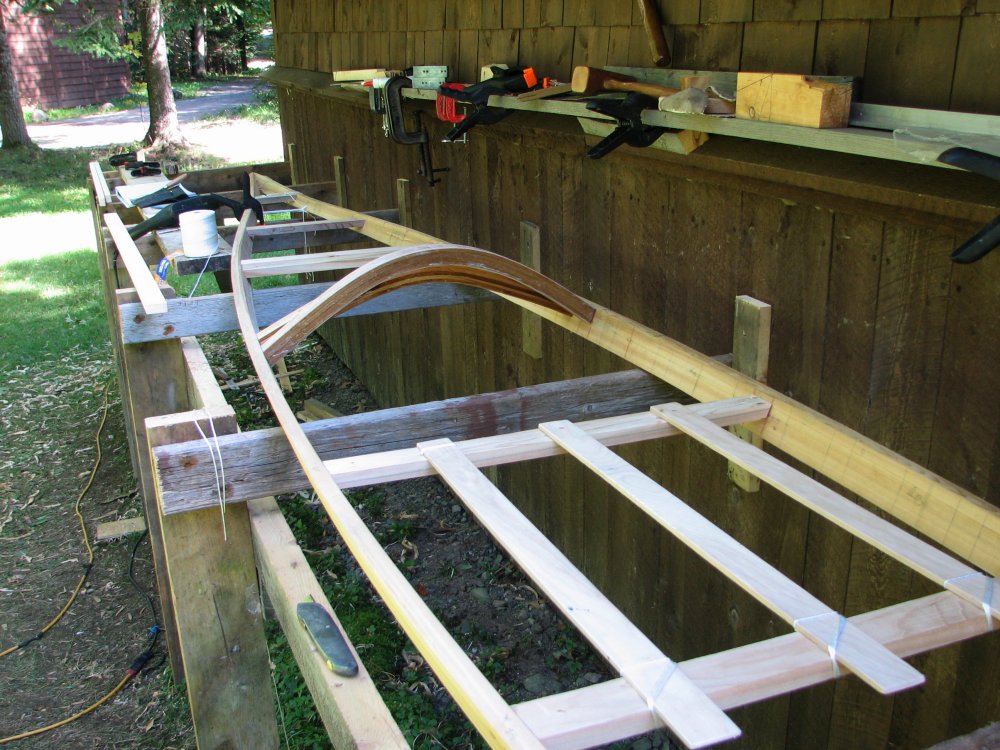
Keel pinned in place, a temporary turnbuckle is added to pull the aft section down into the characteristic attitude of a West Greenland Kayak. This will be cut off once the kayak is complete

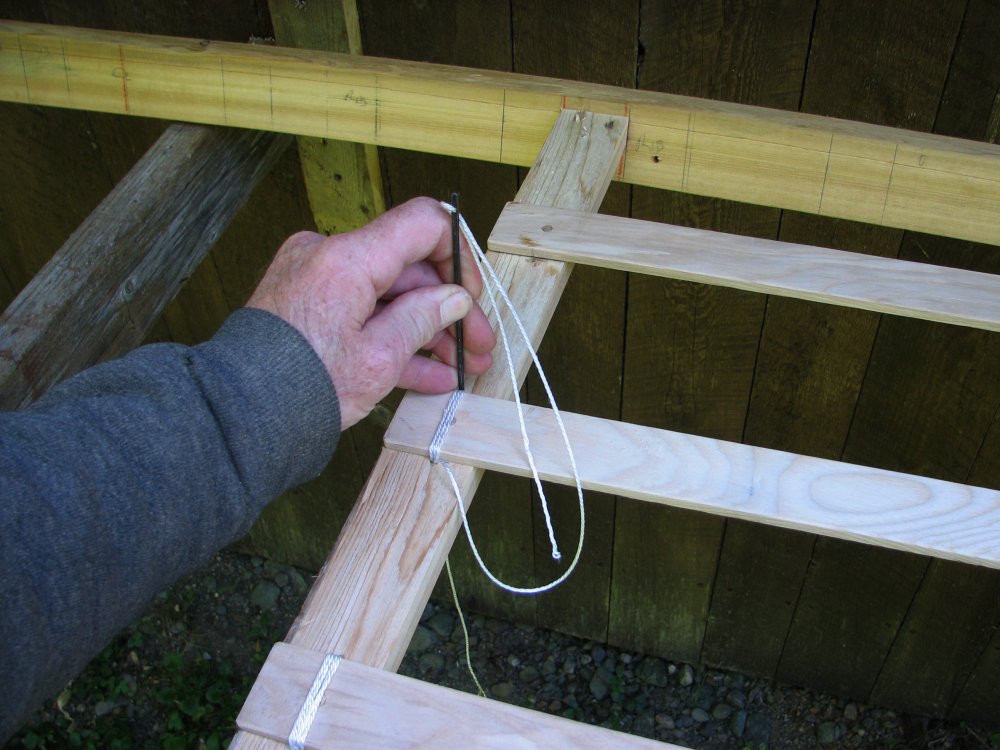
Temporary plywood center support set between the gunnels with a trial rib to determine the optimum shape and length of the first rib. Weighted string mimics fabric profile.

A failed trial run (note the splinter protruding from the curve) with a piece of rib stock that has been soaking in the pond for a week.
Well, I guess I'll have to boil them as I don't have a steam box...
Pre-cut ribs spaced out under the keel awaiting boiling...
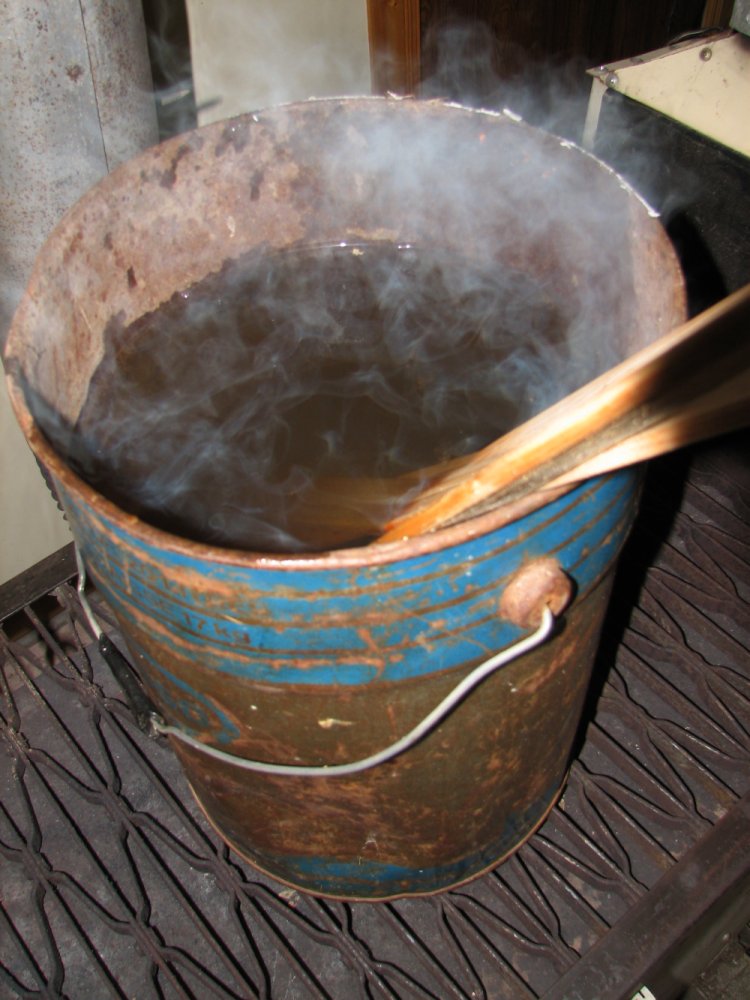
Five gallons (20 litres) of water at a full canner boil. It is stiffling near the furnace and the stove pipe is red hot...
First rib, bent in...
Sometimes they break - note the "spur" just below the tip of the square...
And sometimes, they don't.
Pre-bending the ribs under a compression strap made from an old Honda seatbelt ensures that most of the breaks happen without the heartbreak of during installation...

Forcing the near-side end of the rib into its waiting mortise before the wood cools and loses its flexibility...
Ooops... This one is too long... so take it out, trim it and try again...
With half the ribs in it is time for lunch... (Note the pile of rejects growing under the kayak...)
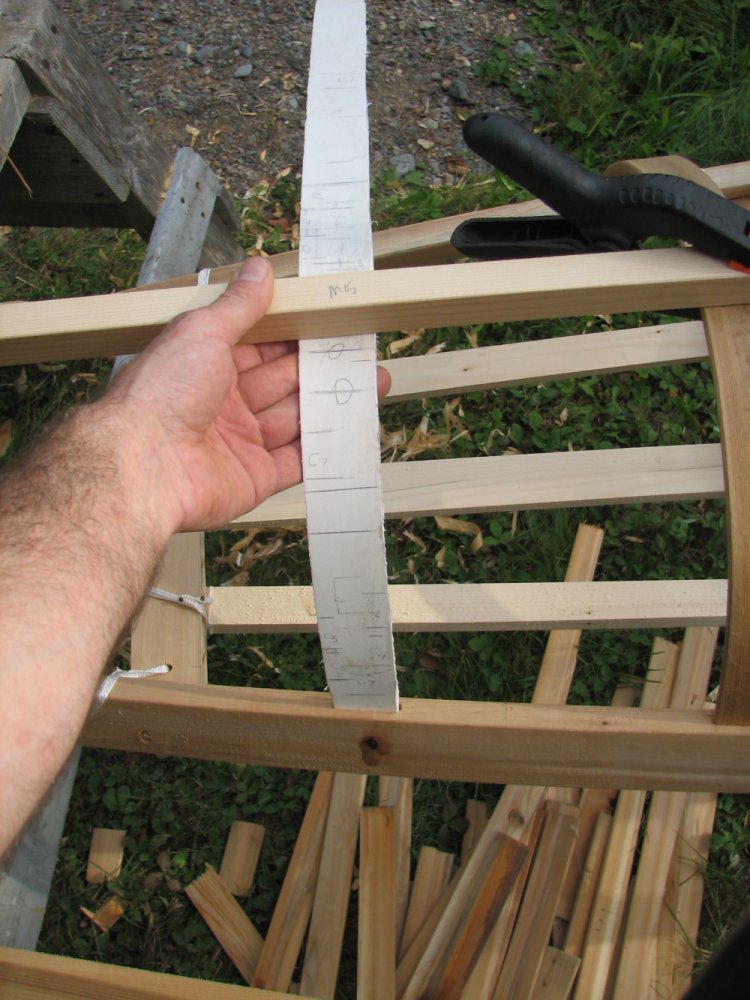
Using a strip of 1/8 inch (3mm) puck a.k.a. arena board as a flexible ruler to estimate the length of the curved ribs at the end of the kayak. The rough reverse side of the HDPE plastic takes a pencil nicely.
Only problem is that it is almost impossible to erase the pencil marks once they are made. This arena board is so tough and indestructible that I wonder what it would be like to make the ribs out of that alone? The strips would simply never break.
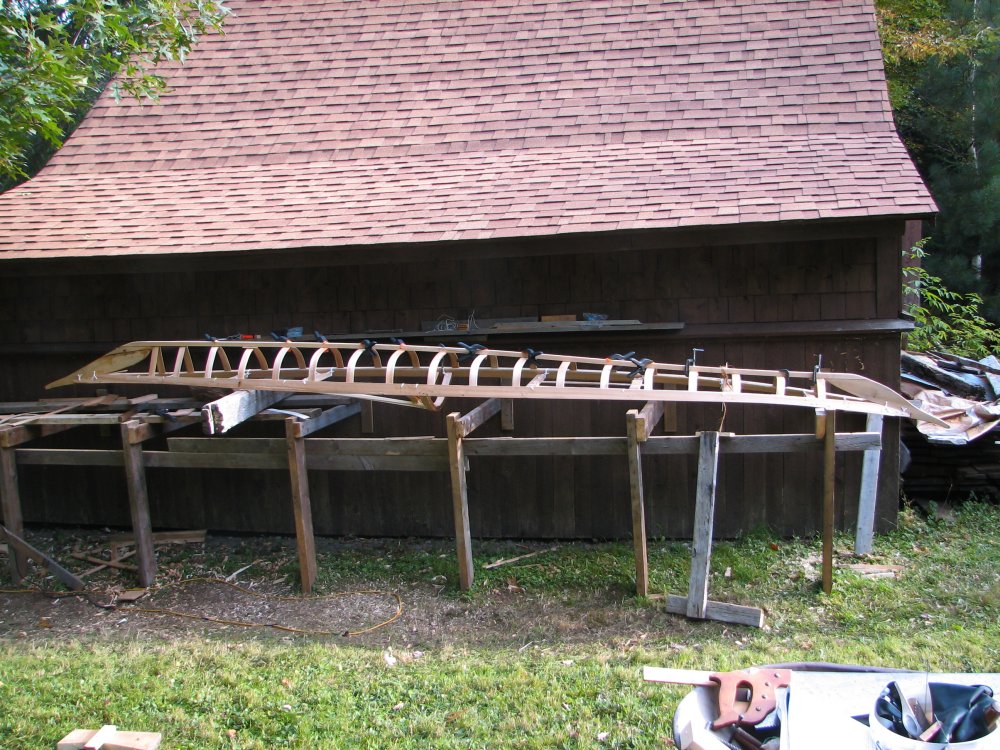

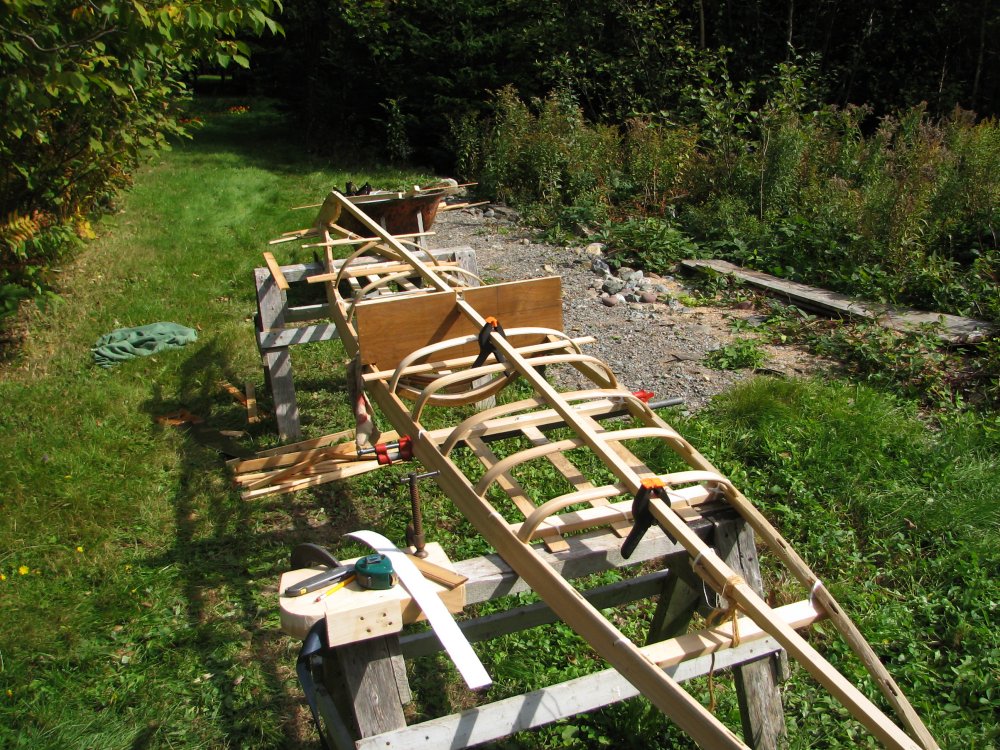
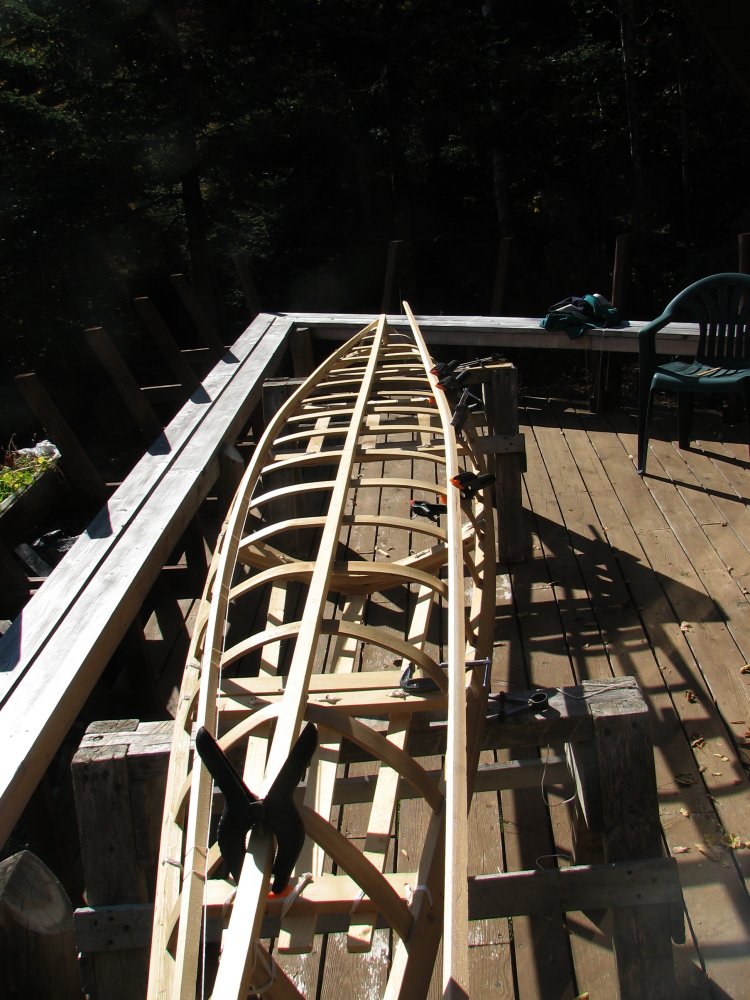
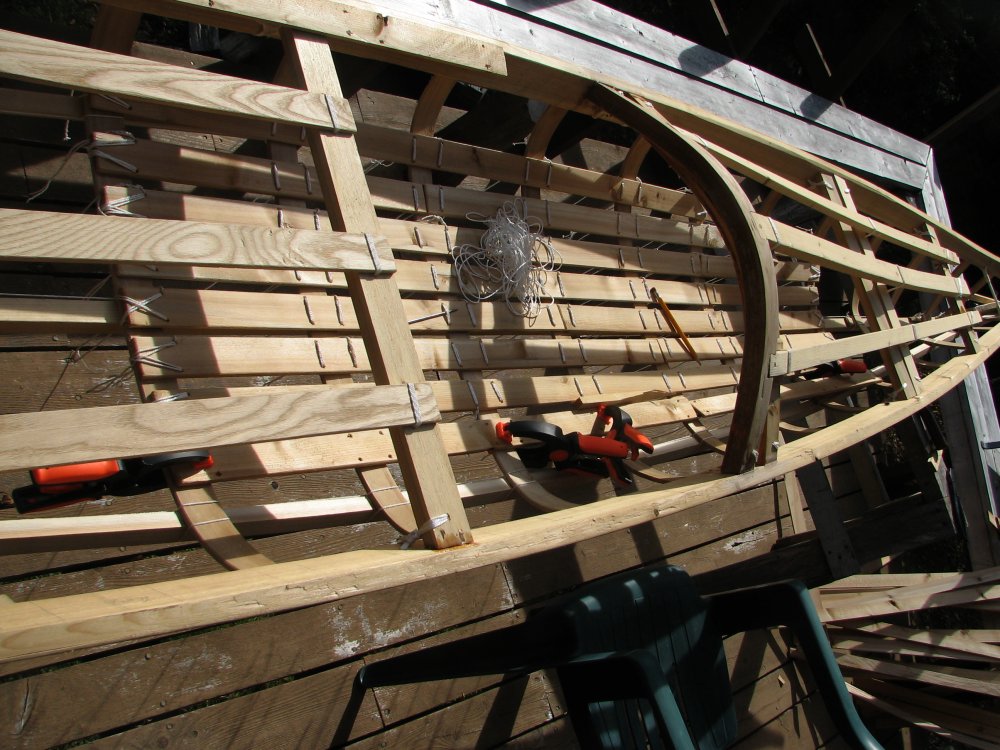
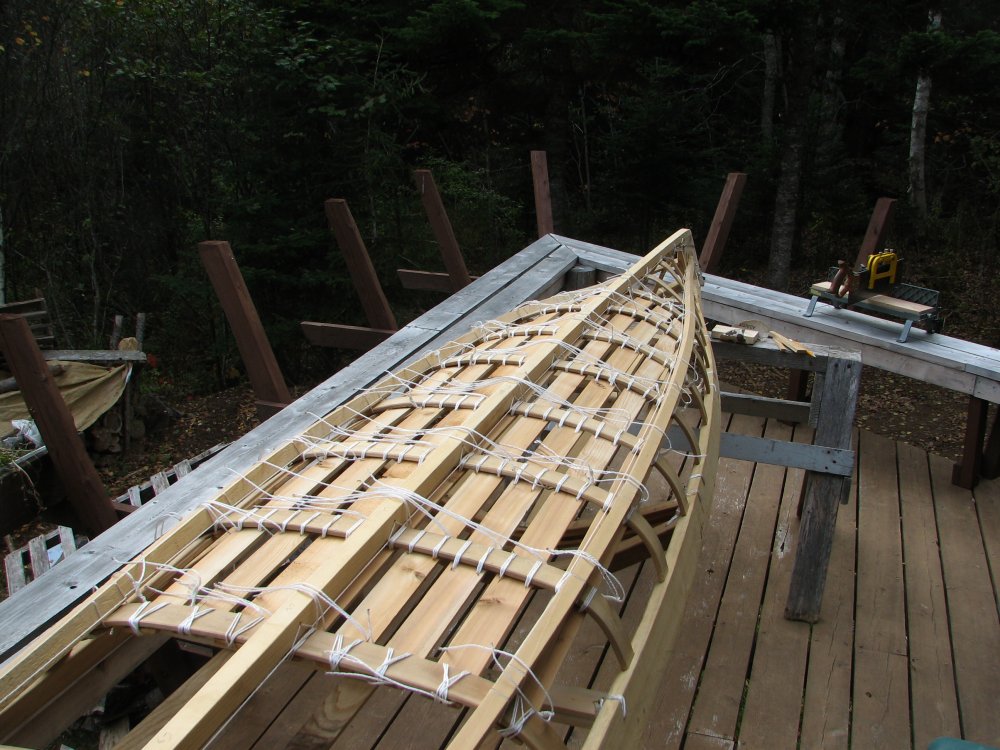
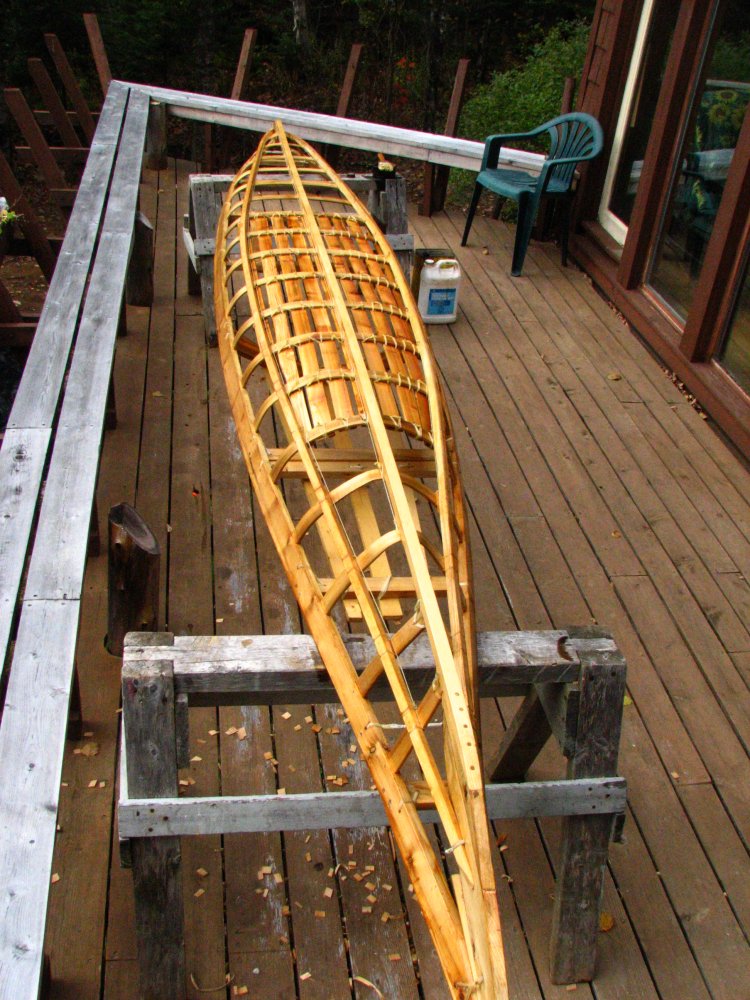
Supper time and all the ribs are now in and drying. The kayak is really starting to look like something now...
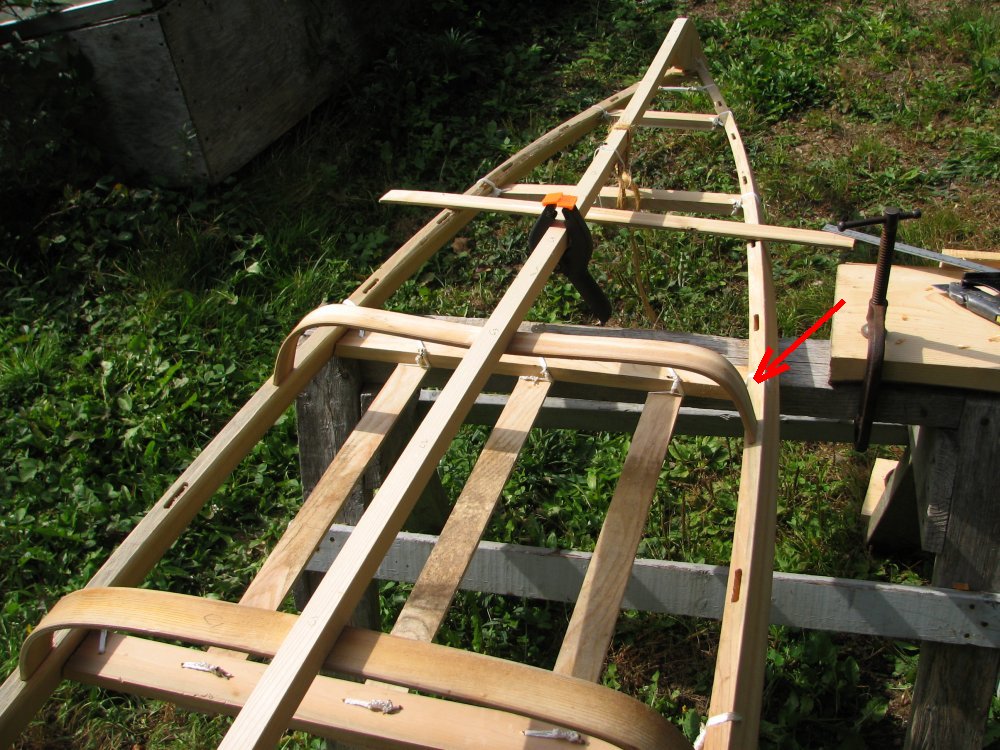
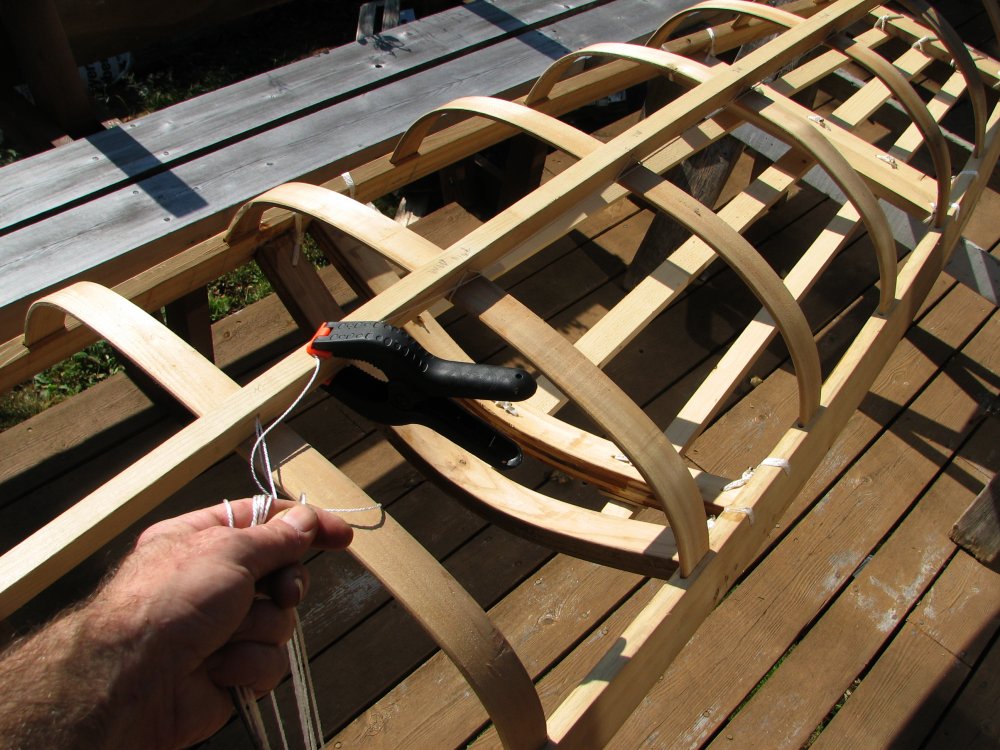
Next come the chines: Clamping a batten on the hull in the approximate position of the chine to check the fairness.
Drilling the holes to pin the ribs into the gunnel. Jig assures that the hole is in the same position for every rib and only 7/8th of the way through the gunnel.

Driving in the 1/8" (3mm) dowel pins...
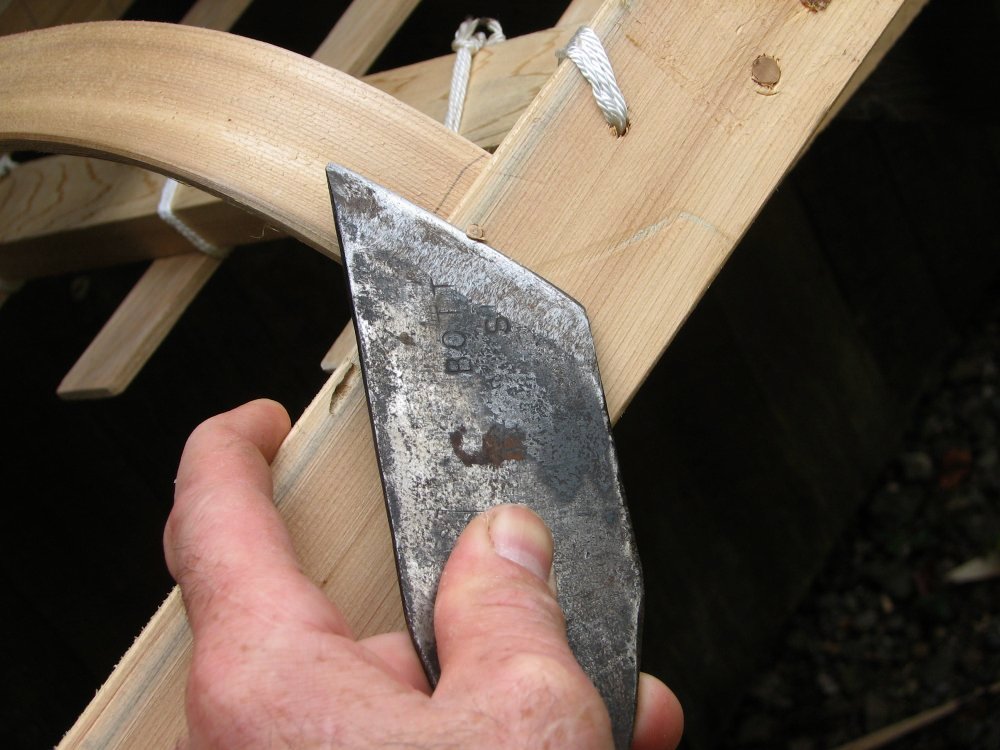
And slicing them off with a wicked-looking skew (Hand-forged from a lawn mower blade riveted to a chunk of hay fork handle the skew is sharp enough to shave with...)
Lashing the keel to the ribs with a running lashing that runs the entire length of the kayak. To save abrasion, the line is threaded through holes in the keel...
Keel and one chine lashed on, the second chine is bent in. To accommodate the shape of the hull the chines are tapered to half their thickness at each end - a job that leaves a pile of curling shavings and an aroma like a pencil factory...
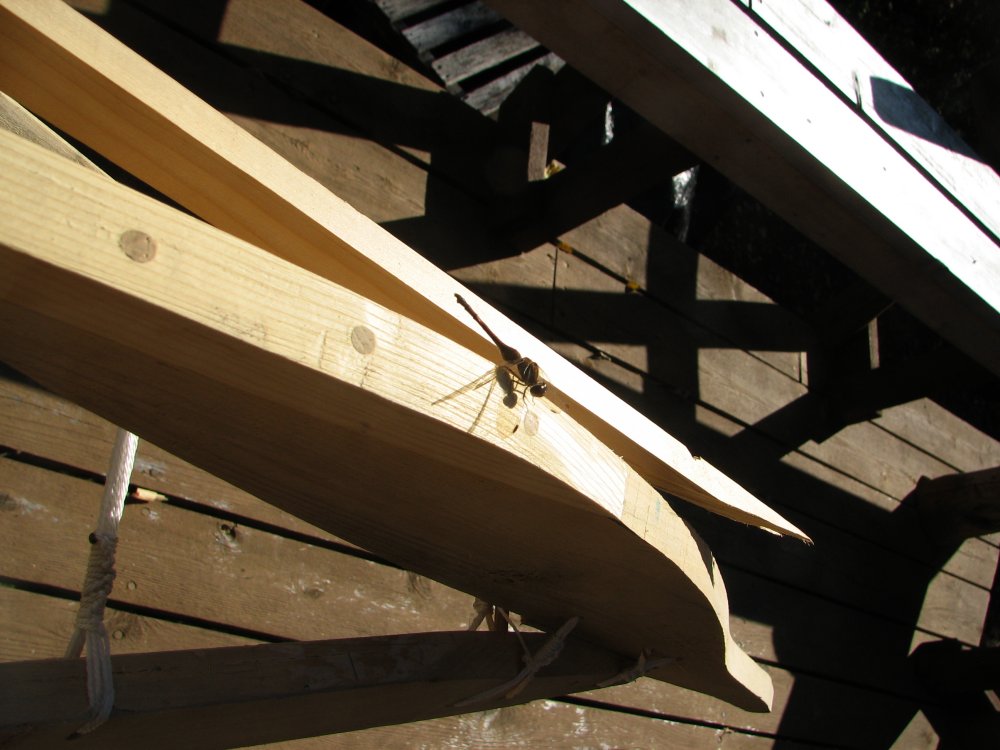
The cedar sitting in the sun is a nice, warm spot for soaking up some rays - at least this little dragonfly thinks so. (You can get an idea of her size by comparing her to the dowel pins: They are ¼ inch (6mm) in diameter. Yes, it is a she. The males are bright red while she is russet...)
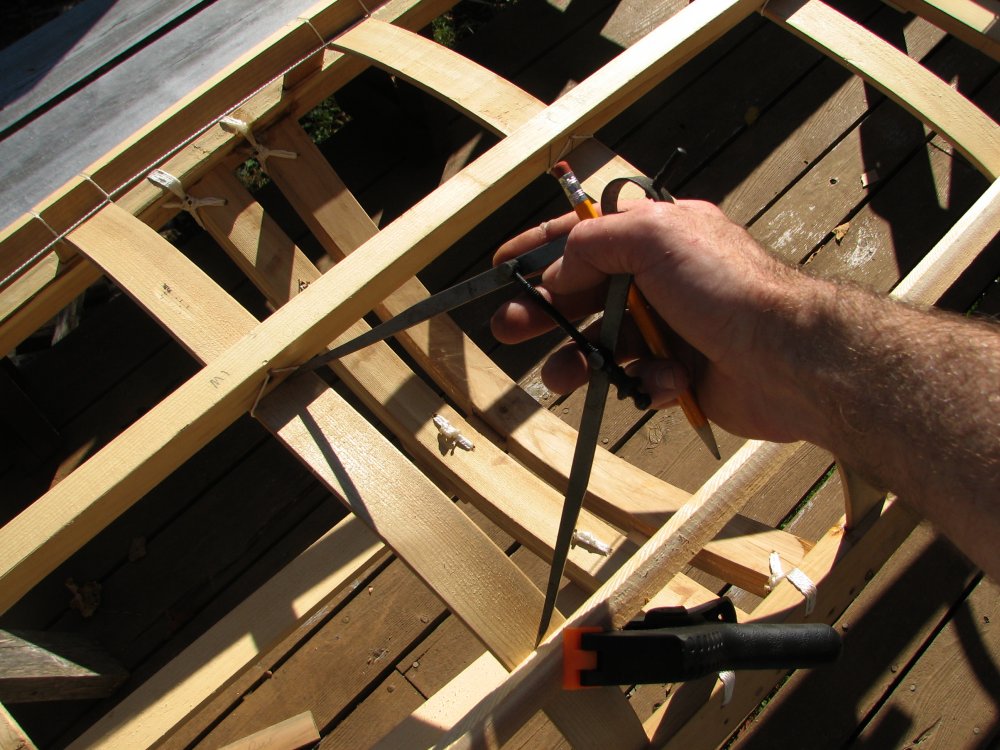
Matching the second chine to the first by measuring to the keel with a pair of dividers...
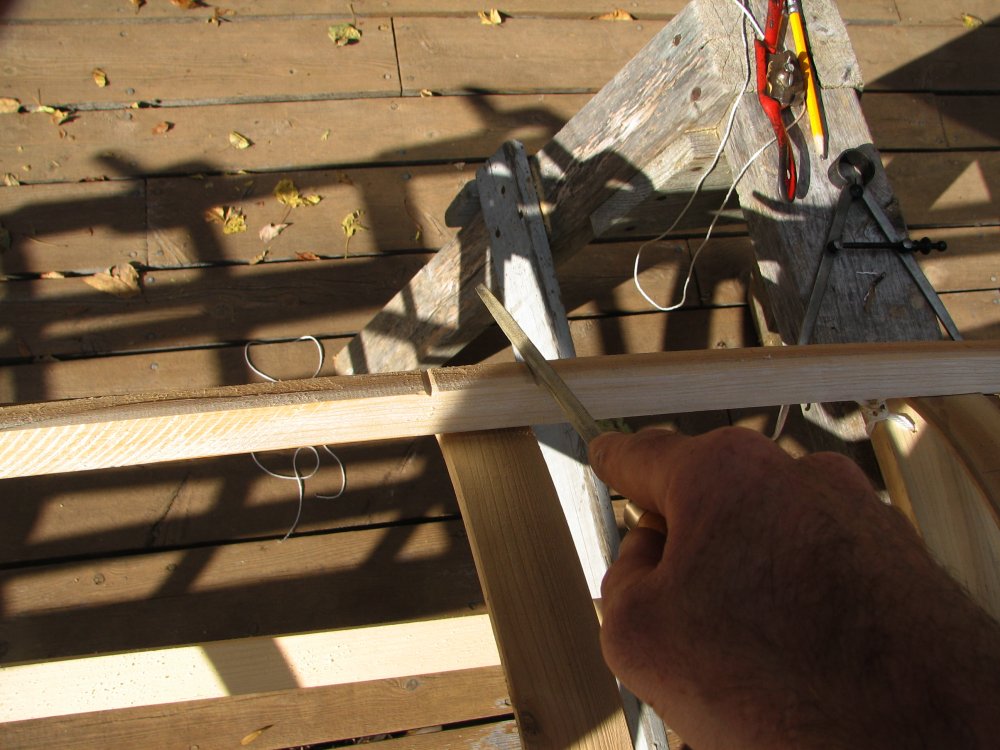
Notching the chine for the lashings with a file as a hole would weaken the light framing too much.

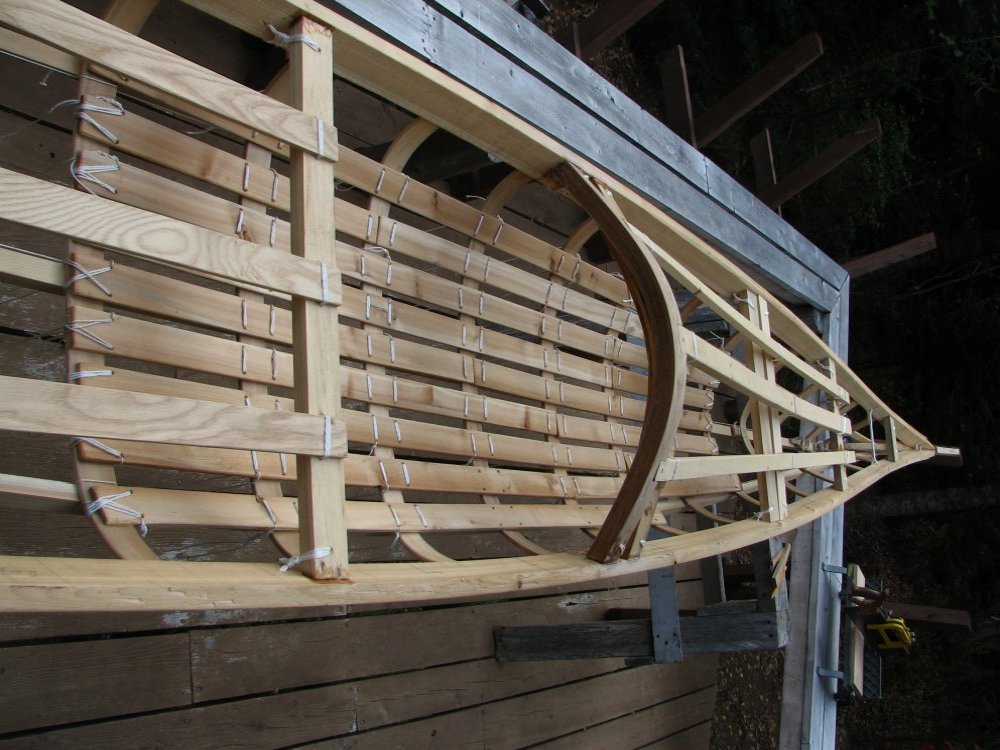
Both chines are now lashed on with long, continuous lashings running the length of the kayak. When finished, the strings are tight enough to play a tune on...
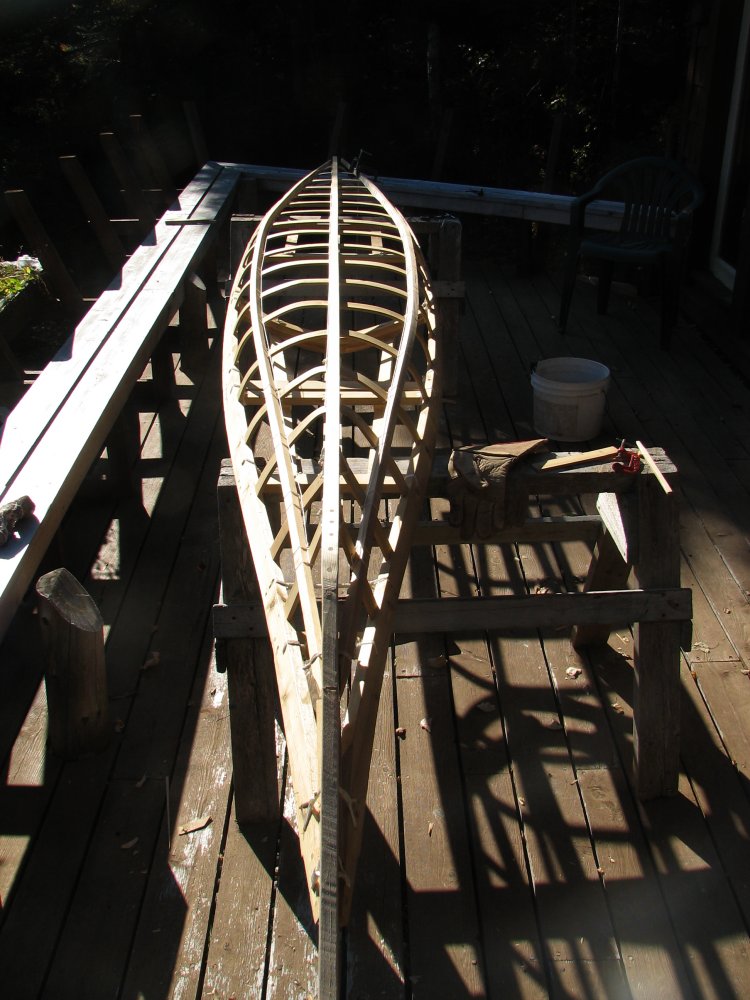
Stern shot of the completed chines...

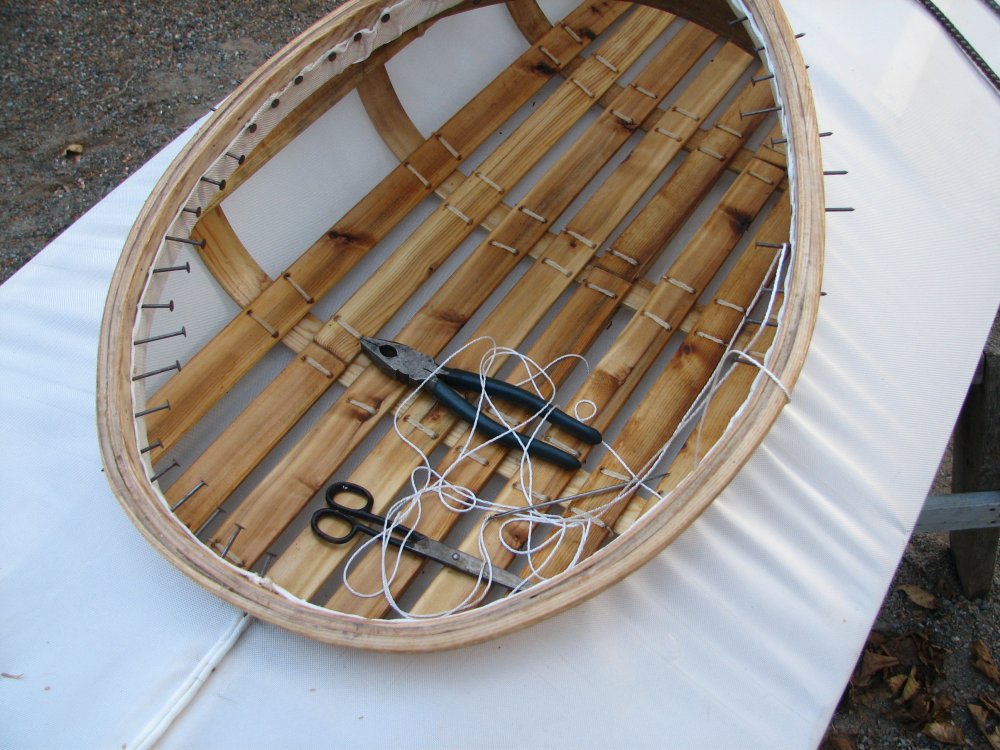
Now the floors... The first one lashed in, with two more laid out alongside. I was going to lay eleven of them but figured it would stiffen the hull too much so cut it back to nine. Twenty eight holes and eight lengths of nylon twine to fasten each plank to the ribs (with about a dozen knots per rib per floor plank). Slow going - and that is an understatement.
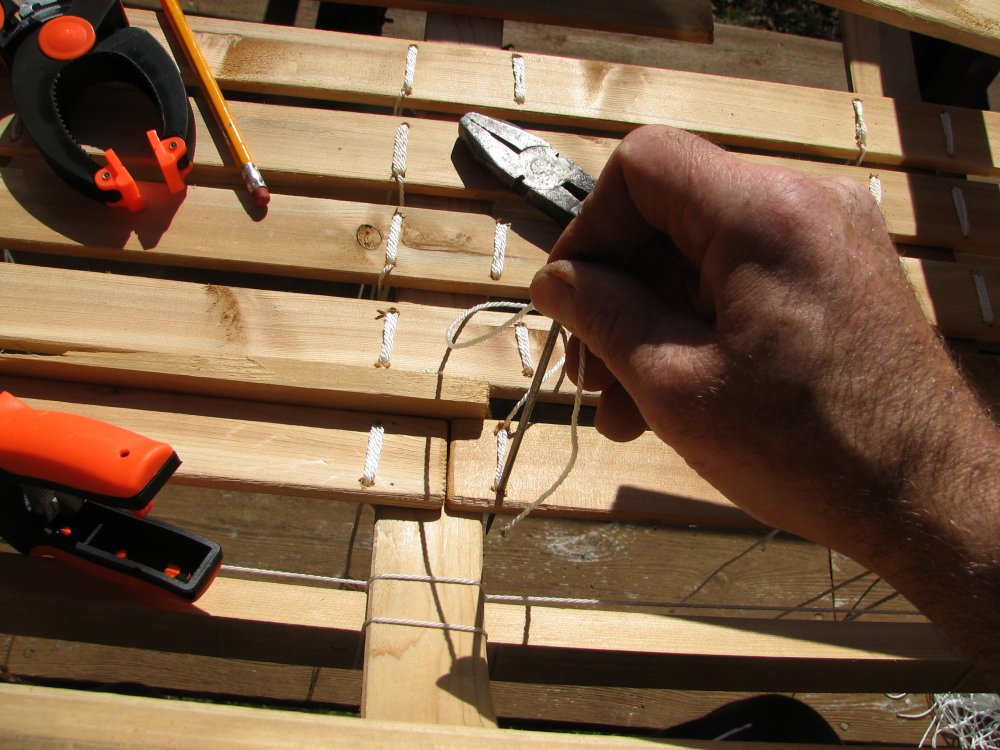
A good old upholstery needle Dad used 50 years ago to re-cover a couple of living room sofas finds new life...
A fast way of cutting and fire polishing the ends of the uncounted lengths of flooring ties: Wrap the line around a scrap of lumber the length of the tie and sear the ends with a lighter.
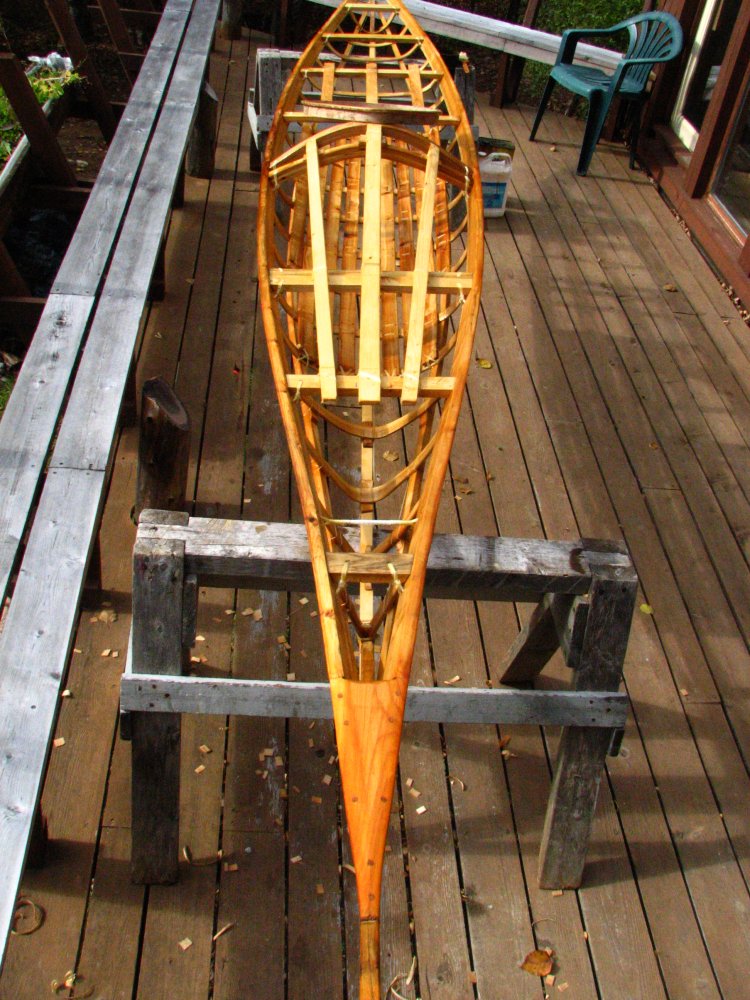
Over half done. Note the pile of pre-cut lashings sitting, ready, on the floor...
All done. No idea how long this took but the first floor planks took around an hour each with the last taking about thirty minutes...
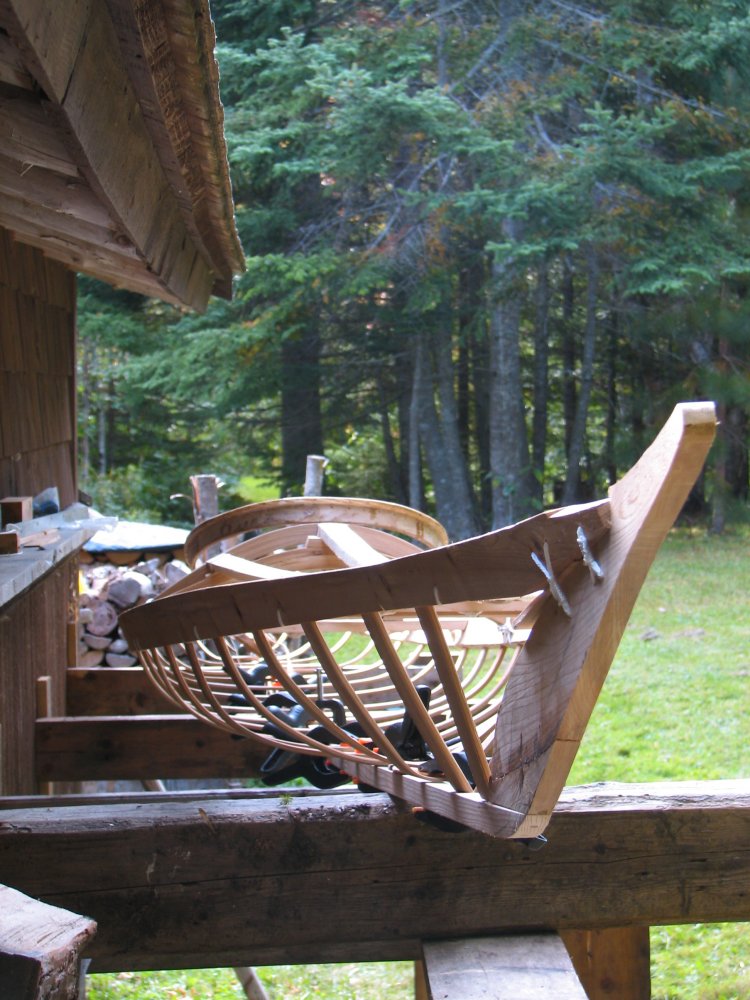
Up-ended and ready for trimming all the tag ends... And not a metal fastening in sight...
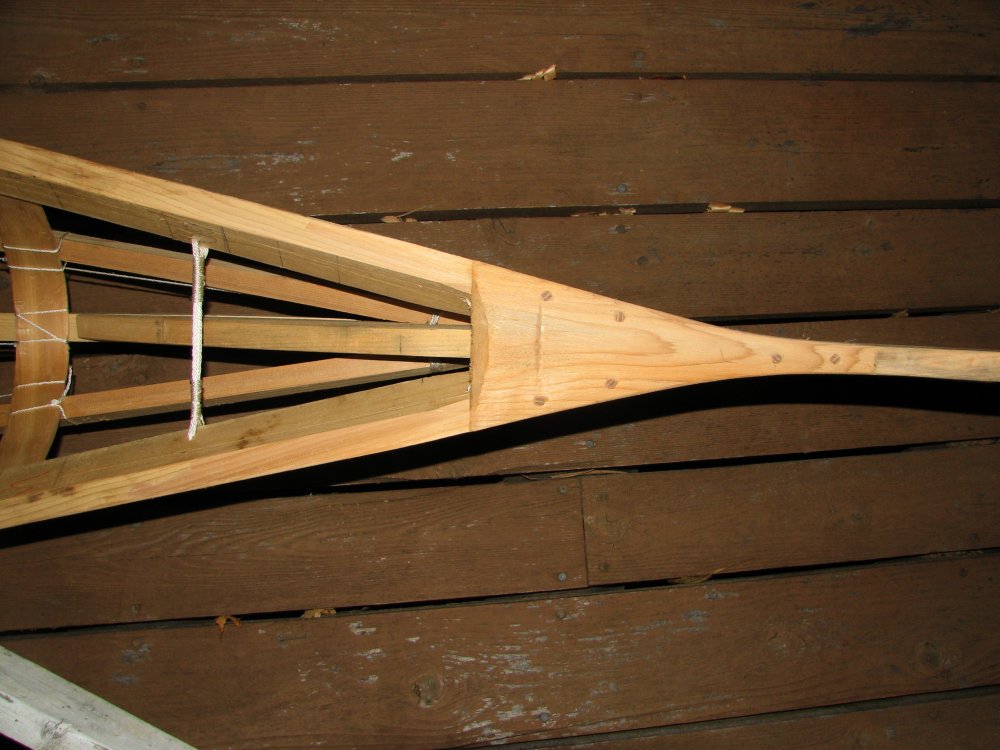
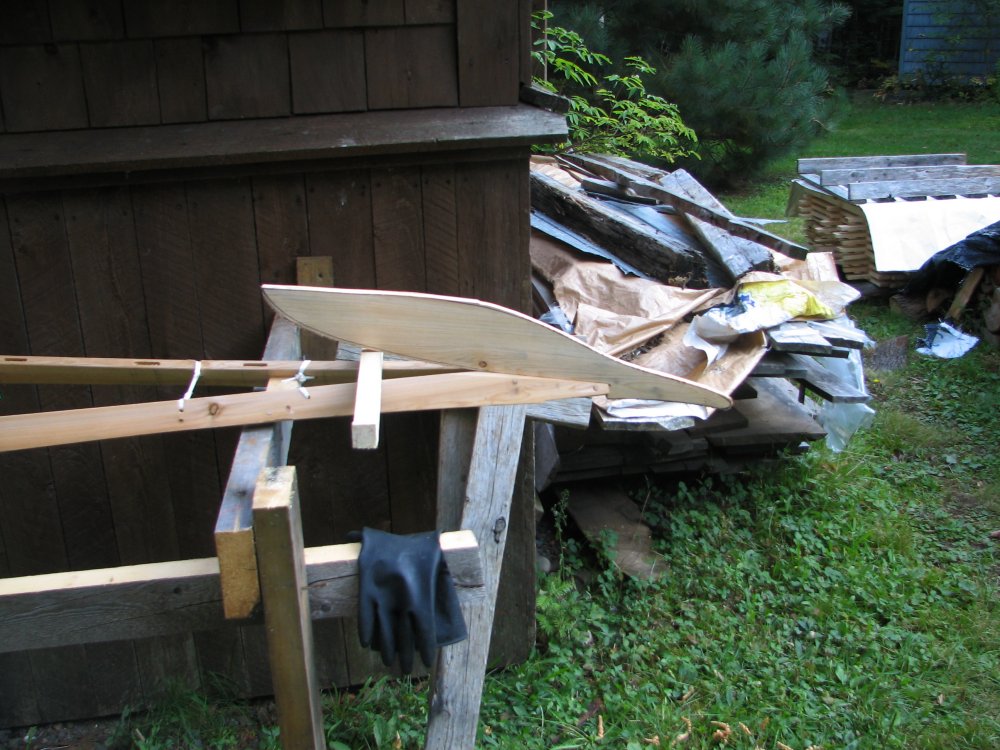
Next come the breast hooks. This is the stern one, bent in, pinned with six dowels and cut to shape...

The bow breast hook before cutting in and installing. To get that shape I took a 3/8 inch (9mm) slab of cedar and boiled it in the largest frying pan for a few minutes then stepped on it while one end was supported about six inches (12 cm) off the floor. Hope to get it in tomorrow and that should finish the woodwork. Next job will be to oil the frame and then the skinning.
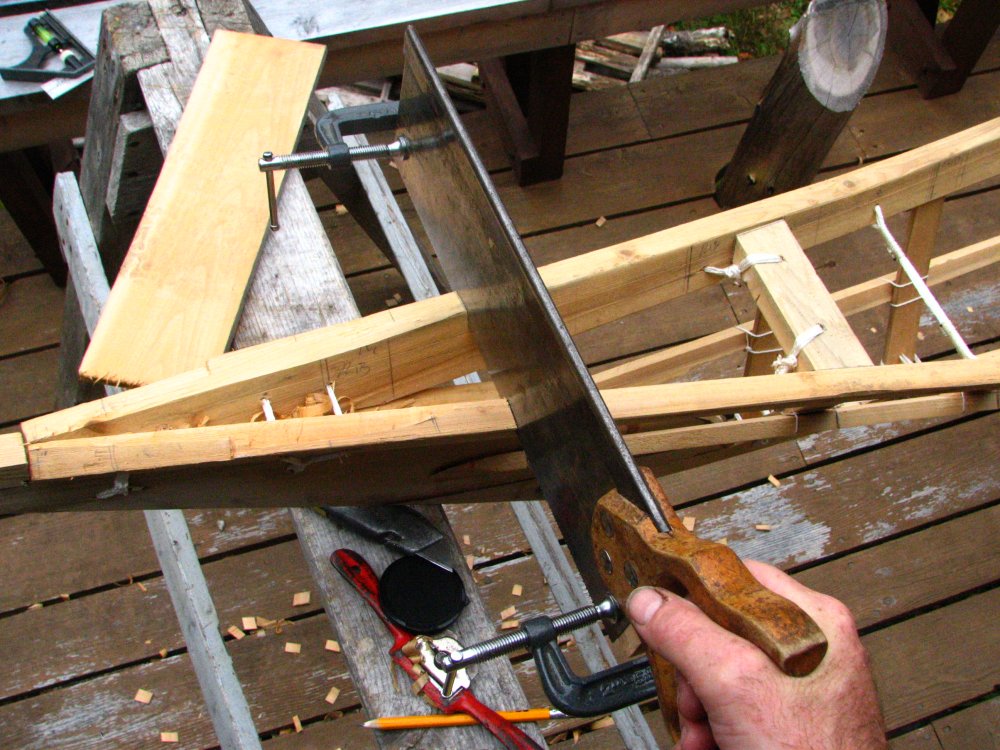
Starting to cut in the bow breast hook...
Carefully cutting down the socket between the cuts... And pinning in place.

Bow breast hook shaped up, the framing is complete...
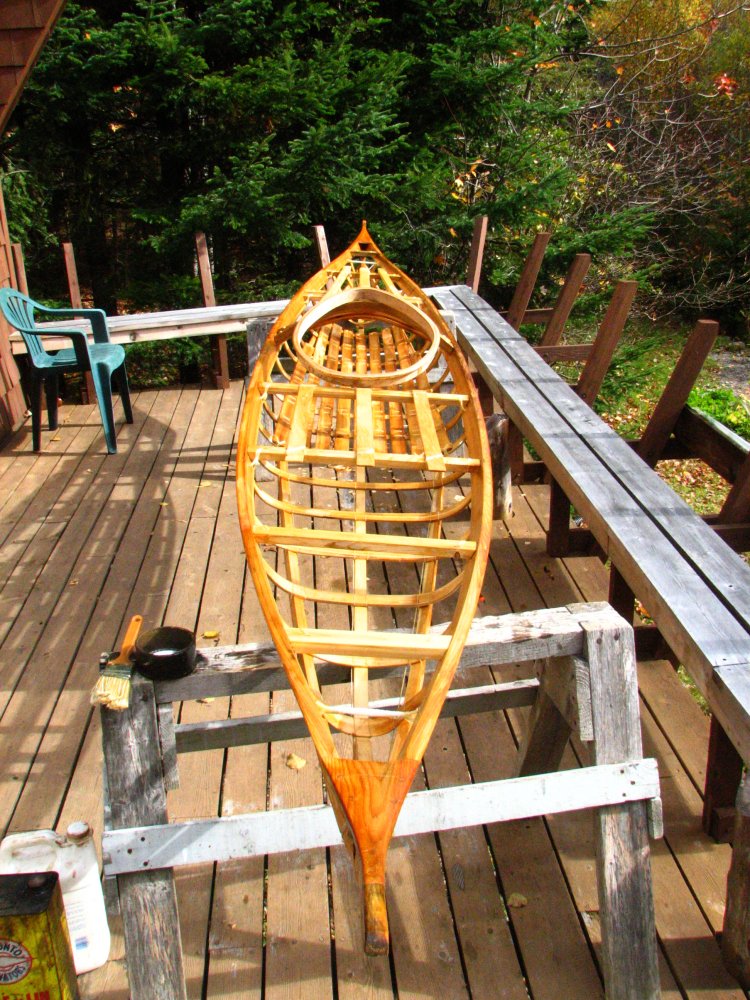
The hull freshly oiled with linseed oil.
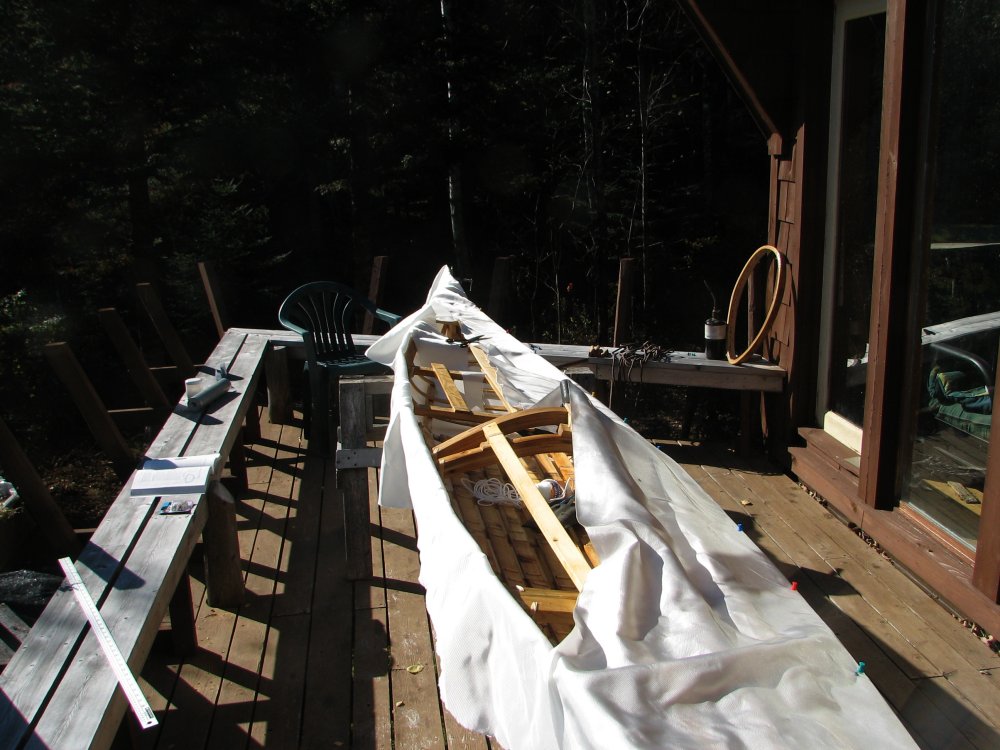
Once the oil has dried, skinning with ballistic nylon...

Making one of the four 'bone' or 'antler' disks that keep the bow and stern lines from freezing to the deck.
These were made by punching out a piece of Corian® counter top with a hole saw then rounding the disks with a rasp in the drill press. A dusty process.
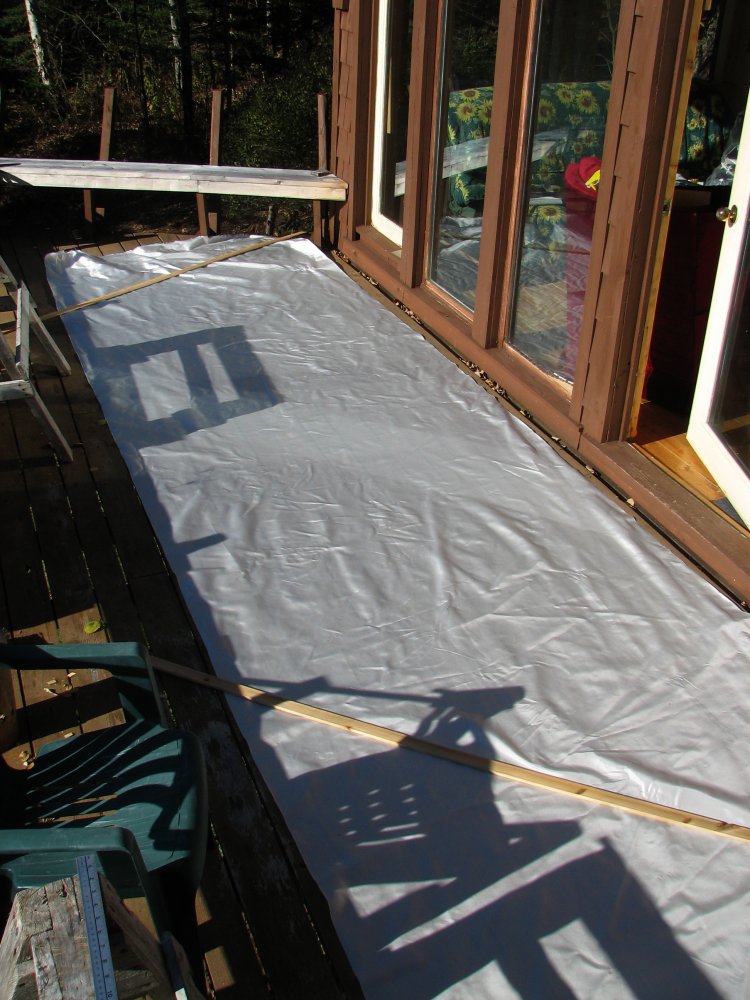
Starting to lay out the skin: A bolt of 7 ounce (or 237 g/m2) ballistic nylon, 18 feet (6 metres) long by 5 feet (1.5 metres) wide.
Ballistic? Well in pre-Kevlar® days ballistic nylon was developed for use in bullet-proof vests...
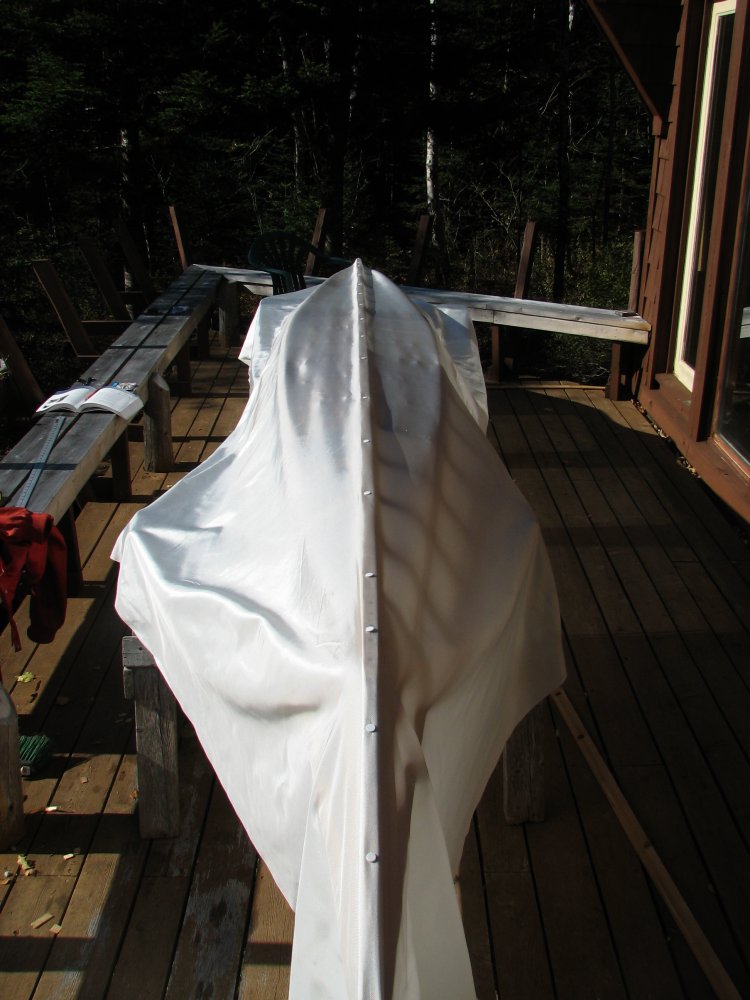

Kayak upside down, the nylon is centered on, and pinned to, the keel...
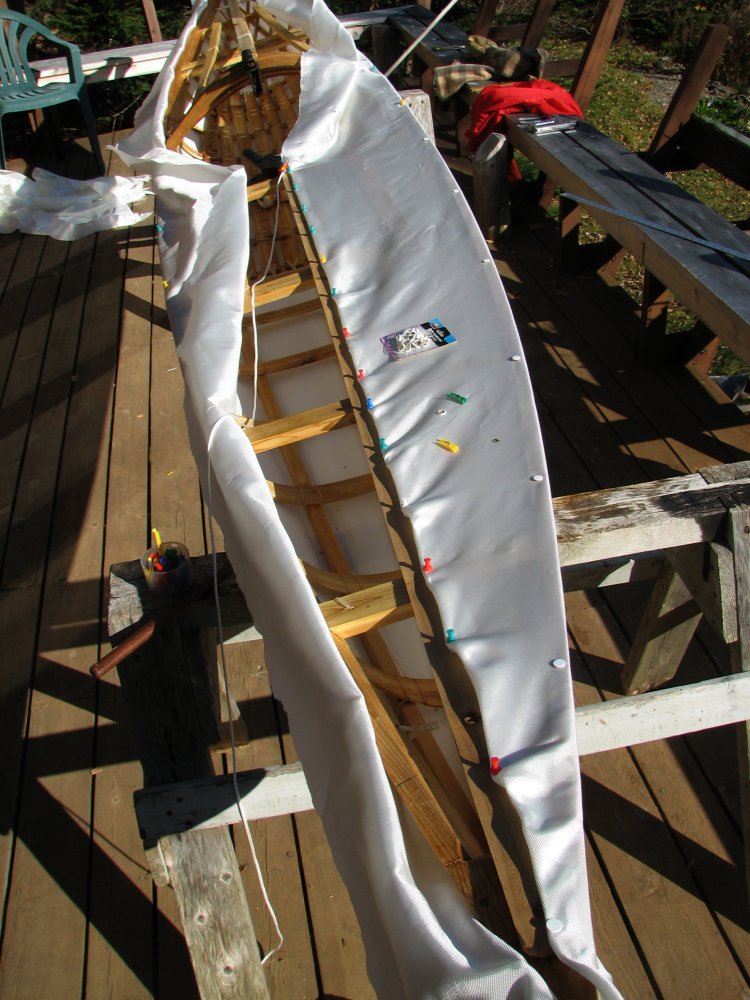
Then right side up, the nylon is pinned to the gunnels, with a pin every six to twelve inches (15 to 30 centimetres)
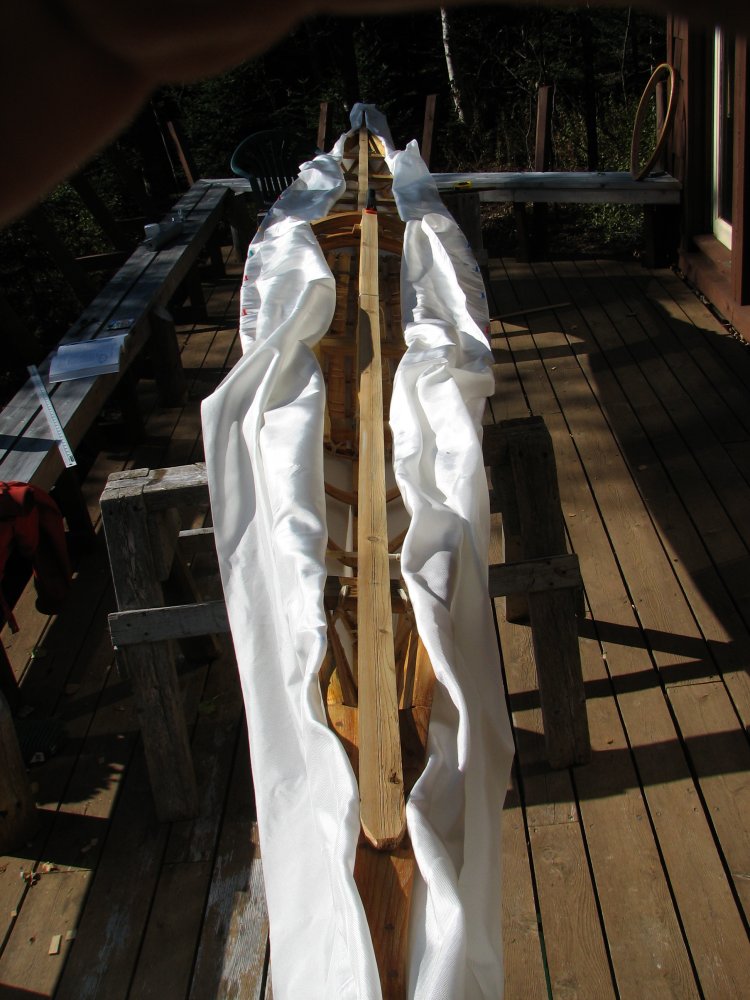
The temporary strips that serve as 'sewing tables' are now laid in and clamped and the fabric is lapped over the temporary strip and cut to width...

Another little visitor arrives and lands right where I'm working. This one is a male. I tell him: "You're in the way..." So he takes off and lands behind me on the bench. Dragonflies - unlike most insects - are usually very responsive if you talk to them... :)
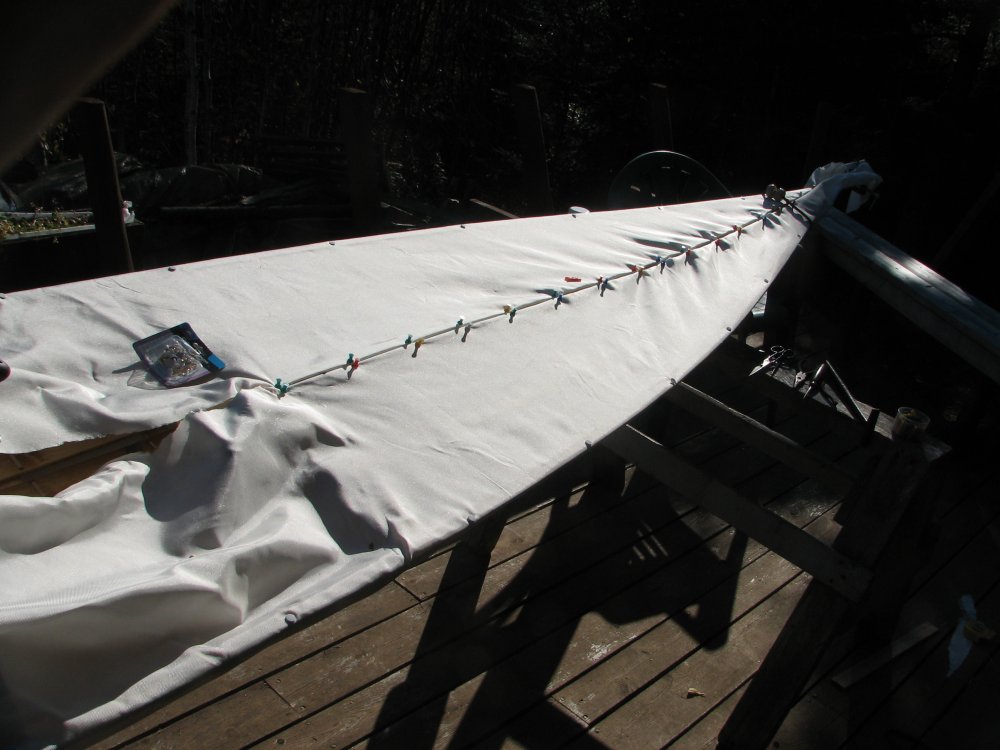
One side rolled around the seam line and pinned to the center strip...

The bow and stern lines have to go in before much sewing is done otherwise you can't reach them - which complicates matters greatly...
The stern pinned up and ready to stitch.
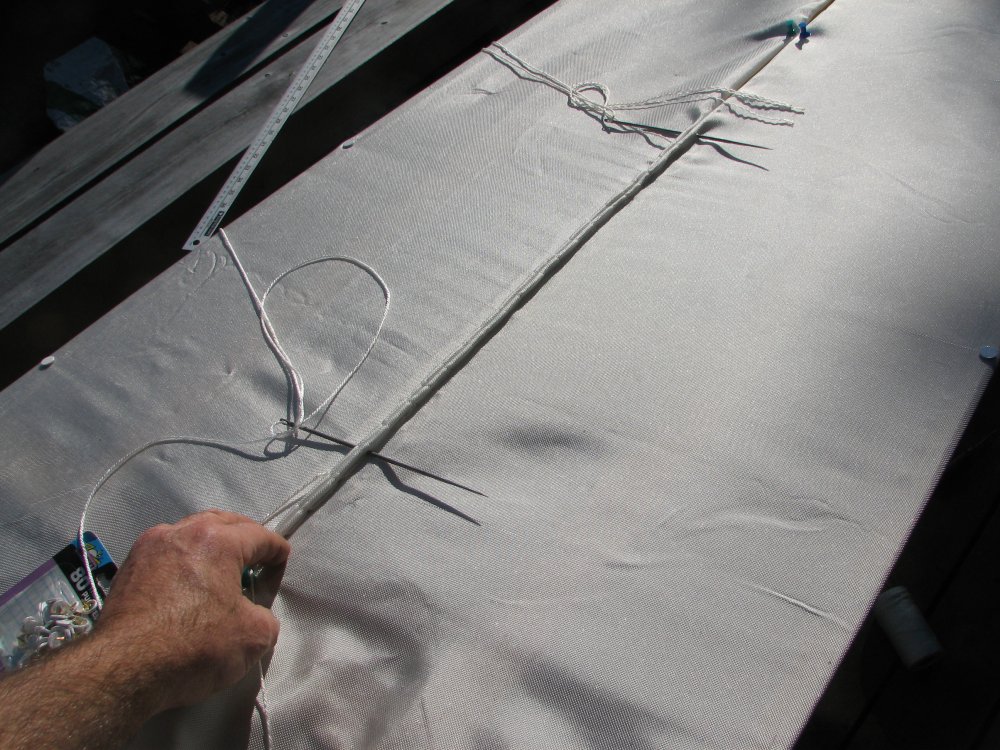
Sewing using a sixteen foot (5 metre) length of line and two long needles especially hand-forged for the job.
Another time I would pay the extra (roughly five times the cost) for braided mason's line as it would not unravel as this twisted seine twine has an ugly habit of doing. The unravelling twine makes the sewing slow and awkward.
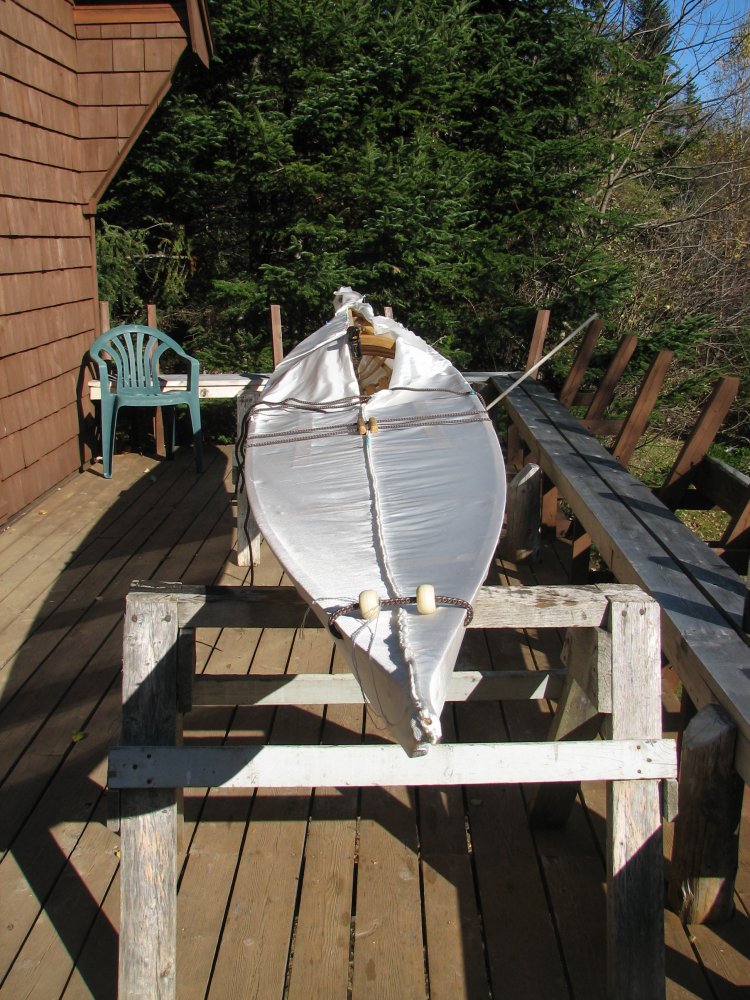
Stern, completed, next day we tackle the bow...
By late afternoon the bow is finally pinned up and the bow deck lines in. I can't imagine doing this with seal skin as it was hard enough with the nylon. I also do not envy the Inuit who were forced to frame their kayaks in a treeless Arctic with whatever material they could scrounge along the tide line...
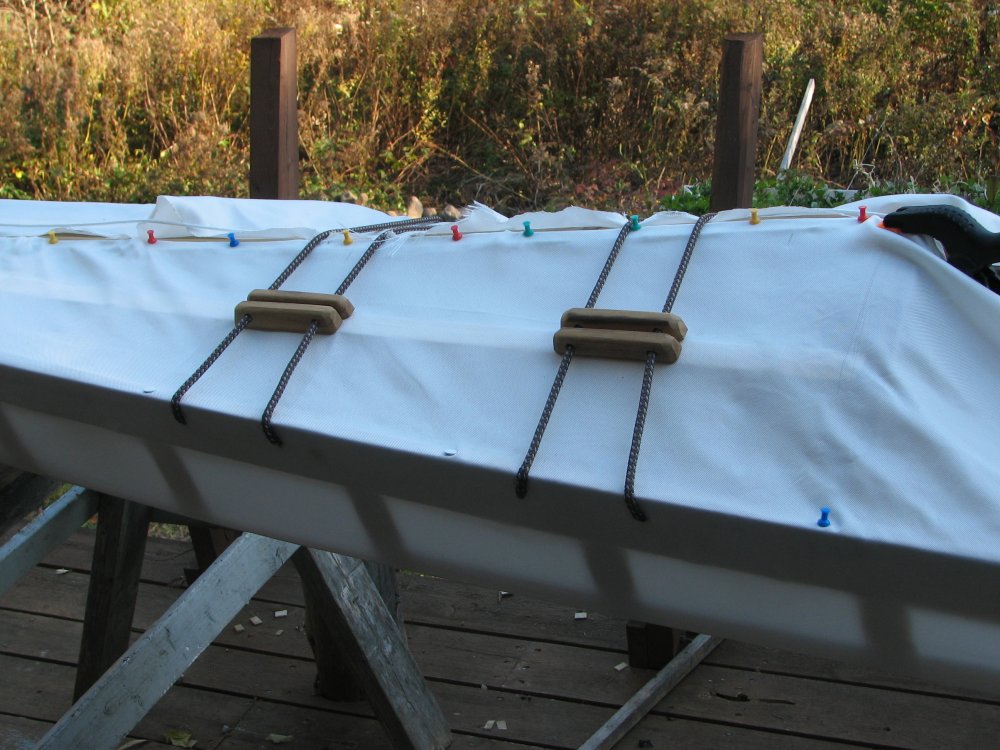
Ever tried threading a 5/16 inch (8mm) nylon line through a ¼ inch (6mm) hole? Yes, it is possible but now you know why almost three hours were lost today just fooling with these lines...
The wood spacers slide along the line to tighten them. The spacers are made from a splintered scrap of teak that I salvaged out of the river last spring. ('What are you bringing that home for?!...' was the horrified remark at the time.
Well, yes, I do admit that the three foot (1 metre) shard did look rather rotten and splintered but it's what's underneath that counts...)

Finally after a couple of wet days (and digging carrots) which slowed up work considerably we only have one foot (30cm) left to stitch at the bow...
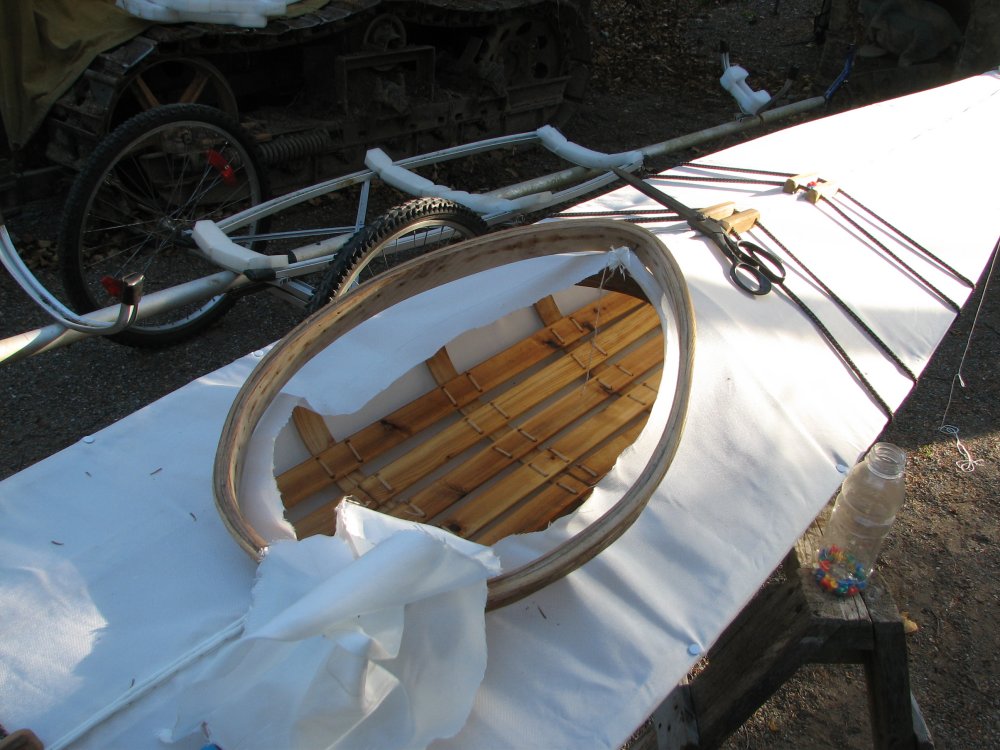
Cutting out the hole for the cockpit and...
...pinning, then stitching, the rim in place... During this latter job, I break one of my hand-forged needles...

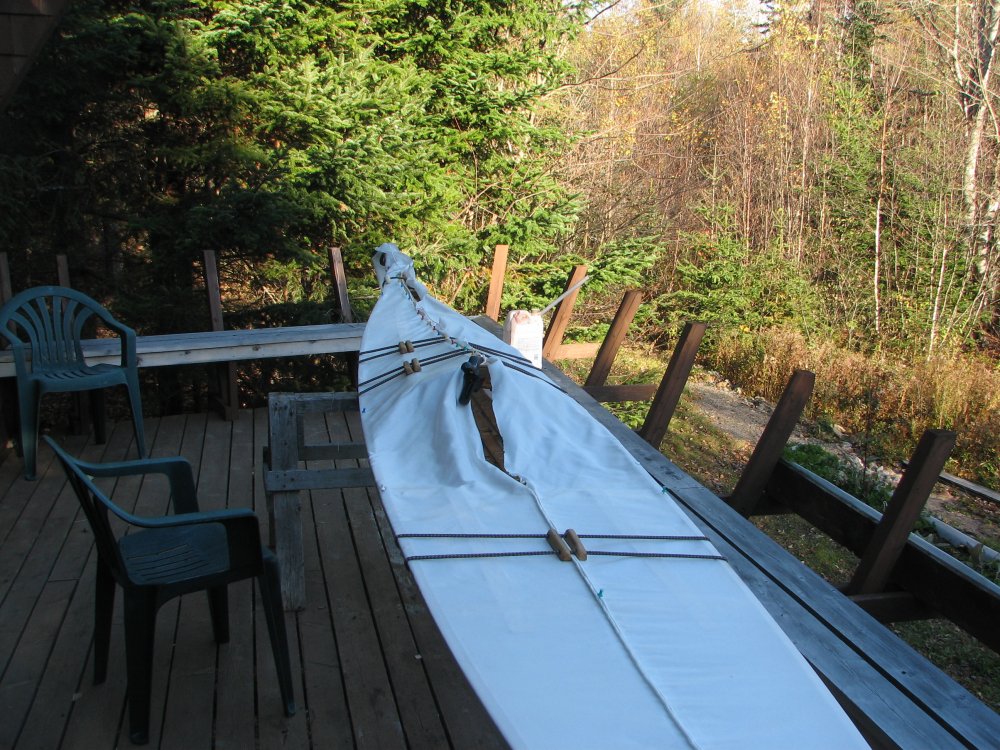
Ready to stain... At LAST!
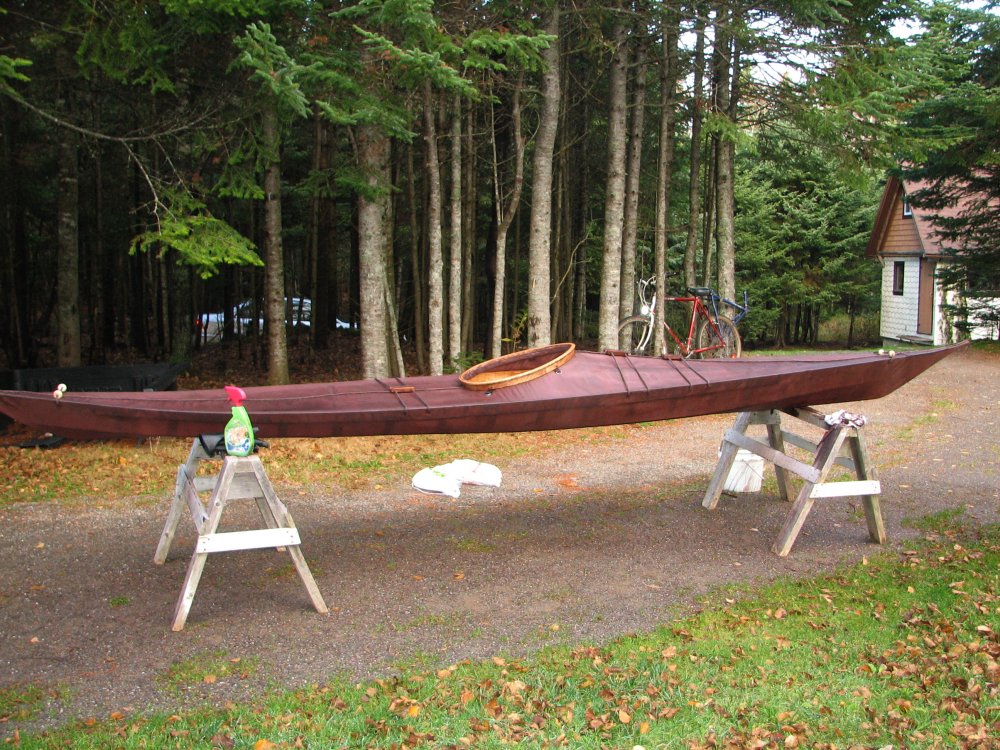
Staining completed!
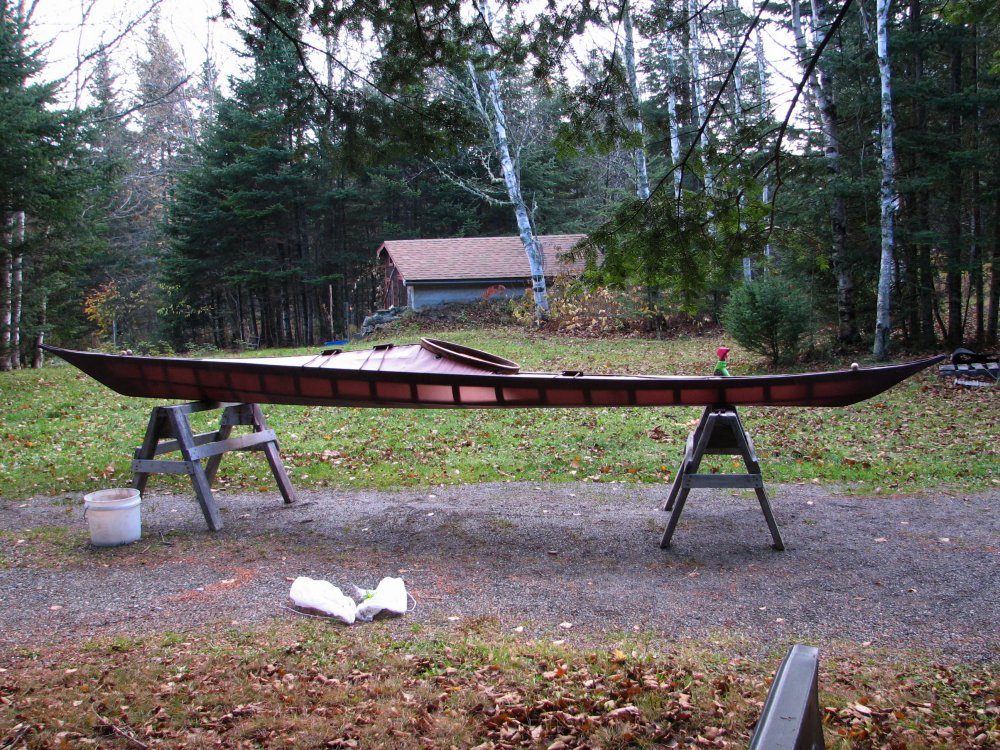
But... (despite the sunny sky at the moment) it naturally starts to rain an hour or so after finishing, so park the tractor outside under a tarp and carry the still dye-wet kayak into the garage...
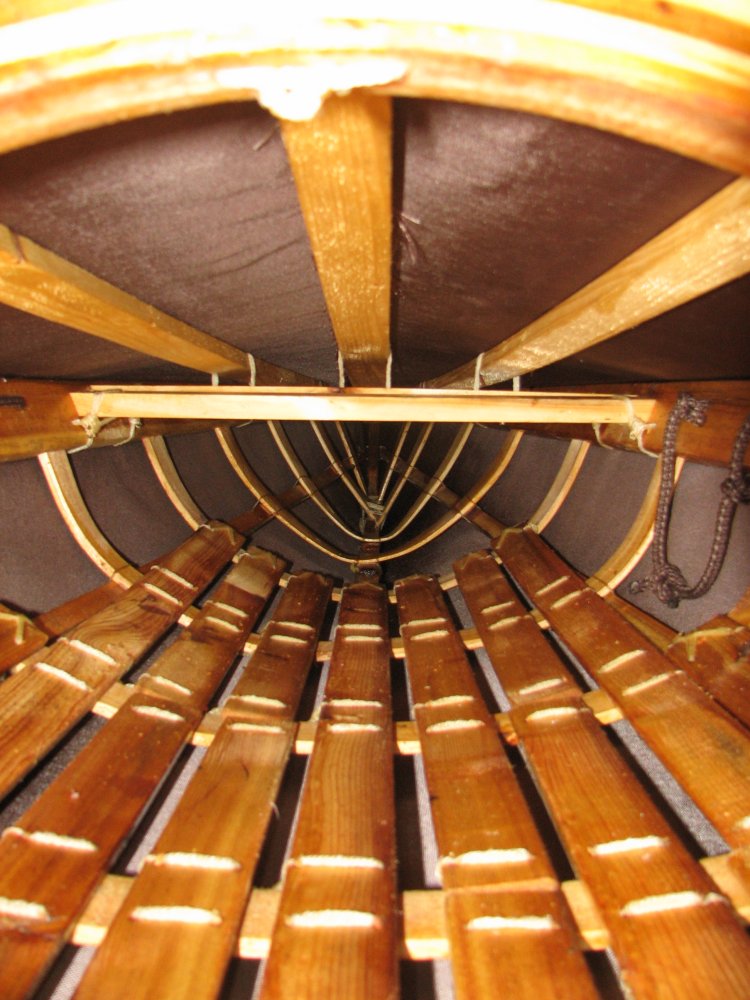
Couldn't resist this shot: Looking forward along the floor towards the bow...
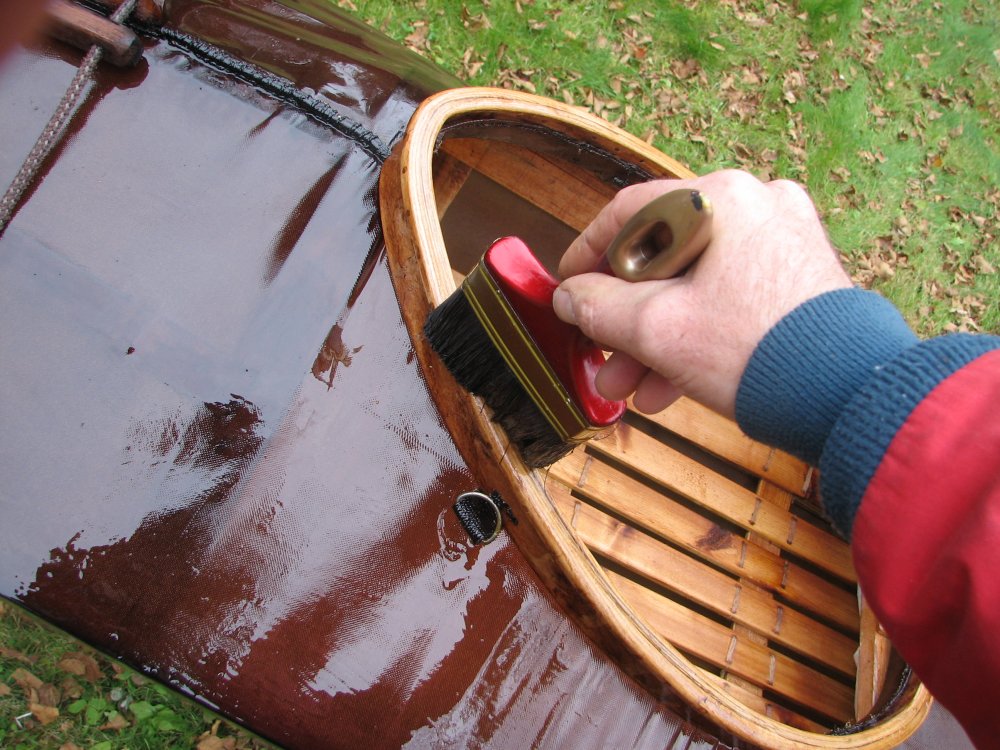
Applying the fourth and final coat of marine spar varnish. Once it's dry, those four coats of varnish are all that will be keeping me out of the water.
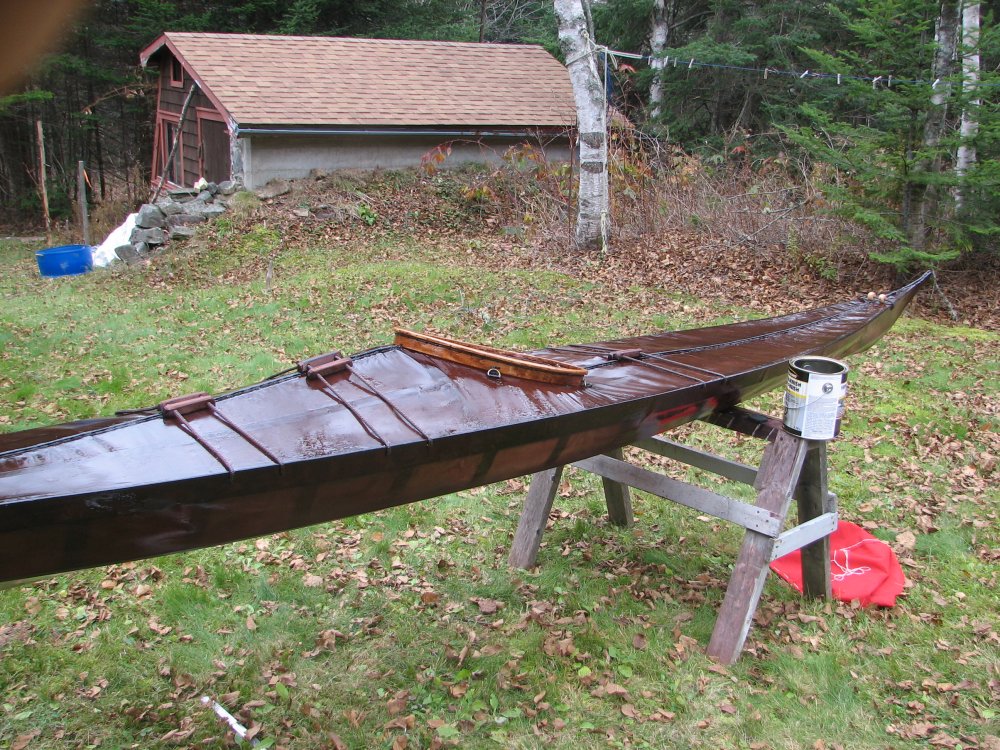
Thinning the first coat of varnish is critical as otherwise the varnish does not penetrate the nylon enough to completely seal the sewing holes in the seams and the hull will leak even after four coats.
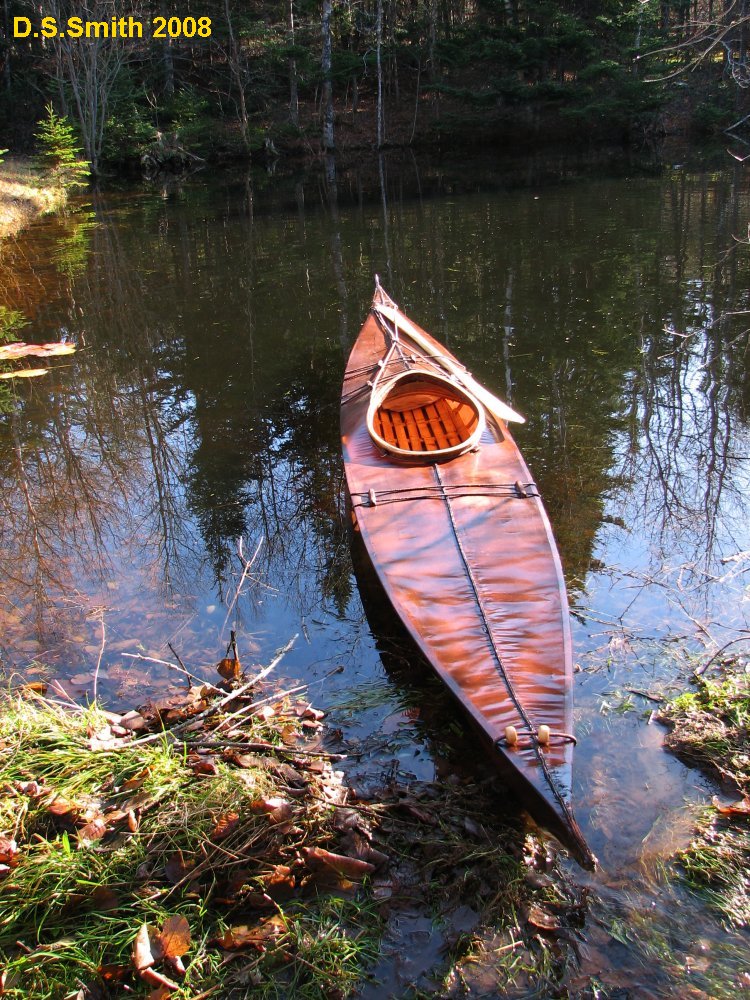
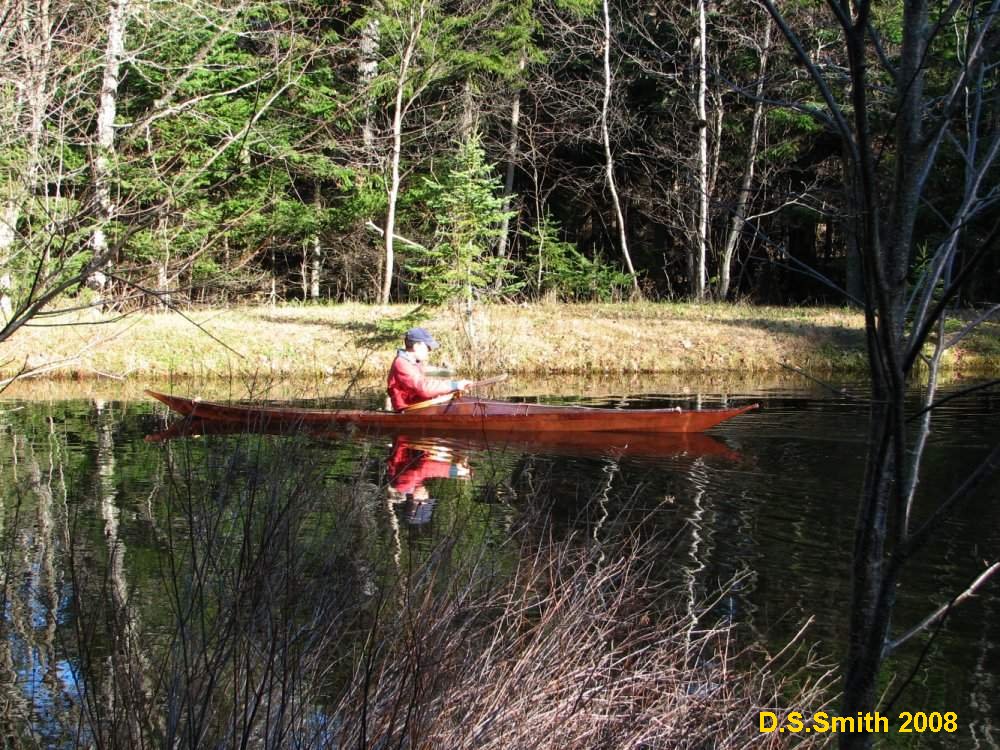
Like a duck to water: Trial run on the pond
This kayak was constructed over approximately 100 hours during the months of September and October 2008 and based on plans obtained from Robert Morris' Building Skin-On-Frame Boats (Hartley and Marks, 2001), Morris (2001).
Since the kayak was built, the book has gone out of print and is now practically unobtainable - unless you are prepared to part with a considerable sum. Building the Greenland Kayak: A Manual for Its Construction and Use by Christopher Cunningham (Ragged Mountain Press, 2002), Cunningham (2002) is still in print and can serve as a substitute. I used both as references and the books do complement each other. However, Morris' book is the more authoritative. A new edition is said to be in the works. Hopefully it will eventually be available.
With stability to within 17 degrees of heel Greenland style kayaks are the most stable of all traditional designs. (If this seems a low stability angle consider that some West Coast Baidarkas are unstable at a mere one degree of heel...)
Having used the kayak for some years I can attest that it is indeed light, fast and nimble with a good degree of stability over most of the conditions I encounter on the river - and with the size of this river (approximately 2.5 km - 1.6 miles - across where I live) it can indeed be challenging when a nor'easter rolls down off the hills or a souwester sends up long rollers up the Long Reach.
However, the kayak does take some getting used to as it is a bit claustrophobic the first time you slide in: being sized to the paddler it is almost like sliding into (and wearing) a custom piece of clothing.
Also, without a rudder it does have an annoying habit of swinging into the wind the moment you stop paddling - no matter how calm it is and if there is any sea running it will start to turn broadside on in a heartbeat - which rather negates taking photos from it (which was the original purpose). Ballasting with narrow sandbags in the bilge does improve the handling but certainly increases the effort of paddling. Eventually, I added long, narrow ballast tanks of 4 inch (10cm) plumbing pipe and they helped. With them 50 pounds (20 kilos) of water ballast can be pumped in with the bilge pump but I seldom fill them as just having the empty tanks shimming each side improves the fit and feel of the kayak. A light bar of cedar lashed crossways also keeps the paddler from sliding forward along the floor boards.
Pet peeves are the lack of internal cargo capacity and the high center of gravity that result if you lash too much gear on the foredeck. (Fifteen kilos of camera gear lashed flat on the foredeck makes a choppy half-metre cross sea very interesting, to say the least) However, after watching a couple of bright orange (read plastic) sea kayaks working their way up river against the wind and current I can attest that they were having a much harder paddle of it than I would have had under the same conditions. The wind was also pushing the kayaks about more than mine as they were built higher and had more hull exposed to the wind pressure.
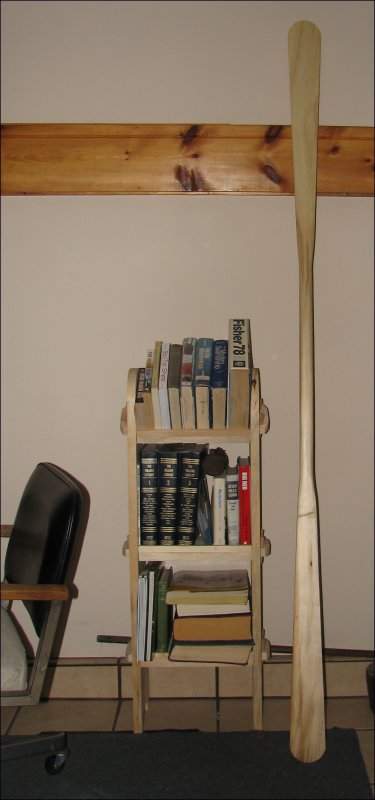
The traditional narrow Greenland-style paddle does require more strokes to move the kayak any given distance through the water than the broad paddle customarily in use today. However in rough conditions where continuous, rapid, light paddling is required to maintain the kayak at the optimum 45 degrees to the waves, it is less tiring to use. Under these conditions I have had little difficulty in keeping up 50 to 60 strokes a minute when necessary (a 25 to 30 stroke cycle).

Changes? Not many. I would not use epoxy again after reading an article on adhesives that points out epoxy starts to weaken and delaminate as soon as the surface temperature reaches 100 degrees F (38 C.) - a point easy enough to reach on a dark-skinned boat like this on a hot summer's day - and would use polyurethane or resorcinol instead.
I would also stain the varnish rather than the fabric as the fabric stain soon bleaches out in the sun. As noted earlier, too, I would definitely use braided nylon for the sewing.
And finally, a special thank you to webmaster Don Hitchcock for providing a new home Downunder for the 'Kayak Diary'.
David S. Smith, 90 Gorham Road,
Glenwood, Kings Co., New Brunswick, Canada E5M 2N2
dsresrch@mail.com
References
- Cunningham C., 2002: Building the Greenland Kayak : A Manual for Its Contruction and Use, International Marine/Ragged Mountain Press; 1 edition (December 17, 2002) ISBN-10: 0071392378, ISBN-13: 978-0071392372
- Morris R., 2001: Building Skin-On-Frame Boats, Hartley and Marks Publishers (2001) ISBN 10: 0881791911 ISBN 13: 9780881791914
Back to Don's Maps
Back to Archaeological Sites
Back to Pacific NW Coast index